


| FAQ |
| Members List |
| Social Groups |
| Calendar |
| Search |
| Today's Posts |
|
#141
 07-21-2010, 05:39 PM
|
||||
|
||||

Kenny:
You need a hazardous materials storage permit for that awesome collection of rattle cans! Just kidding! Nice shop - looks like a fun place to hide from momma! BJ
__________________
1971 GTO 455 HO 4-speed - Cameo White, White Vinyl Top, Jade Green Interior, Ram Air Hood, AC, Honeycombs and 8-track 1974 Formula 455 I Owned in 1975-1976. Now Own Its Twin From Same Dealership 
|
|
#142
07-21-2010, 06:09 PM
|
||||
|
||||
|
Fantastic work and you're making great progress, Chris.
That is a car you'll be VERY proud of.
__________________
Regards, "455HO" Lloyd 2008 GMC Sierra Denali 2WD Crew, L92 6L80E, Silver w/ Ebony guts, 14.26 @ 98 
|
|
#143
07-21-2010, 09:50 PM
|
||||
|
||||
|
^5 looking really good bud....
|
|
#144
07-24-2010, 05:04 PM
|
|||
|
|||
|
I've had some setbacks recently due to stuff not fitting properly. The first part was the aftermarket replacement front speaker I bought. It's a dual speaker that was supposed to fit in the factory opening. I assumed it would be a bolt-in part, but when it came I could not figure out how it was supposed to mount (there was an aftermarket speaker in place when I got the car which was being held in place with a chain) so I didn't know what the factory speaker and bracket looked like. Anyway, I contacted the tech department and we traded emails and pictures and it turned out I had the right speaker, but the wrong bracket. They sent the correct bracket to me and it fit well, so the speaker problem is resolved.
|
|
#145
07-24-2010, 05:09 PM
|
|||
|
|||
|
I had seen aftermarket clutch linkage rods used by some board members some time ago and thought they looked like a good idea, especially since my original ones were badly worn. I bought the new rods about a year and an half ago and put them on the shelf. I pulled them out a few weeks ago and tried to install them but the rod from the clutch pedal to the z bar would not fit. Turns out I had the rods for a 67-69 firebird which are straight. The 70-81 rod has a slight bend. So, I got the correct ones and put them in. Smooooth!
|
|
#146
07-24-2010, 05:13 PM
|
|||
|
|||
|
There is insulation inside the foot well area, behind the kick panel. But my car only had the insulation on one side. So I bought some bulk insulation for three bucks at Lowes and used the original piece as a pattern, then cut new ones.
Last edited by eaglesan13; 07-24-2010 at 05:32 PM. |
|
#147
07-24-2010, 05:18 PM
|
|||
|
|||
|
My car originally had sandlewood interior but sometime before I got it someone had rattle canned the interior to a saddle color. And it was a pretty poor job, they just painted everything and there was overspray everywhere. I cleaned up the kick panels and repainted them using the SEM paint I described earlier.
|
|
#148
07-24-2010, 05:25 PM
|
|||
|
|||
|
This morning I hung the drivers side fender and fender well. I then set the front bumper in place. All the front sheet metal will be final-adjusted by the body man/painter. It's nice to get the sheet metal onto the car so I have some room in the garage. FYI, the reason those towels are always hanging on the passenger door is because my wife parks her car in the garage next to the Formula and I don't want any "accidents" when she opens her door. Cheap insurance

|
|
#149
07-25-2010, 08:16 AM
|
||||
|
||||
|
Thanks again for the great progress pics. Man, that color keeps looking better and better as the parts are hung on the car. The nose is incredible. Good luck with the final body fitment.
__________________
http://www.starspangledbannerchallenge.com/ |
|
#150
07-25-2010, 12:53 PM
|
||||
|
||||
|
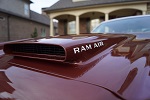
This car reminds me a lot of my 74 Fire Coral Bronze Formula 455. Seeing your hood waiting patiently to be set in its place remids me of how cool those awesome scoops looked from the driver's perspective. The pait color will really accentuate them too, especially in late evening light, with a nice sun set reflecting off those scoops! Can't wait to see the finished product - thanks for posting the photos.
BJ
__________________
1971 GTO 455 HO 4-speed - Cameo White, White Vinyl Top, Jade Green Interior, Ram Air Hood, AC, Honeycombs and 8-track 1974 Formula 455 I Owned in 1975-1976. Now Own Its Twin From Same Dealership
|
|
#151
07-25-2010, 01:42 PM
|
|||
|
|||
|
Hood Hinges
I always thought the hood hinges were painted gloss black and had blue paint daubs on them. But the ones off my car appear to have been black phosphate. Any opinions in the best way to refinish these?
|
|
#152
07-25-2010, 03:24 PM
|
|||
|
|||
|
Quote:
|
|
#153
08-15-2010, 02:32 PM
|
|||
|
|||
|
Well my painter/body man was supposed to be here two weeks ago to help my final adjust the frotn sheet metal and color sand/buff the car. He never showed up. Can't say I'm surprised sine he has all the money. I'm more pissed about the loss of time since I can't put the trim on until the color sanding and polishing is done. I hadn't noticed what a crummy job he had done on the color sanding until I got the car home. It looked okay in pictures but in person it had orange peel, cloudy spots and sand marks in the clear coat.
I asked around town about someone who I might be able to pay to do the finish work. I even thought about doing it myself (although I would rather "learn" on something less than this car). Anyway, I got a referral and a guy came and said he could fix the problems easily. He showed up yesterday morning early (which in itself was a big plus to me). He spent all day color sanding, buffing and polishing. The paint looks awesome, and it's smooth as a baby's butt. I'll have to final adjust stuff myself but that's no big deal, then I can put the trim stuff on. These pictures do not do the paint justice. It has much more red in it in person. I'm glad I stuck with the original color. |
|
#154
08-15-2010, 02:34 PM
|
|||
|
|||
|
More pictures.
|
|
#155
08-15-2010, 04:08 PM
|
||||
|
||||
|
looks great, the outdoor overhead roof shot really shows the richness of that color
__________________
'72 Formula 455HO TH400, Revere Silver, black deluxe '74 Trans Am SD 4 speed, Admiralty Blue, blue deluxe |
|
#156
08-15-2010, 04:51 PM
|
||||
|
||||
|
Remember a tip for installing the front bumper is to bolt it up with the car's front sheetmetal while the nose of the car is up in the air. You put two jackstands under the subframe somewhere behind the cowl area. This allows the front of the sheetmetal to hang. You then bolt up the bumper to the brackets and tighten. When the car is then placed back on the ground it will pull the bumper up tight against the front of the fenders avoiding any gaps between the urethane bumper and the fenders.
|
|
#157
08-16-2010, 12:19 AM
|
||||
|
||||
|
knockout car Chris,,,,, you're doing a great job and it sure looks sweet.
|
|
#158
08-20-2010, 07:20 PM
|
|||
|
|||
|
I spent the morning on my back putting the gas tank in and replacing all the rubber fuel lines. (I hate working on my back, I need to buy a hoist). Then I put the rear trim on. Tomorrow I will do the rear brakes then move the the front of the car. I did the trunk earlier in the week.
|
|
#159
08-20-2010, 07:52 PM
|
|||
|
|||
|
Quote:
|
|
#160
08-20-2010, 08:10 PM
|
||||
|
||||
|
Yeah, love the personal plate and also when the sun hits that color. Very nice!!
|
| Reply |
|
|
The PY Online Forums is the largest online gathering of Pontiac enthusiasts anywhere in the world. Founded in 1991, it was also the first online forum for people to gather and talk about their Pontiacs. Since then, it has become the mecca of Pontiac technical data and knowledge that no other place can surpass.








 Linear Mode

