


| FAQ |
| Members List |
| Social Groups |
| Calendar |
| Search |
| Today's Posts |
|
#41
 02-15-2009, 03:57 PM
|
||||
|
||||
 Thanks for the primer color info everyone. Apparently GM used red oxide or black in all the production plant's & the final color paint didn't matter. That lead's me to believe the light color's used had a very high solid content to cover the dark color primer. Thanks for the primer color info everyone. Apparently GM used red oxide or black in all the production plant's & the final color paint didn't matter. That lead's me to believe the light color's used had a very high solid content to cover the dark color primer. Jeff, when I stripped my GP, I used an electic angle grinder with a wire cup brush to remove the paint. It made quicker work of it than the da & used 3-4 cup brushes instead of all the sand paper. Got the cup brushes from harbor frt. for less than $5 each so was a pretty cheap way to get the job done. Don't use the brass one's though, They disinegrate a lot quicker. Everyone in the area need's to wear saftey googles though. Those little bristtles fly every where!! Any good hardware store would have the brushes but the price may be more than harbor frt. Agree the liquid stripper is a real mess. Helped a buddy do that to his buick year's ago & was an ugly job. Yuk!! 
|
|
#42
02-23-2009, 12:39 PM
|
||||
|
||||
|
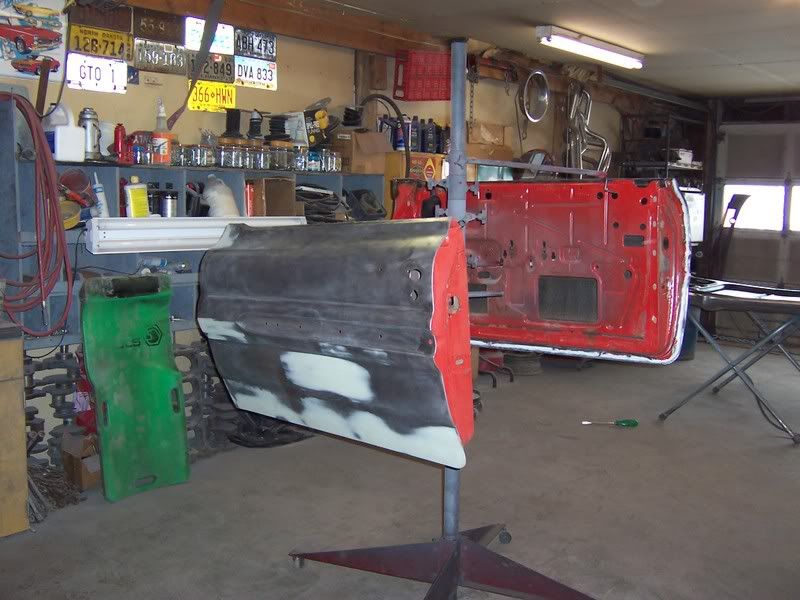
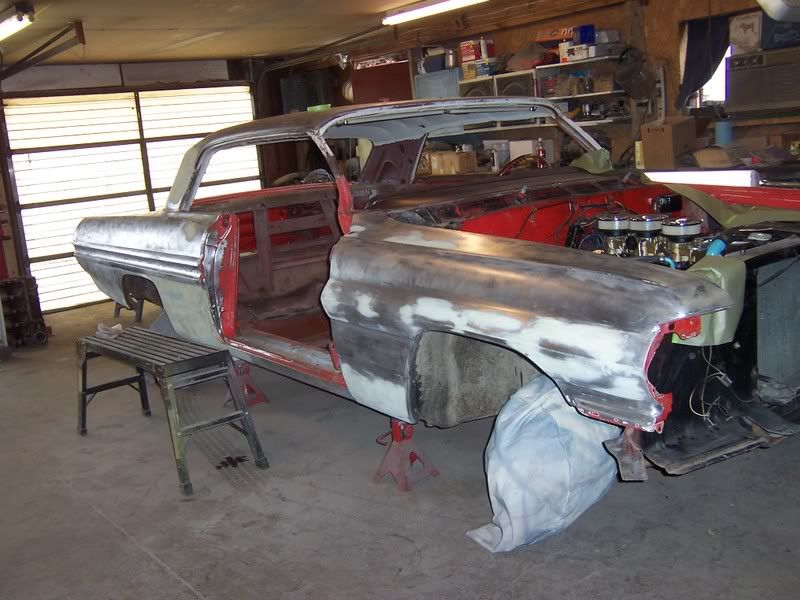
Since it's been a few days, here's another progress and photo update of the project. I currently have the paint pretty well stripped and am doing the metal/filler work on it now.
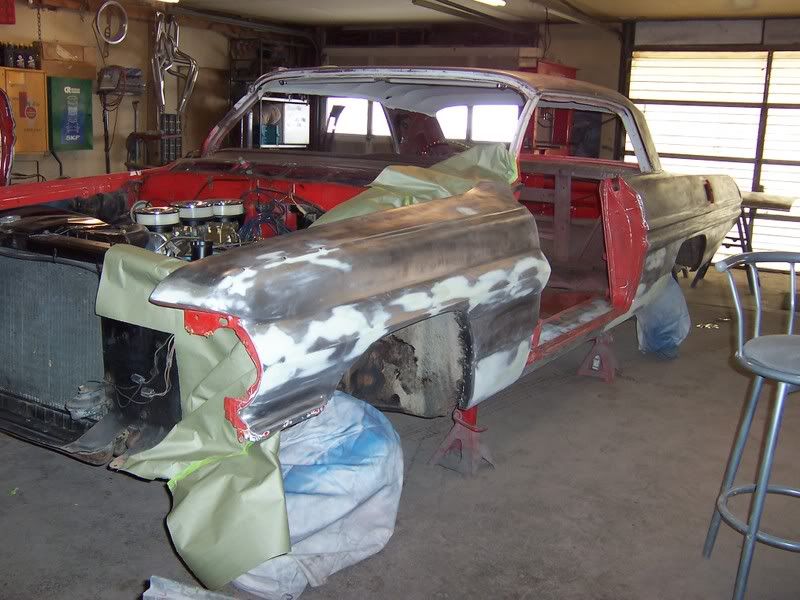
Here's what I discovered on the RH side. First the roof, this is where the bondo was cracking. As you can see I have some holes to weld. Also when you looked from the back you could see that the drip rail and sail panel was slightly bowed in. 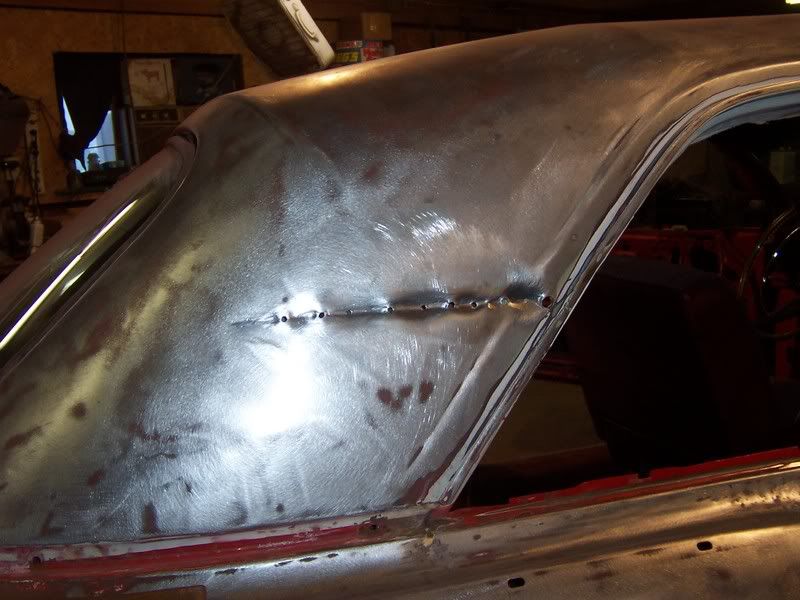 Next is the lower quarter in front of the wheelwell. This area was full of filler and as you can see I have MORE holes to weld in! Between the top and this spot I counted a total of 65!! Also note how the body line that runs along there is really messed up. I am pretty sure that the patch you see in front of the wheel was done later. And there is one on the LH side too. They aren't installed how I like to do them but they will do. 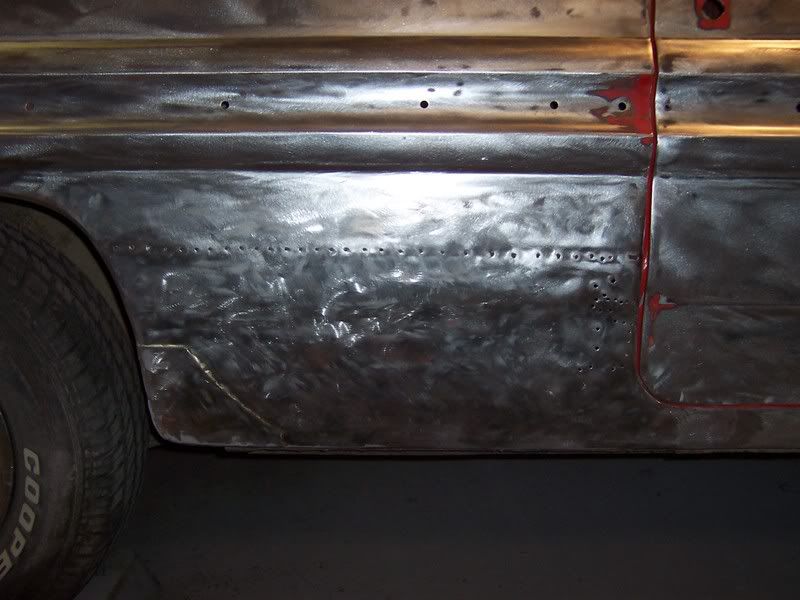 And here it is about ready for filler. I wound up spending a fair amount of time on this area. If you look you can see were I welded metal to the jamb area instead of having 1/4 inch plus of filler there like it was before. Also you can now make out the body line better. 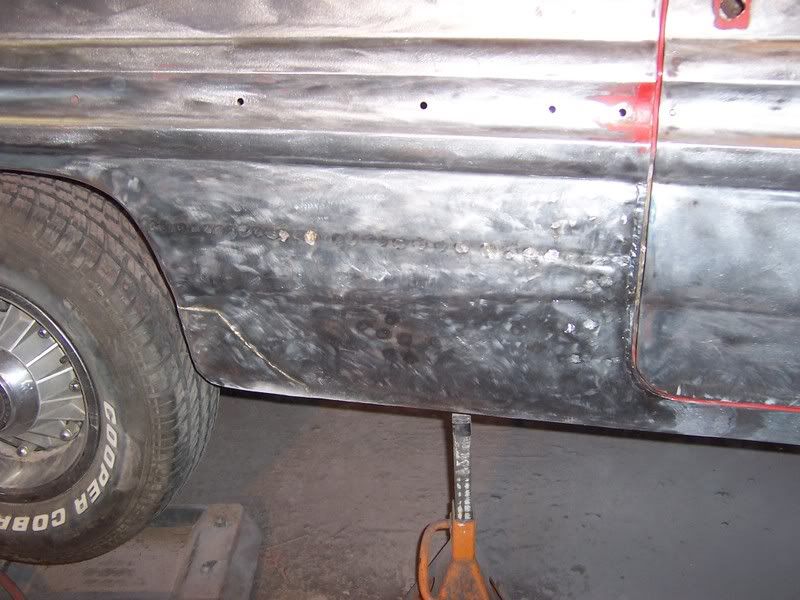 And then I discovered this spot when I was doing the filler work! The hole was hardly noticeable to start with but grew a bit when I got after it with a pick. But after dealing with the metal work above it this was a pretty easy fix.  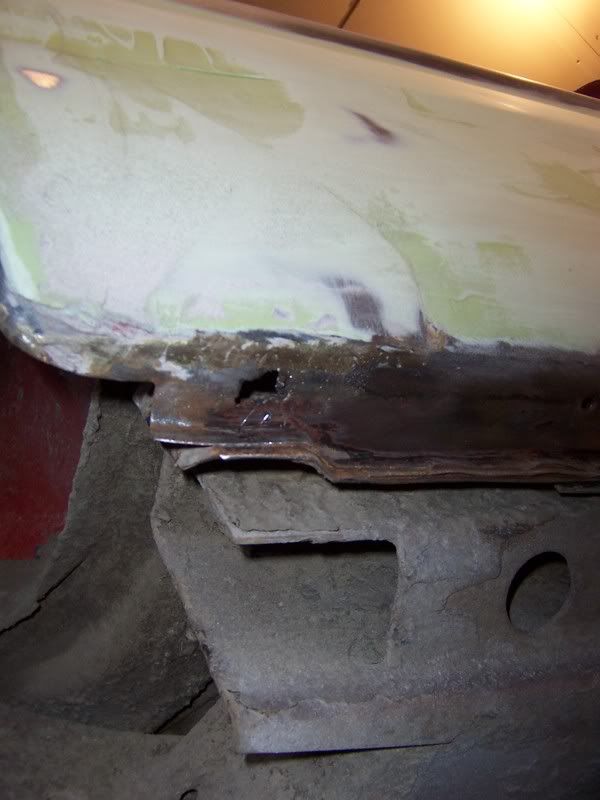 So here is what the RH side looks like today. As you can see I have also started working on the front fender. I am going to pull the doors off too, that way I can do a real nice job on the jambs. It was necessary for me to leave the RH one on until I finished repairing the qarter panel to make sure things would line up properly. 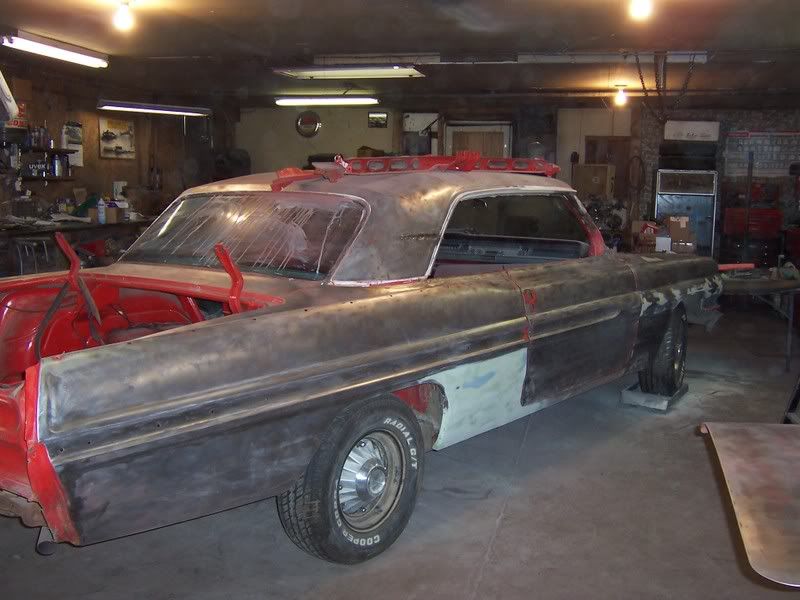 And here's a shot of the LH side, luckily I didn't discover any big suprises there. 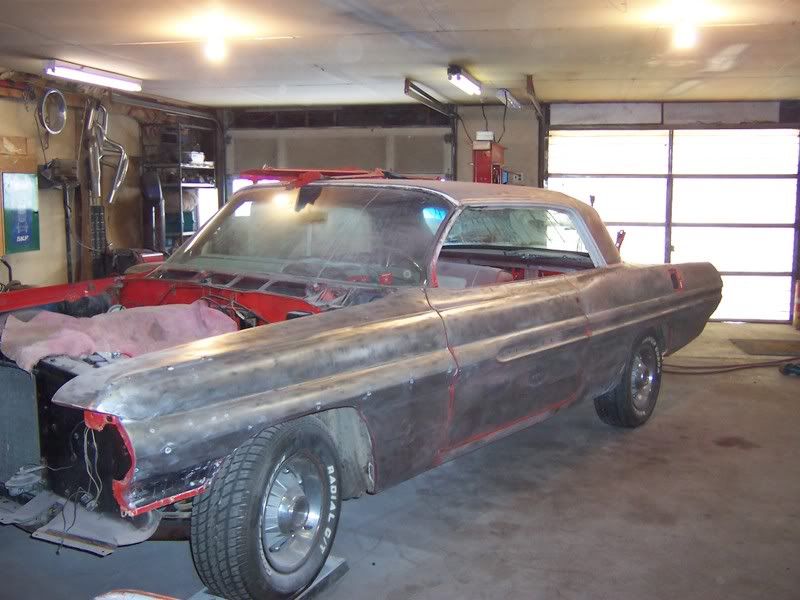 And a photo of the hood and trunk. The filler work is done on the hood and ready for primer. And the trunk has one minor spot on the RF corner. 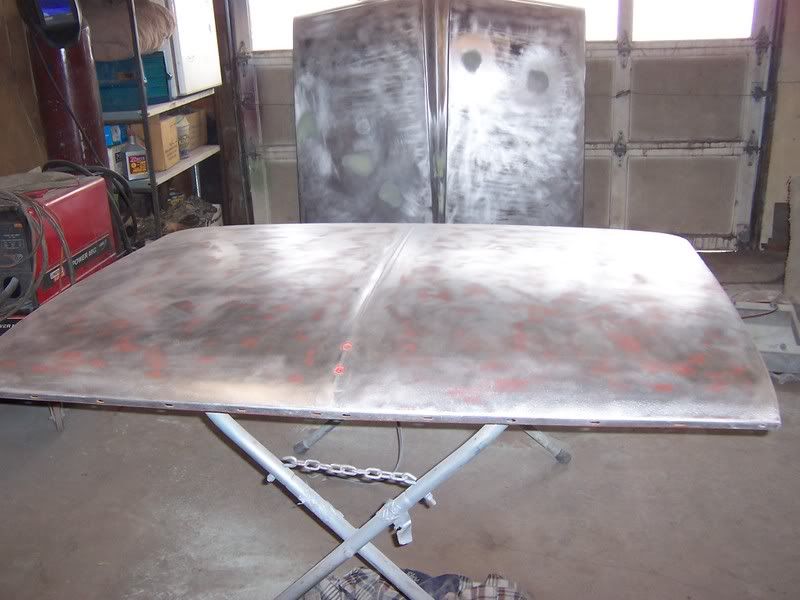 And that's all for now. Stay tuned for further updates. 
__________________
North Dakotas fastest REAL GTO 10.10 @ 131 MPH in the 1/4 Hoping to get it back together some year. www.jandjrepairandrestoration |
|
#43
02-23-2009, 12:47 PM
|
||||
|
||||
|
Looks like you're making good progress. I'm wondering about how it got that big gap on the rear edge of the passenger door - do you suppose that when it got hit in the lower quarter in front of the rear wheel, it pulled the door jamb towards the rear of the car?
It makes you wonder what the previous owner hit in order to damage the A pillar and the sail panel like that. |
|
#44
02-23-2009, 03:34 PM
|
|||
|
|||
|
That's better than I expected it to be Jeff. It's coming along well. You've done a nice job with what you had to work with.
Mike
__________________
so many pontiacs, so little time.................. moderator is a glorified word for an unappreciated prick.................. "Only two things are infinite, the universe and human stupidity, and I'm not sure about the former." --Albert Einstein "There is no such thing as a good tax." "We contend that for a nation to tax itself into prosperity is like a man standing in a bucket and trying to lift himself up by the handle." - Winston Churchill |
|
#45
02-23-2009, 05:25 PM
|
||||
|
||||
|
Jeff,
when you are starting with such damage, that contour you are sculpting is T O U G H to get right. I have pics of several finished '62s in various colors at different angles -PM me if you want any for reference. May the torque be with you! |
|
#46
02-27-2009, 04:01 PM
|
||||
|
||||
|
good looking car right there!
__________________
1967 2+2 hardtop 428 w/auto 1967 2+2 convertible 428 w/4 speed 1967 2+2 convertible 428 w/auto 1967 Bonneville Brougham Coupe 428 w/auto 1967 Grand Prix convertible 428 w/auto https://www.plainfieldpontiac.com/ *BE SURE TO LIKE MY FACEBOOK PAGE* https://www.facebook.com/PlainfieldPontiacRescue/ |
|
#47
02-28-2009, 05:00 PM
|
|||
|
|||
|
Boy do you have a nice garage Jeff....I'm going to switch the wood inserts in my door to plexi glass panels like you have...
|
|
#48
02-28-2009, 05:04 PM
|
|||
|
|||
|
The six two looks good too brother....
|
|
#49
02-28-2009, 08:02 PM
|
||||
|
||||
|
Quote:
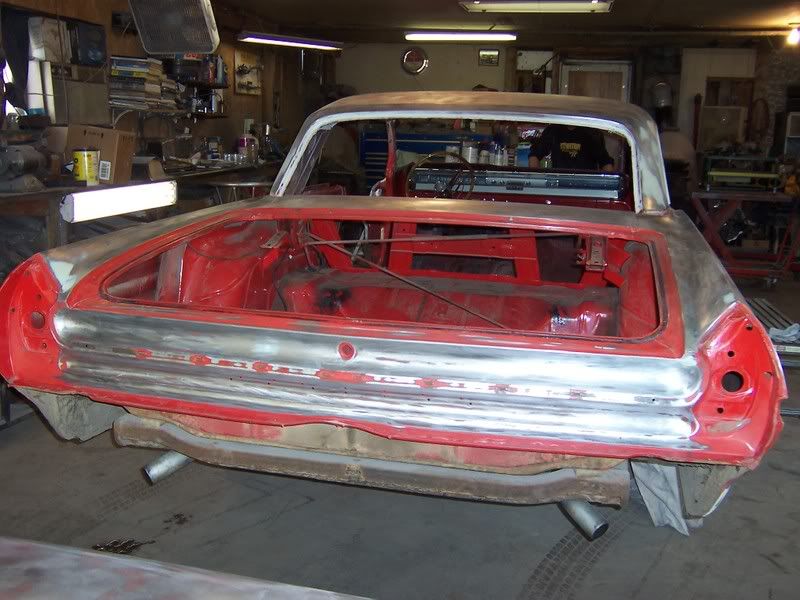
But with the size it is it's pretty cheap to heat and it's been getting me by. I really do like the glass in the door too as the natural light is nice. As for a progress report on the car, I have been getting the necessary metal and filler work done. I also pulled out the windshield and back glass. The rubber was showing the age on both and it will be a bit easier to paint that way. I am hoping to be able to start priming it sometime near the middle of next week if things go as planned.
__________________
North Dakotas fastest REAL GTO 10.10 @ 131 MPH in the 1/4 Hoping to get it back together some year. www.jandjrepairandrestoration |
|
#50
03-06-2009, 09:37 PM
|
||||
|
||||
|
Time for another update and more pics.
While doing the filler work on the LH lower side of the car I did find a couple of surprises. First one was a unusual high spot on the LH fender and here is what I discovered. 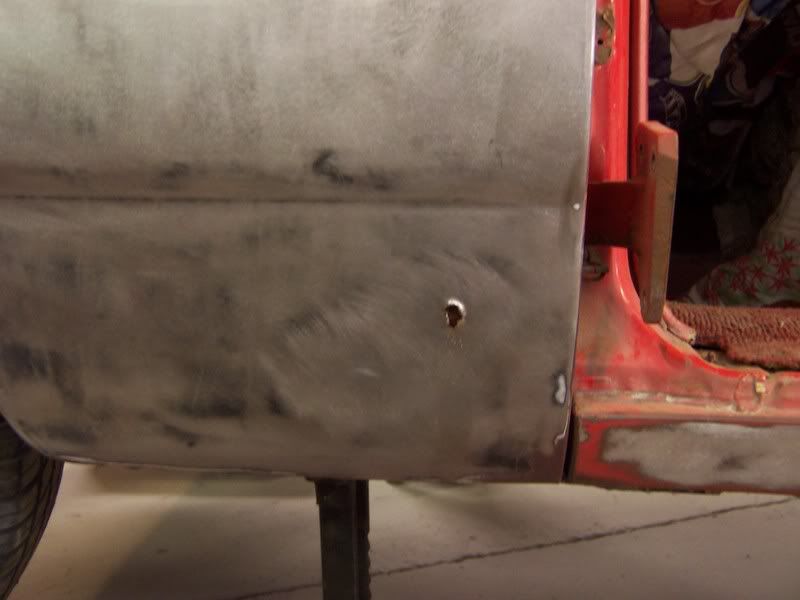 The next step was to make a nice hole for a patch. 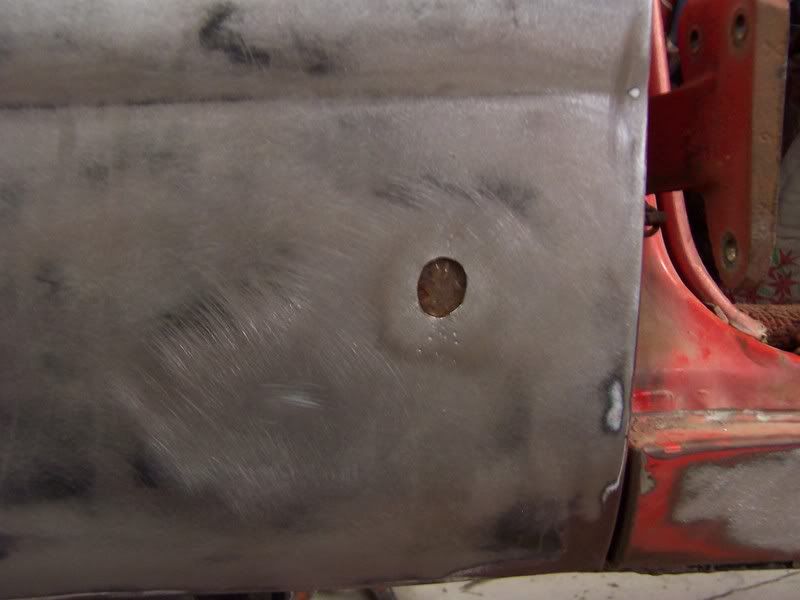 Then weld a patch in...  And after a little grinding it was time for the filler 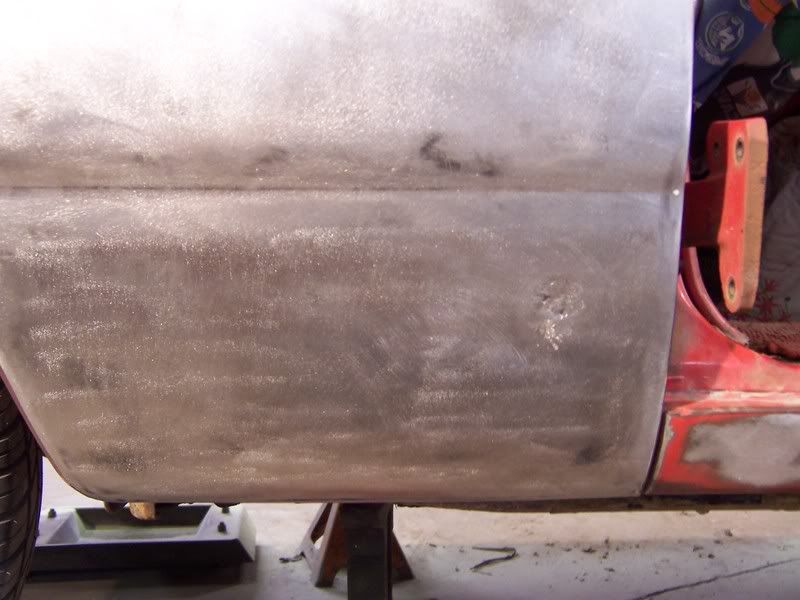 The on to my next surprise. I flushed these holes out when I prepped the area with my Crud Thug. Now you see them...  And now you don't. 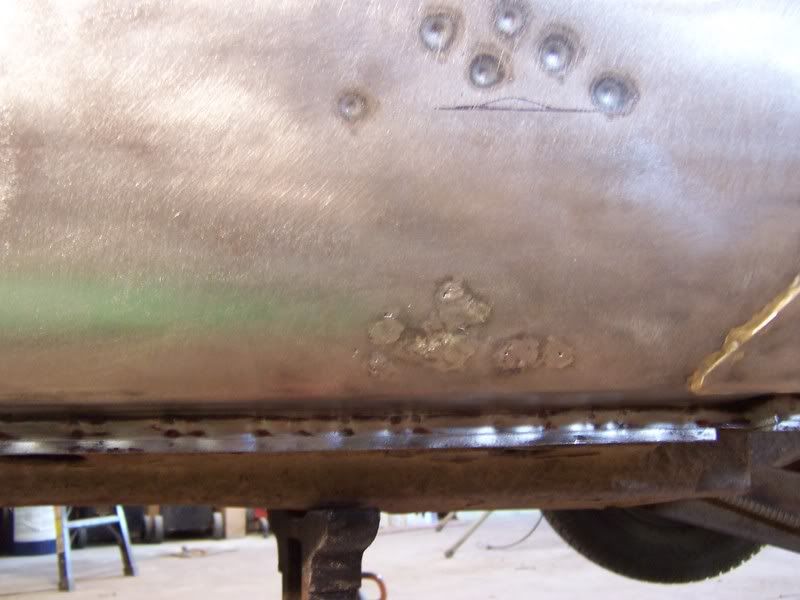
__________________
North Dakotas fastest REAL GTO 10.10 @ 131 MPH in the 1/4 Hoping to get it back together some year. www.jandjrepairandrestoration Last edited by Jeff Walker; 03-06-2009 at 09:47 PM. |
|
#51
03-06-2009, 09:46 PM
|
||||
|
||||
|
Here's some photos of getting things ready for primer.
    And here it is in primer!! First of all I laid down a coat of epoxy primer and then I put down some 2K high build primer.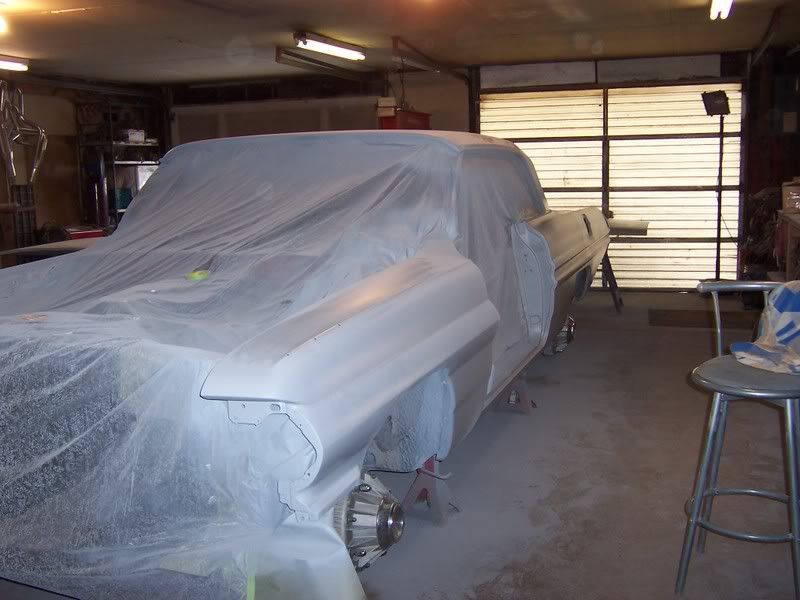 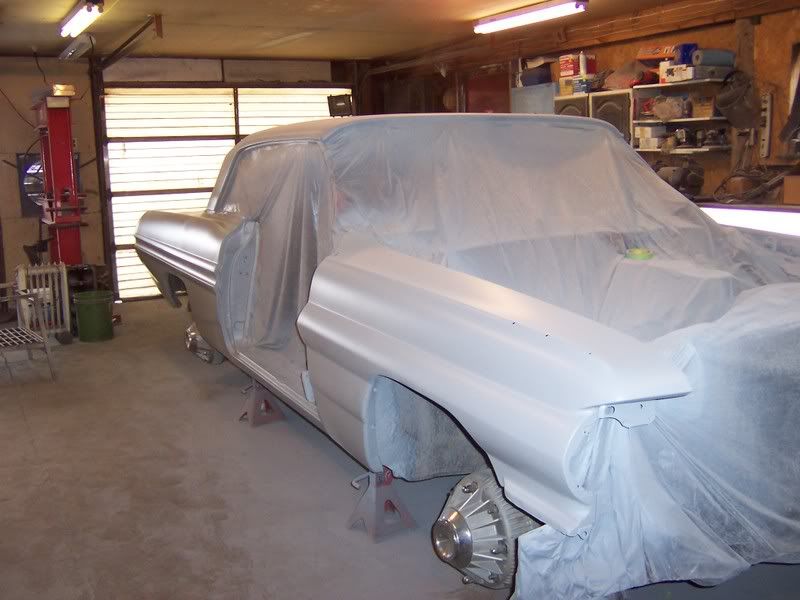 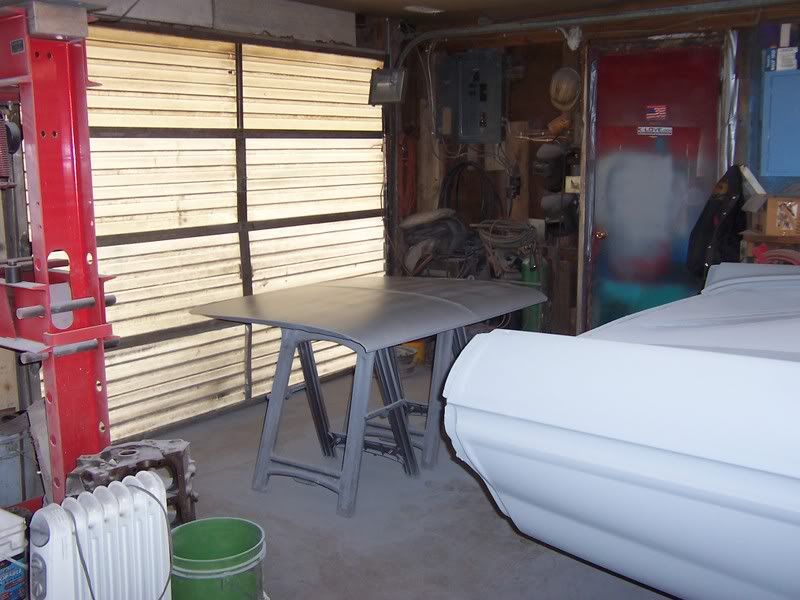 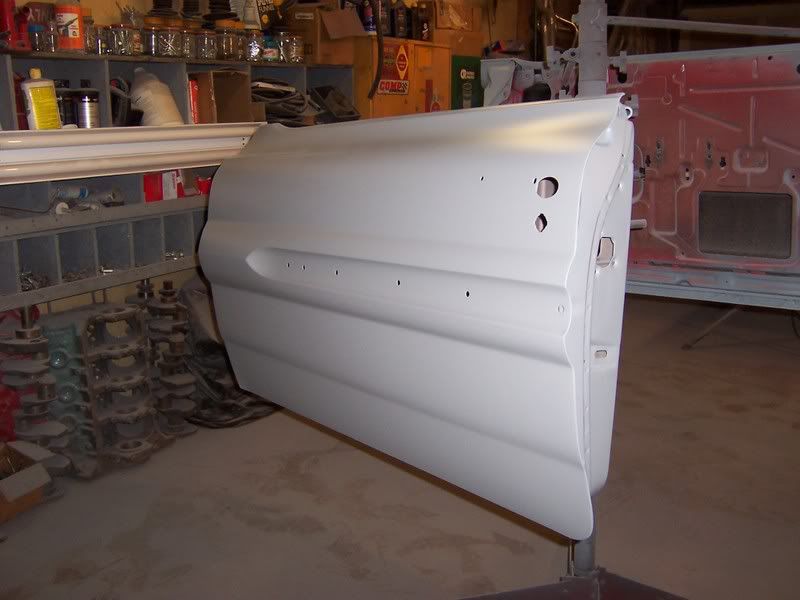 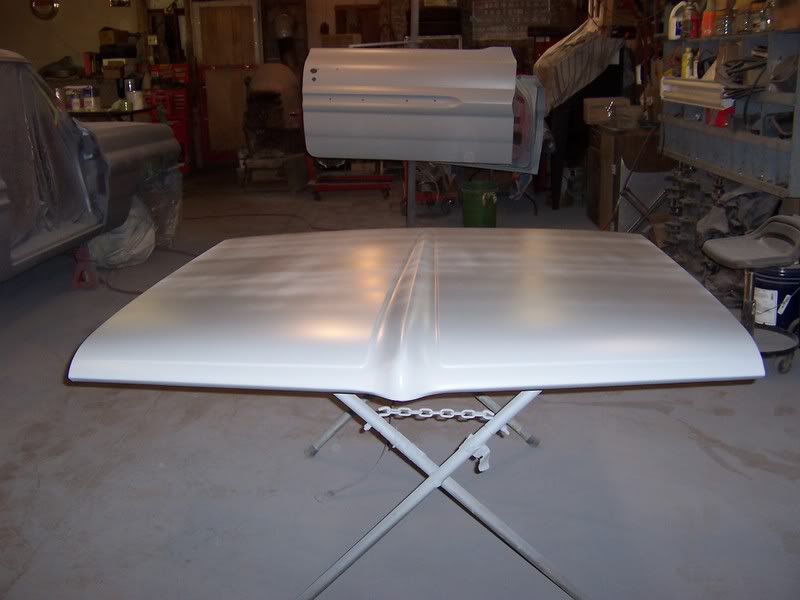 Now it time for a whole lot of block sanding...
__________________
North Dakotas fastest REAL GTO 10.10 @ 131 MPH in the 1/4 Hoping to get it back together some year. www.jandjrepairandrestoration |
|
#52
03-06-2009, 10:24 PM
|
||||
|
||||
|
Looking good, and you work pretty fast!
|
|
#53
03-07-2009, 02:06 AM
|
||||
|
||||
|
Wow! he does work fast and thorough, very well done, maybe you can paint another darksider.........i don't know.........maybe mine?
|
|
#54
03-07-2009, 07:31 AM
|
||||
|
||||
|
Pretty impressive Jeff!!! Looking great!!!
__________________
1967 2+2 hardtop 428 w/auto 1967 2+2 convertible 428 w/4 speed 1967 2+2 convertible 428 w/auto 1967 Bonneville Brougham Coupe 428 w/auto 1967 Grand Prix convertible 428 w/auto https://www.plainfieldpontiac.com/ *BE SURE TO LIKE MY FACEBOOK PAGE* https://www.facebook.com/PlainfieldPontiacRescue/ |
|
#55
03-07-2009, 12:11 PM
|
||||
|
||||
|
ditto what the others said!
technical question: is there a need to be concerned about cold temps when applying primer / paint? |
|
#56
03-07-2009, 12:57 PM
|
||||
|
||||
|
Quote:
And thanks to every one for the compliments. As for me being fast, this has been my main project this last few weeks. This coming week I have some other mechanical work that came in so that will slow the progress down a little.
__________________
North Dakotas fastest REAL GTO 10.10 @ 131 MPH in the 1/4 Hoping to get it back together some year. www.jandjrepairandrestoration |
|
#57
03-07-2009, 09:28 PM
|
||||
|
||||
|
Nicely done, Jeff. I like the way you're doing it. You're lucky to start with such a solid car. It's kind of fun trying to figure out the (body) repair history of a car as you expose it. I'm in the middle of a '56 T-Bird frame-off right now, and I wish it was half as solid as that Pontiac.
Regarding the black vs. red primer, my guess is that everything black is actually a once new GM replacement part, not a used assembly line part from another car. I base this on my experience in a GM dealer body shop in the 70's. Back then you could get new 60's sheetmetal, and all of it was black. We sanded it and applied DuPont red oxide lacquer primer over it, then top coated in lacquer. Keep posting updates, it should turn out sweet! BTW, I would bet money that old Porta-Power attachment was a Porta-Ferguson piece. Maybe see if the pipe diameter is too small for a modern jack pipe?. |
|
#58
03-08-2009, 01:33 AM
|
||||
|
||||
|
Jeff,
does your end customer have ANY idea how many of us are watching this thing hatch? |
|
#59
03-08-2009, 11:00 AM
|
||||
|
||||
|
Quote:
That sure did put a smile on his face when I gave it to him.
__________________
North Dakotas fastest REAL GTO 10.10 @ 131 MPH in the 1/4 Hoping to get it back together some year. www.jandjrepairandrestoration |
|
#60
03-19-2009, 09:24 AM
|
||||
|
||||
|
Man, Dat ish niiiiice!
Jeff, if you don't mind my asking...What are you charging to do such a fine job? You're way too far for me, but I'm interested in a ballpark figure. I'd like something similar done to my 62 GP someday. I need to know how much to expect for a nice job such as you're doing. Keep up the excellent work! Kevin |
| Reply |
|
|
The PY Online Forums is the largest online gathering of Pontiac enthusiasts anywhere in the world. Founded in 1991, it was also the first online forum for people to gather and talk about their Pontiacs. Since then, it has become the mecca of Pontiac technical data and knowledge that no other place can surpass.


 Linear Mode

