


| FAQ |
| Members List |
| Social Groups |
| Calendar |
| Search |
| Today's Posts |
|
#21
 07-23-2015, 10:10 AM
|
||||
|
||||
|
Quote:
We had determined to the best of our ability that they would end up close to 74ccs, I really couldn't pull the trigger on the new pistons before being pretty sure about that number. We'll find out for sure once we have the finished heads back in our possession, we are shooting for about 9.05:1 compression.
__________________
1964 Tempest Coupe LS3/4L70E/3.42 1964 Le Mans Convertible 421 HO/TH350/2.56 2002 WS6 Convertible LS1/4L60E/3.23 |
|
#22
07-23-2015, 08:09 PM
|
||||
|
||||
|
My 716 heads came out at 71 after all headwork was complete and i was shooting for 9.3-9.5 cr. Id think youd be in your desired range.
|
|
#23
08-15-2015, 12:39 AM
|
||||
|
||||
|
.....so now the actual engine build can begin.
The block prep began with some deburring of the lifter gallery and just generally removing any sharp edges inside of the block. The outside surfaces of the block will not be touched with the grinder, these nicely cast 421 blocks looks great just the way Pontiac left them. 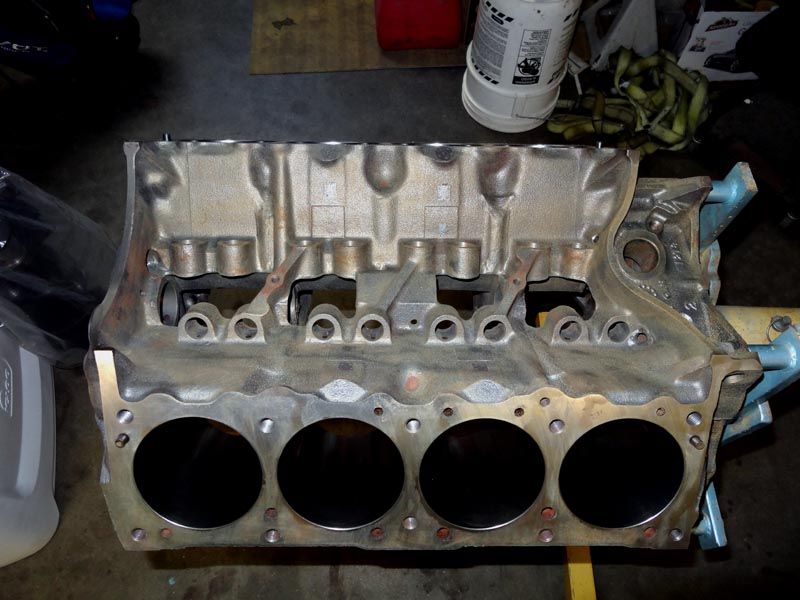 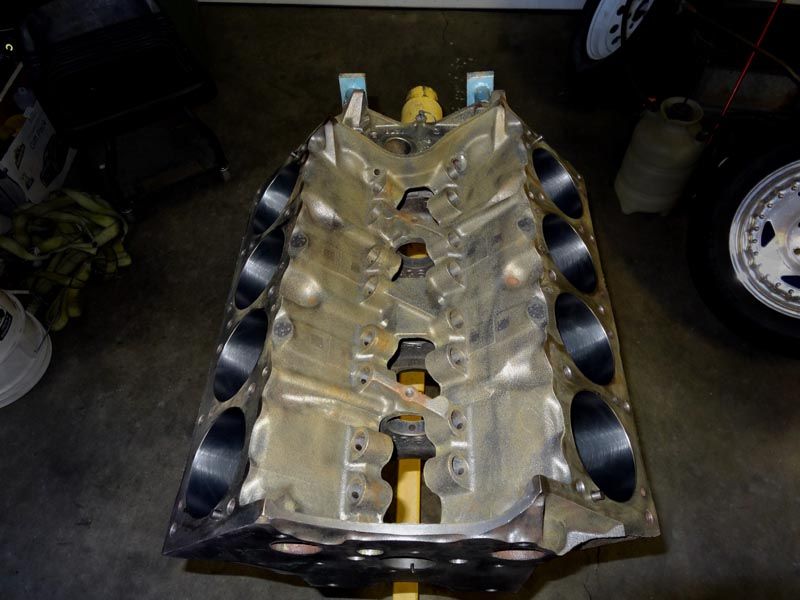 The original style front oil gallery soft plugs will not be used on this build, the openings have been tapped for 3/8 NPT pipe plugs as part of the block prep. 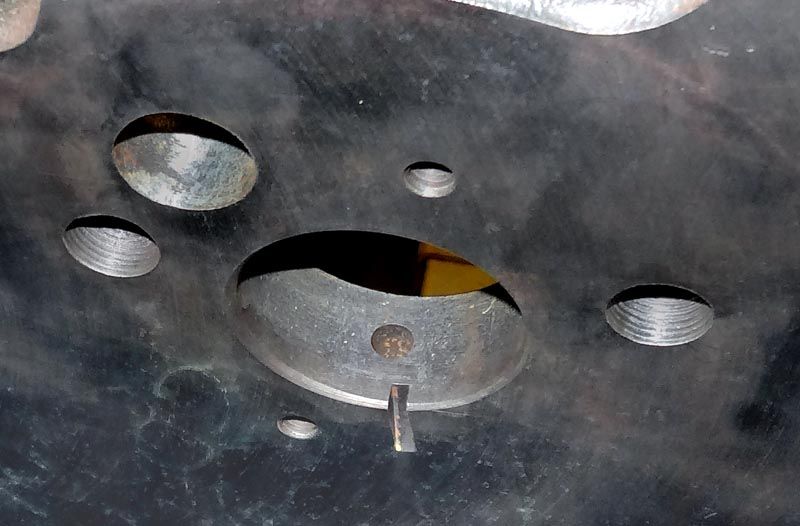 Our machine shop did their best to bore the block the absolute minimum amount possible for bore clean up. You can see what's left of the ridge reamer fiasco that caused me to buy new pistons, those nasty chatter marks are all above the ring travel so they are of no consequence. 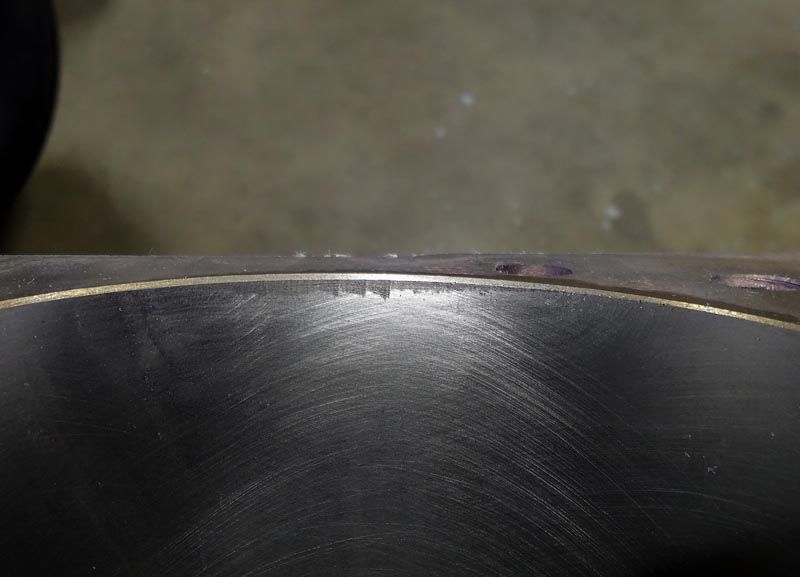
__________________
1964 Tempest Coupe LS3/4L70E/3.42 1964 Le Mans Convertible 421 HO/TH350/2.56 2002 WS6 Convertible LS1/4L60E/3.23 |
|
#24
08-16-2015, 11:31 PM
|
||||
|
||||
|
.....in spite of the 100+ degree heat we've been experiencing during the past week. I have to give huge props to my builder for continuing to forge ahead on this 421 project.
The block prep and cleaning was finished to the point where the painting could be done. 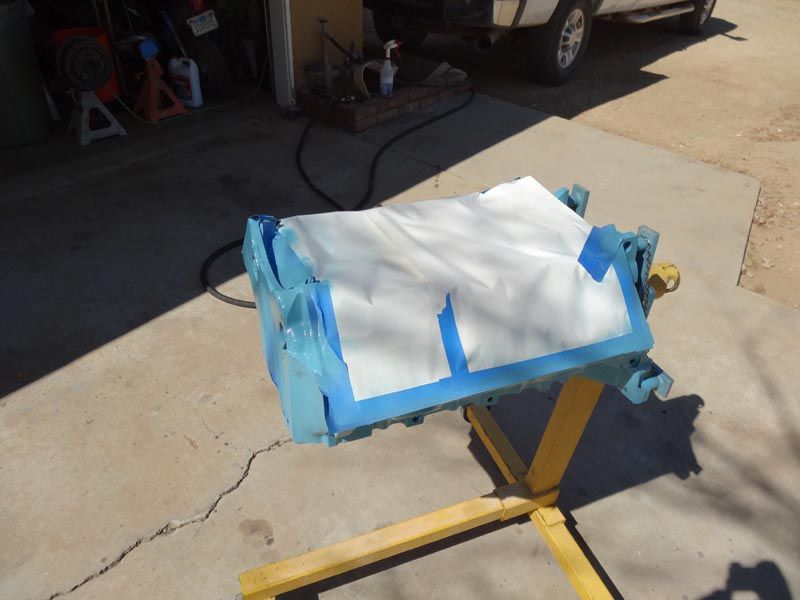 Brass core plugs installed. 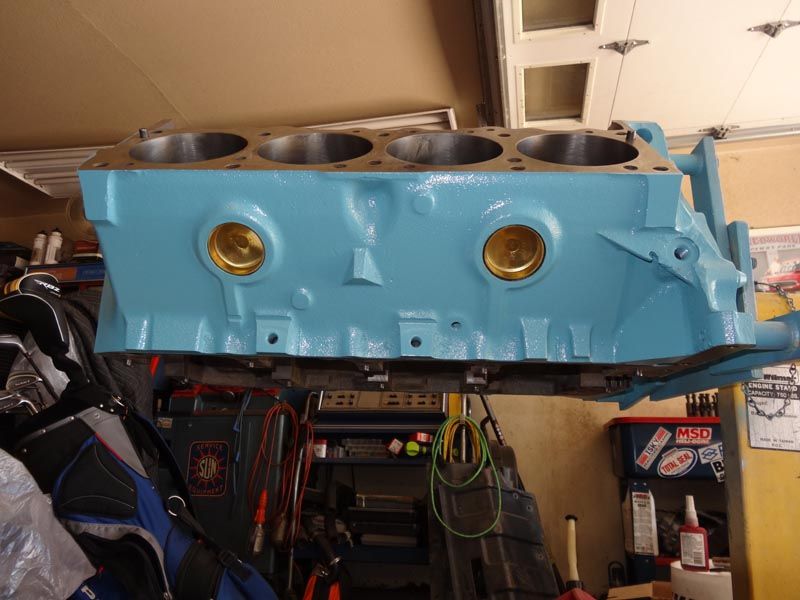 Front oil gallery plugs installed. Note the grinder work done to help improve oil drainback to the pan from the lifter valley. 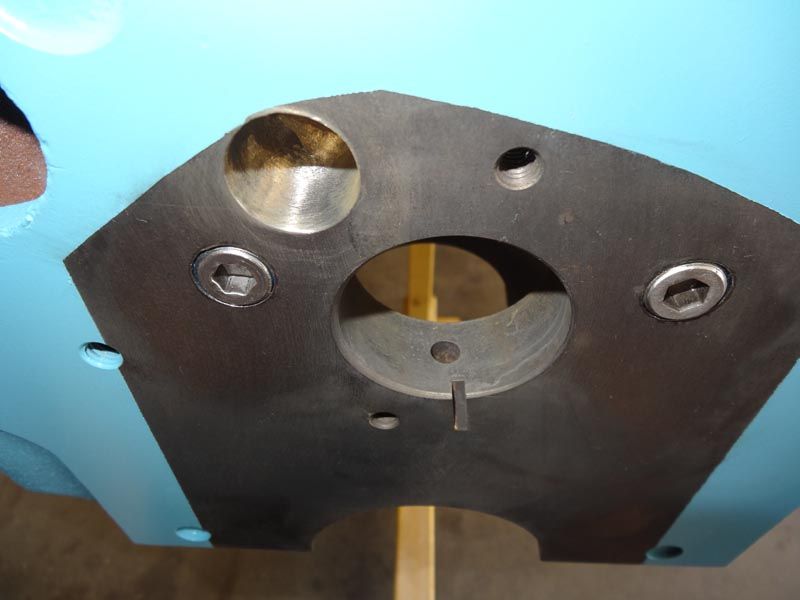 Brass oil gallery plug drilled with a .030" bit to positively lube the distributor drive gear, this drilled plug came in the H-O Racing oil gallery plug kit. 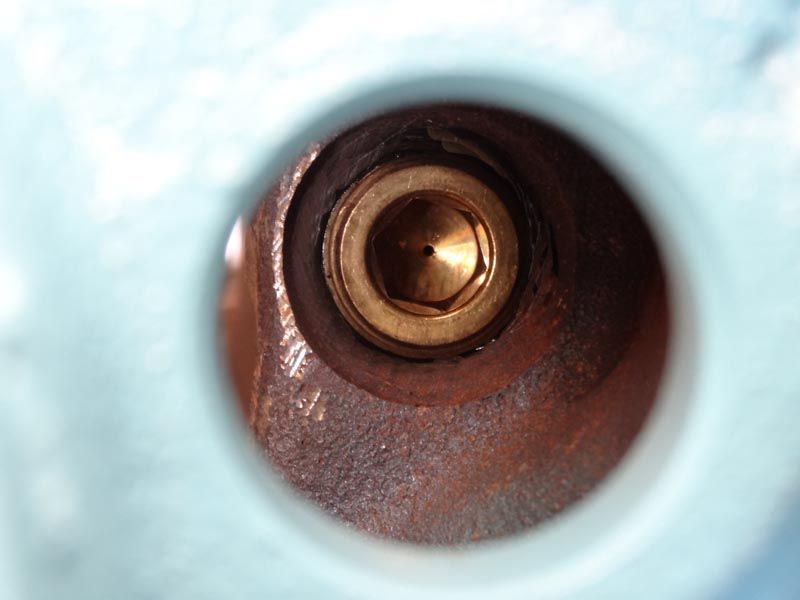 Heads came back looking great, we used readily available 1.96" and 1.66" stainless valves with .100" longer stems, with the heads cut down to 1.93" and 1.645" respectively to eliminate any possible valve head to valve head interference. The original valve sizes were 1.923" and 1.663" according to factory specs. There's simply no room to enlarge the valve sizes, they're just too close together. 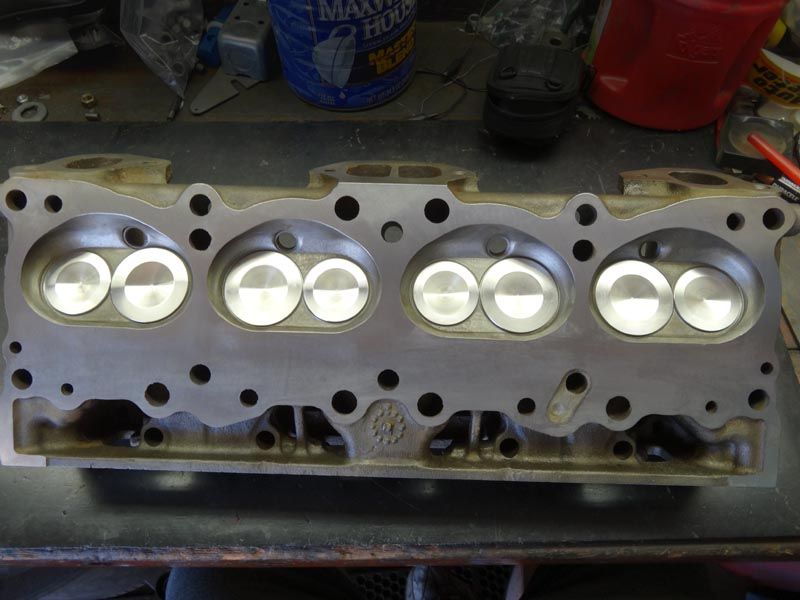 The original trouble-prone press-in rocker studs were pulled out and the rocker stud bosses were milled down by .250" to make room for the bottom hex portion of the screw-in studs we're going to install. 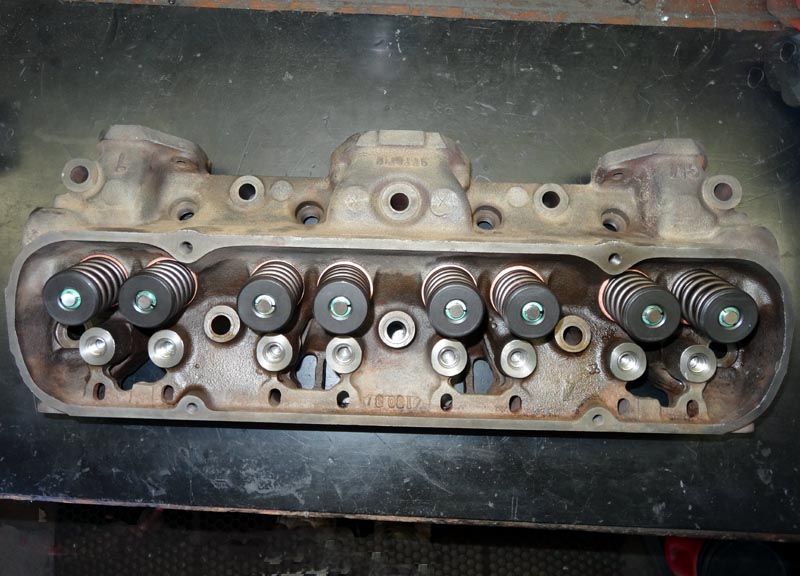 Close-up shot of one of the rocker stud bosses showing one of the 7/16-14 Heli-Coils that were installed. 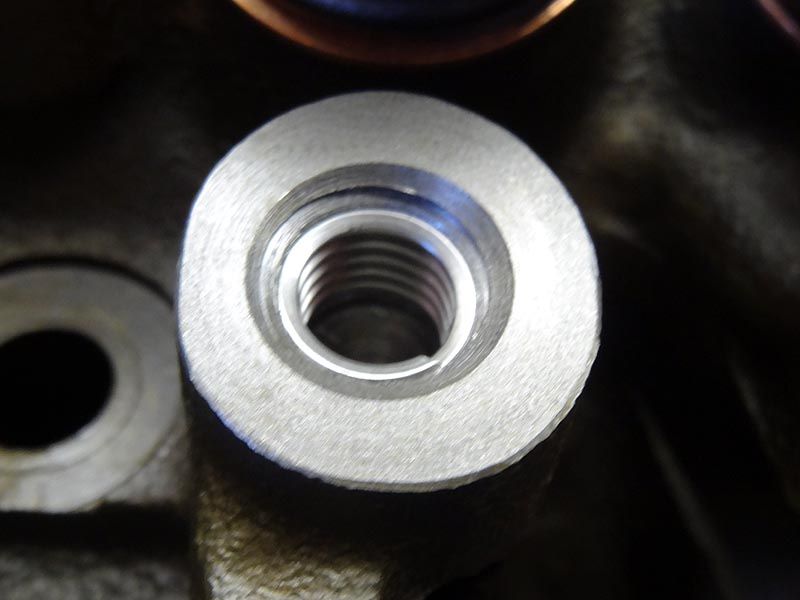 One final check of all of the combustion chamber volumes was performed so we'd know exactly where we stand compression-wise. It turns out we gained a couple of ccs during the final head work. This was likely a combination of the valve seats getting cut deeper during the valve job and the added volume of the small depression in the center of the new stainless valve heads as compared to the flat original valve heads. All of the chambers checked out between 76.4 and 76.6 ccs with the exception of one stubborn chamber that came in at 75ccs. After some touch up that one ended up at 76.4 ccs.  We originally carefully guestimated the heads would end up in the 74+ cc range with the final compression ratio at 9.05:1 before buying the 26cc dished Ross pistons. Now we're looking at 8.87:1 and that's fine with me, it gives me some breathing room on hot summer days running 91 octane in this A/C equipped auto trans car with tall 2.56 gears. We originally carefully guestimated the heads would end up in the 74+ cc range with the final compression ratio at 9.05:1 before buying the 26cc dished Ross pistons. Now we're looking at 8.87:1 and that's fine with me, it gives me some breathing room on hot summer days running 91 octane in this A/C equipped auto trans car with tall 2.56 gears.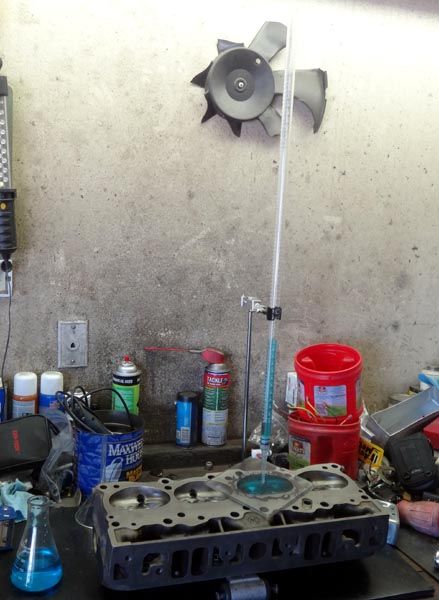 Now that they've met our standards the heads are getting masked and ready for paint. 
__________________
1964 Tempest Coupe LS3/4L70E/3.42 1964 Le Mans Convertible 421 HO/TH350/2.56 2002 WS6 Convertible LS1/4L60E/3.23 |
|
#25
08-17-2015, 09:45 AM
|
||||
|
||||
|
Nice work.
|
|
#26
08-17-2015, 11:51 PM
|
||||
|
||||
|
.....as we keep moving along. The heads have a nice coat of Pontiac Light Blue paint now, and the pistons have had the dish volume checked.
We found that the 26cc dished Ross pistons are actually 27.2 ccs after checking two of them. This puts our compression ratio down just a bit lower again, calculating out to 8.79:1 if our projected deck height works out. We will do our final calculation after the bearings arrive and we can check the deck height. Still just fine at let's call it 8.8:1 compression. This gives me confidence that I'll never get into detonation in hot weather while running the A/C and the engine can likely tolerate a tank of 87 octane if the need ever arises, such as if I can't find premium out on the road somewhere. 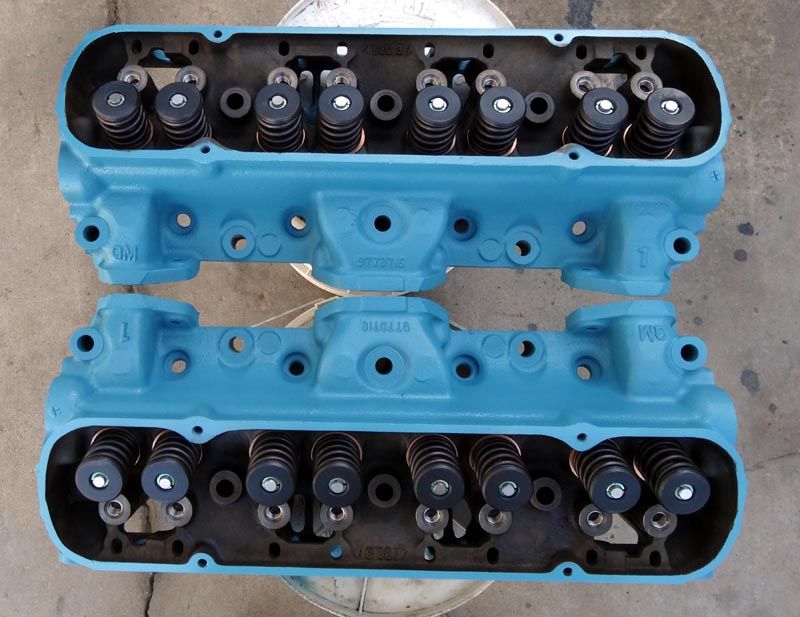
__________________
1964 Tempest Coupe LS3/4L70E/3.42 1964 Le Mans Convertible 421 HO/TH350/2.56 2002 WS6 Convertible LS1/4L60E/3.23 |
|
#27
08-30-2015, 03:58 PM
|
||||
|
||||
|
.....of the 421 short block.
First order of the day was to install the cam bearings. Since we have the proper tooling at hand here to install them and to insure they're installed with the correct oiling hole orientation we didn't have the machine shop do the work, plus it helps us to save a little on outside labor costs. Anything we can do ourselves will be done here at home not only to save on labor but to help insure the best possible quality control. 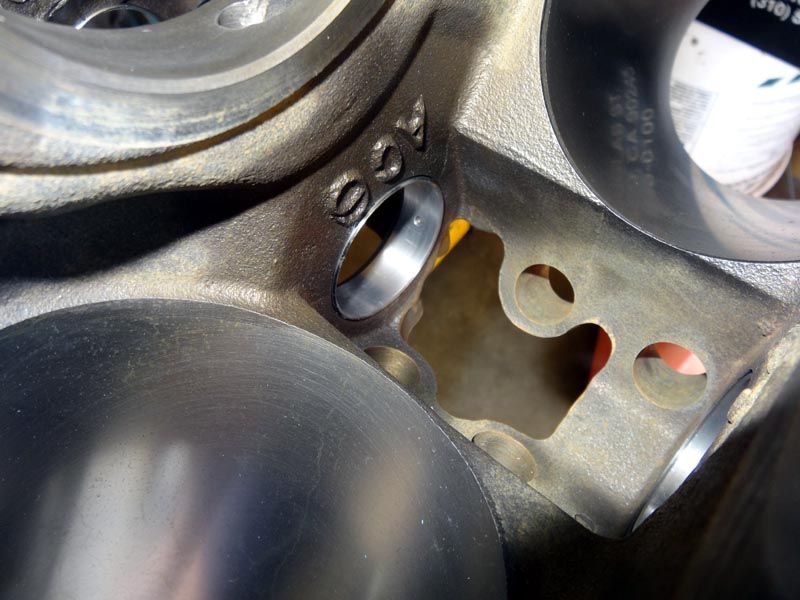 The next very important step is to test fit the cam, this is something you absolutely must do before installing the rotating assembly. While test fitting the cam it went smoothly into the first 4 bearings and became tight when entering the last one. To remedy this issue a cam bearing reaming tool was used to shave off a little babbit from the offending bearings. Having to ream the cam bearings is not unusual at all, most Pontiac blocks have some misalignment of the cam bearing bores. 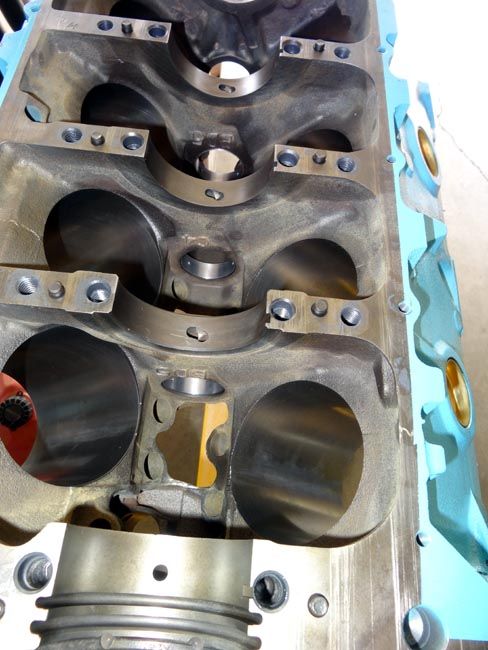 Here is the tool that was used to ream the cam bearings. This tool was made from an old cam with all of the lobes ground off to prevent damage to the bearings, each bearing journal was modified to form a cutter. 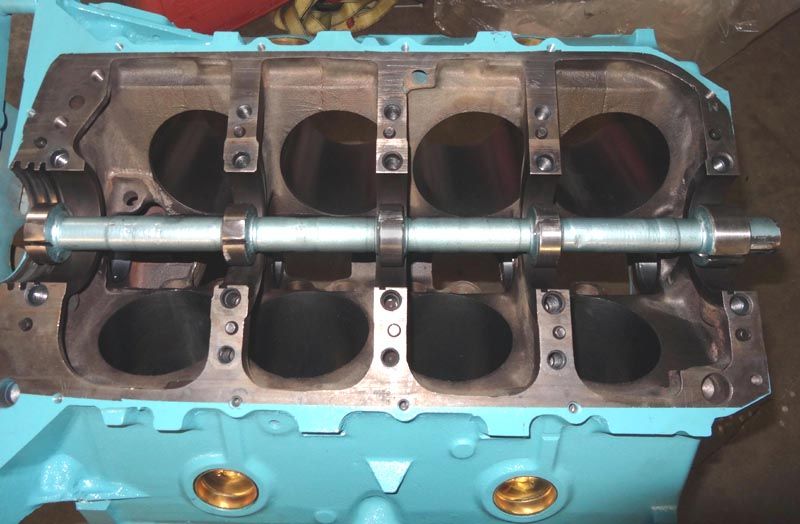 BOP Engineering viton one-piece main seal. This seal is the latest technology in Pontiac rear main seals. 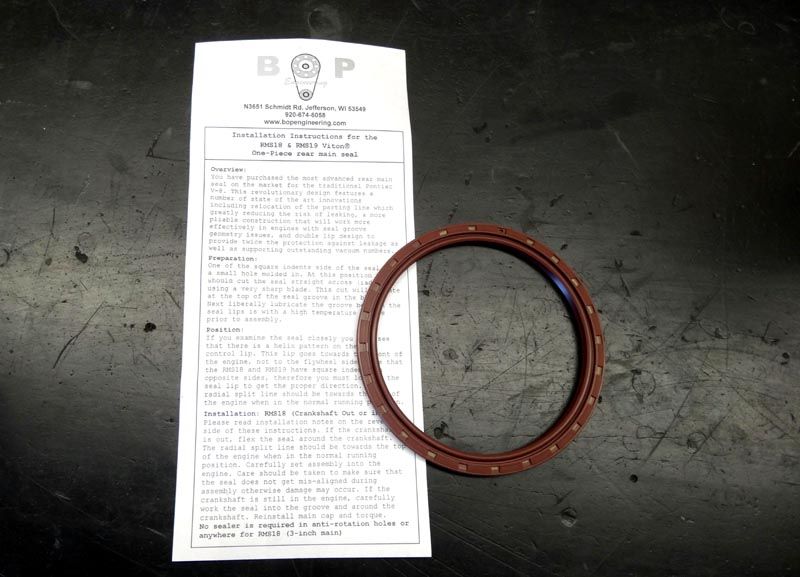 After checking the main seal fit in the block with the rear main cap tightened it was determined that it fit the machined receiver groove in the block perfectly with just the right amount of compression. 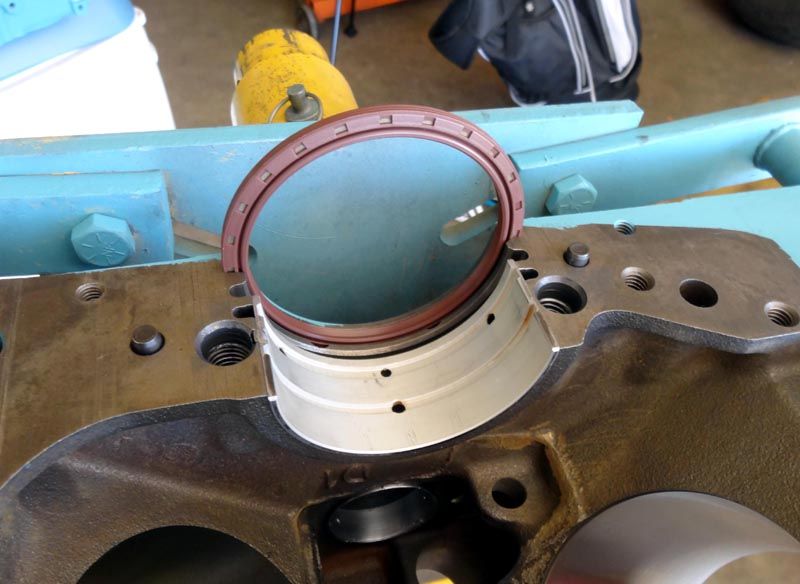 Main bearings in place ready for the crankshaft install. All main bearing clearances were checked with the proper measuring tools. After shuffling around some of the bearing halves all the clearances ended up between .0023" and .0024" so we're looking good there. 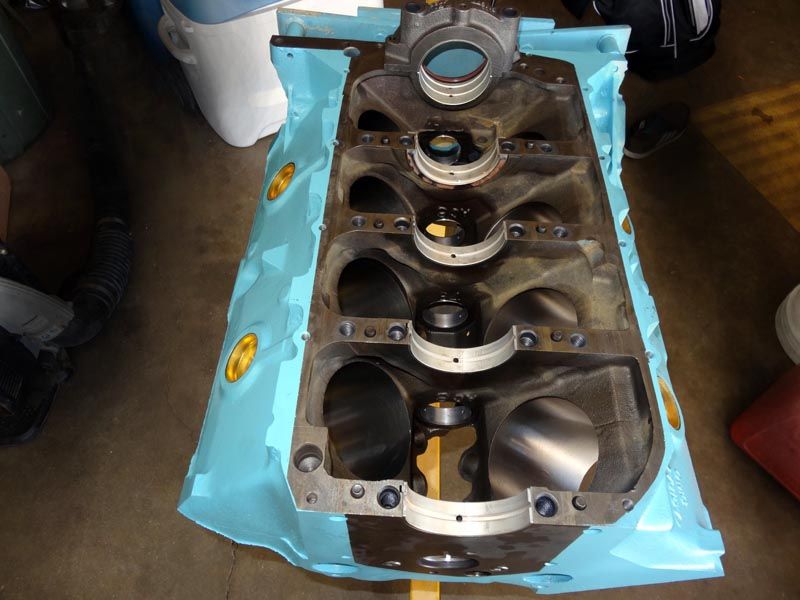 Here is the 4.00" stroke Armasteel 421 crankshaft after balancing, heat treating and being ground first undersize to .010"/.010". All of the oil passages were thoroughly scrubbed out with rifle brushes and it is now clean and ready to install. 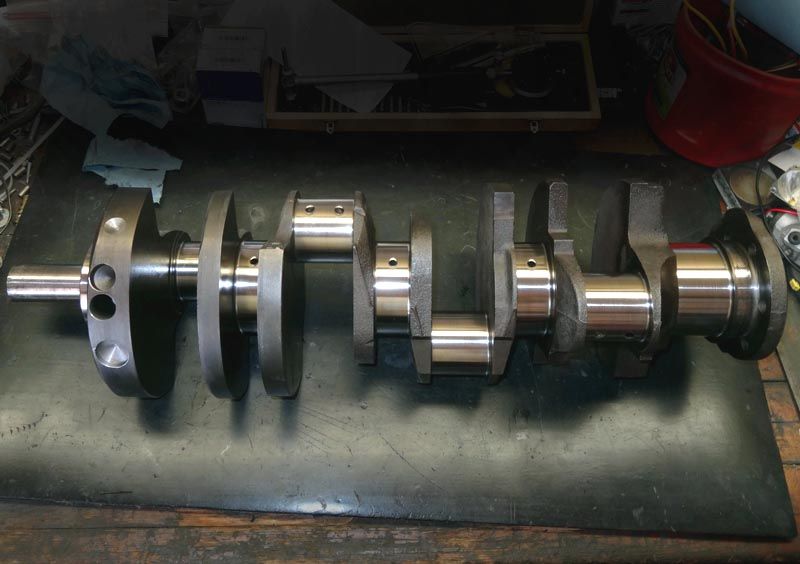 No helpers were present to help install the heavy 80+ pound crankshaft and BOP one-piece main seal at the same time, so an engine hoist was employed to help accomplish this important and somewhat delicate task. 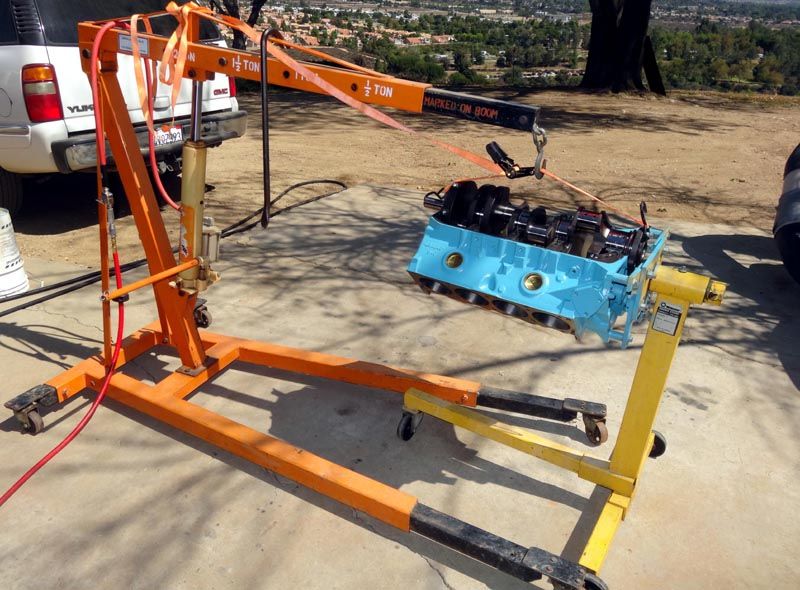 Crankshaft now installed, main caps have all been torqued to spec using the original factory hardware. 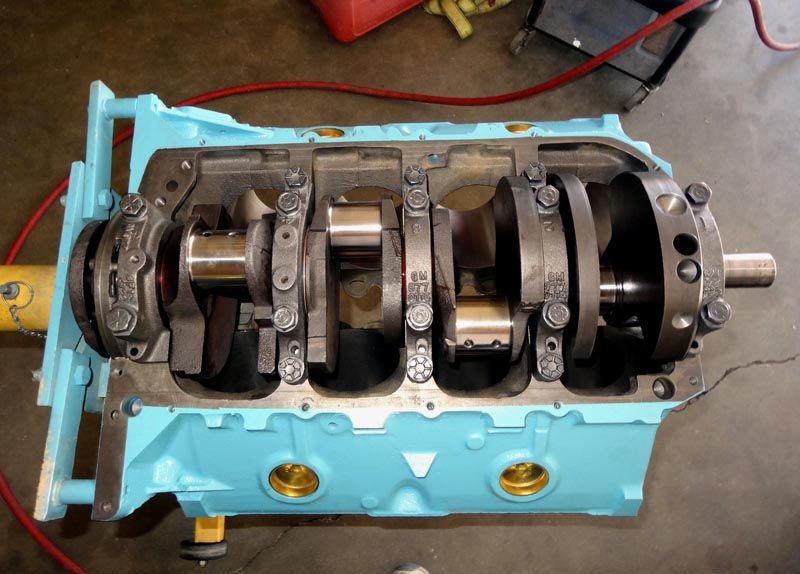 Checking fit of the original cast aluminum rear divider plate to the water pump impeller. 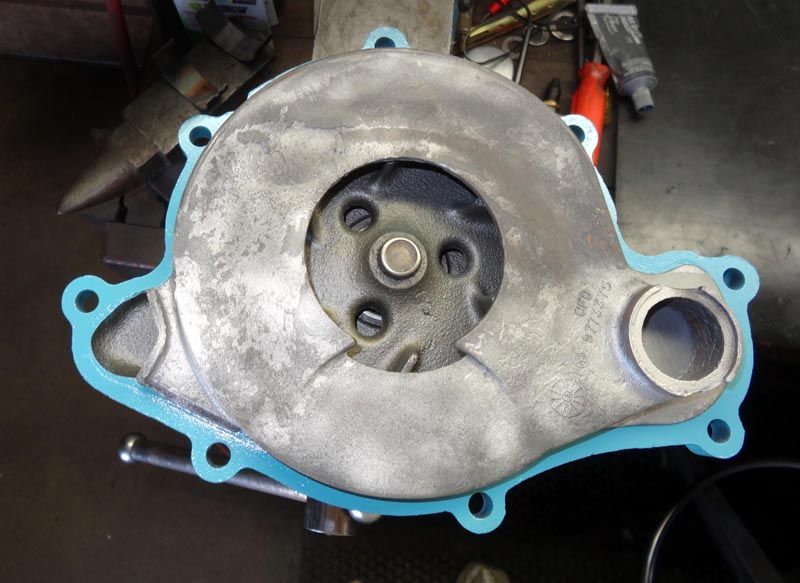 Closeup of impeller to plate clearance. 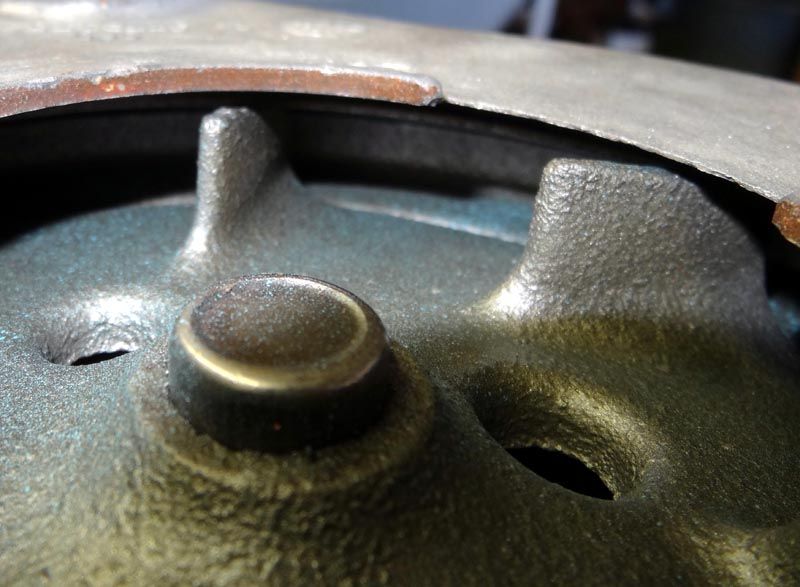 After years of running the thermostat bypass hole in the aluminum timing cover tends to grow in size due to corrosion, they usually start out at about 3/8" diameter. This one had grown to nearly 1/2", so it was about the perfect size to accept a 3/8-NPT pipe tap. The stainless steel pipe plug was drilled out with a 1/4" bit to allow enough bypass water for proper functioning and also to limit the amount of water than can bypass the radiator. 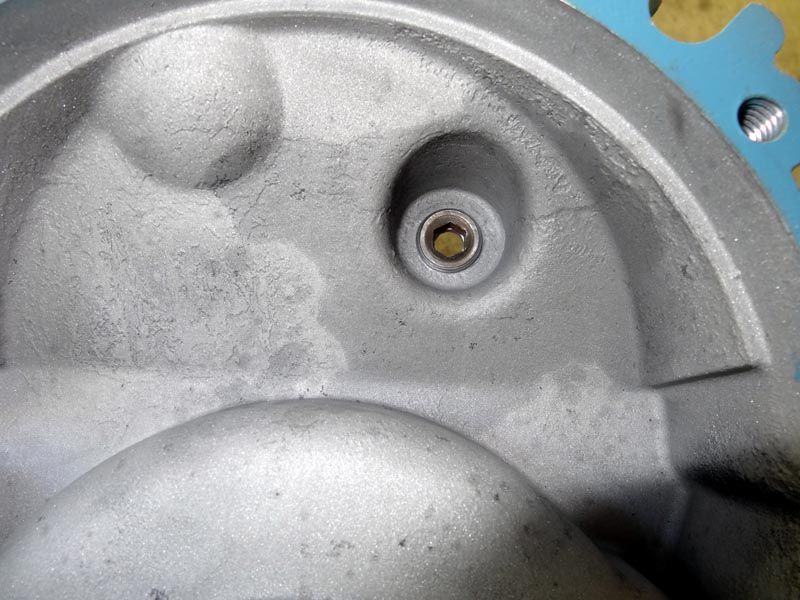 Water pump and timing cover assembly completed. 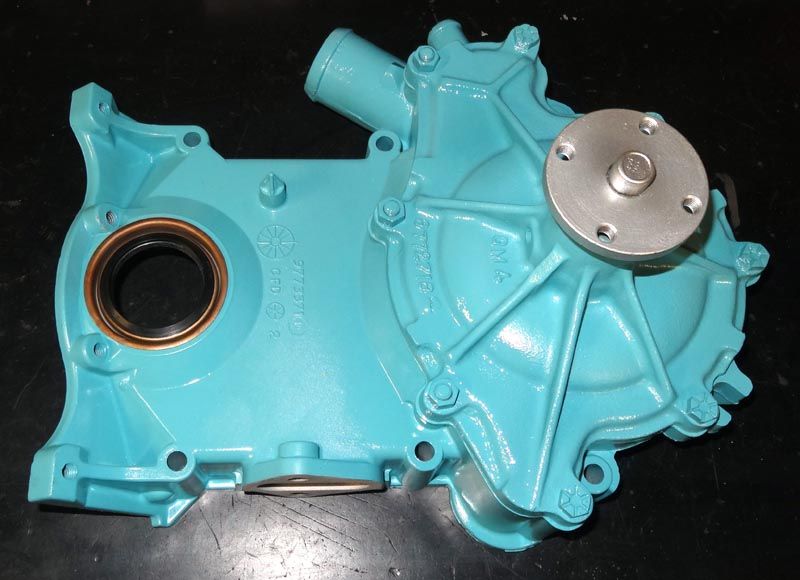
__________________
1964 Tempest Coupe LS3/4L70E/3.42 1964 Le Mans Convertible 421 HO/TH350/2.56 2002 WS6 Convertible LS1/4L60E/3.23 |
|
#28
09-08-2015, 11:44 PM
|
||||
|
||||
|
.....for the connecting rods to come back from being reworked due to a bushing installation issue we caught up on some of the engine detailing work.
When you get bored from sitting around waiting for the 'meat' of the project to get under way again, you find the time to get some small things cleaned up and painted. A bead blasting cabinet is pretty much indispensable for us folks in the old car hobby for getting things cleaned up in a timely manner. These are the intake manifold bolts, note how much thicker the hex heads are on these 1964 bolts as compared to 1965 and later Pontiac intake bolts. 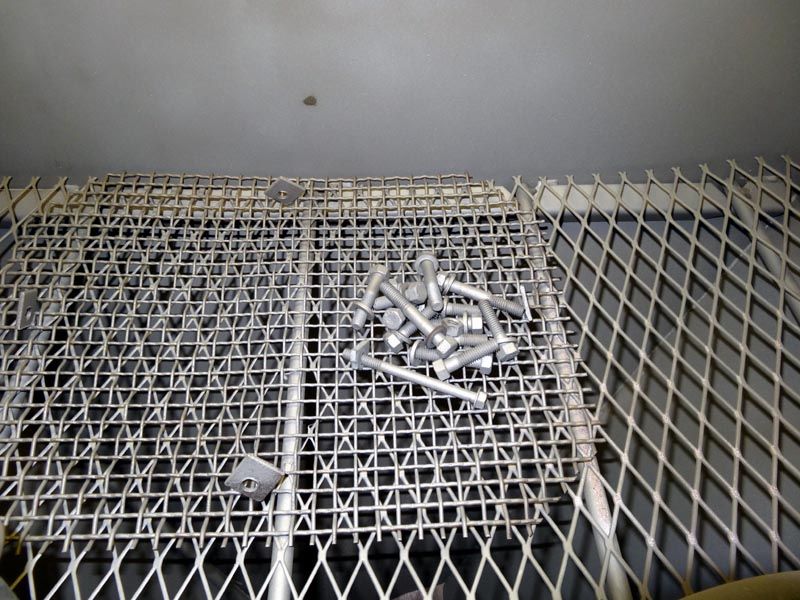 Oil filter adapter, head bolts and timing cover hardware. Everything you'll see on the outside of this engine will be OEM hardware. Just about the only hardware on this 421 that won't be 50+ year old factory issue will be the bolts in the Crower rods and the ARP rocker studs. 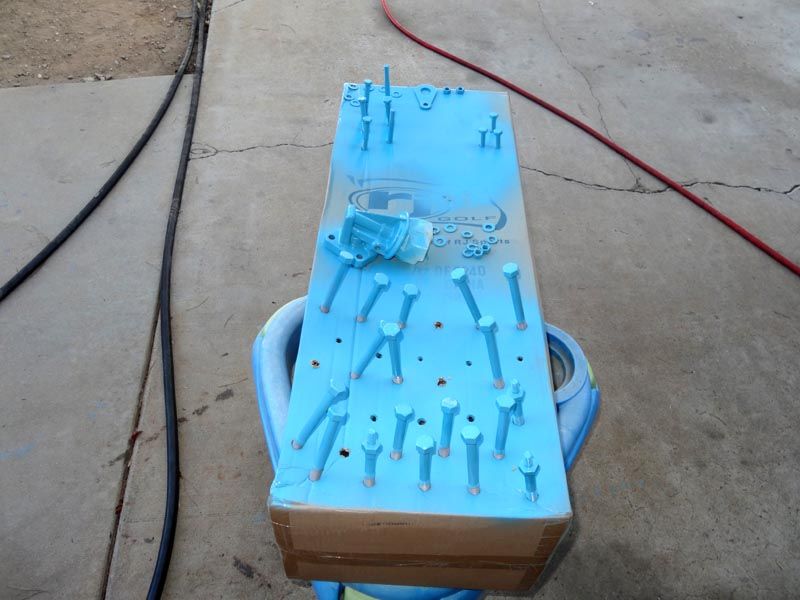 PCV nipples, hot air choke tubes and throttle cable bracket. Later on I might have the throttle cable bracket plated in the correct finish.  New aftermarket harmonic balancer and factory A/C pulley set, all painted the correct Pontiac Light Blue. 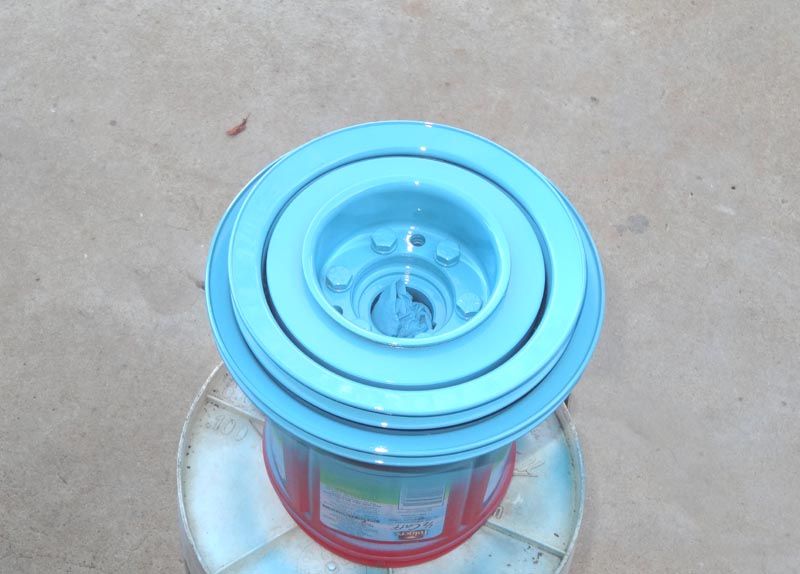 The flex plate has been neutral balanced along with the rotating assembly. Should I ever decide to use a stick shift trans in this car I can easily swap on a neutral balanced flywheel. 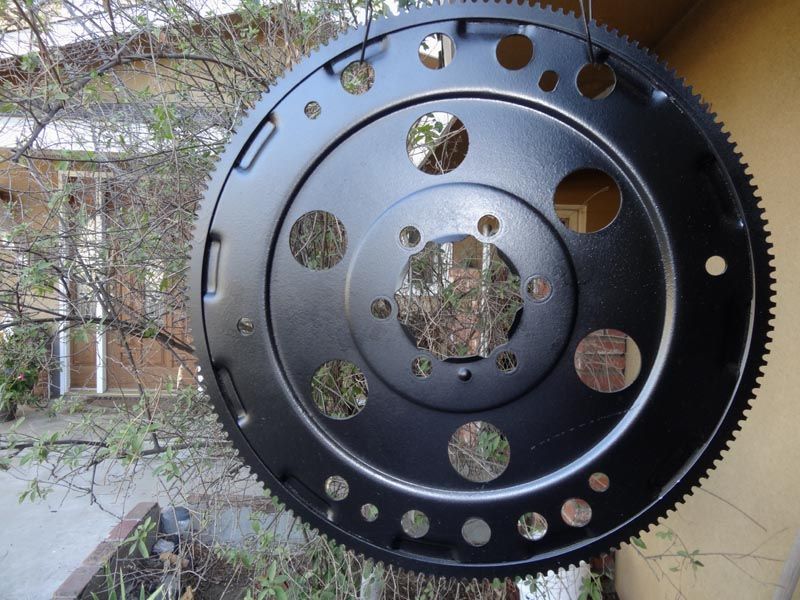 A check of the crankshaft end play shows that we have .006", right in the middle of the factory spec of .003" to .009". Very happy to see this. 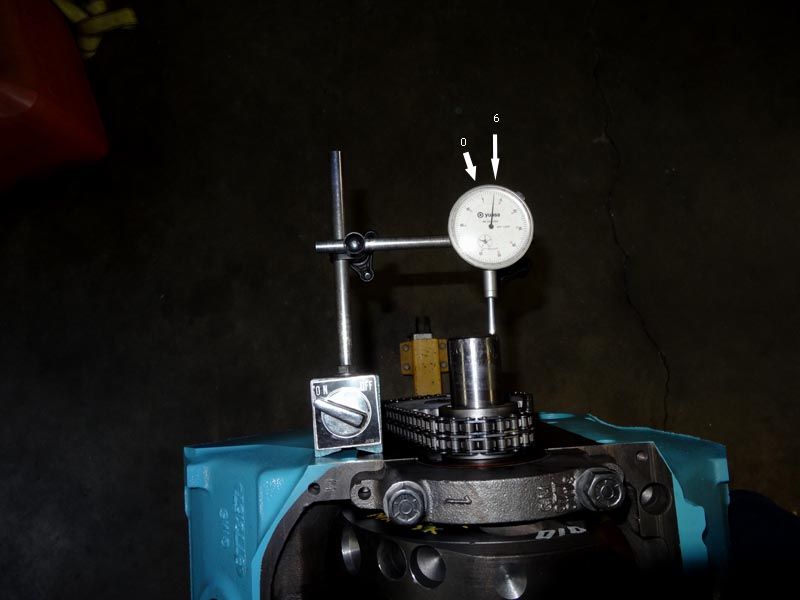
__________________
1964 Tempest Coupe LS3/4L70E/3.42 1964 Le Mans Convertible 421 HO/TH350/2.56 2002 WS6 Convertible LS1/4L60E/3.23 |
|
#29
09-11-2015, 10:31 AM
|
||||
|
||||
|
In post #2 you said that the later '67> stamped steel rockers do not have the correct geometry for an earlier engine and thus you are going with older rockers and you will drill holes in the tips. Could you elaborate on that please? Not the drilling part but the geometry thing.
I am building an older engine and am now thinking I want to go with stamped steel rockers too. I was considering the Comp Cams stamped steel ones with the longer slot for higher lift cams, and some vendors imply they are OK with all years '55> but then some say only '67>. |
|
#30
09-11-2015, 11:32 PM
|
||||
|
||||
|
Quote:
They'll still work fine, so it's not really a big issue. As far as stamped steel factory rockers are concerned, I'd only be comfortable using the correct rockers for the early 326/389/421 heads. Since I've had quite a bit of time to think about things during this 421 build I've decided to go with Crower Enduro stainless steel roller rockers. I'll save the stamped rockers for the stud-oiled '64 326 250 HP 2-barrel engine that originally resided in my '64 LeMans convertible, should I ever decide to use it in the future. 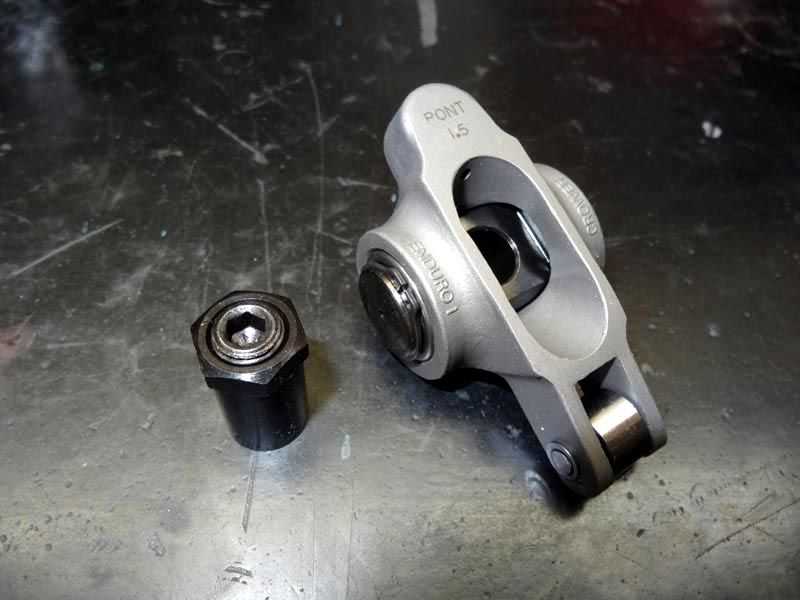
__________________
1964 Tempest Coupe LS3/4L70E/3.42 1964 Le Mans Convertible 421 HO/TH350/2.56 2002 WS6 Convertible LS1/4L60E/3.23 |
|
#31
09-23-2015, 12:07 AM
|
||||
|
||||
|
.....now that the connecting rod bushing issue has been taken care of.
The rods were rebuilt at Crower and arrived looking like new. New bronze bushings for our floating pins were installed but the big ends didn't need any work. They were carefully checked out at our machine shop before being shipped to us. 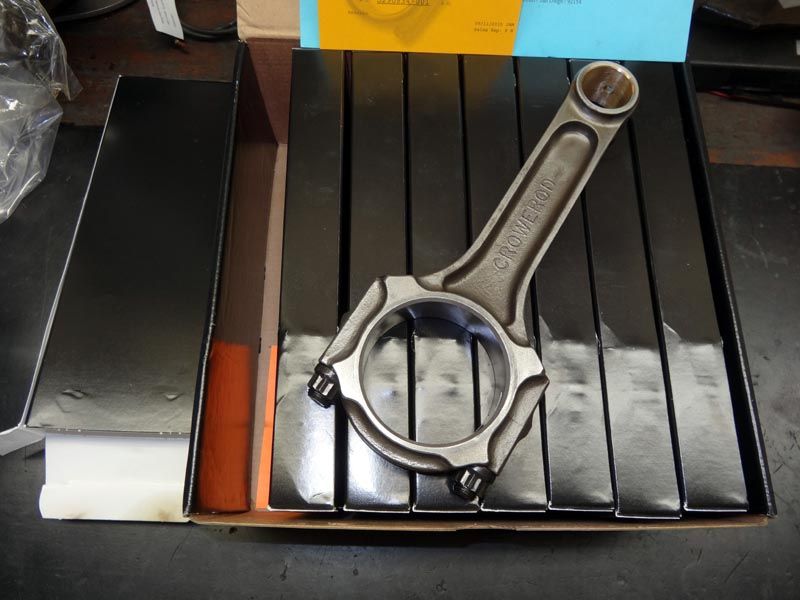 Crower spec sheet supplied with the newly refurbished rods. 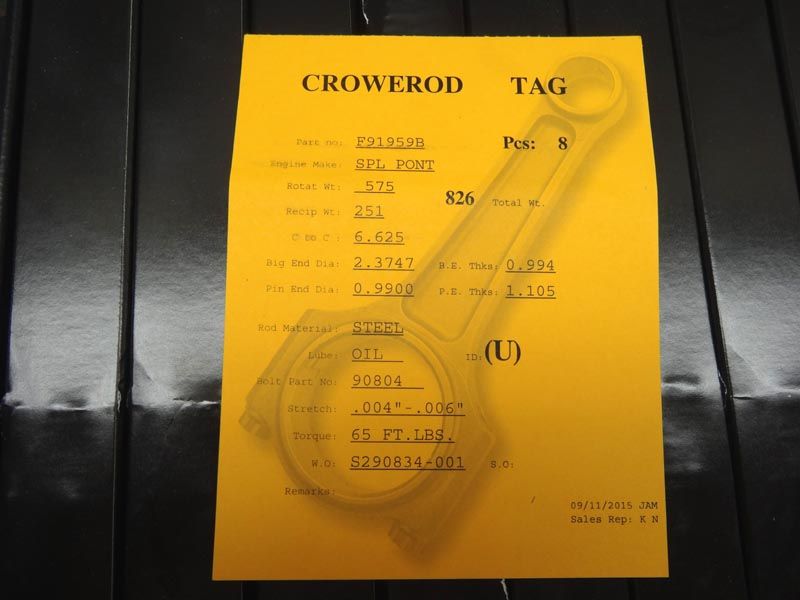 Piston ring end gaps were checked and they were a bit tight at .014", our rings were supposed to be a non file-fit set. The ring ends were ground to achieve a .019" top and .021" second ring gap. Check everything, leave nothing to chance. Pistons have been assembled to the rods and are now ready for installation. 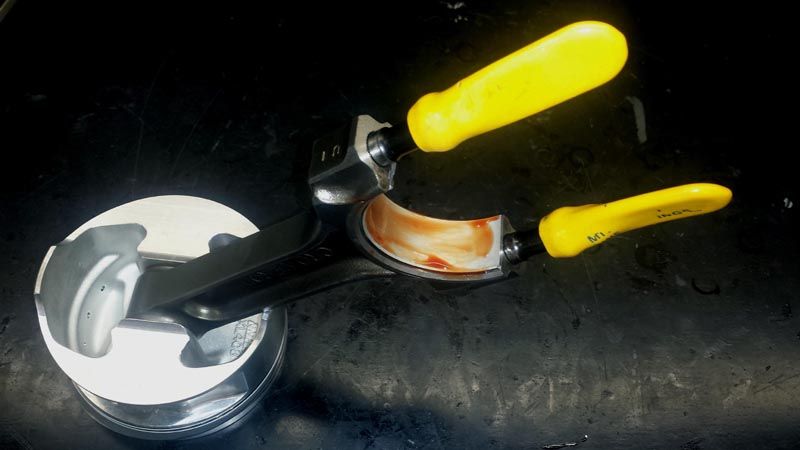 All piston/rod assemblies are now installed. Piston deck height worked out to be .007" to .008" above the deck, giving us a nice tight quench distance of .037" to .038" with our .045" thick head gaskets. We were shooting for .005" above the deck with the new pistons, plenty close enough. Our final compression ratio calculation now ends up at 8.82:1 using pistons .007" above the deck as our number. 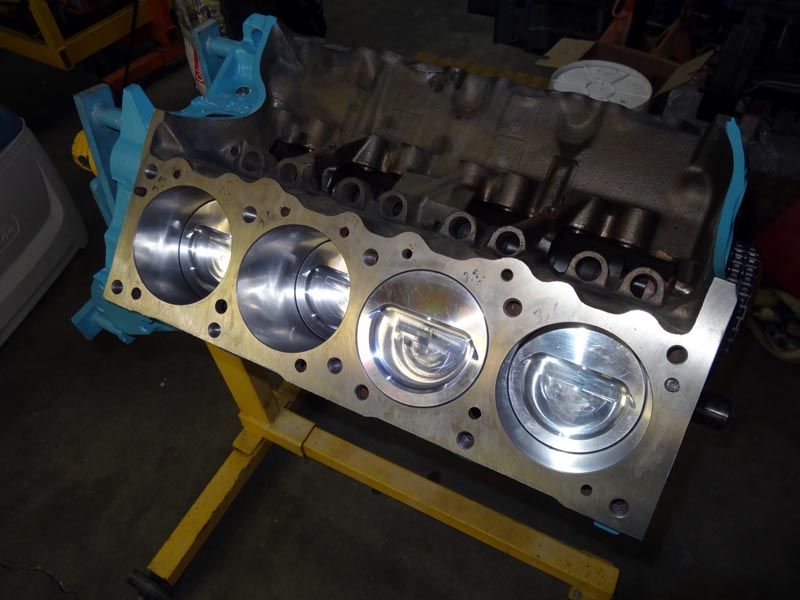 The NOS 068 cam was to be installed at the factory 113 degree intake centerline. Using our Cloyes timing set we ended up at 112.8 degrees using the straight-up marks on the timing sprockets, you're not going to get any closer to hitting the mark than this. 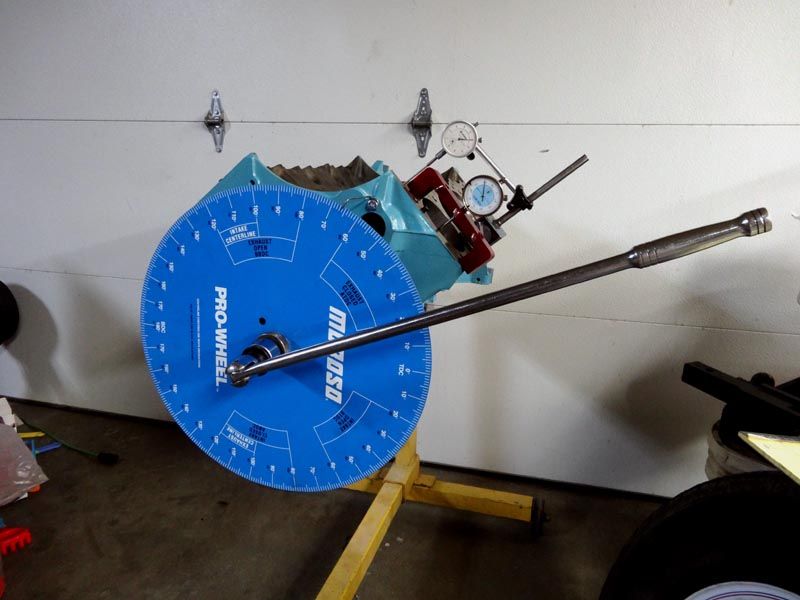 Our Melling Select oil pump was a little sticky, upon disassembly some debris were found along with some dried up preservative that was causing the sticking. After a thorough cleaning all is well. 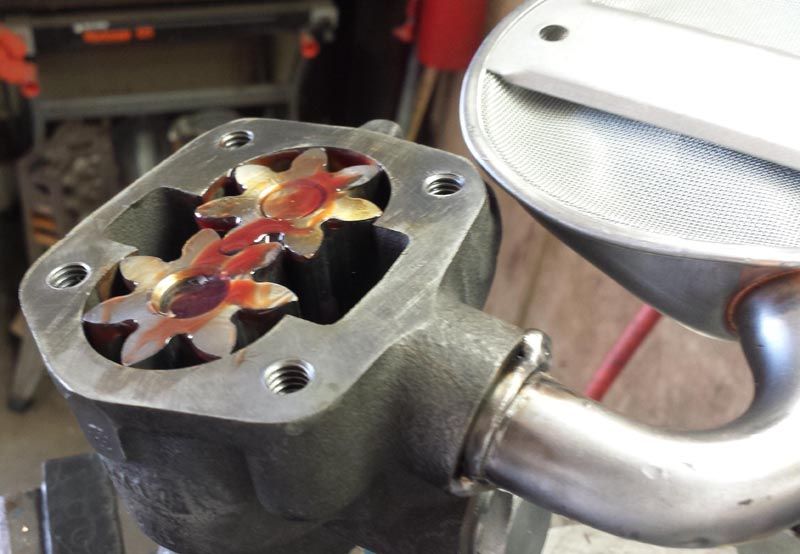 Pickup height was set while the pump was apart and then tack welded to secure it. Bottom plate was torqued down with some blue Loctite on the bolts and it's ready to go. 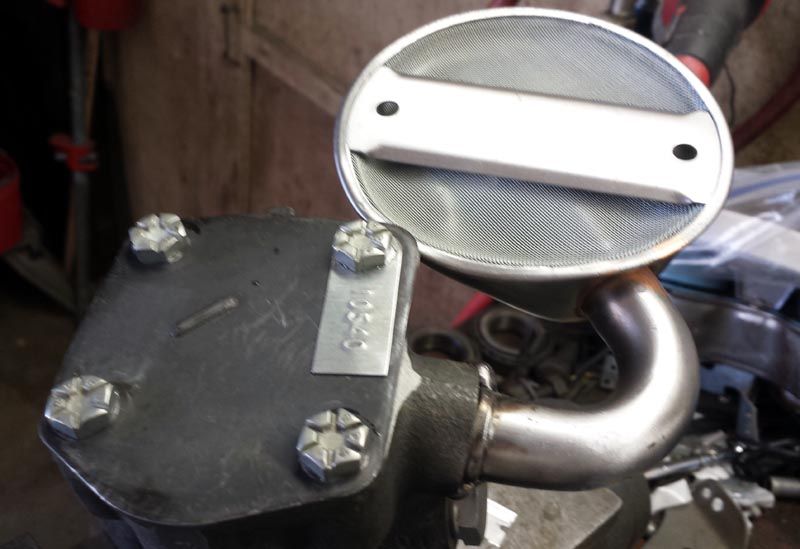
__________________
1964 Tempest Coupe LS3/4L70E/3.42 1964 Le Mans Convertible 421 HO/TH350/2.56 2002 WS6 Convertible LS1/4L60E/3.23 |
|
#32
09-23-2015, 12:11 AM
|
||||
|
||||
|
Love the details, nice work!!
__________________
Brad Hansen 65 Cat Ventura, 66 Cat Vert, 63 GP |
|
#33
09-24-2015, 05:20 PM
|
||||
|
||||
|
.....our progress so far.
Here's the oil pump mounting hardware kit from H-O Racing that I pulled from my collection of parts, purchased probably 20+ years ago. 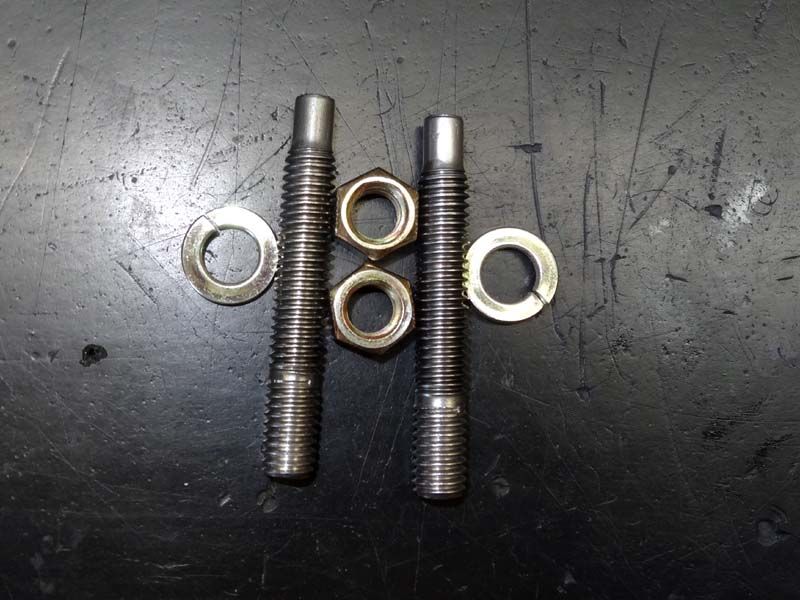 The oil pump mounting studs were installed in the block using blue Loctite. 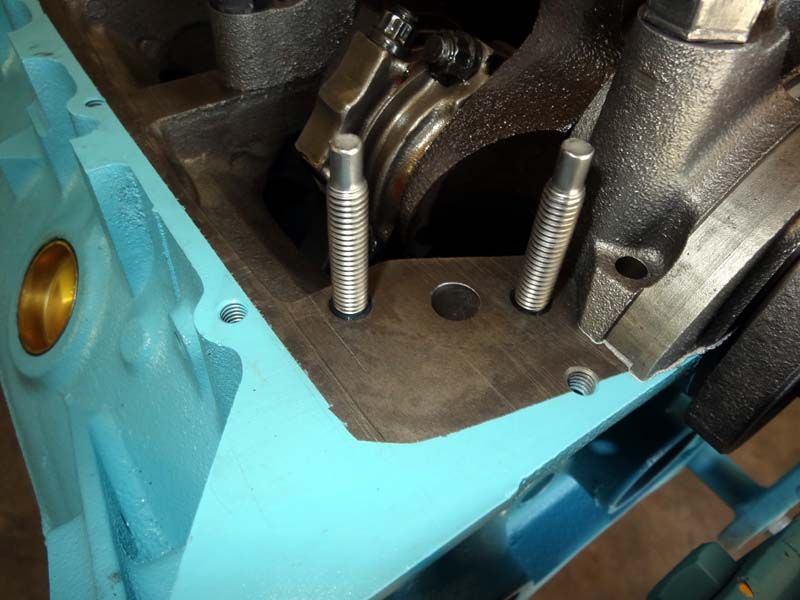 The finished oil pump assembly is now installed along with the pump driveshaft, never forget the driveshaft! Pickup to pan clearance was set at close to 5/16" and checked using wadded-up aluminum foil prior to tack welding the pickup in place. 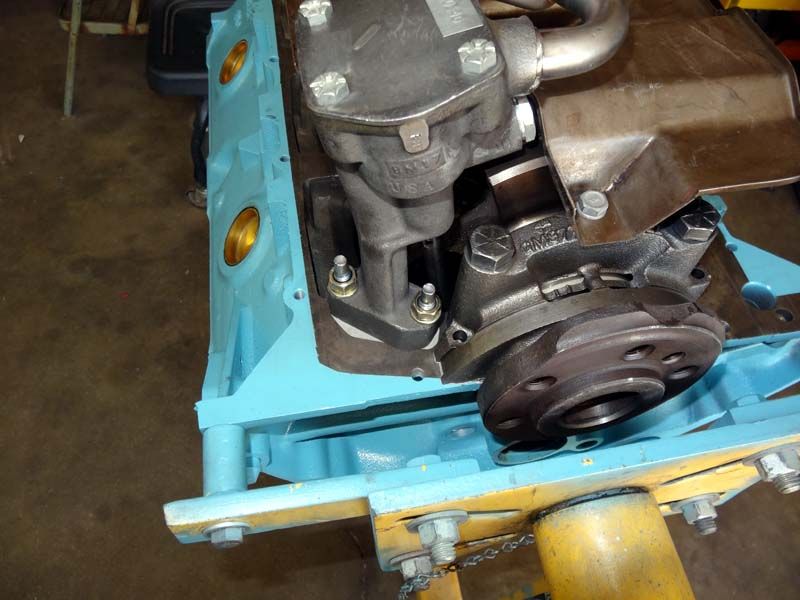 Blue Loctite is your friend. 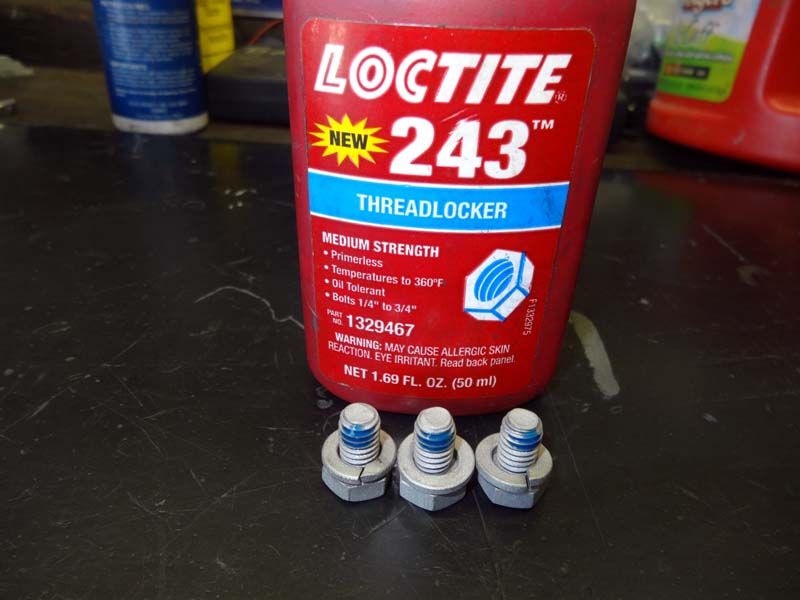 The camshaft lobes have been liberally lubed-up with the proper moly-based assembly lube for a safe break-in cycle. 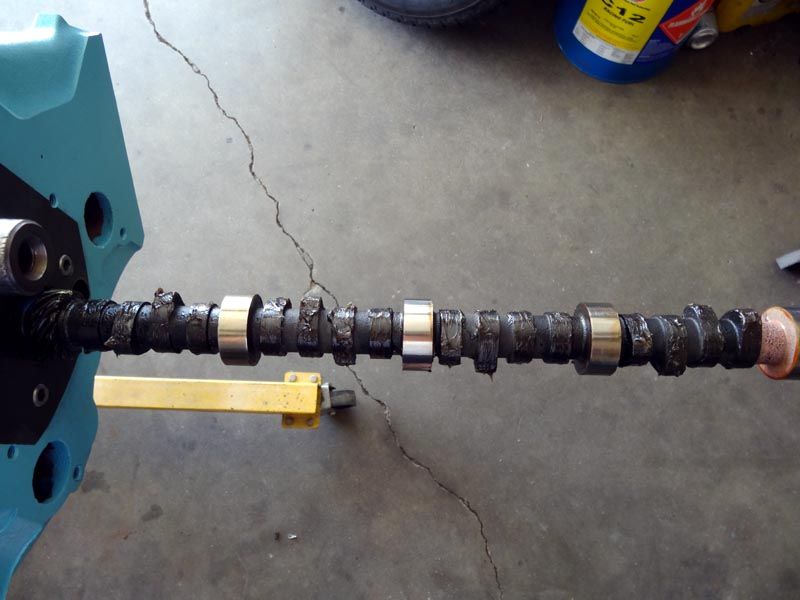 My builder's choice of cam and lifter lube. 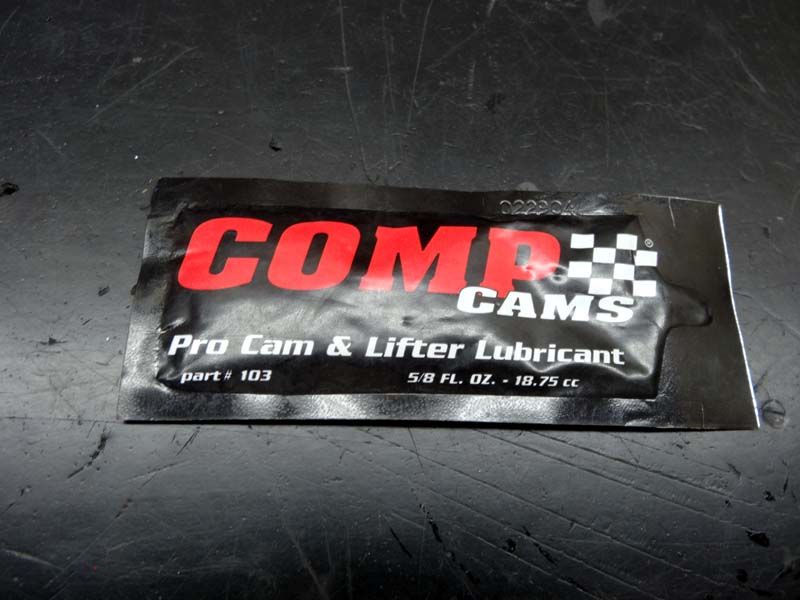 Cam sprocket and fuel pump eccentric are now installed and torqued down for the final time after the camshaft position checking. There's a little bearing lube in between the sliding faces of the pump eccentric just for insurance. 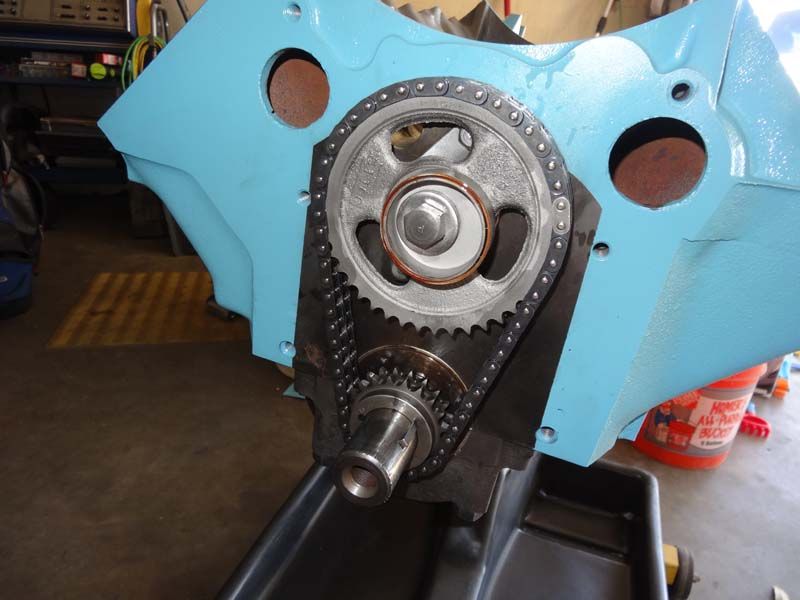 Clevite bearing assembly lube. It originally was marketed as Michigan Bearing Lube, but Clevite bought them out a few years ago. Still the same stuff, and it stays nicely in place. 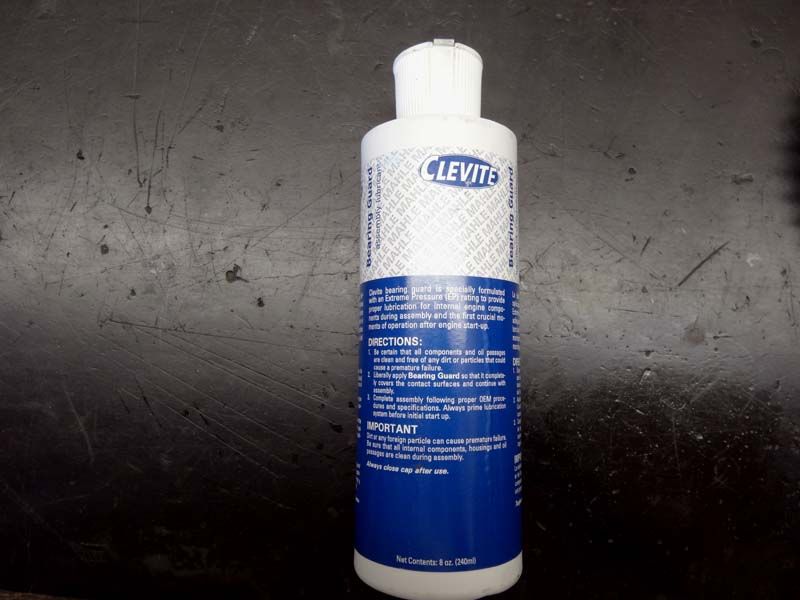
__________________
1964 Tempest Coupe LS3/4L70E/3.42 1964 Le Mans Convertible 421 HO/TH350/2.56 2002 WS6 Convertible LS1/4L60E/3.23 |
|
#34
10-04-2015, 04:36 PM
|
||||
|
||||
|
.....the small details on the bottom end assembly so we can get the oil pan and front cover installed and call that part done.
Stubby block dipstick tube used on 1964 and earlier engines, I'm not exactly sure how many years back this dipstick tube style goes in production but here it is pressed into place. 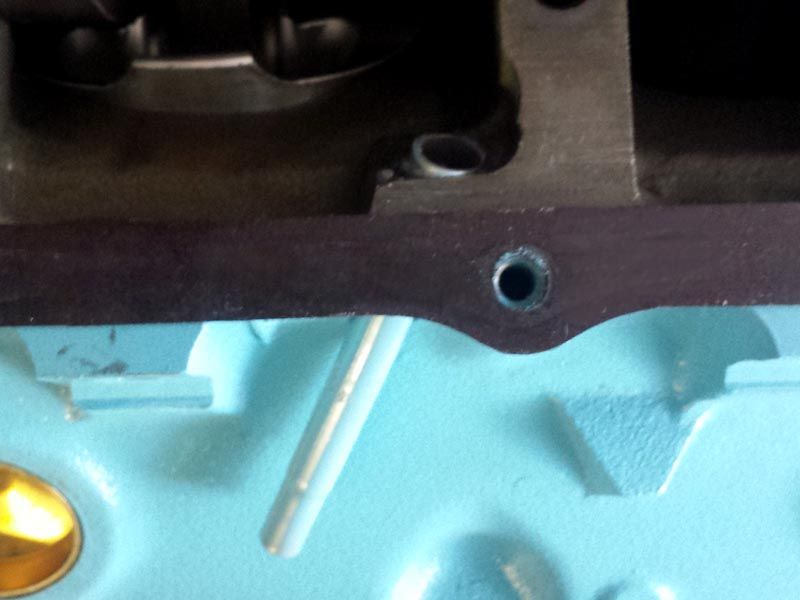 The bottom dipstick guide tube is held in place by inserting the upper end into the block tube and the lower end is retained by the windage tray. Interesting to note that this style of windage tray bowed out after the 1964 model year, but this same design was revived for a very special and super-rare Pontiac performance engine, the 400 RAV tunnel-port in 1969. 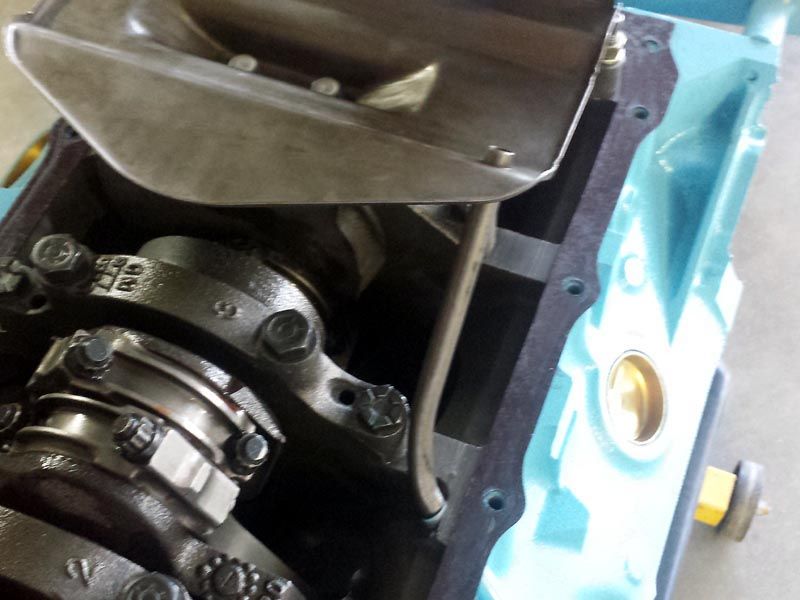 Oil pan and front cover assembly are now installed, sealing up the bottom end and finishing off that part of the engine assembly. The Butler head gaskets are shown here in place ready for the heads after spraying the metal side of these composition-type gaskets with copper coat. I've used these gaskets on several previous street engine builds and they've been very reliable. However they're just not a good gasket choice for a race engine that comes apart on a regular basis, only because of the need to tediously scrape off the black composition material from the block deck surface when changing them out. For something that's going to see many years and tens of thousands of miles before any possible future head removal they're perfect. 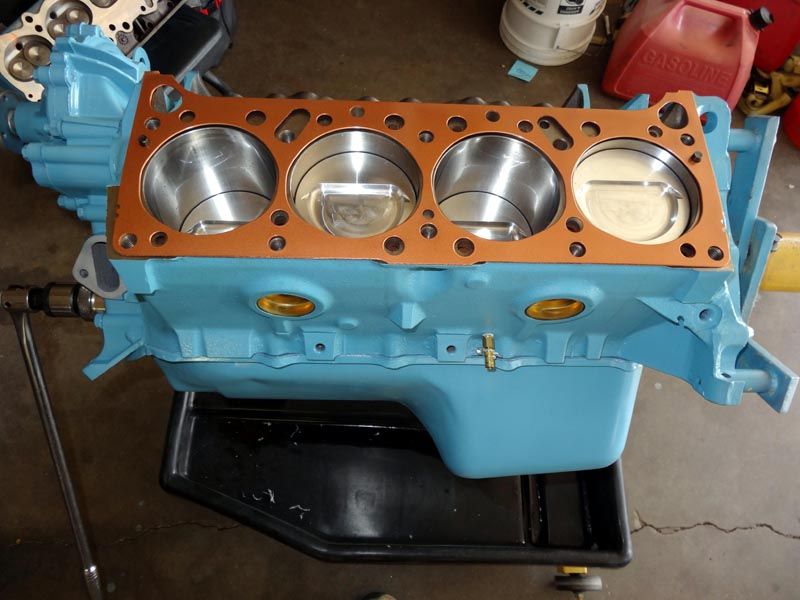 The heads have now been torqued down to factory specs using the original 1964 head bolts. The upper dipstick tube has been attached to a studded head bolt, one of the 2 special longer head bolts used on factory A/C installations that retain the cast iron A/C compressor mounting bracket. Non-A/C upper dipstick tubes will attach to the valve cover bolt. 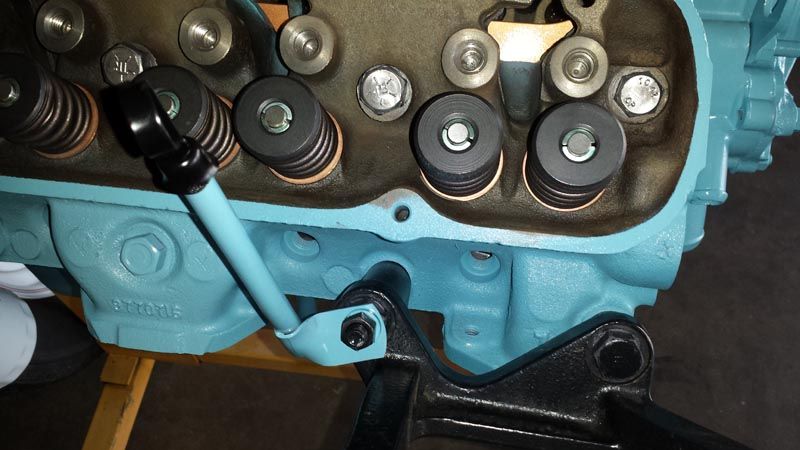 A/C bracket shown here. 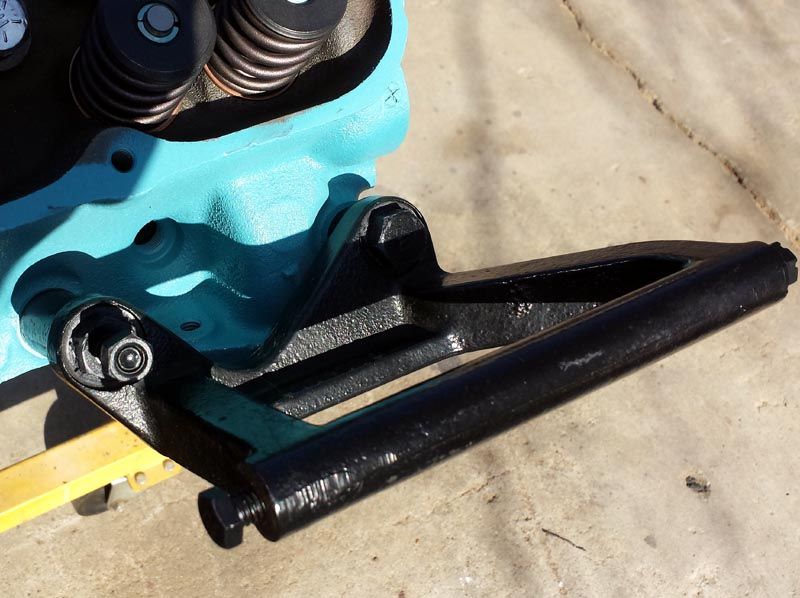 Here the valve cover to rocker arm clearance is checked using some wadded-up aluminum foil. Using a standard 1/8" cover gasket shows we're too close, the covers will end up getting damaged if we snug them down. A set of 5/16" thick gaskets will do the trick here. I knew we would either need valve cover spacers or hopefully only thicker gaskets to clear the polylocks and rocker tips.  Using the standard 1/8" thick gasket the polylock was right at zero clearance and the tip of the rocker arm had .087" clearance to the valve cover. Shown here is a cross section of the clay at the tip where we got this measurement. We're being extra careful here because nice '64 GTO chrome valve covers are not easy to find in excellent original condition. 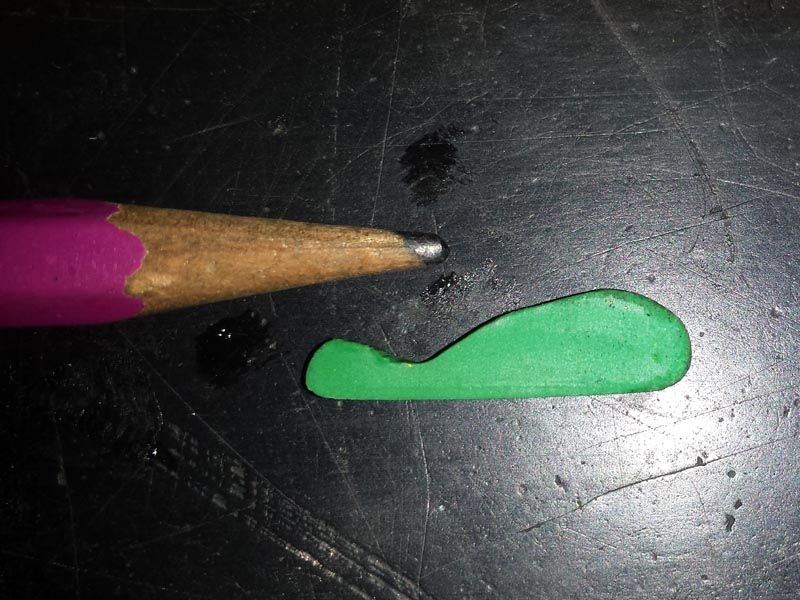 After doing a full mockup on the pushrod length and doing the math, we ended up at the length of a stock pushrod after all the effort. Stock pushrods out of my 421 engine are 8.672" according to my reference book and measured at 8.675" with calipers. The Johnson lifters have 1.7 turns from zero lash to bottom which works out to about .085" distance. The pushrod length test was run with the lifter collapsed and then subtract the lifter travel less .025" (half turn) preload or in this case .085" - .025" = .060" to subtract. So the 8.732" test pushrod length minus .060" equals 8.672". Here are the new Manton pushrods. They were ordered on a Wednesday morning over the phone at around 10AM and arrived via UPS on Thursday afternoon, now that's service. Manton is located a few hours north of us, so one day delivery is a snap. The length specified was 8.670" with a wall thickness of .118", made from chrome moly tubing with a hard melonite finish. 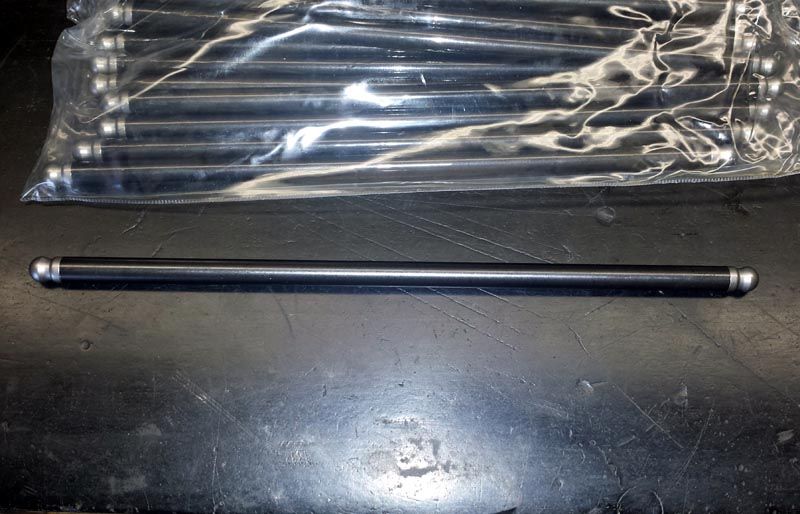 After installing one of the new pushrods we can see the rocker tips are tracking nicely as shown by the travel pattern on the red valve tip. The new ARP 7/16" straight screw-in rocker studs have all been torqued into place. 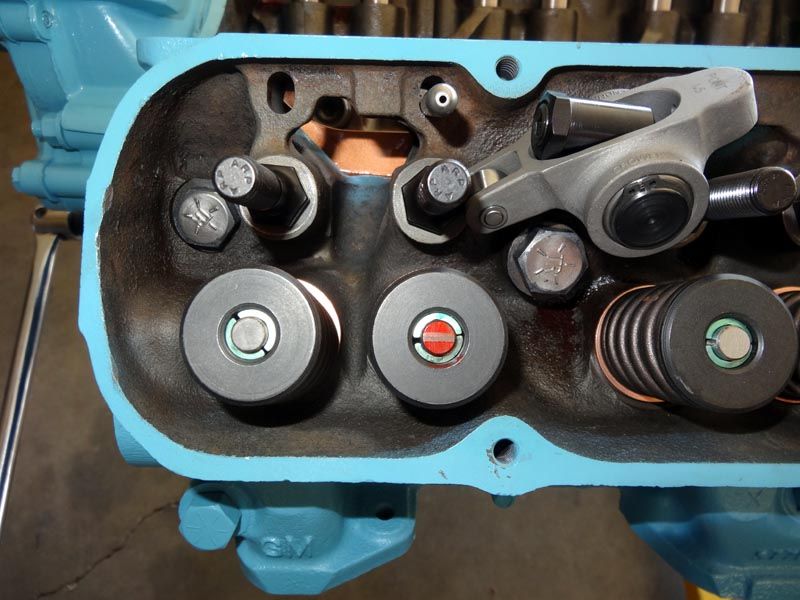 The new Crower Enduro stainless steel 1.5:1 roller rockers were given a nice long soaking in motor oil before installing them for the final time. 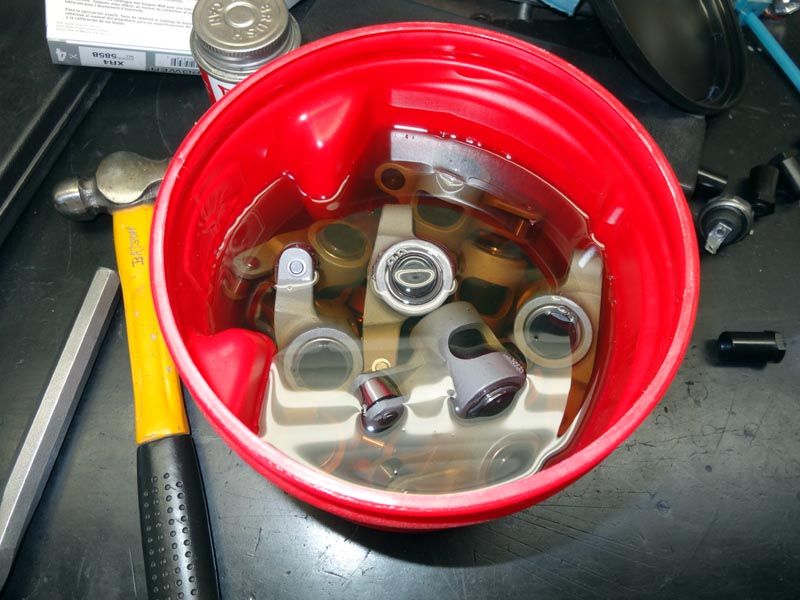 Rockers installed and adjusted, the top end is pretty much complete at the point. This valvetrain is overkill to the max, so reliability will not be an issue here. The ARP rocker studs, Crower rockers and super-stiff .118" wall pushrods won't flex with the mild spring pressures and low-lift I'm running. I see this as a very good thing to keep the pushrod guide slots in the heads from wearing out prematurely. I won't be pulling over to the side of the road to replace a broken rocker or pushrod, or to pound any old press-in rocker studs back in that have started to back out of the head. 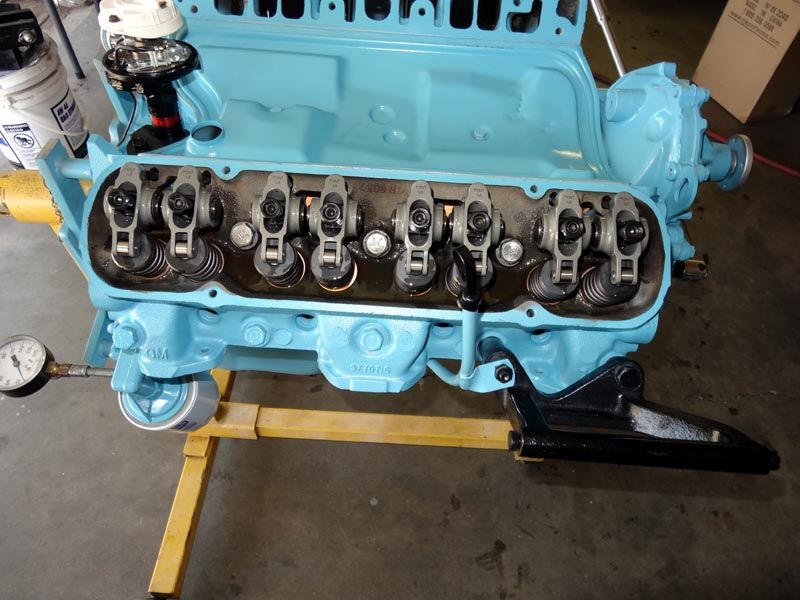 More evidence of machine work that's on-the-money. After setting the lifter preload the polylock heights are all the same after checking them with a straightedge, telling us that the rocker studs are all the same height and the valve seats were all cut to a uniform depth. 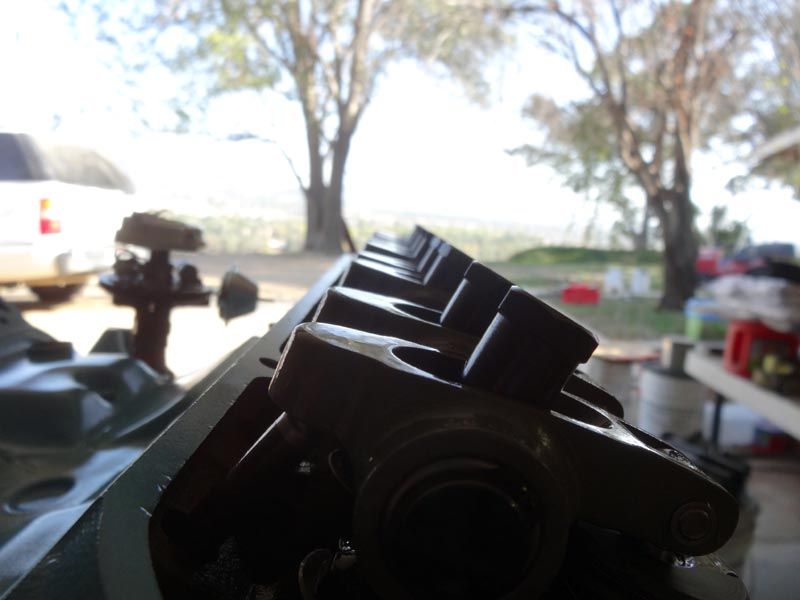 Pressurized the system and oil pump is right on the money at 60psi, surprised how quickly all the rockers got oil. We normally don't worry about that because things always work out, but this time every rocker had an oil bath without turning the crank. 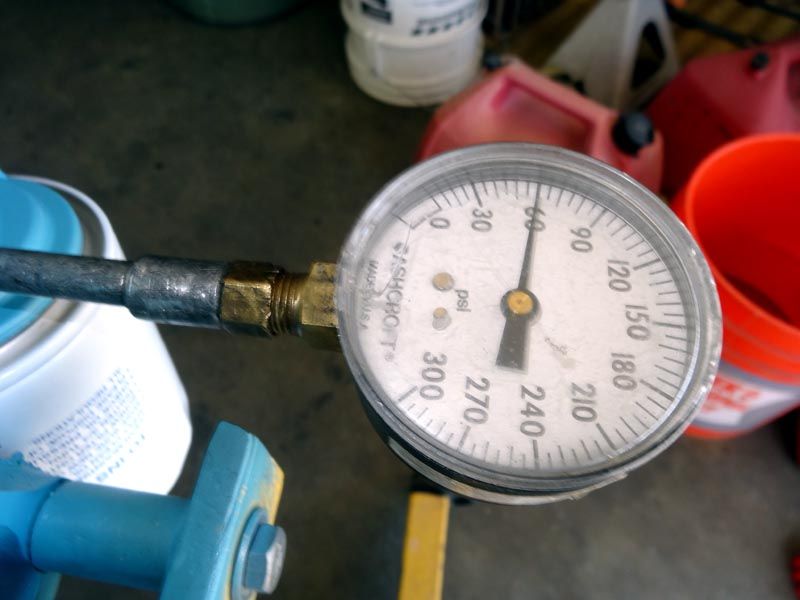
__________________
1964 Tempest Coupe LS3/4L70E/3.42 1964 Le Mans Convertible 421 HO/TH350/2.56 2002 WS6 Convertible LS1/4L60E/3.23 |
|
#35
10-13-2015, 11:08 PM
|
||||
|
||||
|
Here we're doing a tilt test to check for static rear main seal leakage with 5 quarts of oil in the pan. So far so good, we'll leave it tilted like this overnight just to be sure. Next it goes on the test stand for cam break-in.
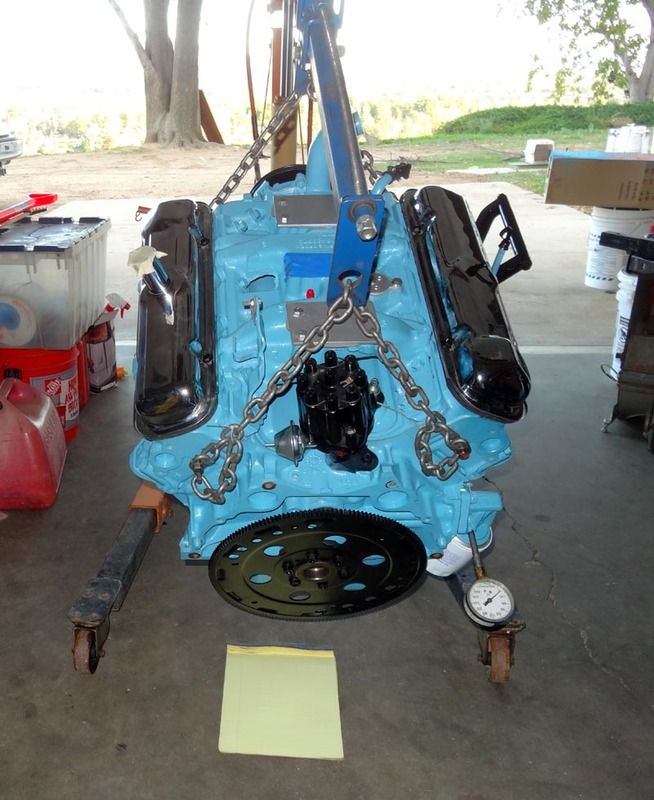 Note the carb block off plates for the outer carbs, this way we only have to deal with the center carb during the initial run-in. 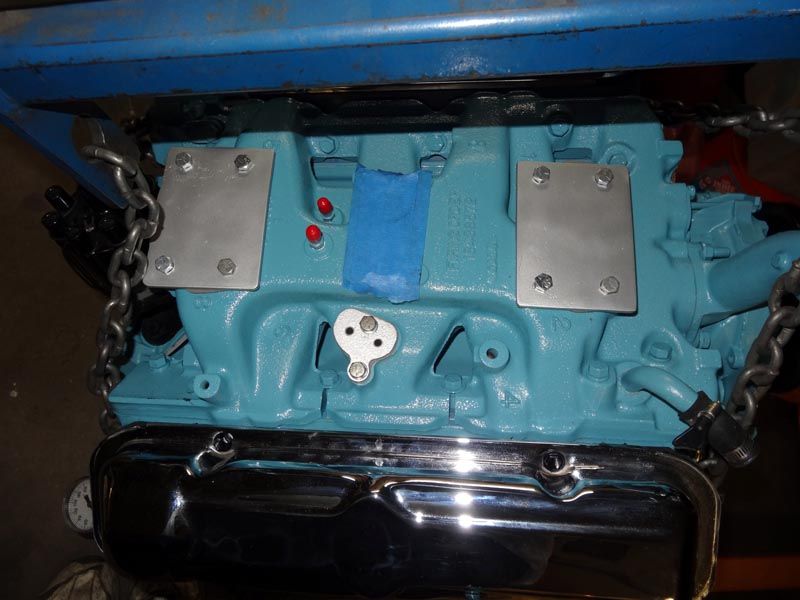
__________________
1964 Tempest Coupe LS3/4L70E/3.42 1964 Le Mans Convertible 421 HO/TH350/2.56 2002 WS6 Convertible LS1/4L60E/3.23 |
|
#36
10-14-2015, 11:08 AM
|
||||
|
||||
|
Awesome!
|
|
#37
10-16-2015, 10:37 PM
|
||||
|
||||
|
....on the test stand and almost ready to fire up. We're trying to find a known working center carb for the initial run-in, if we can't I'll bring my restored 1964 Tri-Power center carb and use it for the break-in.
We are planning to meet up on Sunday the 25th to finally get it fired up. I'm pretty excited.  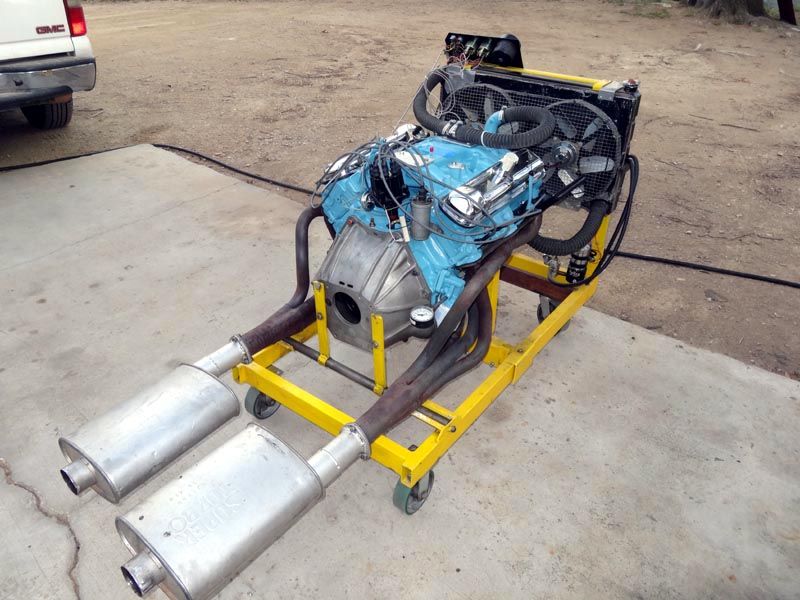 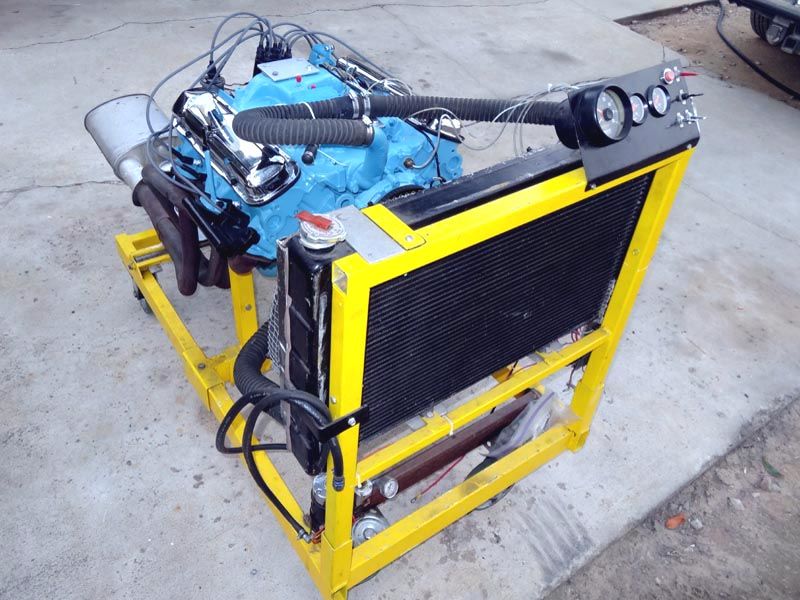
__________________
1964 Tempest Coupe LS3/4L70E/3.42 1964 Le Mans Convertible 421 HO/TH350/2.56 2002 WS6 Convertible LS1/4L60E/3.23 |
|
#38
10-26-2015, 09:37 PM
|
||||
|
||||
|
.....has finally arrived.
Made the trip out to pick up the 421 and see it run on the test stand. Earlier during the week my builder bolted down one of his own Tri-Power center carbs and did the cam break-in, running it for 20 to 30 minutes at 2000+ RPM. By the time I arrived the engine had about 1 hour of total run time on it, enough to burn up $15 worth of 91 octane premium.  We warmed up the engine and checked the oil pressure, once I was satisfied with how it was running we shut it down and proceeded to install my own restored 1964 GTO auto trans center carb. The engine ran perfectly with my carb, as expected. Next it was my job to install the two restored outer carbs along with the new reproduction fuel lines and linkage.  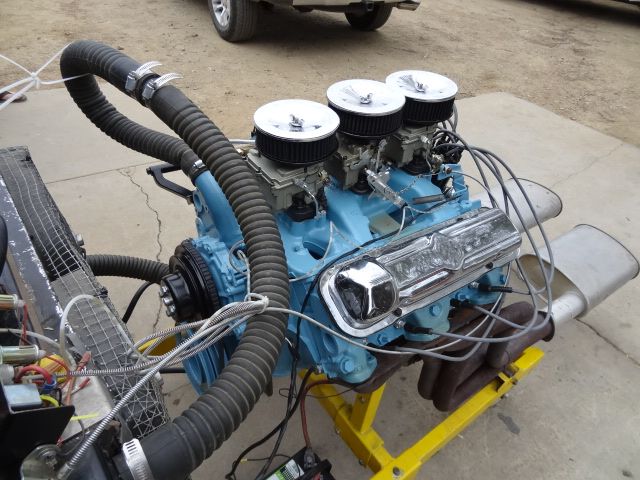 No change in the idle, proving the two outer carbs were sealing up perfectly. We let it warm up a bit and then opened up all 3 carbs to check the throttle response, it made the transition nicely. Now that we were satisfied with everything we let it cool down, drained the break-in oil and cooling water, then proceeded to pull it off the test stand to get it ready for transport. Here Mick who did the build and his son Mark are working on getting the 421 off the test stand.  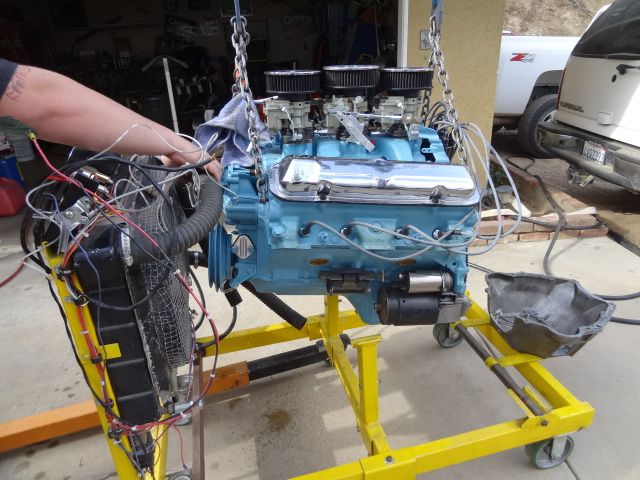 The 421 was bolted to a purpose-built Pontiac engine cradle for transport and storage until it's ready for use, it has 4 casters than can be easily removed in about one minute for truck transport. 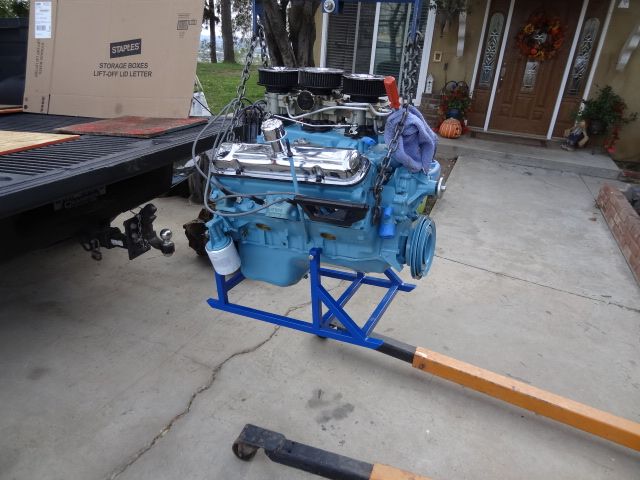 Tucked in the front of the truck bed, almost ready to go home. 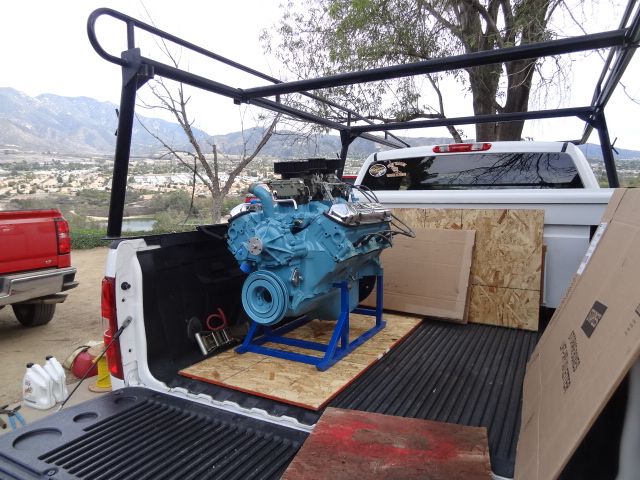 Everything is all secure and ready for the trip home. I also took the opportunity to pick up a clean 1970 Honda Trail 70 that my builder had at his shop, an impulse buy I simply couldn't resist. I hope you all have enjoyed this build, I was lucky to have a retired friend who knows Pontiacs better than just about anyone I know take on this build for me. Thank you Mick, you're the best. 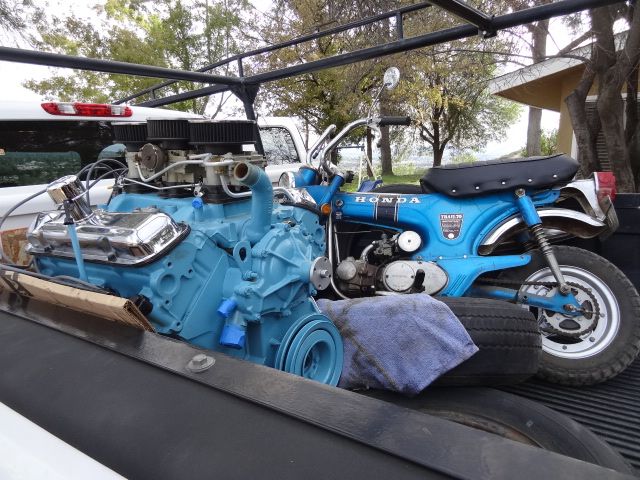
__________________
1964 Tempest Coupe LS3/4L70E/3.42 1964 Le Mans Convertible 421 HO/TH350/2.56 2002 WS6 Convertible LS1/4L60E/3.23 |
|
#39
11-26-2015, 05:16 PM
|
||||
|
||||
|
.....to see the total cost of this build. Most of the parts prices listed are with tax and shipping included.
Parts purchased: 1964 421 Block, crank, heads, oil pan and timing cover - $1475.00 1964 Tri-Power Intake Manifold, Bare - Trade 1964 Water Pump, Rebuilt - $92.00 New Harmonic Balancer - $143.00 1964 GTO OEM Chrome Valve Covers & Repro Breather Cap - $90.00 Rebuild/replate Tri-Power carbs and misc. repro and genuine parts (throttle cable bracket, linkage, vacuum & PCV fittings, choke tubes, air cleaner set) to complete the setup, includes buying a 1964 GTO auto trans center carb outright - $967.67 Misc Tri-Power carb spacers, studs & nuts, base gaskets, restored plug wire looms, OEM 45 deg brass heater hose fitting - $161.50 1962 Pontiac Big Car Aircleaner, Excellent Unrestored Condition - $592.00 16 ea. Manton Pushrods - $230.73 16 ea. 73627-16 Crower 1.5:1 Enduro Stainless Steel Roller Rocker Arms - $478.90 8 ea. Custom 26cc Reverse Dome Ross Racing Pistons w/Pins & Spirolocks - $784.98 1 ea. Cloyes Tru-Roller Timing Set - $86.70 16 ea. H-O Racing VS-11 Valve Springs - Trade 8 ea. Crower Forged Connecting Rods, stock Pontiac dimensions - $900.00 1 ea. NOS Pontiac 9779068 camshaft - $200.00 16ea. Johnson 951R Hydraulic Lifters - $97.00 1 ea. Melling Select 60 psi Oil Pump & Driveshaft - $60.00 1 ea. Butler head gaskets & Misc Engine Gaskets - $75.00 1 ea. BOP Viton Rear Main Seal - $58.00 Misc. Gasket Sealers, Engine Paint, Spark Plugs, Break-In Oil & Gasoline - $110.88 Parts supplied by the machine shop: 8 ea. 6000SG S.I. Stainless Intake Valves - 1.960" x 4.970" - $128.00 8 ea. 6001SG S.I. Stainless Exhaust Valves - 1.660" x 4.970" - $128.00 16 ea. 6523 SBI Cast Valve Guides - $24.00 8 ea. 30677 Durabond Valve Seat - Exhaust - $48.00 2 ea. 30723 Durabond Valve Seat - Intake - $12.00 16 ea. OS810 Pioneer Viton Valve Stem Seals - $28.00 16 ea. 607-STA Isky Valve Spring Retainers - $92.00 16 ea. 101-7101 ARP Rocker Arm Stud Kit - $48.00 8 ea. 90922-1 Crower Custom Piston Pin Bushings - $100.00 16 ea. Helicoil Insert 7/16-14 - $16.00 2 ea. Helicoil Insert 3/8-16 - $1.50 4 ea. EPC18-B Brass Expansion Plug - $8.00 8 ea. 43M5529-010 Engine Pro Moly Piston Ring Set-4.125-010 - $120.00 1 ea. Clevite Main, rod and cam bearings - $287.40 $7644.26 Parts Total Machine shop labor: Cook/Clean & Blast Block - $67.00 Magnaflux - $34.00 Check Align Hone - $40.00 Cylinder Bore 2X & Hone W/Torque Plate, 4.120 Did Not Clean, Went To 4.135" - $369.00 Surface Block W/BHJ - 10.215" - $179.00 Block - Final Rinse After Machining - $39.00 Crankshaft Grind-H.P. Middle Spec - $129.00 Crankshaft Heat Treat - $195.00 Rod & Piston Work Bore For Pins Bushings -1.040" - $140.00 Balancing Job - Neutral - Make Flex Plate Neutral - $155.00 Complete Valve Job & Resurface - $309.00 Head Work Set Up Springs And Assemble Heads - $75.00 Clean & Mag Heads W/VJ - $45.00 Install seats - $67.50 Install False Guides - $80.00 Machine For Positive Seals - $36.00 Install Helicoils $20.00 Machine For Screw-In Studs, Helicoil For 7/16, Cut Bosses .250" - $179.00 Machine Valve Head Diameters - Intake 1.930"/Exhaust 1.645" - $96.00 Machine Shop Labor Total - $2254.45 Grand Total, Parts & Machine Shop Labor - $9898.76 As you can see, this rebuild/restoration of an antique Pontiac performance engine easily eclipsed the 10 thousand dollar mark. I'm sure there are some things that I left out, I had been collecting parts for this 421 for about 5 years and some parts had been sitting in my garage waiting for a place to go for 10 to 20 years. I didn't include what I was charged for cleaning and assembling the engine, this cost is between my friend and myself. There are a few pieces that I purchased that I really didn't need, but I wanted them so.....they added unnecessary cost. Just the initial price of the 421 block, crank and heads is about $1000 more than you'd pay for a common 400 or 455. The Crower forged rods were purchased way back in the early 1990s, so they probably cost now about 2/3rds of what I paid back then. The Crower roller rockers really weren't a necessity, but finding the correct stamped factory rockers would have cost about $150 anyway and I decided to substitute a top-quality part instead. Happy Thanksgiving Everyone! 
__________________
1964 Tempest Coupe LS3/4L70E/3.42 1964 Le Mans Convertible 421 HO/TH350/2.56 2002 WS6 Convertible LS1/4L60E/3.23 |
|
#40
12-27-2015, 08:01 PM
|
||||
|
||||
|
Here's the lucky recipient of the 421 HO, patiently waiting for a heart transplant.
Yes, a lowly A-body.  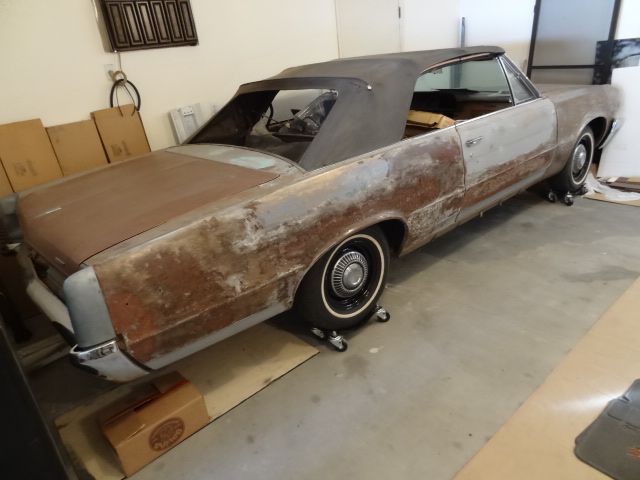 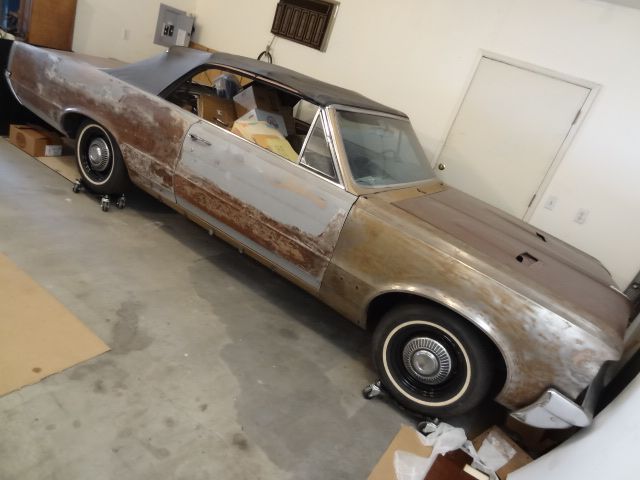 I'm really liking the look of the thin whitewalls and dog-dish caps, tires are 215/70-14. 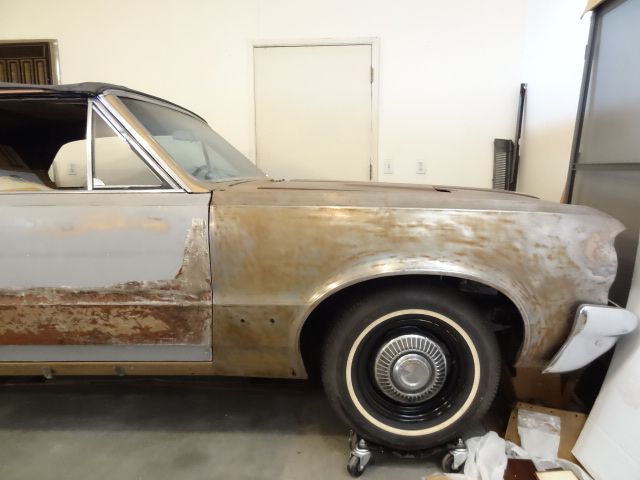 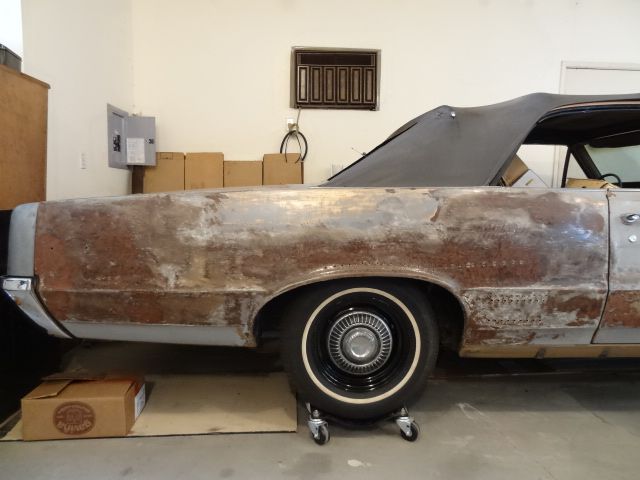 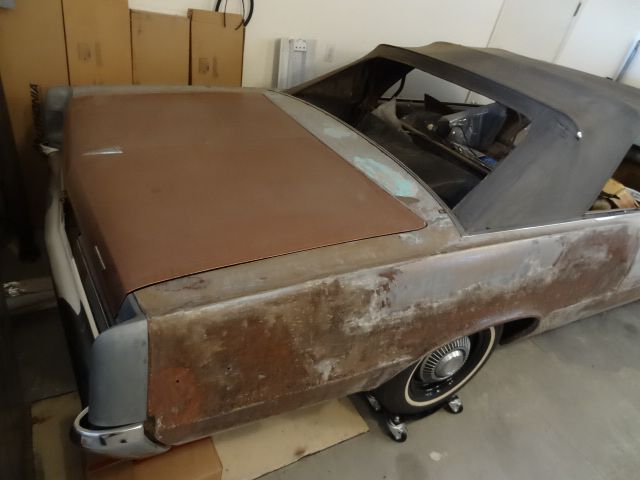 One of two GTO hoods I have for the car. The other one's even nicer than this one. 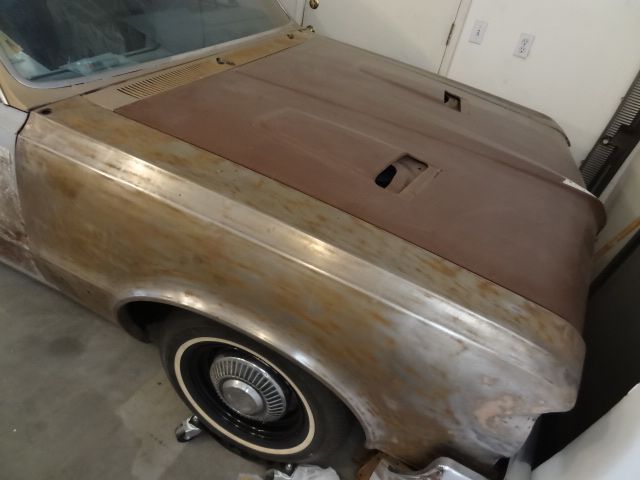 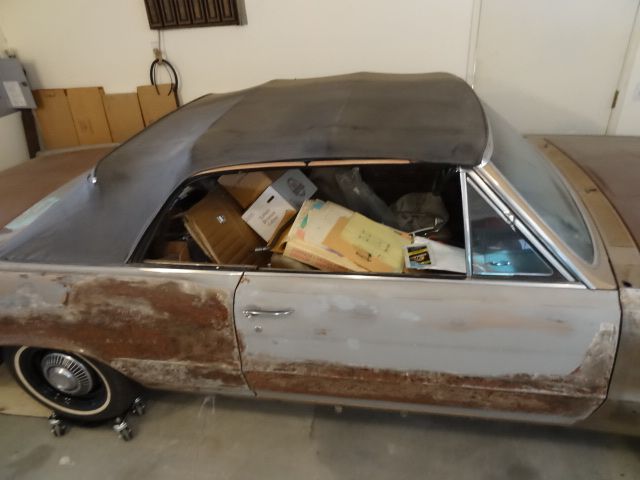 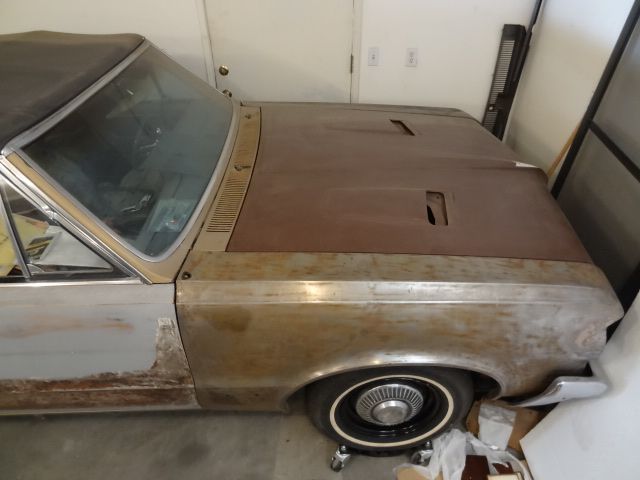 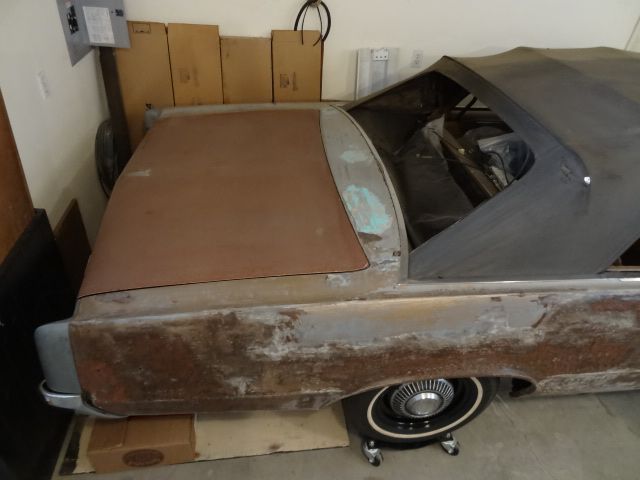 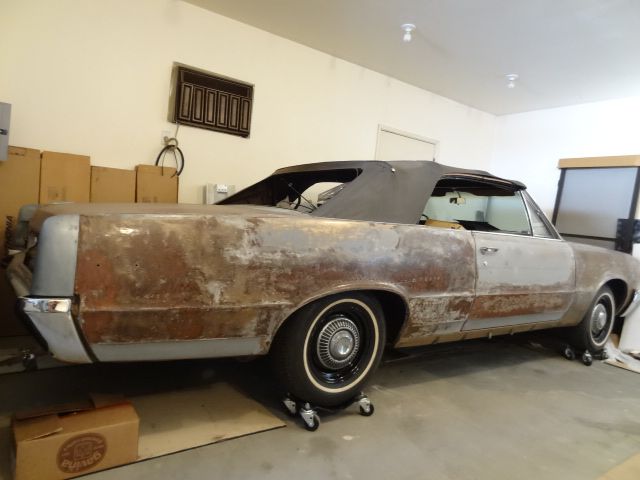 Fresh 421 HO waiting for its chance to motivate the Le Mans. 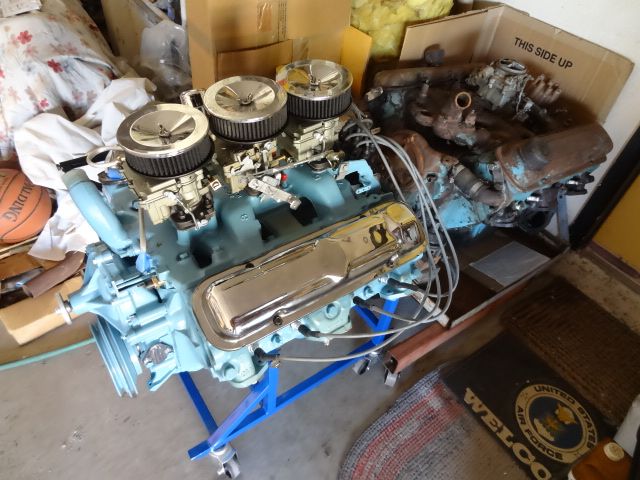
__________________
1964 Tempest Coupe LS3/4L70E/3.42 1964 Le Mans Convertible 421 HO/TH350/2.56 2002 WS6 Convertible LS1/4L60E/3.23 |
| Reply |
|
|
The PY Online Forums is the largest online gathering of Pontiac enthusiasts anywhere in the world. Founded in 1991, it was also the first online forum for people to gather and talk about their Pontiacs. Since then, it has become the mecca of Pontiac technical data and knowledge that no other place can surpass.


 Linear Mode

