| FAQ |
| Members List |
| Social Groups |
| Calendar |
| Search |
| Today's Posts |
|
#121
|
|||
|
|||
|
Some updates:
Shooting in pulley alignment with the Dayco laser alignment tool, you can get the serpentine pulleys right on the money with respect to plane (shaft parallel) and rib alignment. The redline in the middle of the target is the beam and indicates this P/S pulley is aligned and parallel. The laser source (not shown) is mounted on the crank pulley and projects a beam as a line to the target. Dayco is nice enough to provide magnets on the laser and target pieces, but this is not much help with aluminum pulleys. A little clay does the trick. The "vees" of the target center around the serpentine pulley ribs. 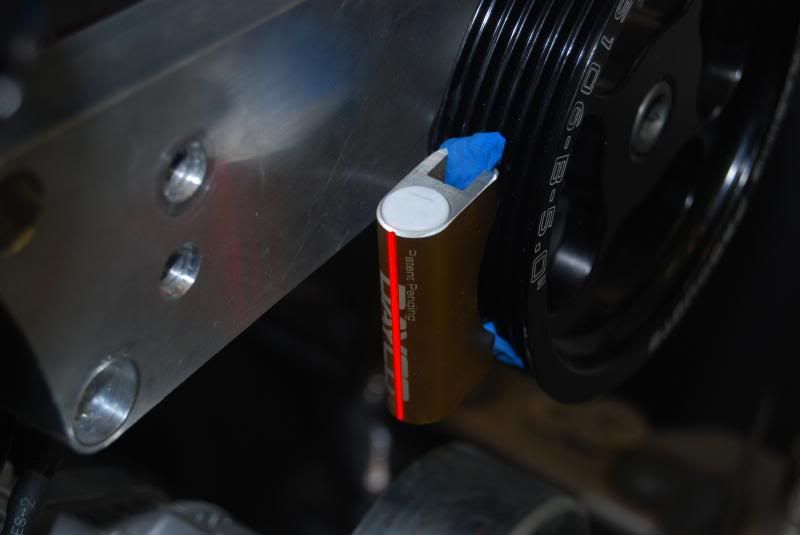 Mark did a nice job providing a fore and aft adjustment of the Sanden compressor. This makes it easy to align. 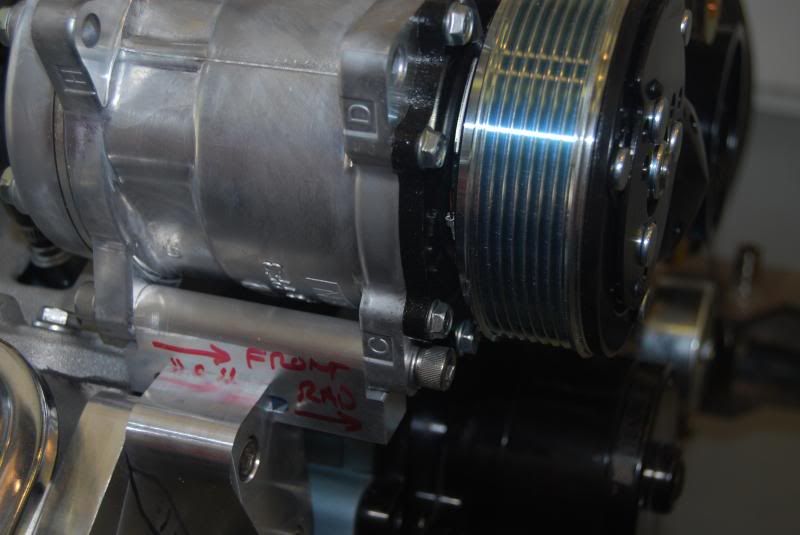 Here is a shot of the rear mounted Holley regulator, it's pressure referenced to vacuum and has the fuel pressure sensor mounted. The MAP sensor is mounted above and to the right. 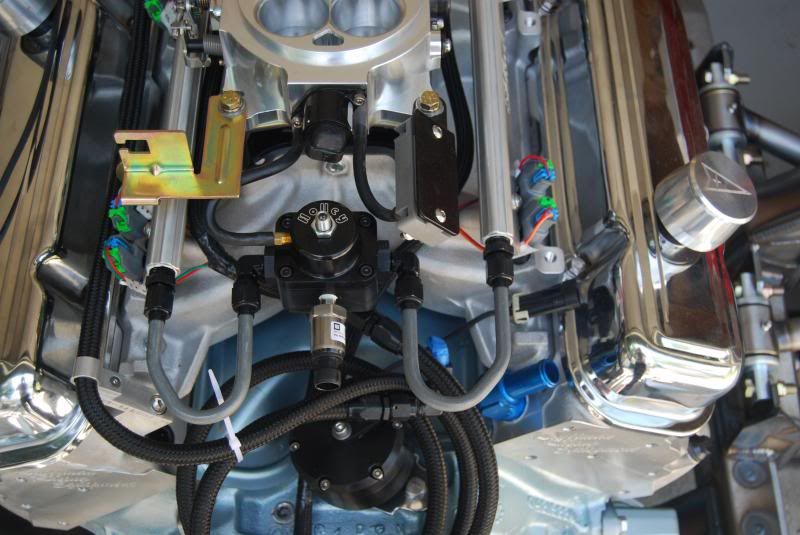 Here are some shots of the front chassis with the C6 spindles, RS does a nice job with the details such as putting bump stops on the A arms- both directions of travel. This design makes it very easy to adjust camber angle with shims. 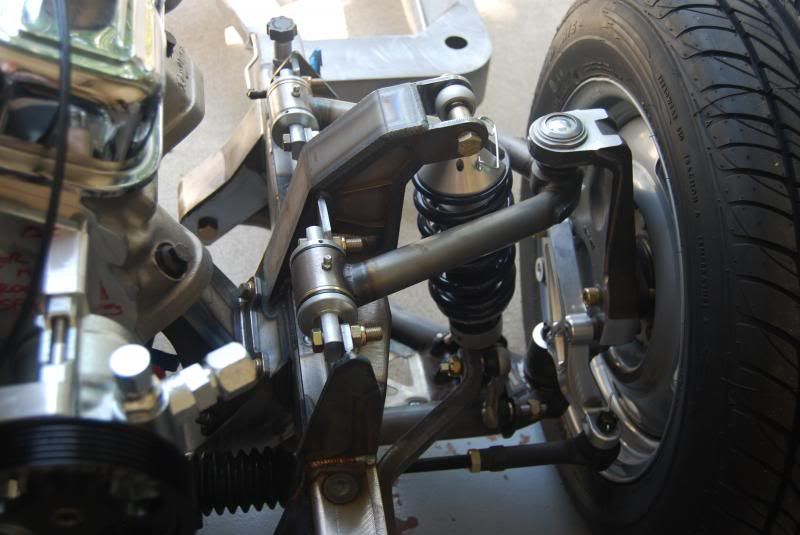 Ford 9" with Z06 brakes mocked up. RS does not use tubing (except for some round sections) for their chassis, they make all the rectangular sections from water jet cut flat stock, then TIG weld them into box sections. This get you non-uniform cross sections- thicker where you need strength, thinner where you don't, and no tube crushing in the radii. 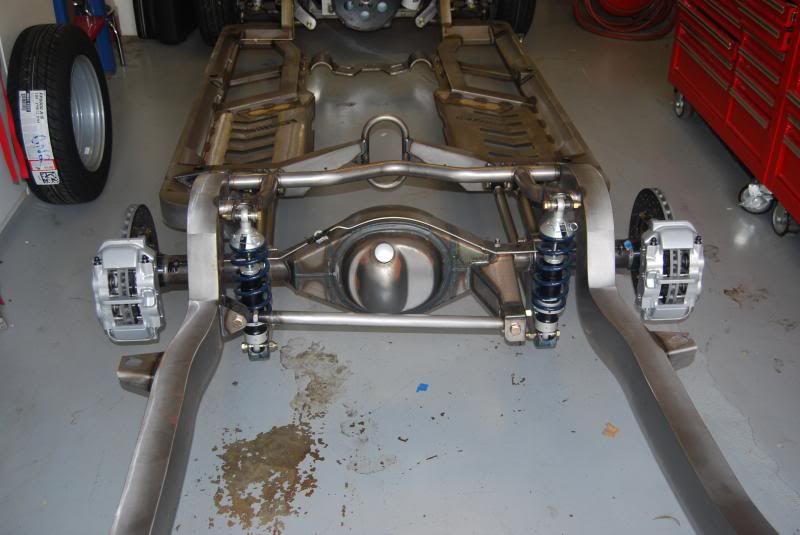 Tru-Trac 3.55 mocked up: 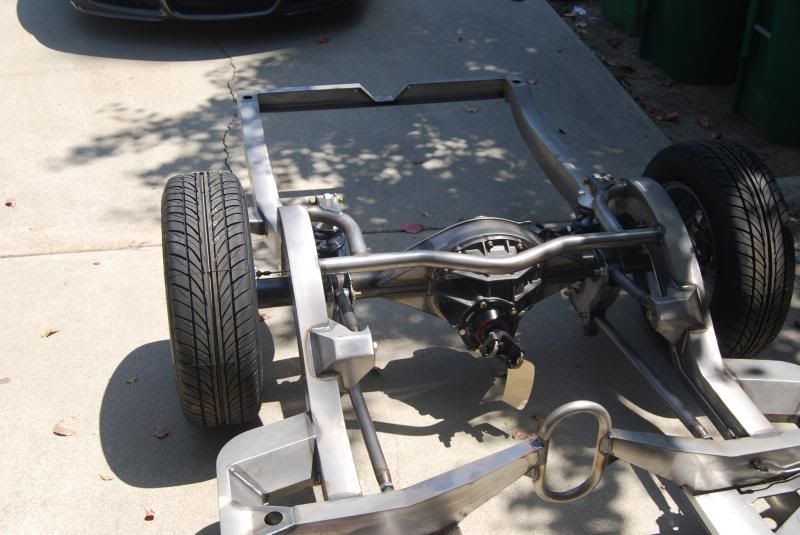 Next week the 200 4R goes in: 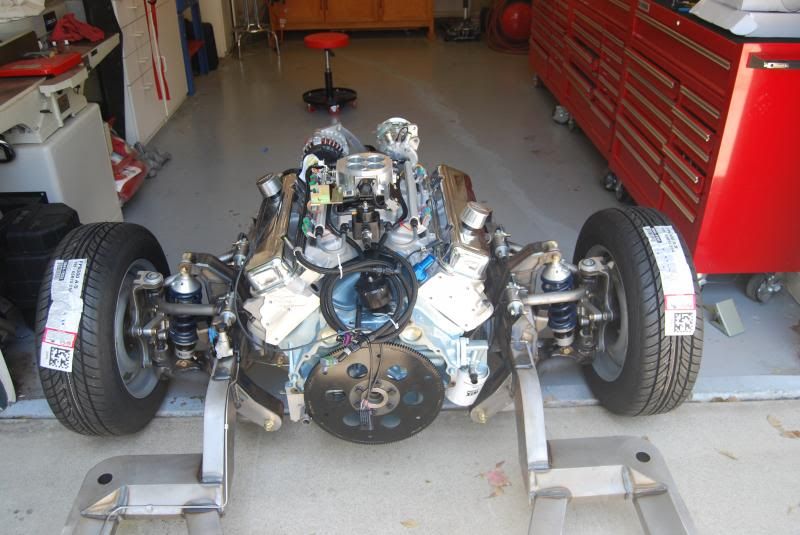 Here is one of the car, soon to get it's new chassis and motor. 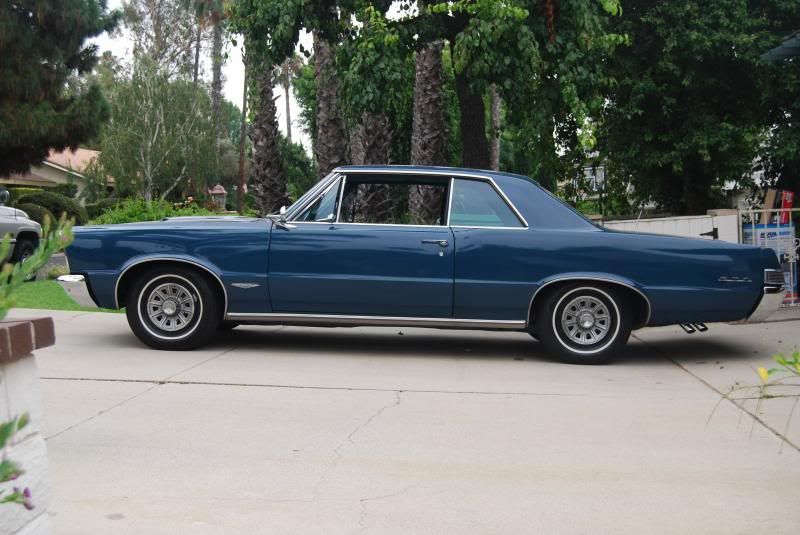
__________________
1964 Catalina 2+2 4sp, 421 Tri-power 1965 GTO, Roadster Shop chassis, 461, Old Faithful cam, KRE heads 305 CFM, Holley EFI, DIS ignition. 1969 GTO 467, Edelbrock 325 CFM, Terminator EFI 1969 Firebird Convertible |
|
#122
|
||||
|
||||
|
Nice is Luhn going to make this system available
__________________
Its ok to giggle and snicker, Dont laugh and point |
|
#123
|
|||
|
|||
|
darbikrash - What method was use to mount the pick-up wheel to the balancer? Played with a couple ideas, one using standoffs screwed in the 4 pulley holes. pickup would bolt to these and pulleys would attach using nuts on the protruding standoff threads.
|
|
#124
|
||||
|
||||
|
Check photos in post 118. The trigger wheel appears to be bolted to the back side of the balancer.
__________________
Its ok to giggle and snicker, Dont laugh and point |
|
#125
|
|||
|
|||
|
This 65' GTO/RS chassis build is EXACTLY why we need a dedicated build section like Pro-touring.com has. Ive been missing this the entire time. Im sure most of the rest of the board has been as well and thats unfortunate because its awesome and really something you dont see that often.
__________________
 -1967 GTO HO Restomod. PKMM 433ci, SilverSport T56 Magnum 6spd, Moser 9", SC&C and a bunch of other pro touring goodies - Build Thread http://forums.maxperformanceinc.com/...615847&page=23 |
|
#126
|
||||
|
||||
|
Impressive workmanship and attention to the details!
Thanks for sharing. |
|
#127
|
|||
|
|||
|
Quote:
Be sure and locate the tooth gap on the wheel to (roughly) where you think the sensor will be on the timing cover, it has to be 60 degrees BTDC. If you miss, you can rotate the wheel through the next set of threaded holes, as they are also 60 degrees apart. You can see in the pic the keyway slot in the balancer, this is your reference to the crank. The wheel comes from Holley with about a 1" hole, you have to bore it out to fit over the balancer snout. The balancer snout is turned to create a precision locating diameter for the (new) wheel ID, if I recall it's around 3.5". The wheel OD is 7 3/4", Holley makes several sizes -this is perfect as it is just larger than the balancer OD. It is very important that the runout of the teeth when the balancer is mounted is less than .002/inches TIR for a clean signal with a sensor gap of .015/.020 inches. The wheel is only 1/8" thick. The pulley mounts over the front with no interference and no special fasteners. 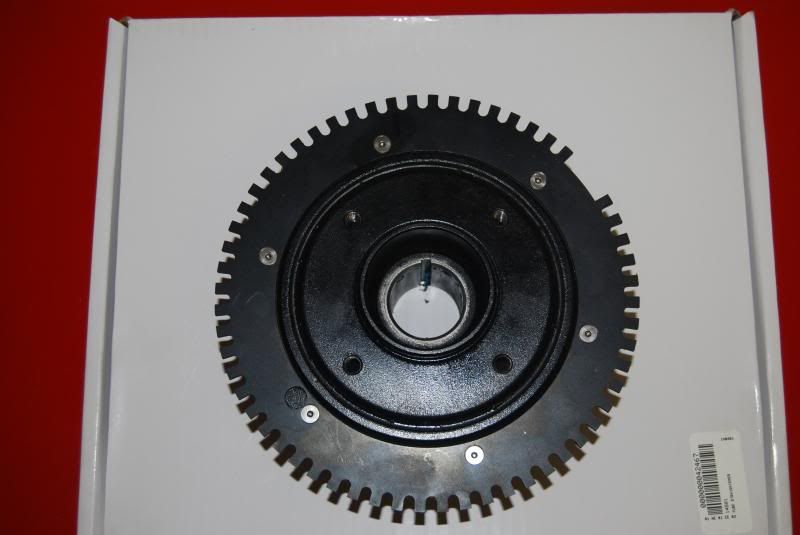
__________________
1964 Catalina 2+2 4sp, 421 Tri-power 1965 GTO, Roadster Shop chassis, 461, Old Faithful cam, KRE heads 305 CFM, Holley EFI, DIS ignition. 1969 GTO 467, Edelbrock 325 CFM, Terminator EFI 1969 Firebird Convertible |
|
#128
|
||||
|
||||
|
What hall sensor is that? Clean install!
__________________
__________________________________________ "How I learned to stop worrying and love the OHC Pontiac L6"  The Silver Buick- '77 Skylark coupe w/455, SPX, MegaSquirt 3 & TKO-600 (Drag Week 2011, 2012 & 2015!) 1969 Firebird with a turbo'd Pontiac L6 controlled by a MegaSquirt 3 and backed with a microsquirt controlled 4L60e and 4.56 gears! (Drag Week 2018!) |
|
#129
|
|||
|
|||
|
The crank sensor is a Holley Hall effect, P/N 554-117. It's $82
http://www.holley.com/554-117.asp The 1X cam sensor is also Hall effect, I got it from DIY Autotune for $40. http://www.diyautotune.com/catalog/h...sor-p-479.html These sensors work much better configured in the ECU as "digital falling" meaning they trigger after the tooth/slot has already passed as opposed to triggering when they first see the tooth (digital rising).
__________________
1964 Catalina 2+2 4sp, 421 Tri-power 1965 GTO, Roadster Shop chassis, 461, Old Faithful cam, KRE heads 305 CFM, Holley EFI, DIS ignition. 1969 GTO 467, Edelbrock 325 CFM, Terminator EFI 1969 Firebird Convertible |
|
#130
|
||||
|
||||
|
Nice set up darbikrash,
Can you post more photos showing fore and aft orientation of the components.
__________________
Its ok to giggle and snicker, Dont laugh and point |
|
#131
|
||||
|
||||
|
Quote:
__________________
__________________________________________ "How I learned to stop worrying and love the OHC Pontiac L6"  The Silver Buick- '77 Skylark coupe w/455, SPX, MegaSquirt 3 & TKO-600 (Drag Week 2011, 2012 & 2015!) 1969 Firebird with a turbo'd Pontiac L6 controlled by a MegaSquirt 3 and backed with a microsquirt controlled 4L60e and 4.56 gears! (Drag Week 2018!) |
|
#132
|
|||
|
|||
|
I got the 200 4R installed this week, and all the serpentine belt drive brackets back from the anodizer. I also mocked up a plywood firewall to mount the DIS coils and ECU.
The next big push is EFI wiring and fuel lines. I have most of the programming done on the Holley EFI, it is real easy to add I/O like a trans temp sensor which cost $11, and is easy to tie into the ECU for monitoring. I'm very impressed with the Holley EFI system, and would recommend it to anyone considering adding EFI to an old school Pontiac engine. Ollie I am posting some fore and aft views of the belt/pulley system. The 200 4R has hardened internal parts, and a Continental 10" non-lock up converter. I am installing a Shiftworks cable shifter, this adapts the 4 speed overdrive transmission to the stock GTO Powerglide console shifter. Looks totally stock but with 4 gears. 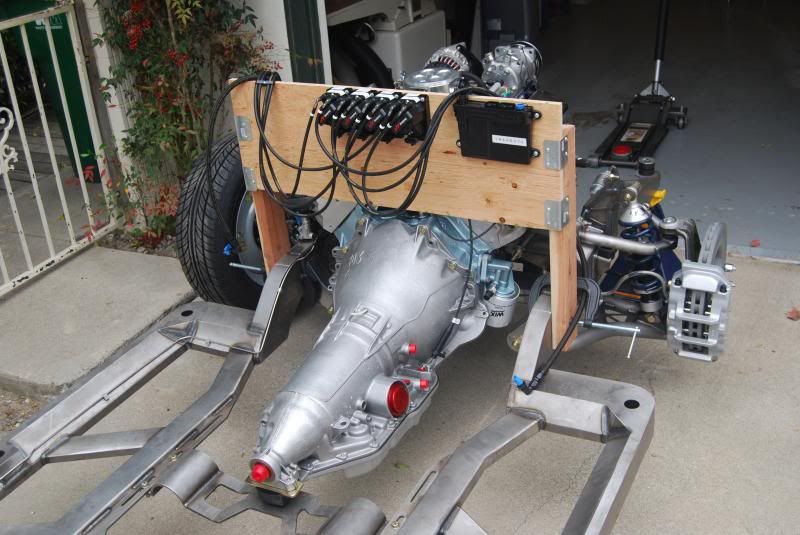 I have to say working with a jig built chassis is really nice. The transmission cross member slides on slots on the chassis rails, and lined up perfectly with the transmission mounts. The cross member has clearance for 3" exhaust, and allows the exhaust to dropout without removing the cross member. 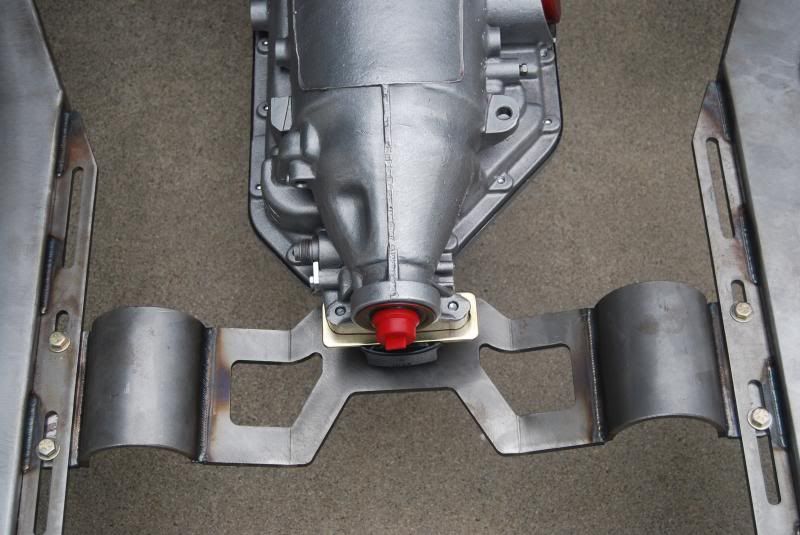 The coils are mocked up and the plug wires installed extra long. The coils will be mounted under the dash inside the car, so you will not see them in the engine compartment. I checked resistance of each plug wire after crimping, all were 200-220 Ohms- except one which measured 2000 Ohms. Sent it back and got a new one. I would hate to trouble shoot something like that. With these wasted spark systems, you have to be very careful that the firing order and wiring is correct and matches the software, so each plug wire is numbered twice, once at the coil and once at the plug. Each coil tower is also numbered, and the firing order is labeled in big letters on the ECU. No mistakes! The coil boots will be put on when the plug wires are trimmed to final length. 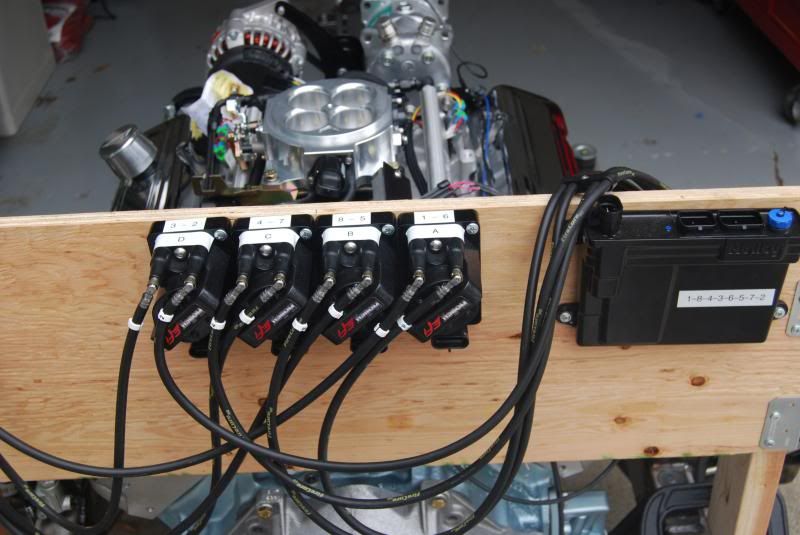 Here are some more shots of the serpentine belt with the installation and anodizing complete. It takes a 76.5" long Gates six rib belt, $26 at the local O'Reilly's parts store. 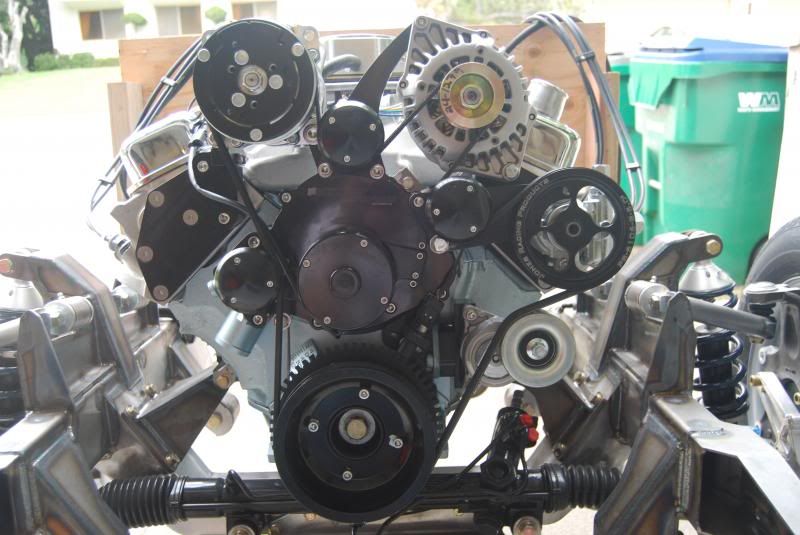 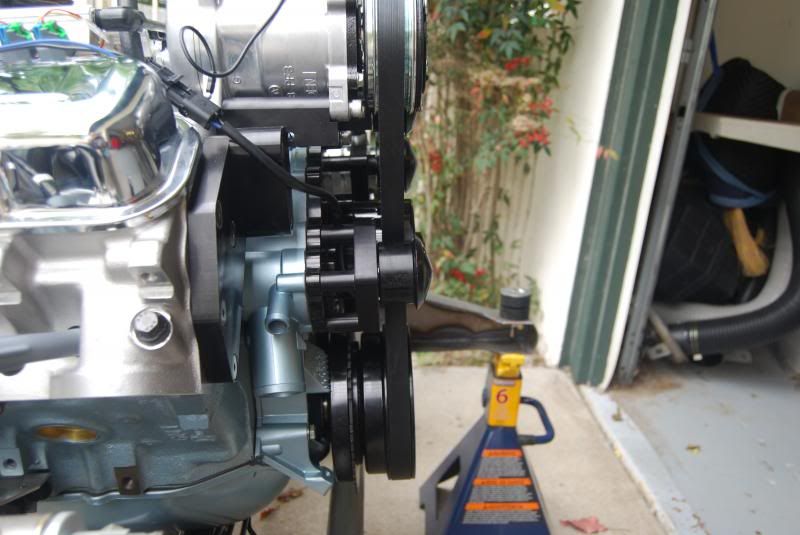 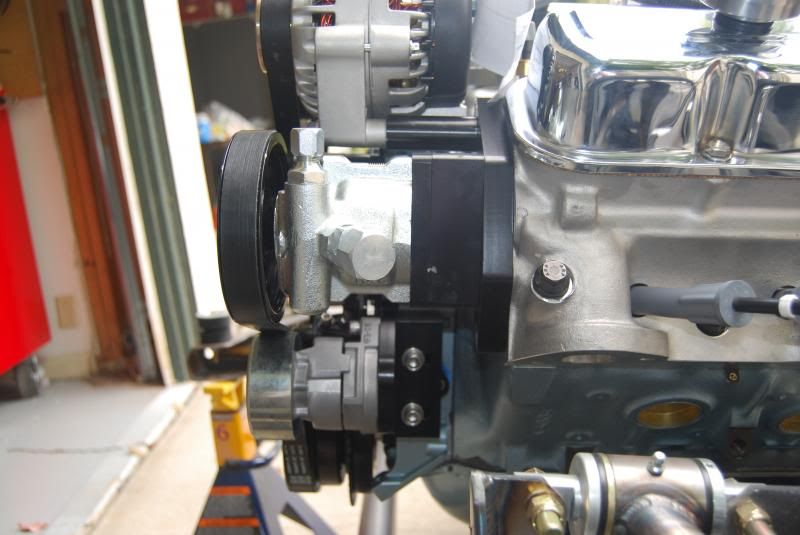 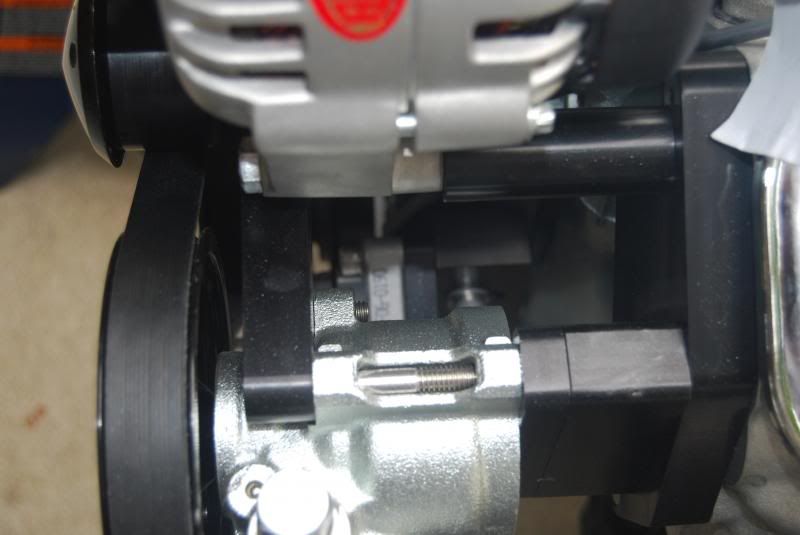 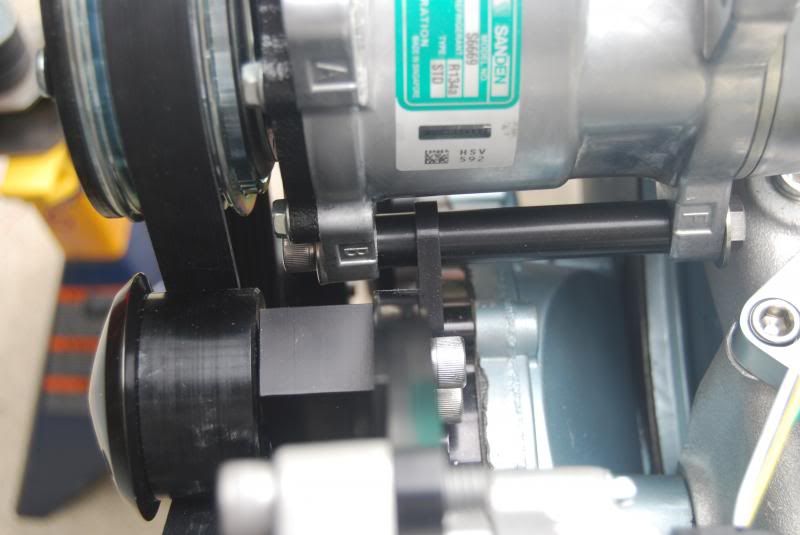 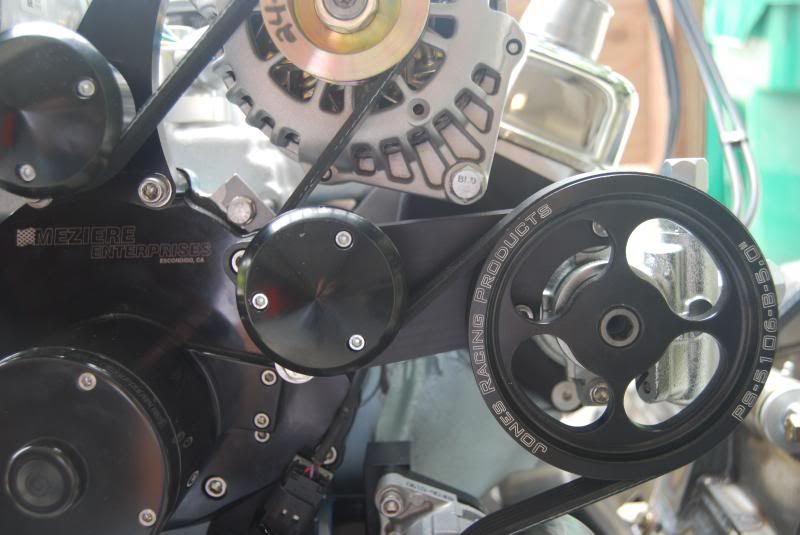
__________________
1964 Catalina 2+2 4sp, 421 Tri-power 1965 GTO, Roadster Shop chassis, 461, Old Faithful cam, KRE heads 305 CFM, Holley EFI, DIS ignition. 1969 GTO 467, Edelbrock 325 CFM, Terminator EFI 1969 Firebird Convertible |
|
#133
|
||||
|
||||
|
Work of art!
Are you sure you don't want one of these? This is how I shift my 200-4r   (the 4.56 gears make calibrating the shift points a nightmare with the 200-4r, though shifts reasonably well when left in D for normal driving)
__________________
__________________________________________ "How I learned to stop worrying and love the OHC Pontiac L6"  The Silver Buick- '77 Skylark coupe w/455, SPX, MegaSquirt 3 & TKO-600 (Drag Week 2011, 2012 & 2015!) 1969 Firebird with a turbo'd Pontiac L6 controlled by a MegaSquirt 3 and backed with a microsquirt controlled 4L60e and 4.56 gears! (Drag Week 2018!) |
|
#134
|
||||
|
||||
|
Thanks for posting the side views, darbikrash.
Nice set up. Is Luhn Performance going to produce this.
__________________
Its ok to giggle and snicker, Dont laugh and point Last edited by Ollie; 05-25-2014 at 04:46 AM. |
|
#135
|
||||
|
||||
|
Thanks Darbi it Looks great.
If any one is interested please give us a call. We have the system available as a retro for mechanical water pump March systems as well. The only note is you have to be running an electric fuel pump as the tensioner bolts to the timing cover mechanical fuel pump location. Yes Ollie we are going to have a production run of parts in the near future. We have to finishing the run of D1SC supercharger brackets along with a run of our high volume inlet oil pump parts. Once these are completed on the cnc we will have the serpentine drive system available for sale along with the EFI brackets and sensors. We will also be running our billet Sanden AC compressor mounting bracket that can be used in place of the steel brackets provided by the aftermarket AC companies. (pictures of the prototype used on a driver side D1SC first generation F body setup) This bracket allows for more degrees of freedom for the different chassis'. We also offer custom BOP accessory drive brackets with or without efi for most pulley and or water pump configurations. |
|
#136
|
||||
|
||||
|
Quote:
__________________
Throttle's Performance (701) 893-5010 https://www.facebook.com/pages/Throt...70911996281602 |
|
#137
|
||||
|
||||
|
Here is our latest production piece, a two wire inductive pickup cam synch.
We will be doing an up coming thread on converting a mechanical pump system to an in tank system next. 
|
|
#138
|
||||
|
||||
|
Looks Great just what I'm looking for. Didn't see it on your web site. Cost? Thank's Scott
|
|
#139
|
||||
|
||||
|
Hi Scott,
Glad to hear your project is moving along. We will have pricing and availability shortly and I will post it in the performance parts for sale section. Its that time of year and we are trying to get all the projects moving in the right direction...to the customers hands...  Thanks PY and to all the members and customers, without you we would only be making this stuff for our own cars...what fun is that 
|
|
#140
|
||||
|
||||
|
Quote:
Perfect for us coil-near-plug guys!
__________________
'71 Holden HQ Monaro - 3850lbs race weight, 400c/i - 11.4 @ 120 '66 Pontiac GTO - 389, 4 speed street cruiser |
| Reply |
|
|