


| FAQ |
| Members List |
| Social Groups |
| Calendar |
| Search |
| Today's Posts |
|
#61
 03-24-2012, 10:32 PM
|
|||
|
|||
|
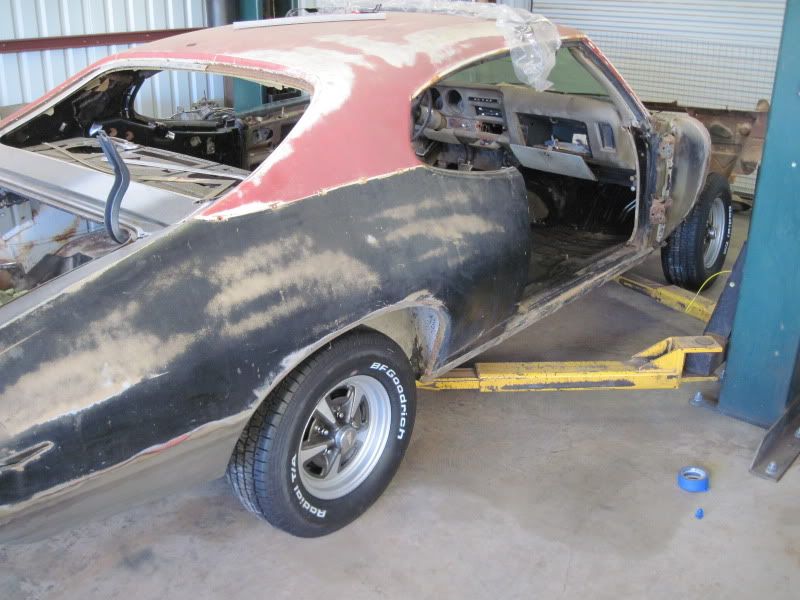
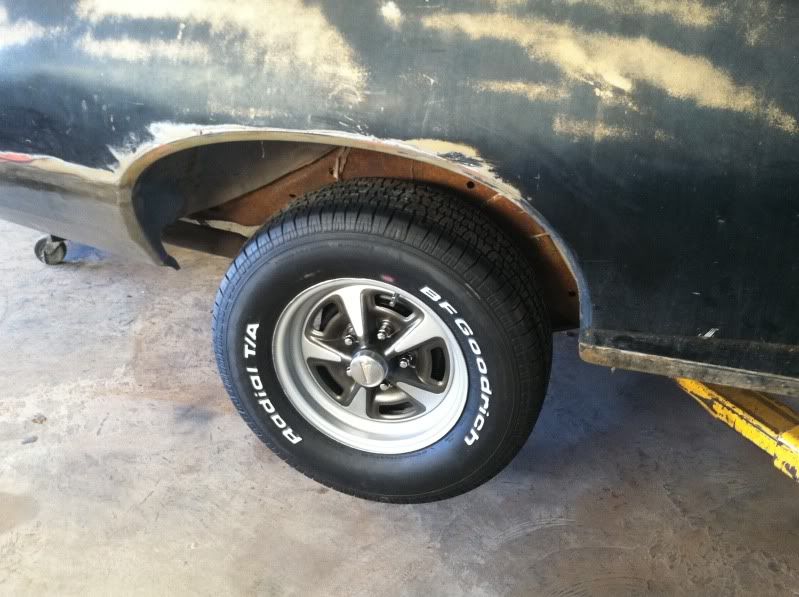
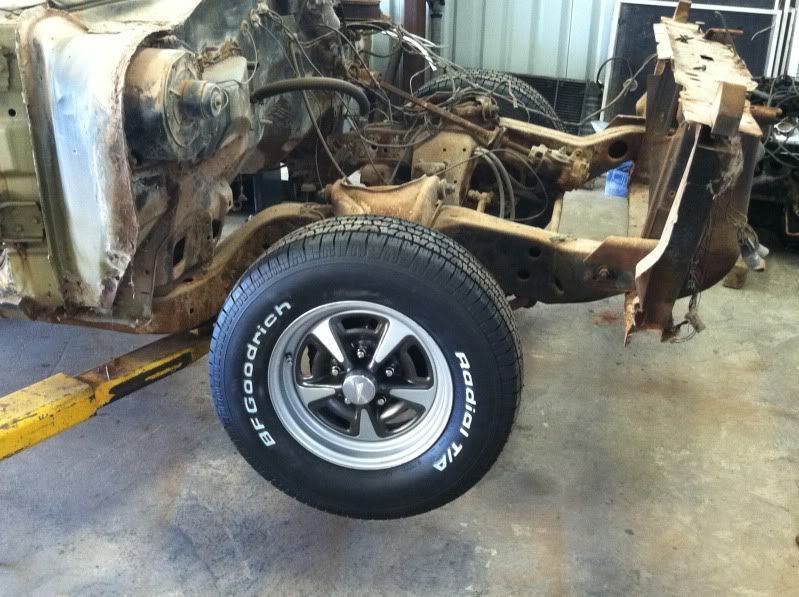
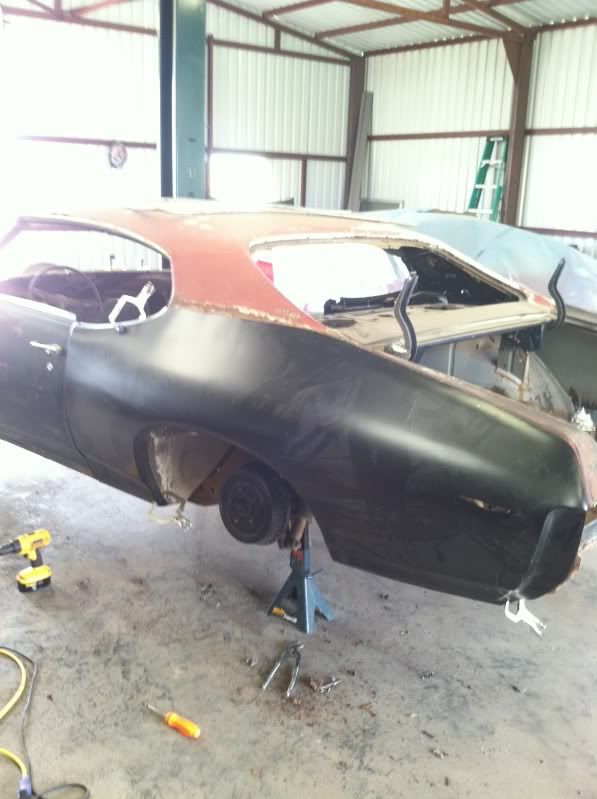
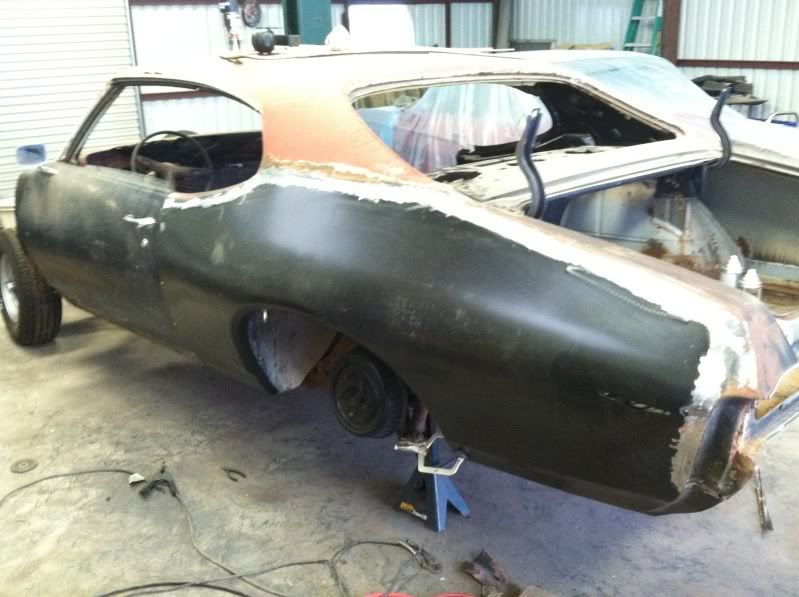
Got my new tires and wheels mounted today. Look pretty good but I'm going to have to replace one of them due to being bent. Not a huge deal, just glad I can roll it around without having to air up the tires each time. I know, I know...it's kinda like putting lipstick on a pig at this point, but it's helping to motivate me.
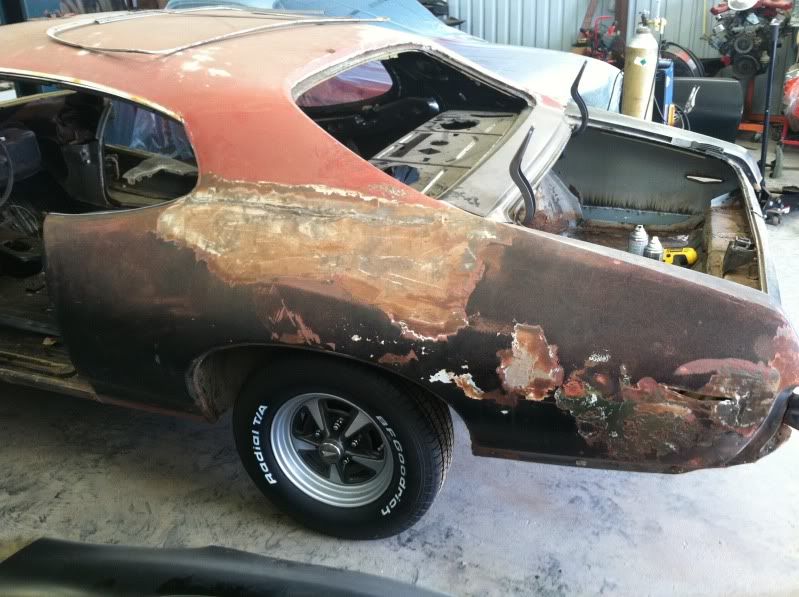
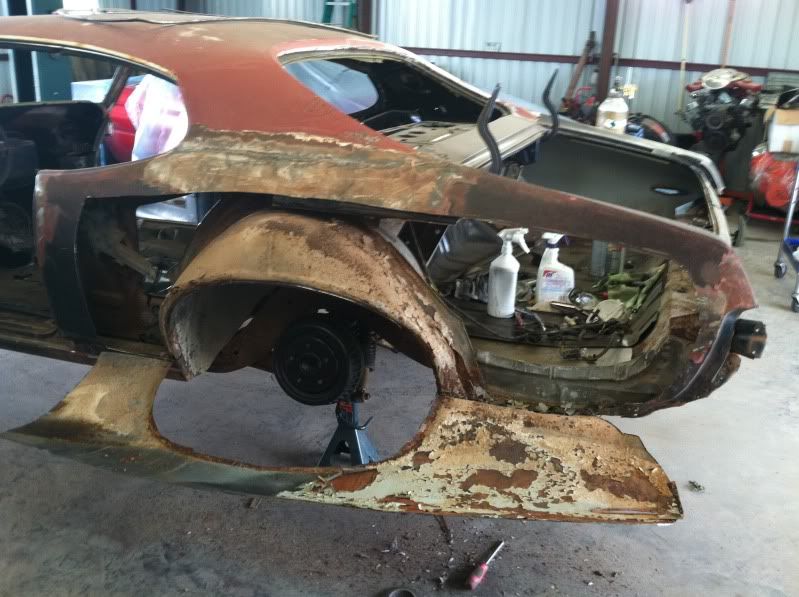
   Okay...you aren't seeing stars. These are all the holes in the front fender that were holding all that bondo in that large dent. Kinda reminds me of a Lite-Brite from when I was a kid. I still have to patch the lower section of the fender. I did a little more hammer/dolly work on the fender after these pics were taken to try to get it a bit smoother. Hammer and dolly work is definitely an aquired skill that I'm still trying to get better at. 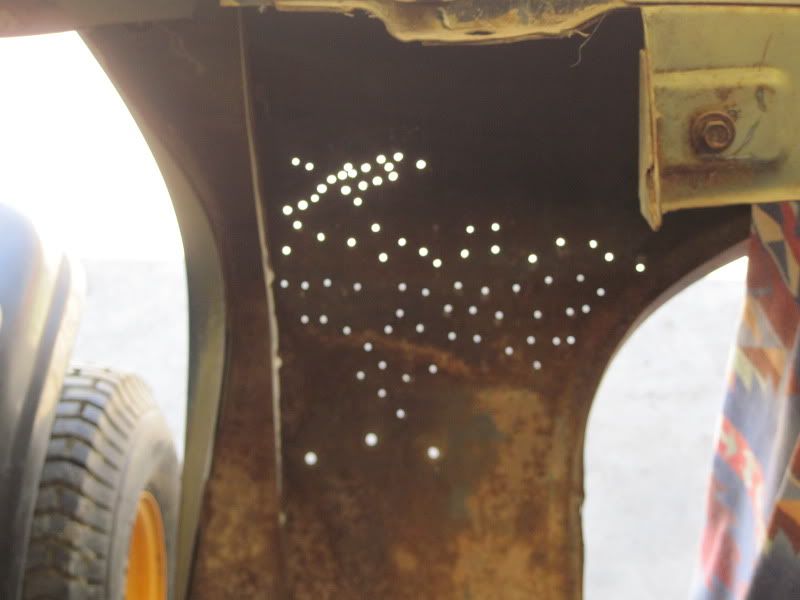 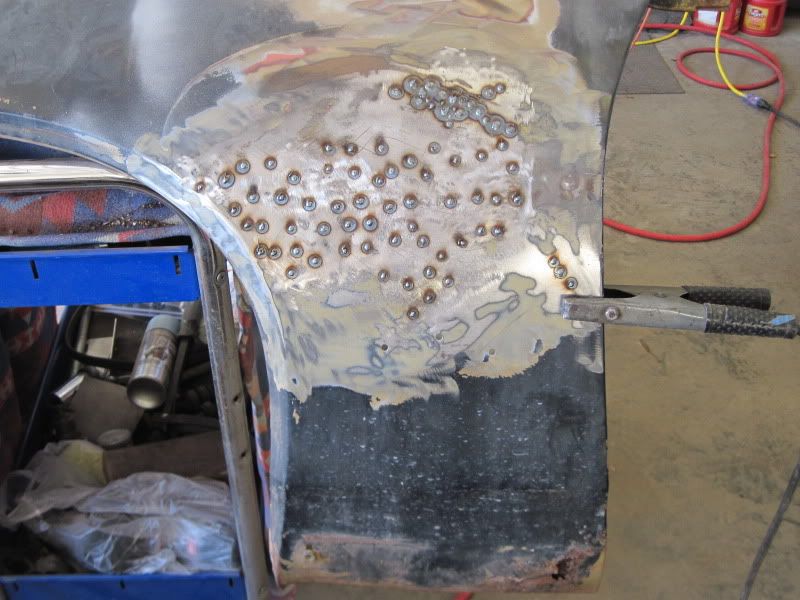 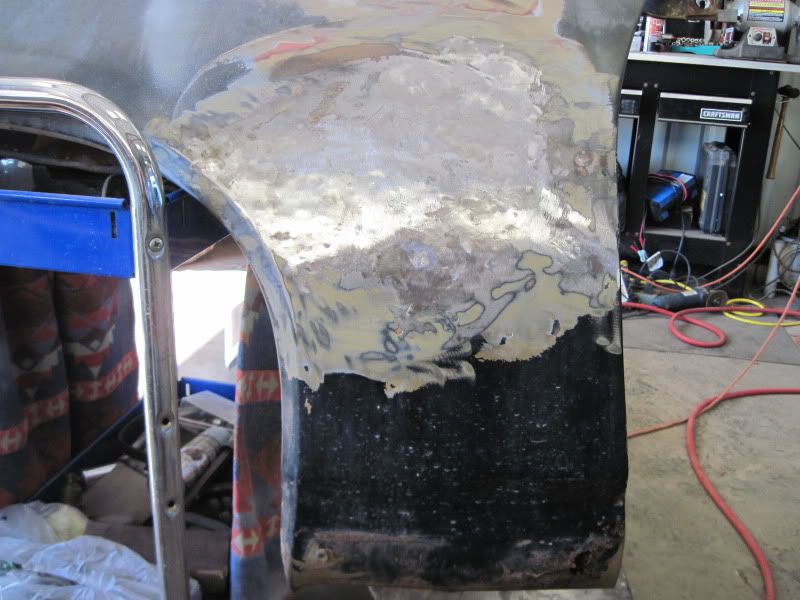 Pulled the core support off and started getting ready to clean up the firewall. And just when you think your making good progress...BAMM you remove a trim panel and find more evil rust. Maybe I shouldn't have looked under the lower windshield molding..... 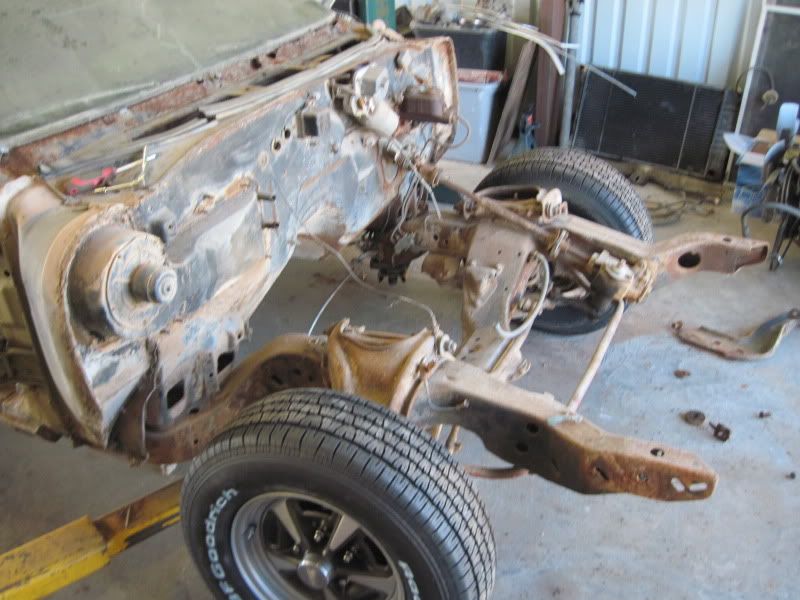 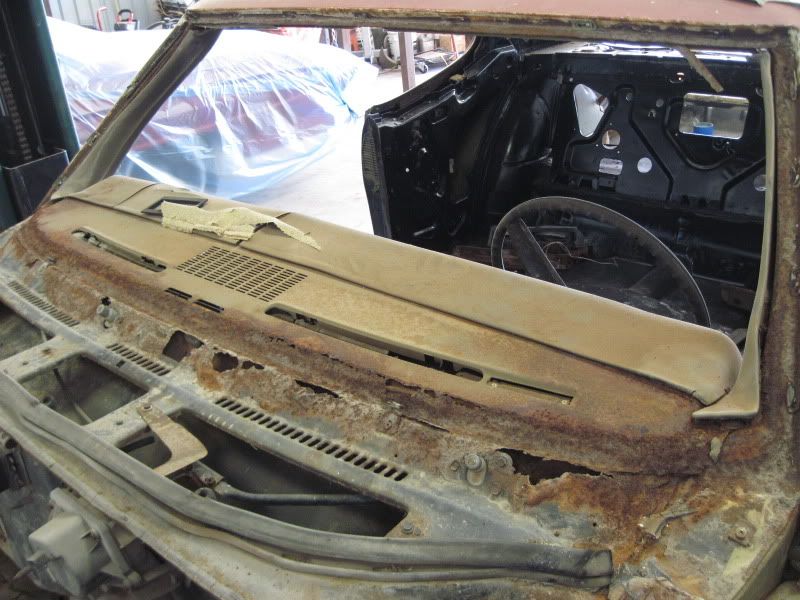 Chipper... I still need to put it back in the air and get you the brand name off those coil-overs. I'll try to do it tomorrow. |
|
#62
03-25-2012, 04:46 PM
|
||||
|
||||
|
It never ceases to amaze me what a nice set of wheels and tires will do for a car....ANY car.
What kind of welder are you using? Looks like it does a good job on sheetmetal.
__________________
Greg Reid Palmetto, Georgia |
|
#63
03-25-2012, 05:05 PM
|
|||
|
|||
|
Inspiring project, best of luck to you sir.
|
|
#64
03-25-2012, 06:11 PM
|
|||
|
|||
|
Greg... I'm using a Millermatic 135 mig welder. It's been great since the day I bought it.
Garry... thanks. Every once in awhile I feel like I need inspiration to continue! Seems like there is never enough hours in the weekend to get everything I need to done. Cleaned and painted the front core support and bumper brackets today. Also cleaned up the firewall and painted it too. Tired of staring at it. Now I just need to get the frame area cleaned so I can drop the engine /trans in soon. Got some new core support bushings coming in so I can reassemble most of the front end. I think my next plan is to go ahead and pull the dash out before I try to repair the dash/cowl area. Once that's completed would be a great time to slide the engine/trans in and put on the front end for a trial fitting. Some days it just doesn't feel like I'm making forward progress. |
|
#65
03-25-2012, 06:21 PM
|
|||
|
|||
|
Chipper... I looked and couldn't find an actual brand name on those coil overs. They just have part numbers on them.
|
|
#66
03-25-2012, 11:17 PM
|
||||
|
||||
|
No problem thanks for looking just thought it was interesting. I had to replace the cowl panel and lower part of the dash where the windshield is sealed to. For some reason I must not of took pics or I just cant find them. I replaced the whole cowl that PY offers, the only thing is it is for a chevelle so you need to remove all your brackets including the one that bolts the steering column and also you need to relocate where the fender bolts up to it. The lower part of the dash where the windshield sits I found through Ames. If I come across pictures I will post them, but I strongly recommend to remove the windshield and see how bad it is.
|
|
#67
03-26-2012, 06:47 PM
|
|||
|
|||
|
I already pulled the windshield and started pulling the dash. I think I'll be able to fix it without TOO much work.
I hope. |
|
#68
03-28-2012, 04:34 PM
|
||||
|
||||
|
Good deal I remember that cowl being a pain in the you know what to replace. Keep the pics coming you are moving along nicely.
|
|
#69
03-30-2012, 07:53 PM
|
|||
|
|||
|
I "think" I'm going to tackle painting the front frame /control arms and / or doing the dash/cowl repair this weekend.
|
|
#70
03-31-2012, 05:46 PM
|
|||
|
|||
|
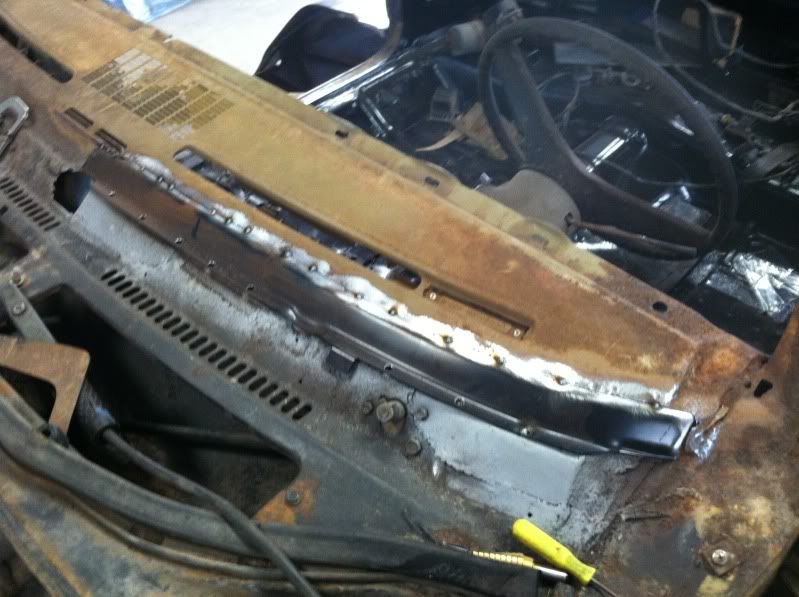
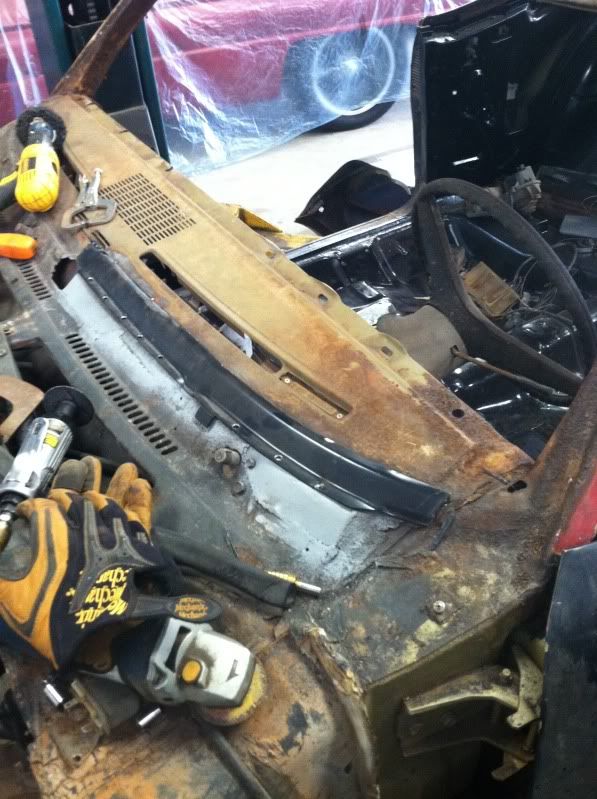
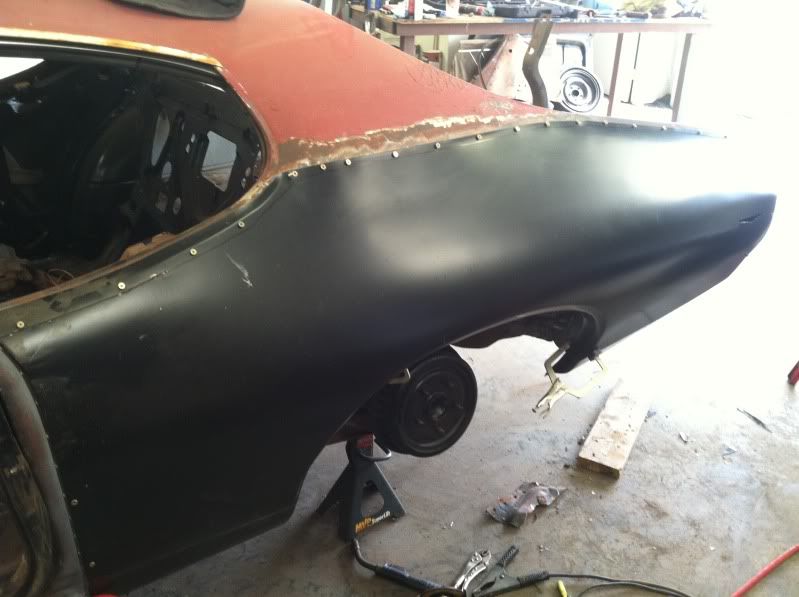
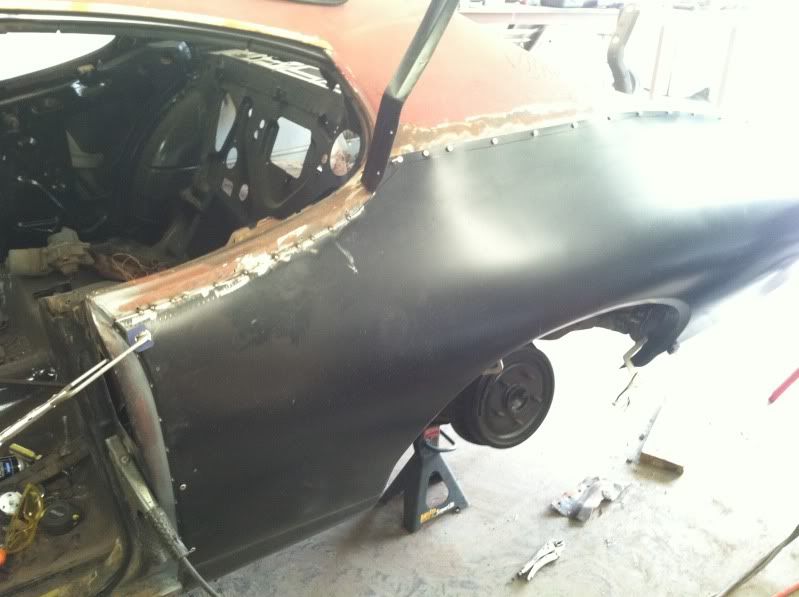
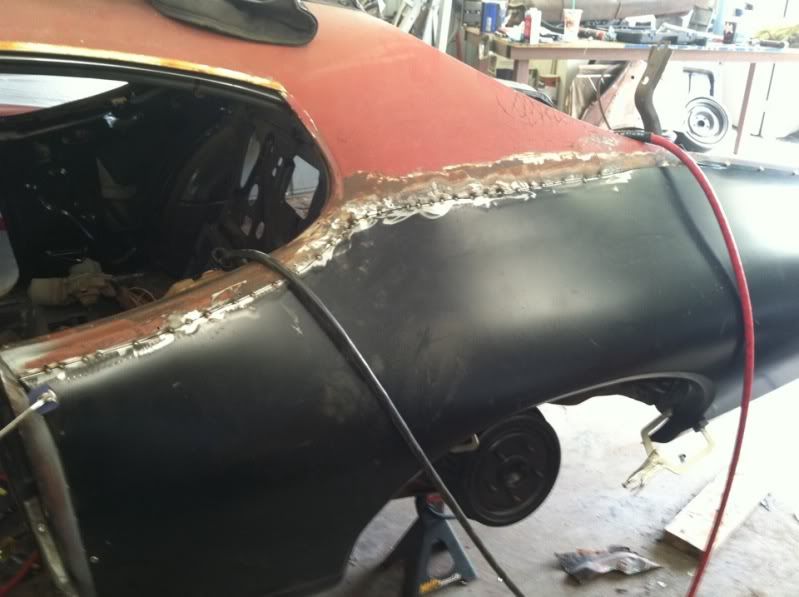
Patched the driver's lower fender area and the lower corner of the firewall. Also started cutting out some of the cowl / windshield area rust. Hoping to finish up the cowl this weekend. That would be a load off my mind.
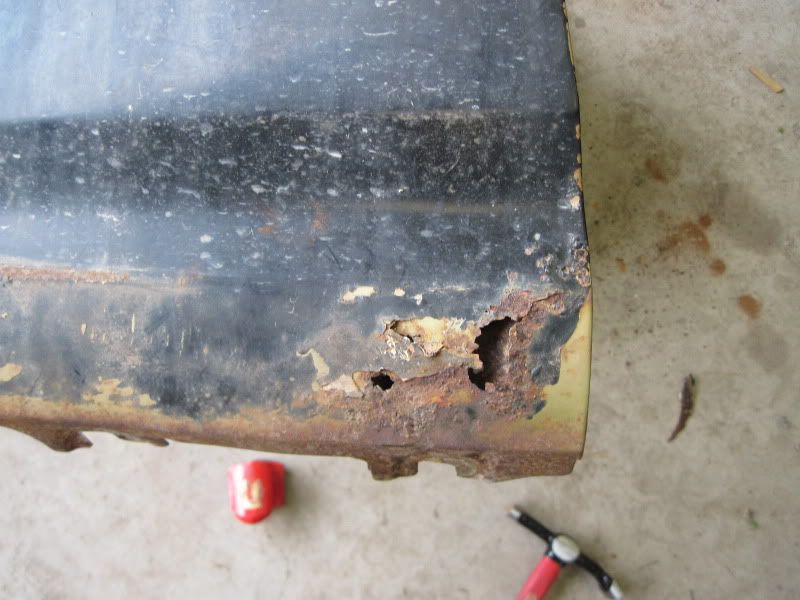 Weld-thru primer applied... 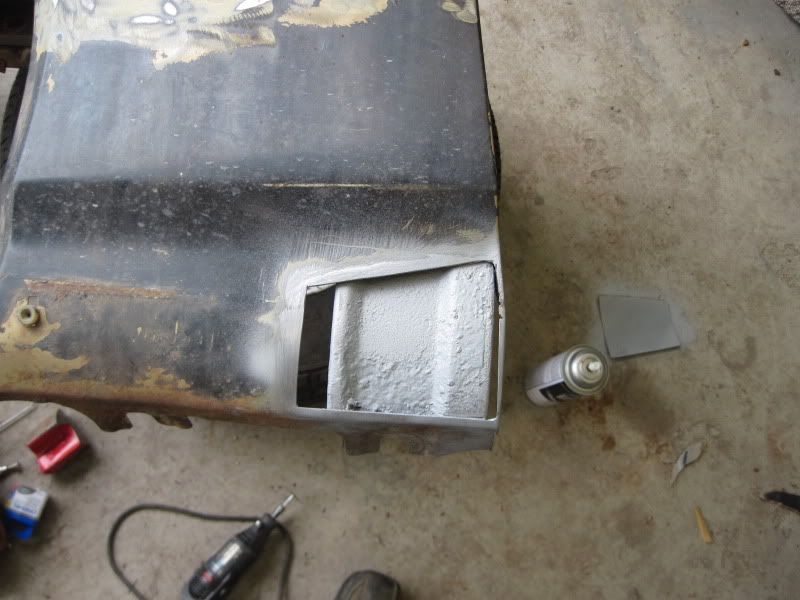 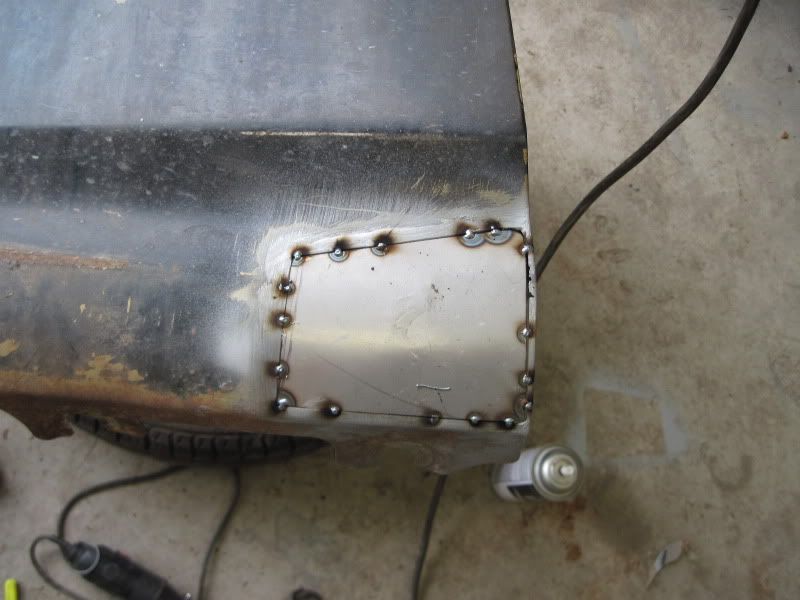 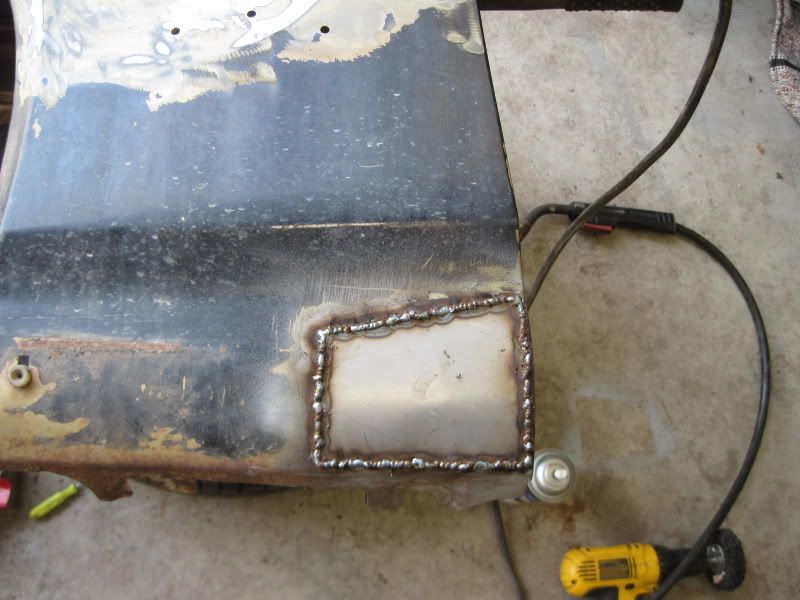 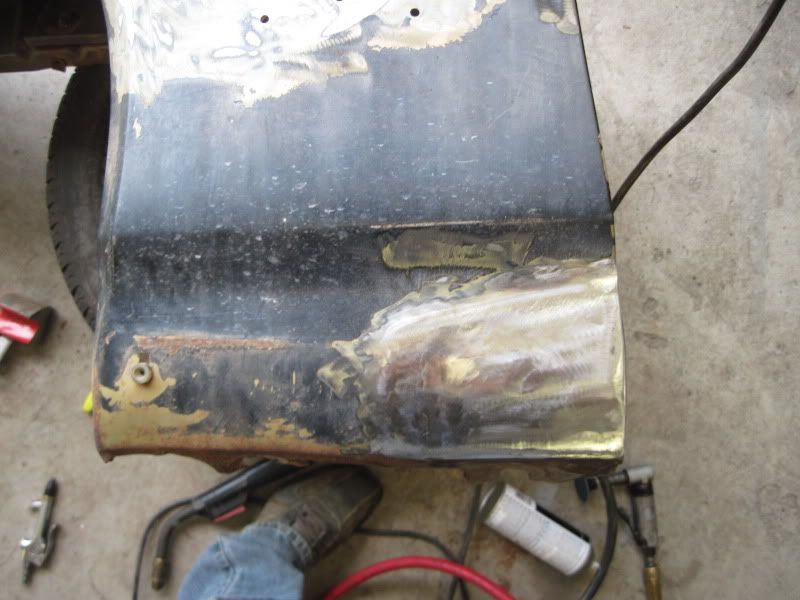 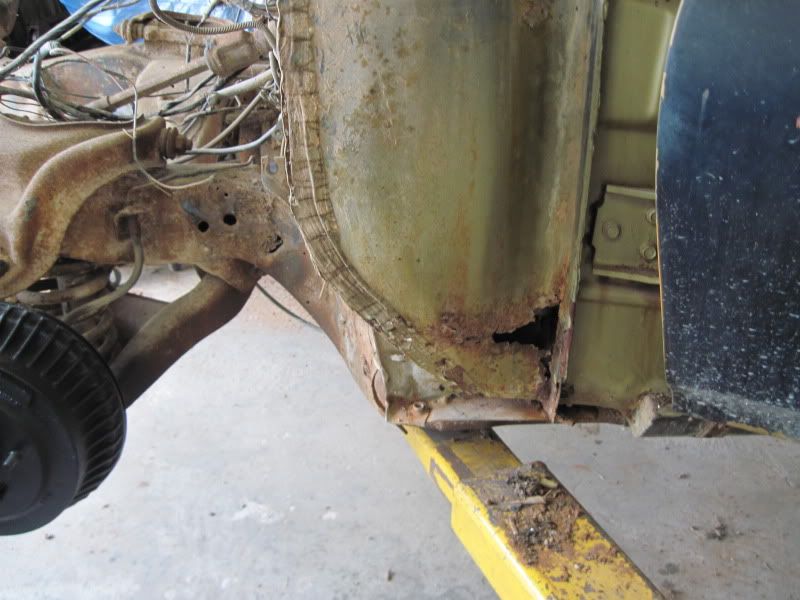 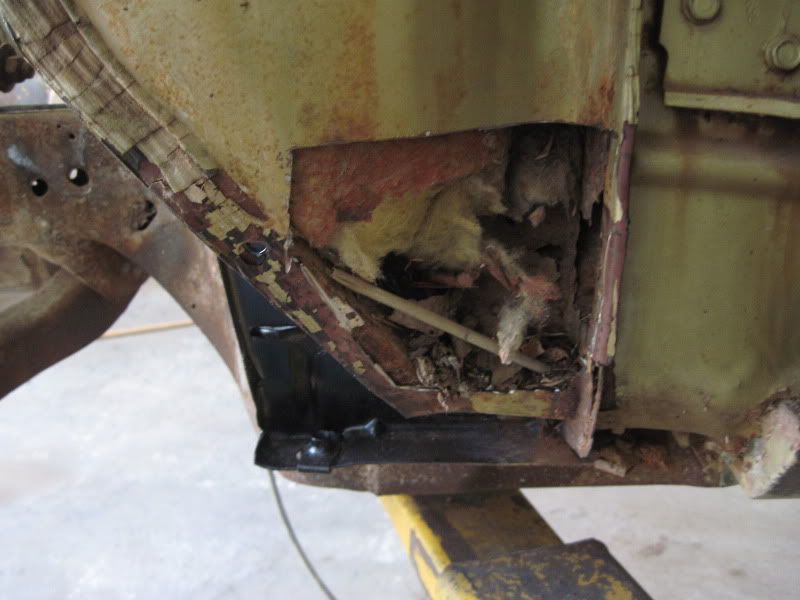 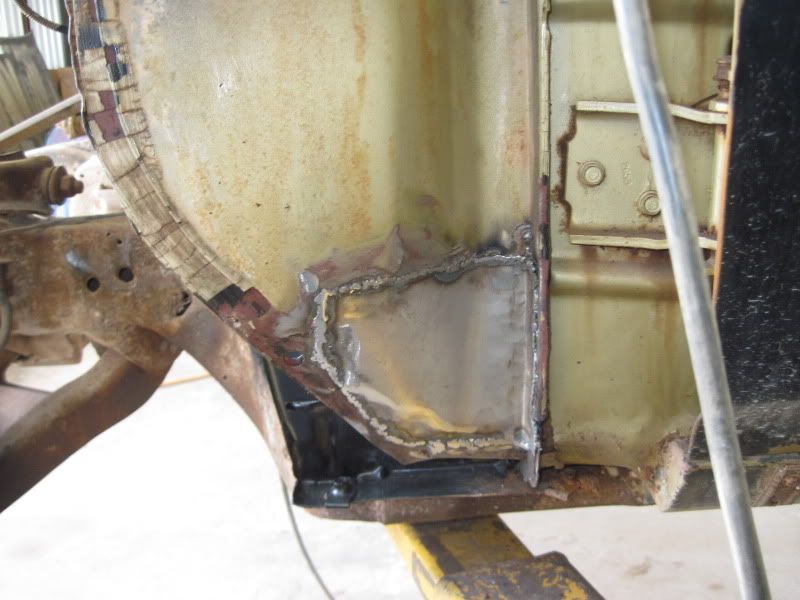 Seam sealed and a quick coat of paint to keep it from flash rusting... 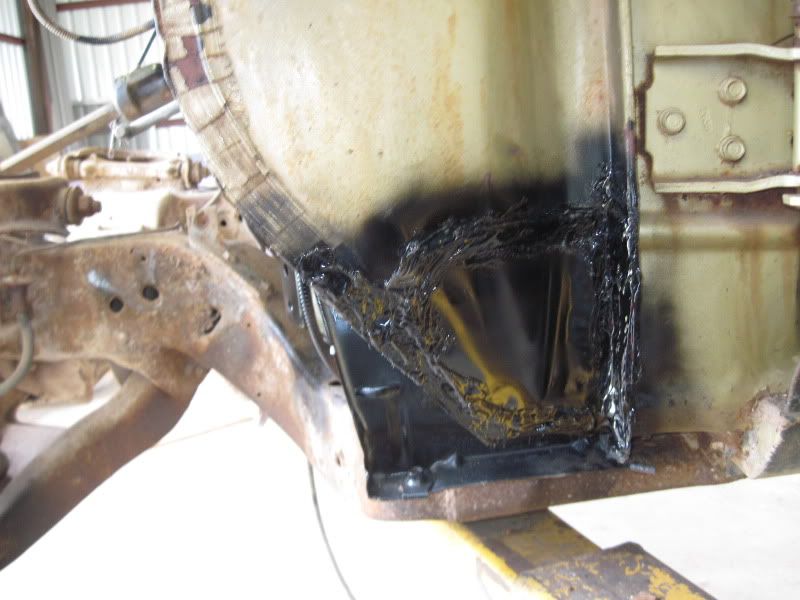 And the dash/cowl uglyness begins... 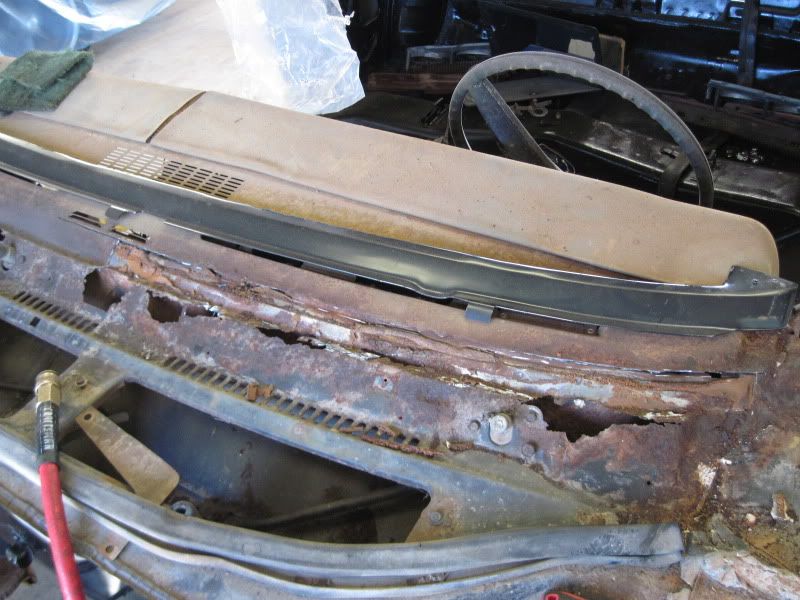 More to follow tomorrow. |
|
#71
03-31-2012, 09:38 PM
|
||||
|
||||
|
I hope you cleaned all the cr@p out of the bottom inner cowl before welding it up. When I did mine I cut it out nice and straight then made a panel that I just sheet metal screwed on. Had about 4 screws.This way if I every need to get back in there to clean out I could. Plus you can't see it once fenders are back on. After cleaning it out good I poured and brushed POR 15 in it.
Looks like your coming along fine.
__________________

|
|
#72
03-31-2012, 11:50 PM
|
|||
|
|||
|
The amount of crap that was down in that corner was amazing. Dirt, leaves, a plastic straw, rust, ect. I cleaned it all out and then sprayed a bunch of rust killer inside the whole area before painting and installing the panel. In retrospect... your idea of making it an access panel would probably have been a much better idea. Maybe I'll do that on the other side....
|
|
#73
04-01-2012, 07:36 AM
|
||||
|
||||
|
That's actually a great idea - need to file that one away for the future!
__________________
Some guys they just give up living And start dying little by little, piece by piece, Some guys come home from work and wash up, And go racin' in the street. Bruce Springsteen - Racing In The Street - 1978 |
|
#74
04-01-2012, 10:19 AM
|
||||
|
||||
|
Nice work!

__________________
1971 Pontiac GT-37 Car is a junk yard dog and maybe one day will be restored. 
|
|
#75
04-01-2012, 10:31 AM
|
|||
|
|||
|
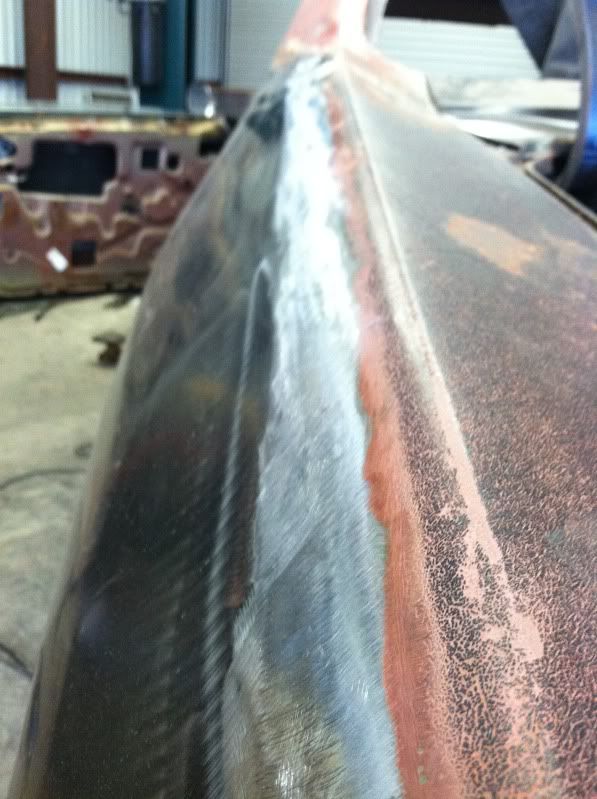
Nice work on the patch job. Cant even tell there is one there. Nice work
|
|
#76
04-29-2012, 10:26 PM
|
|||
|
|||
|
Been awhile since I posted up anything...work has had me too busy to get much done on the car. I started fixing the dash area and got around to starting my left rear quarter panel skin install. One thing that I learned is that the dash panel repair piece SUCKS. It was meant for a firebird or El Camino, but it's setup to be modified for the GTO. Lots of cutting and trimming to the piece even half-ass fit.
|
|
#77
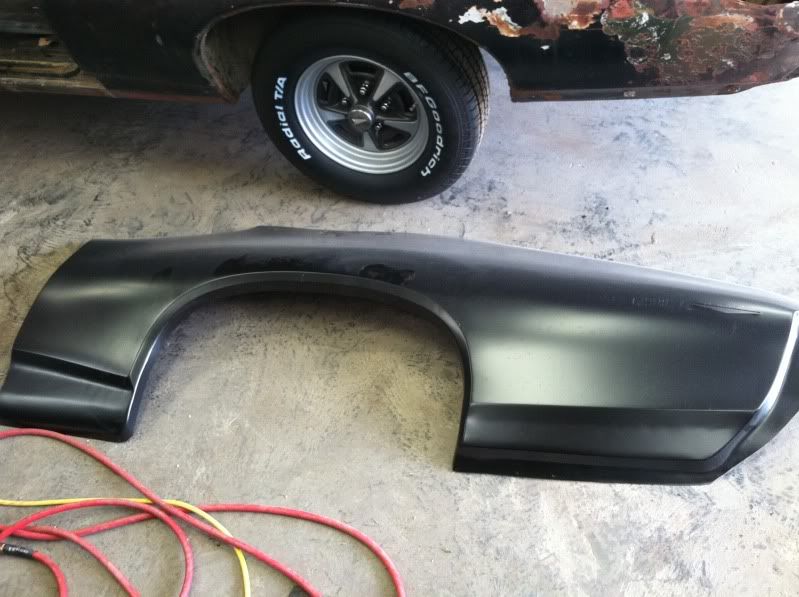
04-30-2012, 02:57 AM
|
||||
|
||||
|
That is a lot of work but it is well done so far!
__________________
-Jeremy 1968 GTO 4-spd convertible, console, factory gauges, hidden headlights, 3.90:1 posi, AM/FM radio. 1962 Catalina convertible, Starlight black w maroon interior & white top. |
|
#78
05-12-2012, 11:32 PM
|
|||
|
|||
|
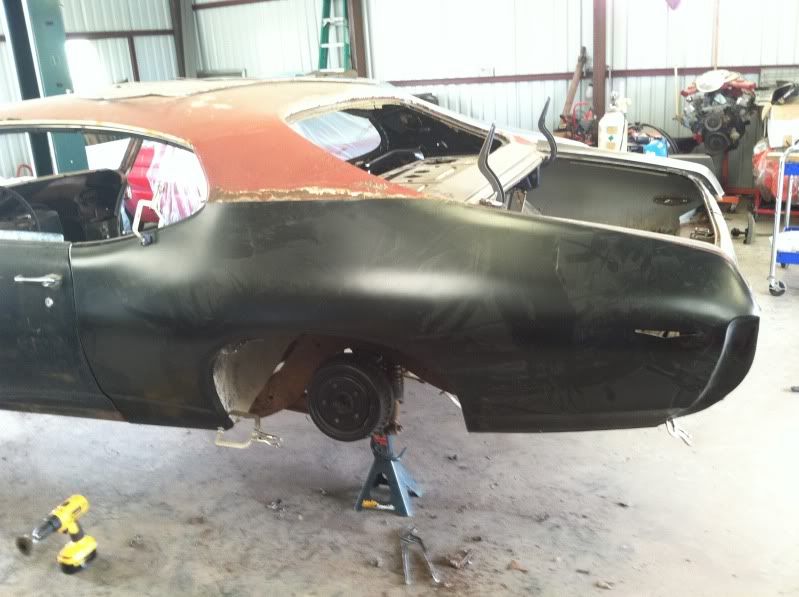
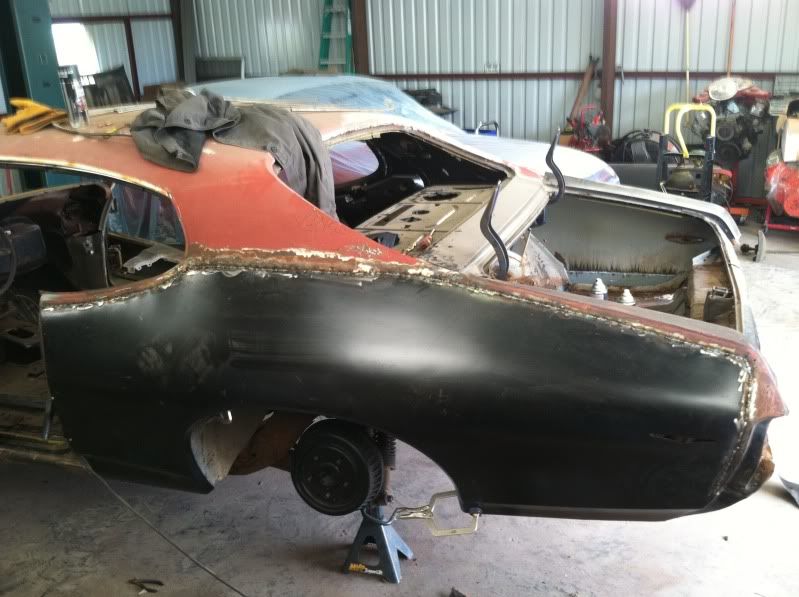
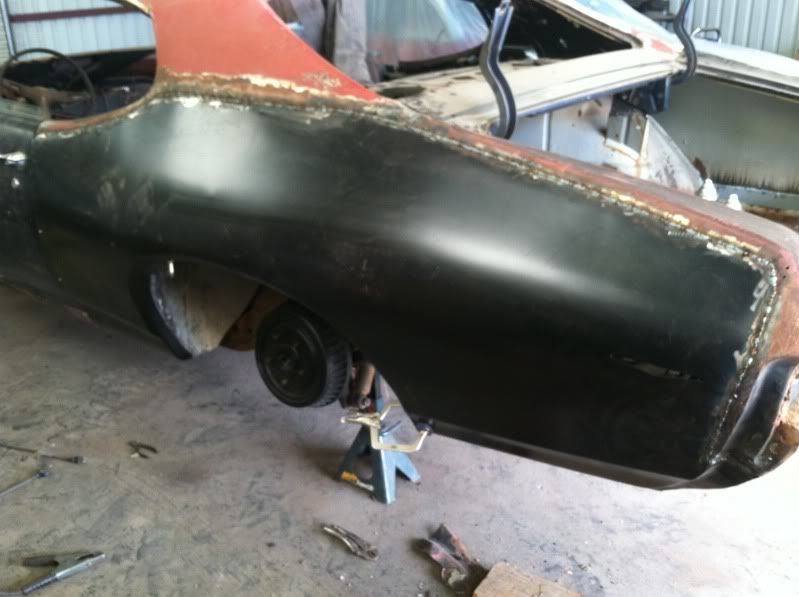
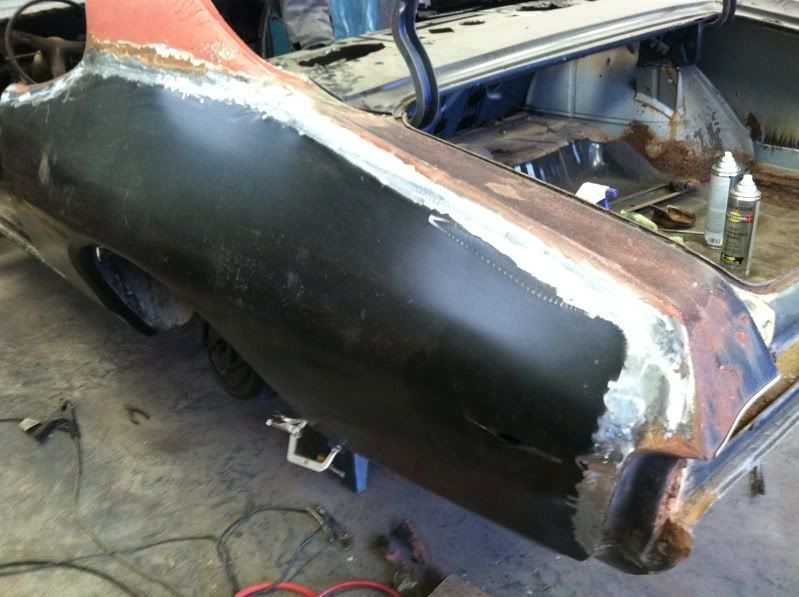
Work and personal stuff have keep me from getting much done for the last several weeks, so I figured I'd get something done today. Got the new quarter skin mostly installed...just have to attach it to the trunk drop panel and near the rocker.
|
|
#79
05-13-2012, 04:43 AM
|
||||
|
||||
|
Dude.... you seriously deserve some kind of reward for the effort you are putting into bring this beautiful car back to life. I wish you all the best, and hope the car ends up being everything you hope it will be. As a member of the GTO loving community I thank you for your efforts.
JohnnyB |
|
#80
05-13-2012, 08:38 AM
|
|||
|
|||
|
I love watching builds like this. Your works is second to none. Keep it up
|
| Reply |
|
|
The PY Online Forums is the largest online gathering of Pontiac enthusiasts anywhere in the world. Founded in 1991, it was also the first online forum for people to gather and talk about their Pontiacs. Since then, it has become the mecca of Pontiac technical data and knowledge that no other place can surpass.


 Linear Mode

