


| FAQ |
| Members List |
| Social Groups |
| Calendar |
| Search |
| Today's Posts |
|
#1
 01-05-2016, 08:54 PM
|
|||
|
|||
|
This may be a lost cause for how bad this wheel is but I have nothing to loose. If it don't pan out I will either have it recast or go with an aftermarket wheel.
To start I have soaked the wheel in Evaporust to remove the rust on the exposed metal. I also built the stand for the wheel. I figured it will come in handy while epoxy dries and when doing sanding. I will use the dermal to grind out the plastic cracks. I will fill the cracks with PC7 epoxy and fill the small hairline cracks with super glue. Last will be painting the wheel. 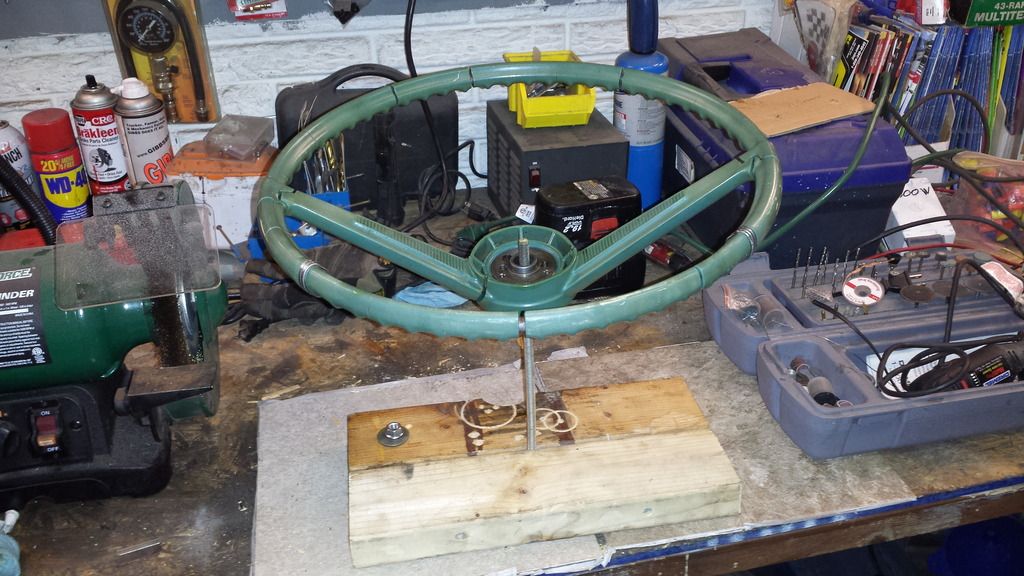 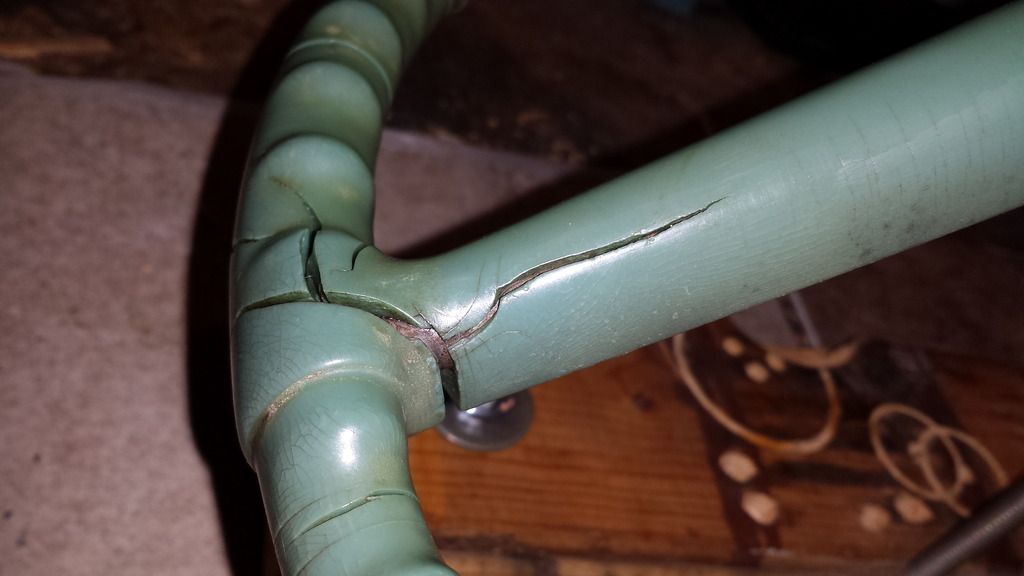  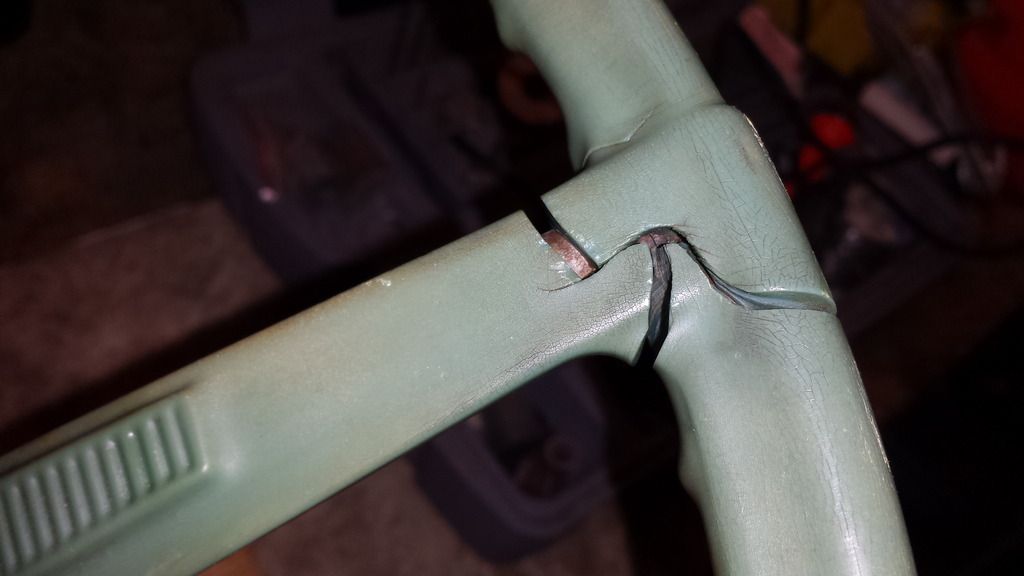 This is the worst section. 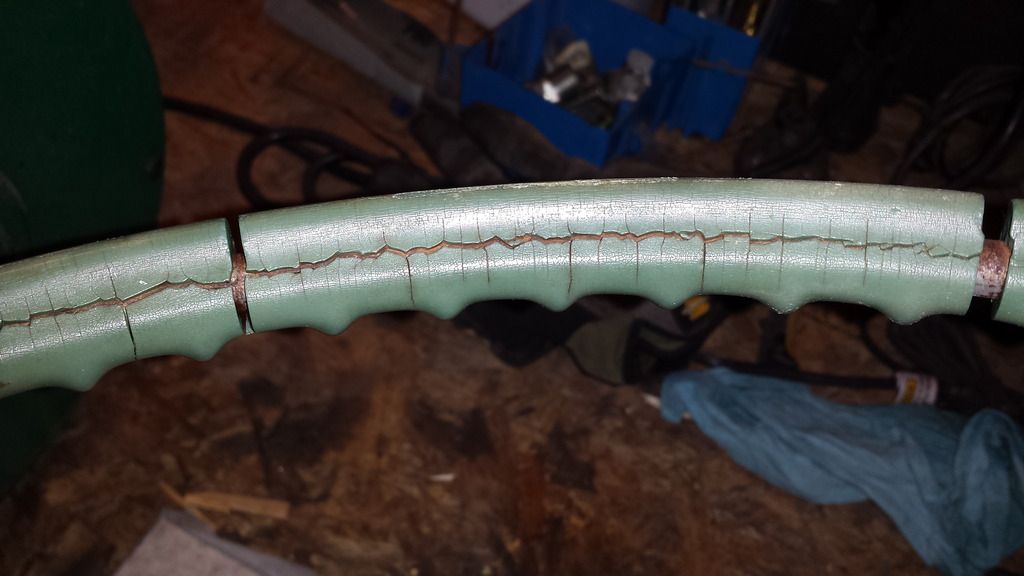 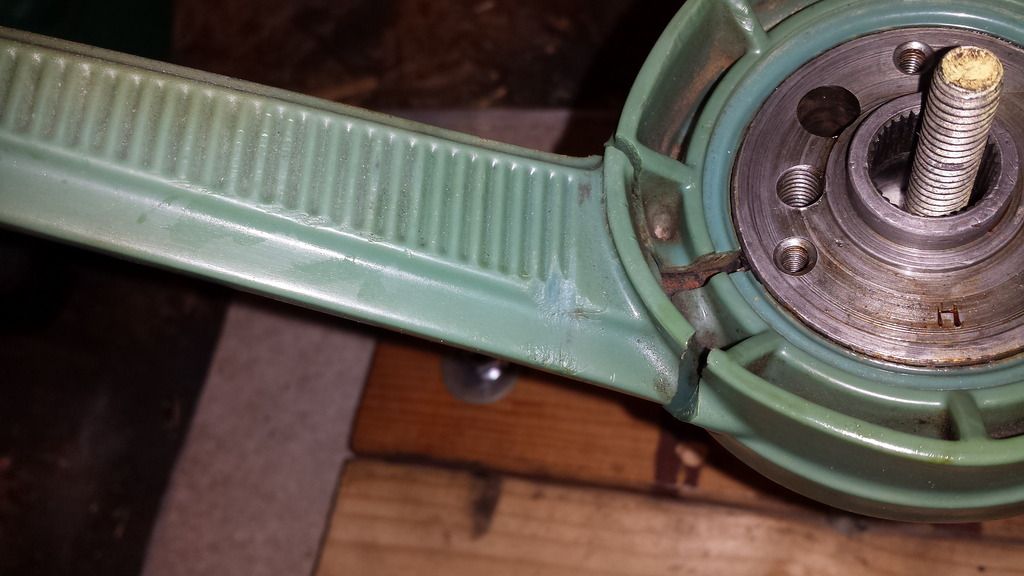 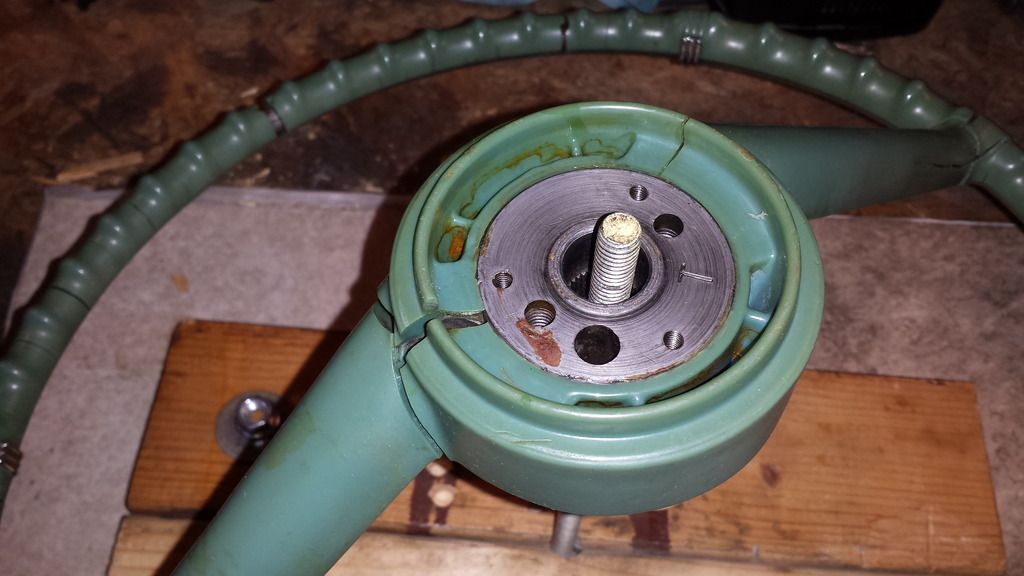
|
|
#2
01-05-2016, 09:12 PM
|
||||
|
||||
|
I did mine a few months ago. Came out pretty good except for a bunch of hairline cracks that I thought the primer would fill but unfortunetly didn't. Never thought about using super glue in them. I didn't think super glue was sandable.
Your wheel is in a lot worse shape then mine. You've got a lot of grinding and sanding ahead of you. Good luck. |
|
#3
01-05-2016, 10:10 PM
|
|||
|
|||
|
Quote:
cheaper then this one. http://www.ebay.com/itm/1964-64-1965...BWJaCM&vxp=mtr I'm wondering how to match the paint? The color is much different then the exterior or interior of the car. |
|
#4
01-06-2016, 07:21 AM
|
||||
|
||||
|
I would highly recommend SPI epoxy primer. I used it a couple years ago repairing the endura bumper on my 70 and it still looks great. It stays pliable. And with several coats will fill small voids and sand flat. Talk with Bary at southern polyurethane incorporated he is a great guy. He gave me his personal cell number when I was painting my car told me to call him over the weekend if I had any problems.
__________________
1970 Firebird, 468, KRE 290 DPorts, 236/244 .615 lift HR, HO Intake, 77 Q-Jet, RA manifolds, 3.42 rear, 10" Contential, 700R4. Last edited by 70f400; 01-06-2016 at 07:26 AM. |
|
#5
01-07-2016, 12:01 AM
|
|||
|
|||
|
I use Marine Tex epoxy (gray) for repairing wheels. I like the consistency better than the others. It's smooth and not too runny or stiff. Sticks good, dries hard and sands well. Can be found at boating supply stores or on the internet. I found a good deal on eBay a few months ago. Not the cheapest, but is great stuff for many purposes.
Tiny anchor holes drilled into the "V"'s that you will carve out help, as would spanning the crevice with some fine wire strands before filling will help prevent repairs from cracking again. I agree about using epoxy primer on it after your filler and sanding work. After the epoxy coat, you could use some sanding primer for further sanding and smoothing before paint.
__________________
Steve F. |
|
#6
01-09-2016, 11:46 AM
|
|||
|
|||
|
Quote:
I have been doing some homework to make sure I'm on the right track. I have been to busy or lazy to get started too. Two question I have not figured out is if the two chrome rings on the wheel are molded in. Mine move and seem like they could come out but I would hate to ruin them. For now I guess I will work around them. The other thing I'm wrestling with is if their might be a better product for the section with all the spider cracks. I watched this video of a guy using araldite. It looks runny enough that it might be a better solution then super glue. https://www.youtube.com/watch?v=NsdKYtHsSc4 Videos https://www.youtube.com/watch?v=wIEM...eature=related Links http://www.hotrod.com/how-to/interio...eering-wheels/ http://www.eastwood.com/steering-whe...-from-eastwood http://www.secondchancegarage.com/public/475.cfm http://www.autotraderclassics.com/ca...l!-78572.xhtml http://www.imperialclub.com/Repair/Steering/wheel.htm http://blog.elcaminostore.com/steeri...l-restoration/ Most commonly used Products Araldite epoxy resin POR-15 Steering Wheel Restoration Kit PC7 Marine Tex Notes of interest: Make an upside down V groove, with the deepest part of the grove being wider than the top of the groove. Now, even if the two materials eventually delaminate, the patch material cant fall out. Anchor holes for the filler The steering wheel plastic never matched the dash (contrary to opinion) After the epoxy has been applied, dip your finger in lacquer thinner then blend the epoxy smooth (PC7) |
|
#7
01-12-2016, 02:05 AM
|
|||
|
|||
|
The chrome rings are removable, but you do have to be careful removing them. I haven't seen your exact style of wheel, but the rings look like rings that are used on 58, 59, 60, and early 60's Impalas, except the Impala wheel uses single rings in 4 locations, whereas yours appears to have 3 rings in 2 locations. The Impala rings are reproduced, and if yours are 3 individual Impala type rings put together at each location, you could buy new ones if necessary.
For wire strands, if you have some 12 gauge automotive stranded wire, you can split the insulation open and cut out some of the strands for wire. Or if you have some MIG welding wire, that would be even better. So where you have large cracks, you can drill some tiny anchor holes on the sides of the crevice that you carve out, add some epoxy, lay some pieces of wires across the span of the crevice, and bury them in the epoxy that you fill the crevice with. So, it acts like "rebar" does in concrete to reinforce it.
__________________
Steve F. |
|
#8
01-28-2016, 01:05 PM
|
|||
|
|||
|
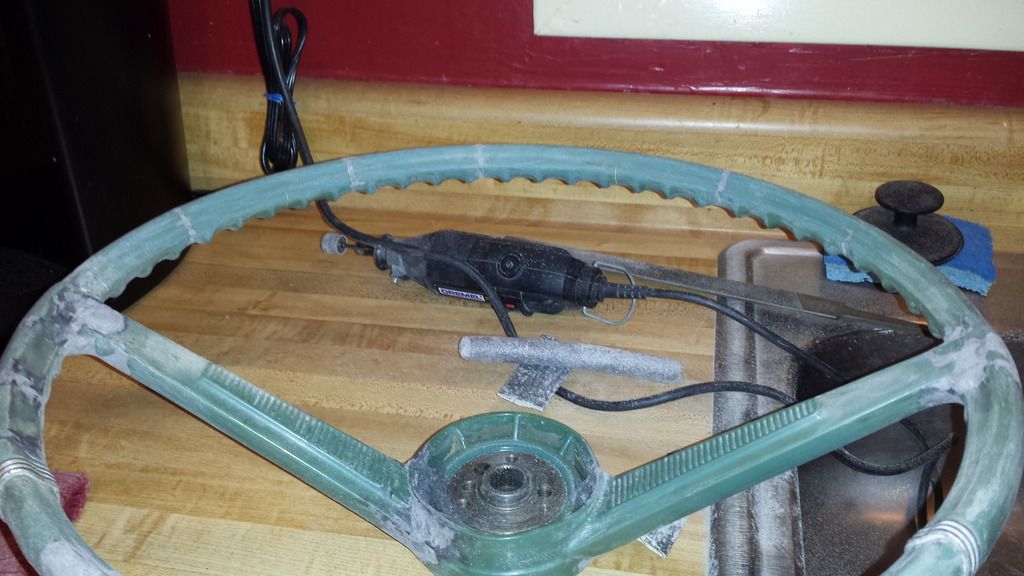
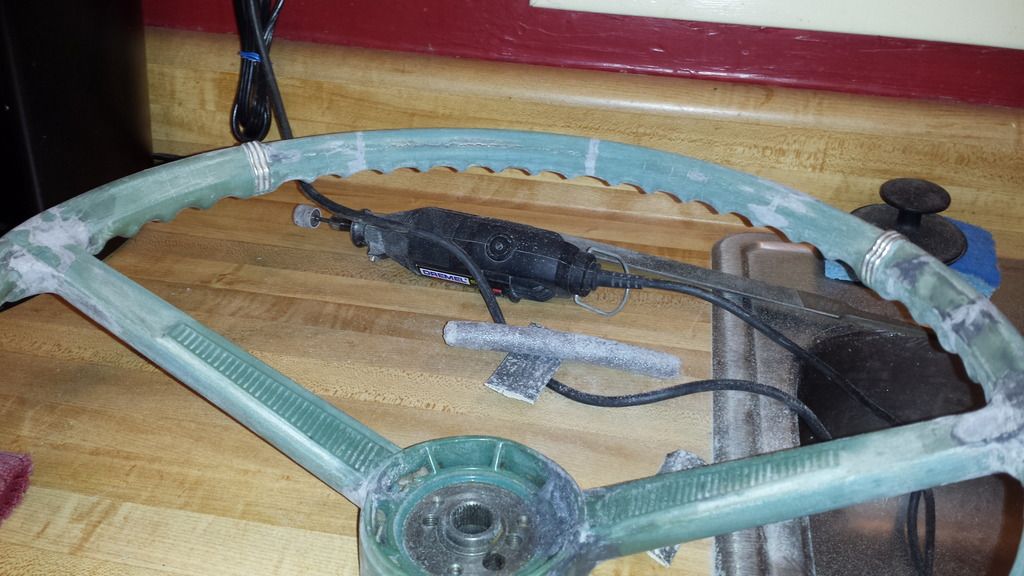
A little progress.
After grinding with the dremmel. I'm a bit shocked how thin the plastic is in most spots. 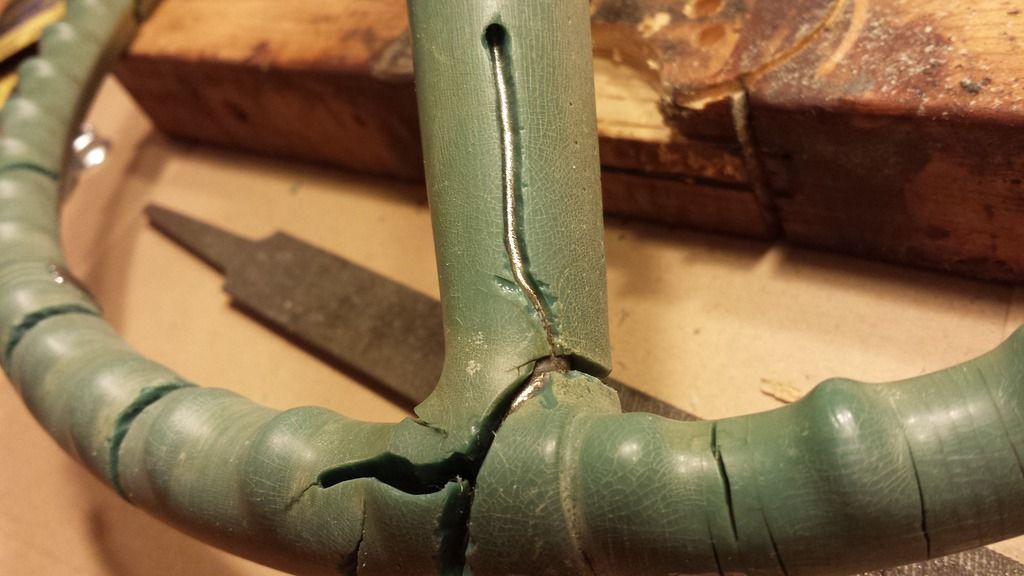 A blurry pic of mixing the PC7. That stuff is like tar. You have to keep your fingers wet or it sticks to you like crazy. I mixed way to much for the amount of cracks I have. I should have started out with a smaller batch and did two or three different application. I ended up with more build up on the cracks then what I really needed. I was concerned with shrinkage but now I will be sanding for days.  I'm started the sanding process with a metal file/rasp. It clogs pretty easy and I have to clean it with a wire wheel. The PC7 stuff does feather nicely. I'm going to have to break out the Dremel and the die grinder sanding drums. I have a couple other sander I might try. The 120 grit works pretty well at this stage. 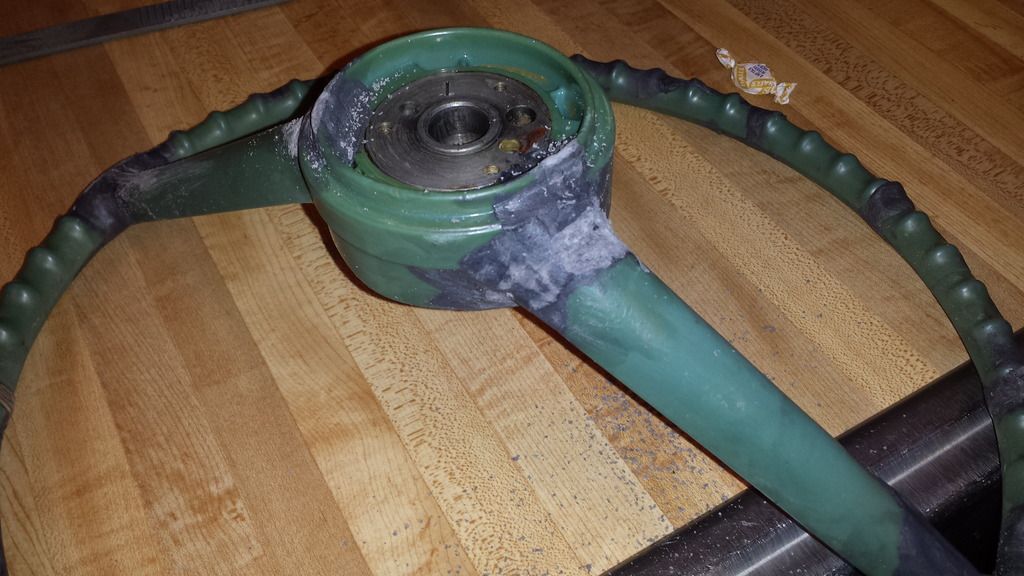
|
|
#9
01-28-2016, 02:27 PM
|
||||
|
||||
|
subscribed!
|
|
#10
01-28-2016, 03:01 PM
|
||||
|
||||
|
When you include the hours that's going to be a $3000 steering wheel
 And I thought I was a Jedi Master of "I can fix anything" ... the force is strong with you
|
|
#11
01-28-2016, 04:49 PM
|
||||
|
||||
|
I'm about to try the same thing on my wife's '64 GTO--same color, too!!
__________________
BONESTOCK GOATS '64 GTO Tripower Hardtop (Wife's Car) '64 GTO Tripower Post Coupe (My Car) '99 Bonneville SE Sedan |
|
#12
01-29-2016, 11:53 AM
|
|||
|
|||
|
Quote:
LOL.Spent 3 hours sanding last night with the dremel, file and sand paper. This is hard tedious work. The dremel I have to be really careful not to grind ruts in. The PC7 epoxy is very gummy and clogs everything. And the super glue idea for the cracks was very bad idea. The PC7 doesn't stick to it and just flakes off. I have a feeling I will be doing some major grinding in the small test area that i did. I can see why the price is around $500 for most steering wheel restorers. But I'm not giving up. I ordered some SEM High build primer for when the time comes. Sorry no pic today. Photobucket is down for maint. Been having issues that last few weeks with it. they added a bunch of crap advertising and most of my pics have been failing while uploading. |
|
#13
01-29-2016, 12:16 PM
|
|||
|
|||
|
My painter friend uses 3M panel bond adhesive. Says it is much easier to use than the epoxy. Billk
|
|
#14
01-29-2016, 01:09 PM
|
|||
|
|||
|
Quote:
Maybe on the next wheel
|
|
#15
01-29-2016, 01:20 PM
|
||||
|
||||
|
I have had similar (bad) luck with PC-7 doing a wheel for one of my '62s. In fact, I also had a helluva time getting primer or paint to stick on the parent plastic of the wheel itself.
But, for what it's worth... here is a two-part epoxy that I use for potting circuit boards... certainly higher "flow" than PC-7 (or JB-Weld). It comes in two plastic jars so you only mix up what you need. I bought it from a place that isn't the cheapest source on Earth... http://www.digikey.com/product-searc...=0&pageSize=25 Hope it helps... |
|
#16
01-29-2016, 10:49 PM
|
||||
|
||||
|
Quote:
__________________
1969 Verdoro Green GTO #Matching 400 + .045, 4.21 Ohio Forged Crank, SD 290 KRE heads, Torker II, OF Cam, Etc... 1978 W72 Marty Blue T/A GONE |
|
#17
01-29-2016, 11:29 PM
|
|||
|
|||
|
I've used some of the dual cartridge panel bond adhesive, and I have the special dual caulk gun for it. It may be a good adhesive, but it didn't work well for me as a filler. I tried using it once to fill some holes in a urethane bumper. It would dry, and I'd sand it and get ready to paint, and the stuff expanded some more, and I'd have to sand it down again. I couldn't trust it to remain stable after sanding it, so I removed the stuff from the bumper, and used Marine Tex to repair it with no problem.
As I mentioned in reply #5, I think Marine Tex is the best for this. I've restored many steering wheels with it. Not cheap, but it works great, dries hard so it's not gummy, sands good and no problem with paint adhering to it.
__________________
Steve F. |
|
#18
01-29-2016, 11:39 PM
|
||||
|
||||
|
Quote:
http://3mcollision.com/3m-ez-sand-ri...air-05885.html
__________________
1969 Verdoro Green GTO #Matching 400 + .045, 4.21 Ohio Forged Crank, SD 290 KRE heads, Torker II, OF Cam, Etc... 1978 W72 Marty Blue T/A GONE |
|
#19
02-01-2016, 01:00 AM
|
|||
|
|||
|
Lot of sanding but getting the hang of it. Still a long ways to go.
|
|
#20
02-01-2016, 06:26 AM
|
||||
|
||||
|
Keep up the good work Rohrt!
|
| Reply |
|
|
The PY Online Forums is the largest online gathering of Pontiac enthusiasts anywhere in the world. Founded in 1991, it was also the first online forum for people to gather and talk about their Pontiacs. Since then, it has become the mecca of Pontiac technical data and knowledge that no other place can surpass.


 Linear Mode

