Reply
 
Thread Tools Display Modes
  #21  
Old 10-06-2022, 06:45 PM
grd777 grd777 is offline
Ultimate Warrior
 
Join Date: Aug 2015
Location: Toronto canada
Posts: 1,065
Default

Quote:
Originally Posted by JUDGE3 View Post
thanks

it comes from building large model airplanes as a youngster, and doing a ton actual aircraft cowling and panel fitment cut/grind to fit to very close tolerances over 42 years at the plant.

its easy to get overwhelmed seeing magazines thru the years that started showing only high end restorations by pros that makes one think you have to full panel replace everything. the era i came up in, i watched many a person cut out only whats needed and do a good job splicing and welding.

good luck would like to see you post a thread with pics of your progress
that makes sense .one question i have how does the welding look like on the inside of the trunk. i don't like when i see the weld when i open the trunk

  #22  
Old 10-06-2022, 07:02 PM
JUDGE3 JUDGE3 is offline
Ultimate Warrior
 
Join Date: Sep 2011
Posts: 1,122
Default

weld and grind, rinse and repeat to suit your visibility taste.

  #23  
Old 10-07-2022, 04:25 PM
grd777 grd777 is offline
Ultimate Warrior
 
Join Date: Aug 2015
Location: Toronto canada
Posts: 1,065
Default

Quote:
Originally Posted by JUDGE3 View Post
weld and grind, rinse and repeat to suit your visibility taste.
i see in this photo that the qtr panel was sandwich between the brace and the rocker . any tips how to install the new qtr panel here
Attached Thumbnails
Click image for larger version

Name:	IMG_7025 (002).jpg
Views:	128
Size:	56.7 KB
ID:	600094  

  #24  
Old 10-07-2022, 05:51 PM
Formulabruce's Avatar
Formulabruce Formulabruce is offline
Ultimate Warrior
 
Join Date: Nov 2004
Location: North East of AMES PERFORMANCE, in the "SHIRE"
Posts: 9,383
Default

Quote:
Originally Posted by grd777 View Post
i see in this photo that the qtr panel was sandwich between the brace and the rocker . any tips how to install the new qtr panel here
That is stock, you can separate, install weld the spot weld holes from inside, but you will need more than the inspection cover hole. I would consider gluing it if you can get it all clean, way less chance of future rust.

__________________
"The Future Belongs to those who are STILL Willing to get their Hands Dirty" .. my Grandfather
  #25  
Old 10-07-2022, 05:58 PM
grd777 grd777 is offline
Ultimate Warrior
 
Join Date: Aug 2015
Location: Toronto canada
Posts: 1,065
Default

Quote:
Originally Posted by Formulabruce View Post
That is stock, you can separate, install weld the spot weld holes from inside, but you will need more than the inspection cover hole. I would consider gluing it if you can get it all clean, way less chance of future rust.
yes i was wondering how i was going to weld that ,not much access from the inside what glue do you used

  #26  
Old 10-07-2022, 06:29 PM
JUDGE3 JUDGE3 is offline
Ultimate Warrior
 
Join Date: Sep 2011
Posts: 1,122
Default

I cut the lip on the new quarter back enough for it to fit in place, then welded solid across this short area, then carefully grind a faux body line. it will look same as factory.

The Following User Says Thank You to JUDGE3 For This Useful Post:
  #27  
Old 10-07-2022, 10:15 PM
Formulabruce's Avatar
Formulabruce Formulabruce is offline
Ultimate Warrior
 
Join Date: Nov 2004
Location: North East of AMES PERFORMANCE, in the "SHIRE"
Posts: 9,383
Default

Quote:
Originally Posted by grd777 View Post
yes i was wondering how i was going to weld that ,not much access from the inside what glue do you used
I use this. Must have bare metal and clean. I like to eliminate ANY chance of rust, and welding can bring a harder metal with different expansion to that edge, Gluing is the way to get it done. The glue itself has anti corrosion chemicals in it which will ooze inside and prevent moisture from entering that area. Bonding will take more time to fit, but IMHO will be worth it. ( I have welded this seam on the exterior and cut in a groove, but got a paint bubble in a couple years, so I switched repair proceedures )
https://www.summitracing.com/parts/t...+5b9ad67255698
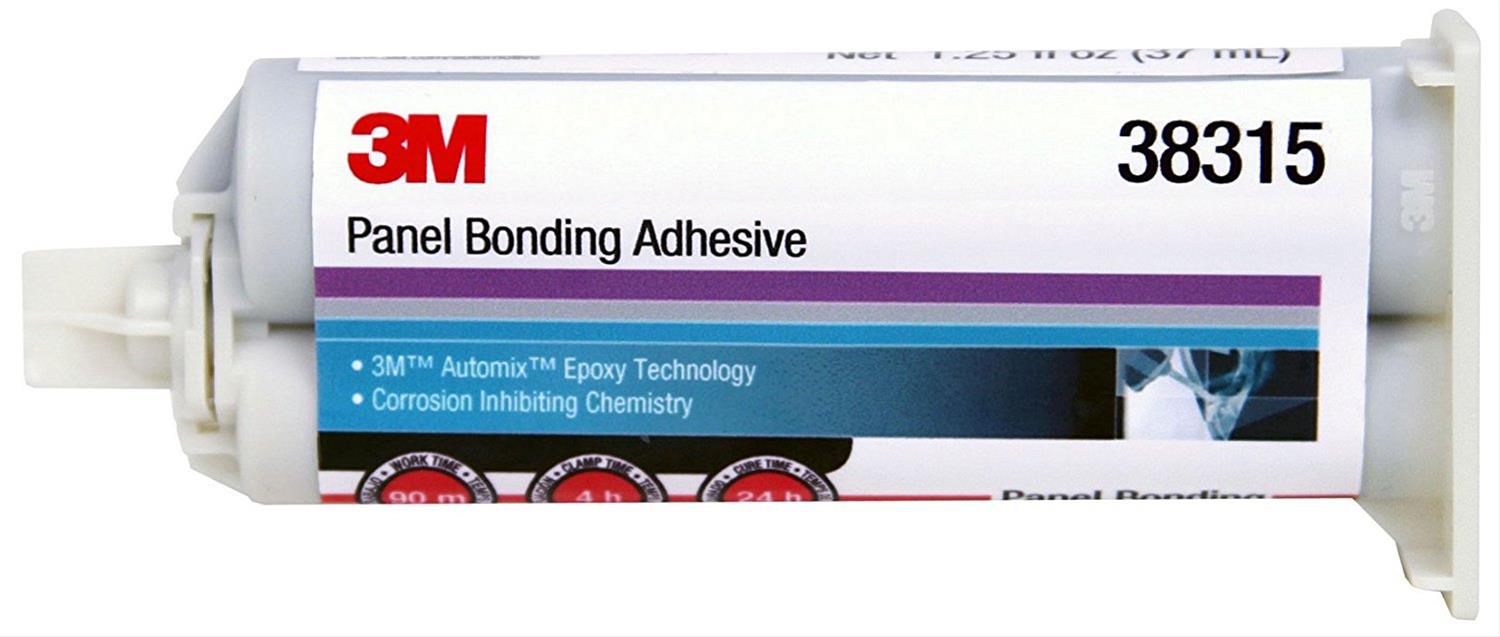
__________________
"The Future Belongs to those who are STILL Willing to get their Hands Dirty" .. my Grandfather

Last edited by Formulabruce; 10-07-2022 at 10:41 PM.
  #28  
Old 10-13-2022, 03:18 PM
grd777 grd777 is offline
Ultimate Warrior
 
Join Date: Aug 2015
Location: Toronto canada
Posts: 1,065
Default

Quote:
Originally Posted by JUDGE3 View Post
I cut the lip on the new quarter back enough for it to fit in place, then welded solid across this short area, then carefully grind a faux body line. it will look same as factory.
Hi Judge3
Just to follow up on the qtr panel work. Did you have any issues when you installed the side marker bezels. Seem when I try them on the skins it does not fit snug.

  #29  
Old 10-13-2022, 07:58 PM
JUDGE3 JUDGE3 is offline
Ultimate Warrior
 
Join Date: Sep 2011
Posts: 1,122
Default

I can only wish I was far enough along to even think about the bezel.

have not even checked that. I will say though, a non perfect fit won't bother me at all if i'm to the point of installing it.

that pic of the quarter area in question reveals a wonderfully dry rust free area. jealous of that! mine sure wasn't.

as far as rust proofing there, thats why I like por15. I used it in this area prior to the quarter install, then once installed I soaked a brush and went thru the door jamb access and let it seep real good in there, and then used internal frame coating tubes, then sprayed epoxy primer thru it. (I put a 2" brush on wire, even on a broomstick to push up in to the rocker panel.)

my overkill ways. rustproofed for the next guy.

  #30  
Old 10-14-2022, 03:16 PM
Formulabruce's Avatar
Formulabruce Formulabruce is offline
Ultimate Warrior
 
Join Date: Nov 2004
Location: North East of AMES PERFORMANCE, in the "SHIRE"
Posts: 9,383
Default

Fit the bezels BEFORE paint. I had to use a die grinder to slightly move over one side to make it "drop down" into the panel. Not noticed once painted.

__________________
"The Future Belongs to those who are STILL Willing to get their Hands Dirty" .. my Grandfather
  #31  
Old 10-14-2022, 04:16 PM
grd777 grd777 is offline
Ultimate Warrior
 
Join Date: Aug 2015
Location: Toronto canada
Posts: 1,065
Default

Quote:
Originally Posted by Formulabruce View Post
Fit the bezels BEFORE paint. I had to use a die grinder to slightly move over one side to make it "drop down" into the panel. Not noticed once painted.
It is way off will send photos

  #32  
Old 10-14-2022, 04:35 PM
grd777 grd777 is offline
Ultimate Warrior
 
Join Date: Aug 2015
Location: Toronto canada
Posts: 1,065
Default

Quote:
Originally Posted by Formulabruce View Post
Fit the bezels BEFORE paint. I had to use a die grinder to slightly move over one side to make it "drop down" into the panel. Not noticed once painted.
It will need filler or something here are some photos
1st one is on a full qt
2nd one is a original qtr
Last is a repo 1/2 skin. Will need work on the skin

Want to thank my friend for these photos
Attached Thumbnails
Click image for larger version

Name:	9FD34668-7D27-4638-AA42-7AB56769550C.jpg
Views:	121
Size:	52.3 KB
ID:	600431   Click image for larger version

Name:	28A43D4B-EDB0-4E7D-B2F4-CDCC7F35BF6D.jpg
Views:	95
Size:	57.4 KB
ID:	600432   Click image for larger version

Name:	0966BEE5-A3EE-4421-816D-8185229688DB.jpg
Views:	120
Size:	46.3 KB
ID:	600433  

  #33  
Old 10-15-2022, 04:45 PM
JUDGE3 JUDGE3 is offline
Ultimate Warrior
 
Join Date: Sep 2011
Posts: 1,122
Default

triggered me to check mine. yes they will need the mount holes massaged over to move the bezel.

  #34  
Old 10-15-2022, 05:26 PM
grd777 grd777 is offline
Ultimate Warrior
 
Join Date: Aug 2015
Location: Toronto canada
Posts: 1,065
Default

Quote:
Originally Posted by JUDGE3 View Post
triggered me to check mine. yes they will need the mount holes massaged over to move the bezel.
Yes I think it also sits to low

  #35  
Old 10-16-2022, 01:42 AM
Formulabruce's Avatar
Formulabruce Formulabruce is offline
Ultimate Warrior
 
Join Date: Nov 2004
Location: North East of AMES PERFORMANCE, in the "SHIRE"
Posts: 9,383
Default

Couple points.
1. The quarter panel stamp for the recessed bezel is tapered a bit on one side ( front?) and more of a shelf ( factory) on the other side.
I have ended up slightly moving to the bezel to a more neutral position.
2. The bezel can sit a tiny bit deep. I dont think it mattered much, BUT you can put a plastic washer on the bezel studs I suppose.
This is the best we have to work with .

__________________
"The Future Belongs to those who are STILL Willing to get their Hands Dirty" .. my Grandfather
  #36  
Old 10-16-2022, 08:36 AM
grd777 grd777 is offline
Ultimate Warrior
 
Join Date: Aug 2015
Location: Toronto canada
Posts: 1,065
Default

Quote:
Originally Posted by Formulabruce View Post
Couple points.
1. The quarter panel stamp for the recessed bezel is tapered a bit on one side ( front?) and more of a shelf ( factory) on the other side.
I have ended up slightly moving to the bezel to a more neutral position.
2. The bezel can sit a tiny bit deep. I dont think it mattered much, BUT you can put a plastic washer on the bezel studs I suppose.
This is the best we have to work with .
Yes I will try that and post a photo

Reply


Posting Rules
You may not post new threads
You may not post replies
You may not post attachments
You may not edit your posts

BB code is On
Smilies are On
[IMG] code is On
HTML code is Off

Forum Jump


All times are GMT -4. The time now is 04:03 AM.


About Us

The PY Online Forums is the largest online gathering of Pontiac enthusiasts anywhere in the world. Founded in 1991, it was also the first online forum for people to gather and talk about their Pontiacs. Since then, it has become the mecca of Pontiac technical data and knowledge that no other place can surpass.


Copyright © 2017