| FAQ |
| Members List |
| Social Groups |
| Calendar |
| Search |
| Today's Posts |
|
#1
|
||||
|
||||
|
Ever see a naked dash?
 With not many shops that can fully restore a 70-72 GTO/LeMans dash, I decided to tackle the challenge myself. Money was another incentive. Just Dashes are the best, but it would have cost me 1200$ to have the dash restored. That includes almost 200$ of shipping back and forth. And a 6 months wait time. I cant afford to have the car in hibernation during summer, and that money can be used for other stuff on the cars. I am a DIYSelfer, I have the skills and motivation. So what the hell. You'll never know if you never try. I decided to put a little DIY guide for you guys, cause I know many people asked if it can be done, are afraid to do it themselves because nobody seems to have done it. Hope you like it. I will keep updating this thread as the work progress. Car is a 72 GTO. The dash was re-dyed a few years ago. The 70-72 dash is just a metal frame covered with foam, and then covered with vinyl. The foam is shaped into form, and the vinyl is glued over. The edges are folded over and glued to the back. Not sure if the foam is closed cell. Its kinda porous. Still in good shape after 45 years. The vinyl however is in pretty bad shape. Its sun-baked, cracked and it has turned into plastic. - Remove the dash from the car. Takes about an hour when you've done it a few times. - Take pictures, lots of them - Take more pictures. Every angle, nook and crannies, screw holes, bumps and whatnot - Carefully remove the vinyl, make sure you dont disturb the foam underneat. Some pieces of foam will stick to the vinyl, that will be fixed later. The soft vinyl was easy, it just pealed off. The top was another story. It was so dry, it cracked in small pieces. I used a butter knife to break it free from the foam. That's it. Next step is to repair the foam. Filling the gaps, replacing missing chunks. I will then sand it and shape it to form. List of materal is short; butter knife, scissors, sharp blade, 2 yards of high-quality Madrid vinyl, HH-66 vinyl cement, 1/8" foam sheets. I did my back seat last year. Doing the bucket seats sometimes this summer. Hopefully the dash restoration will be as smooth and easy as the rear seat! http://forums.maxperformanceinc.com/...d.php?t=779216  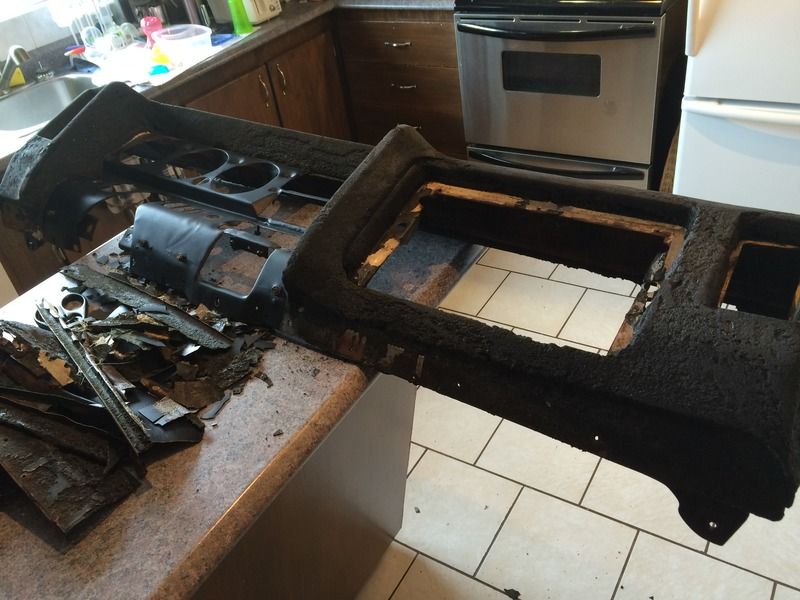 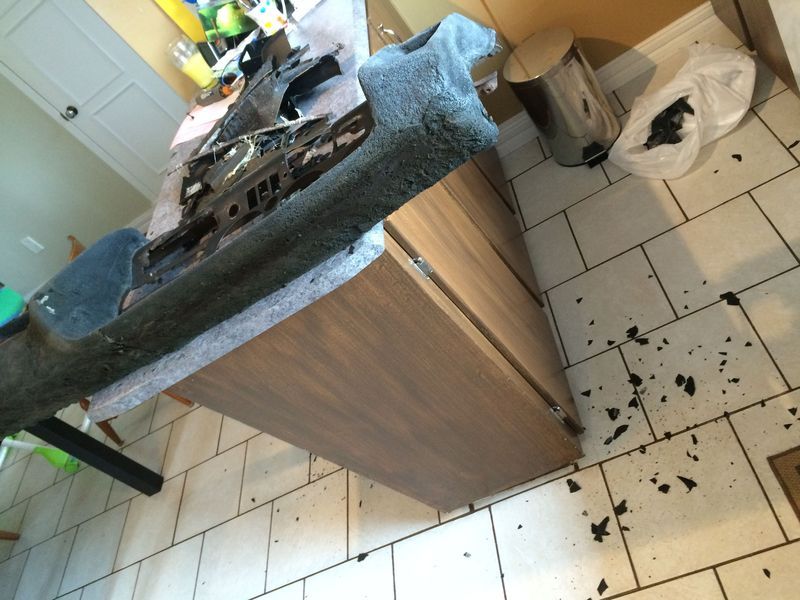 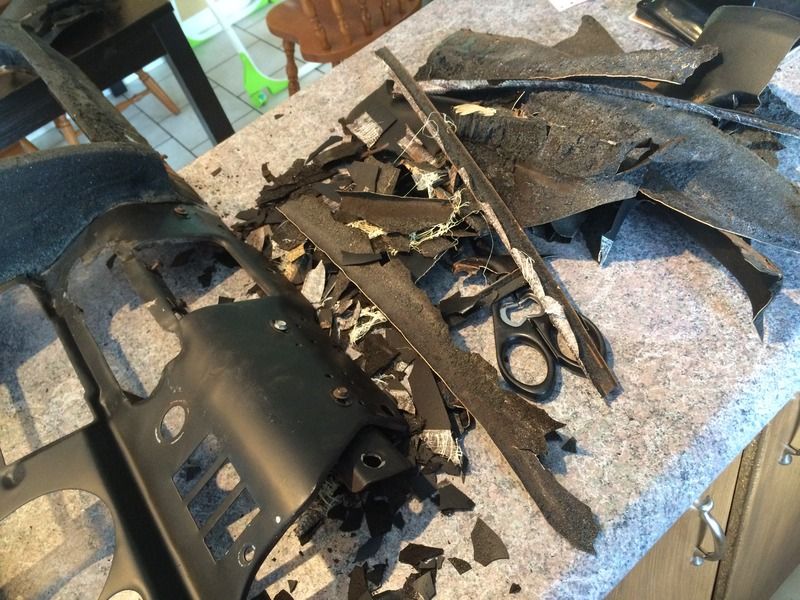 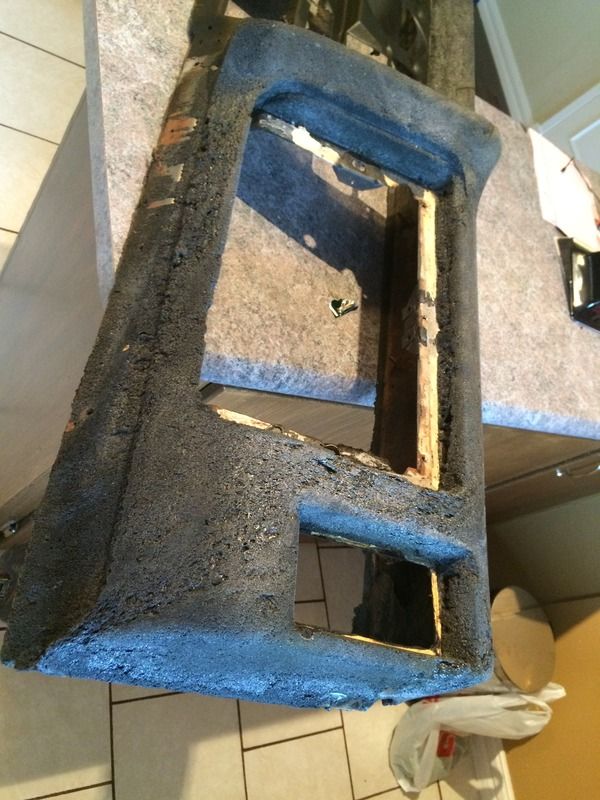 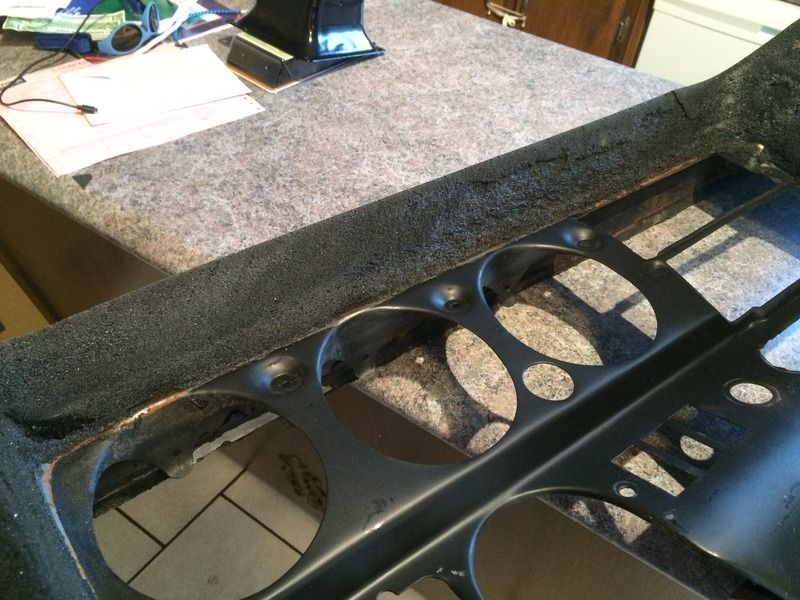 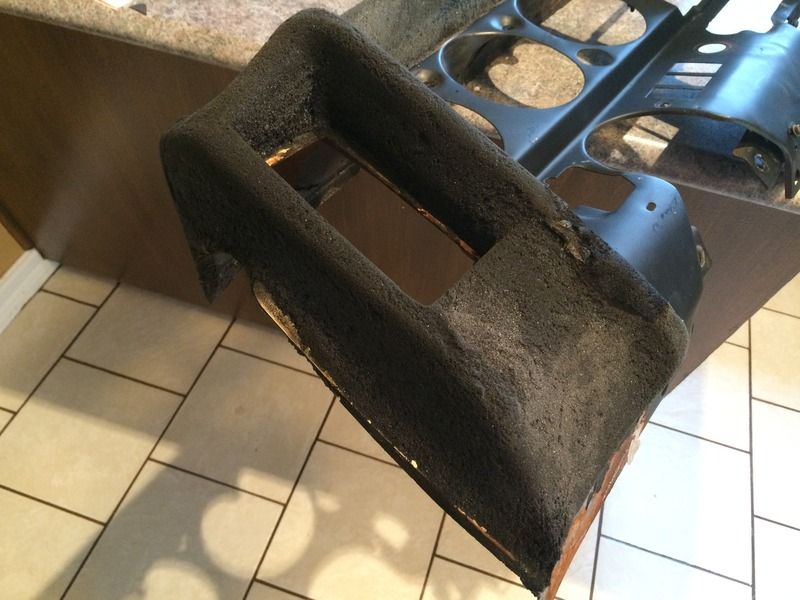 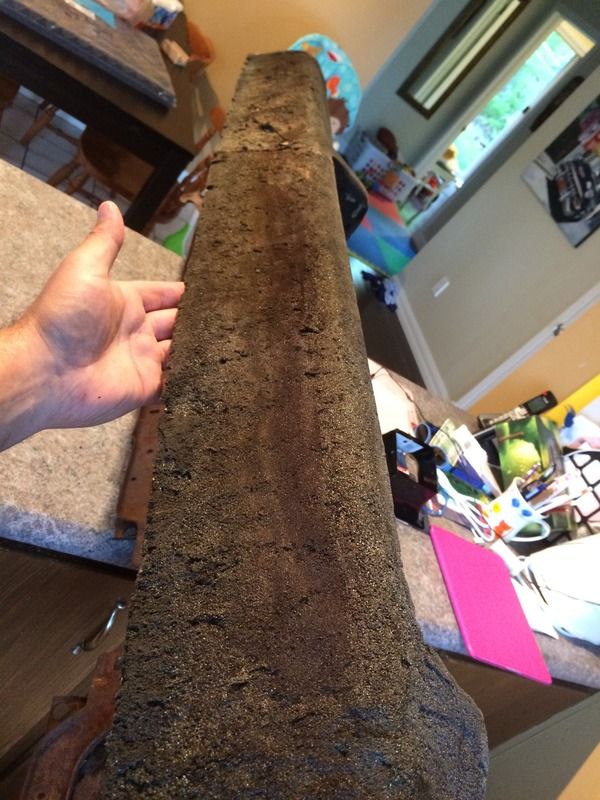
|
|
#2
|
||||
|
||||
 Are you really doing that on the kitchen counter? Are you really doing that on the kitchen counter? 
__________________
Some guys they just give up living And start dying little by little, piece by piece, Some guys come home from work and wash up, And go racin' in the street. Bruce Springsteen - Racing In The Street - 1978 |
|
#3
|
|||
|
|||
|
Looking at the pics of the kitchen, bet your on the wife's sh!t list

__________________
Buzzards gotta eat... same as worms. |
|
#4
|
||||
|
||||
|
Yup, lol! I have the bucket seats already on my workshop table. Wife wasnt home, i had time to clean up the mess

|
|
#5
|
||||
|
||||
|
By the way, I'm also working on a reproduction back seat divider panel. Its been in developement for a few months now, I do have a prototype that I will post later.
|
|
#6
|
||||
|
||||
|
Nice work so far.
I had to remove a lot of the original foam to get my "cap" to fit when I did it earlier this summer. I'm interested to see how you do the vinyl.
__________________
'71 Formula 455 HO Ram Air - Future Project '64 GTO 389 4bbl 4-Spd. - Nice Driver '71 Lemans Sport Conv. Modified-350/350 3.23 Posi - Driver/Project |
|
#7
|
||||
|
||||
|
It will be an interesting project. I will update the thread whenever I make some progress!
|
|
#8
|
||||
|
||||
|
Following. Thanks for sharing the project.
__________________
68 GTO Ram Air I Auto, Starlight Black/Teal-Survivor 68 Firebird Ram Air II 4spd, Aegena Blue/Black/Black 68 Firebird 400 Conv. Auto, Red/Parchment/Parchment 69 Firebird Ram Air IV, 4spd Matador Red/Black-Survivor 70 GTO Ram Air III 4spd Conv. burgundy(currently Black)/White/Black 71 GTO 455HO 4spd, Lucerne Blue/Black/Black 71 GTO 455HO Auto, Lucerne Blue/Sandalwood/Blue |
|
#9
|
||||
|
||||
|
Thanks Mesca for tackling this and posting the progress!!
Threads like these are appreciated
__________________
|
|
#10
|
|||
|
|||
|
Nice work, but even I would not do that in the kitchen. LOL
|
|
#11
|
|||
|
|||
|
I'm subscribed. While I am a couple years away from this, I have to agree that the money to have it done right is awfully steep. I always wondered if just removing the old, cracked vinyl and putting a cap on then would work well and eliminate some of the tightness around vents, etc that I have read about.
My biggest concern with this method would be the edges not staying down good and maybe creeping back to form loose areas. |
|
#12
|
|||
|
|||
|
Thanks for sharing. I was planning on a cap over the old vinyl but after seeing this I may strip off all the old before installing the new cap, but not in the kitchen

|
|
#13
|
||||
|
||||
|
I'm fixing the foam today. Replacing missing chunks and patching cracks.
I will post pics later. Doing OK so far! Removing the old vinyl and putting a cap is a good temporary fix, but it just doesnt look as good. |
|
#14
|
||||
|
||||
|
Mesabug.
You cleaned it up BUT posted it on the Internet!!!! That is like doing a criminal act and posting it on YouTube. Not your snartest day. LOL
__________________
JLP |
|
#15
|
||||
|
||||
|
lol.
Let's hope my wife doesnt find out about my secret kitchen activities  Foam repairs completed. I used high density closed-cell foam, similar to what was used. Its barely noticable. I did some square cuts where the foam was missing, glued pieces in place, shaped and sanded. Keep in mind that the foam doesnt need to be pretty. Its just a underlayer for the vinyl. Dont try to make it look good. Doing the vinyl today. 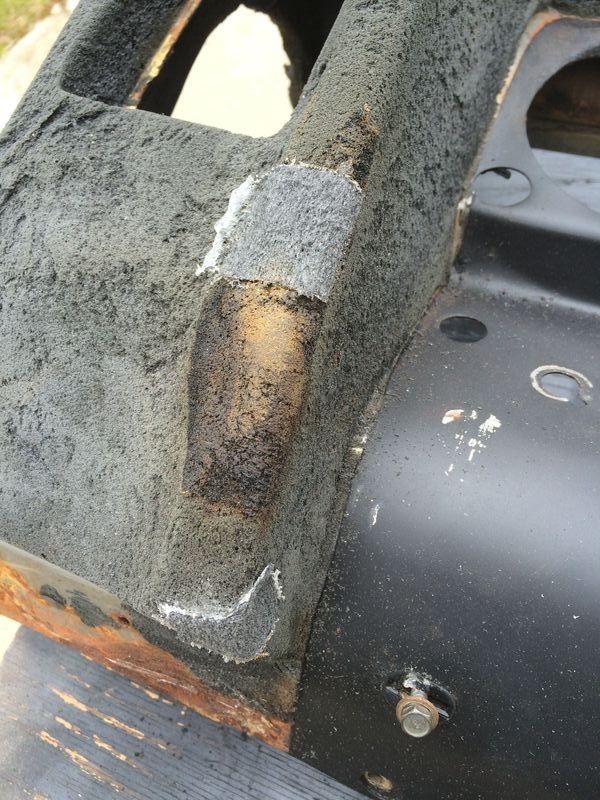 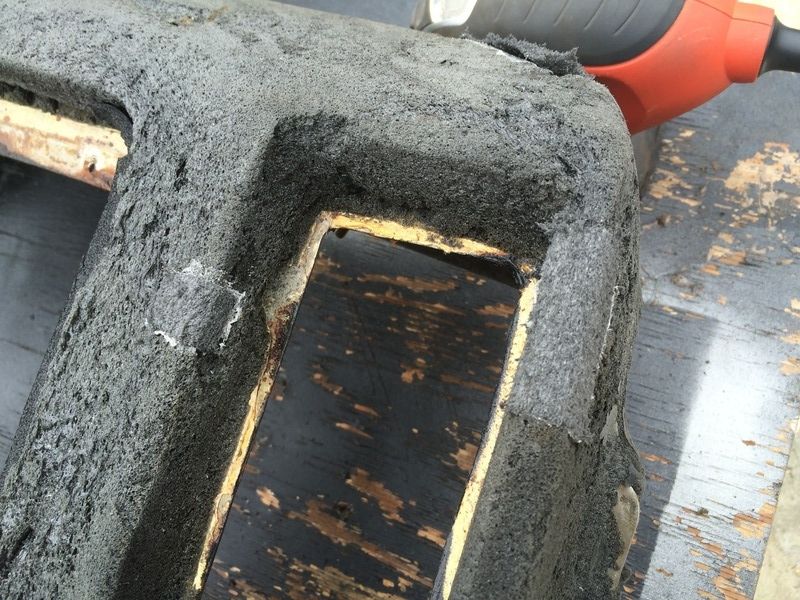 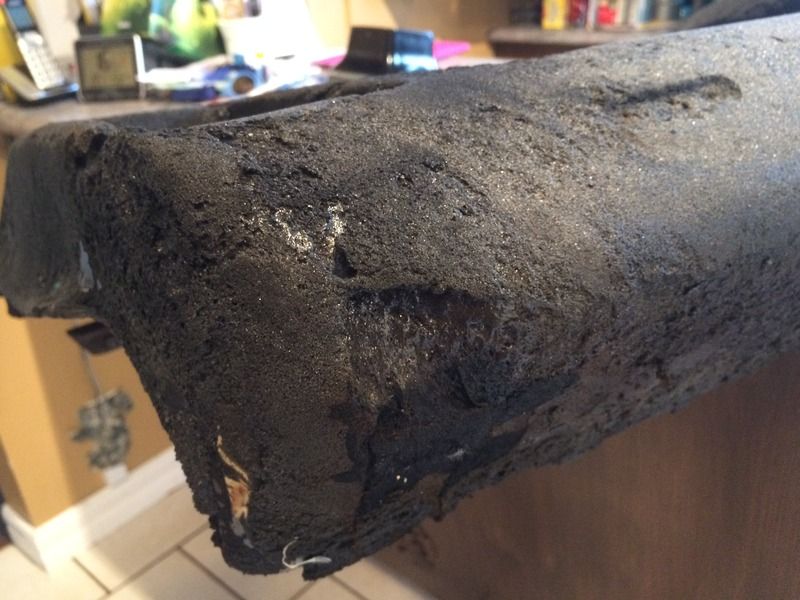 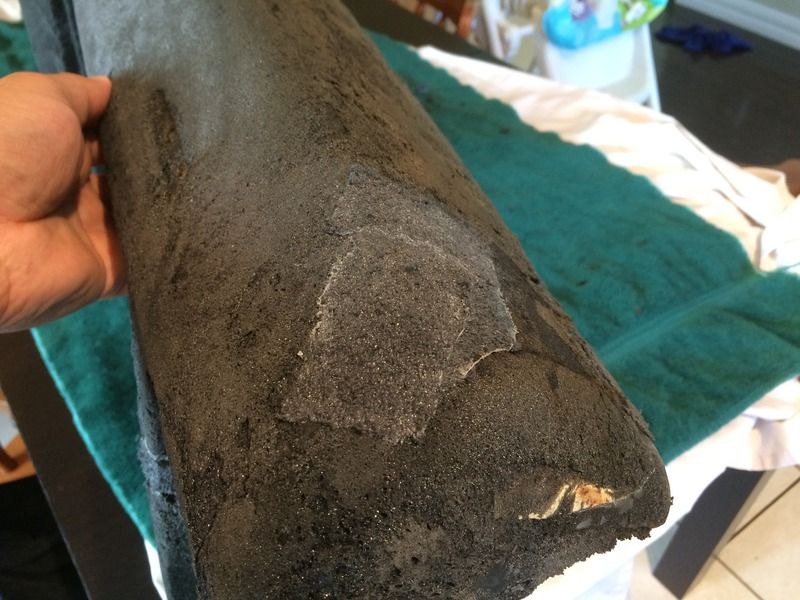
|
|
#16
|
|||
|
|||
|
This is looking to be a fantastic DIY project!
|
|
#17
|
||||
|
||||
|
Agree, rooting for you on this. Thanks for sharing.
I'm interested in how you will get the vinyl to stretch and bond. I covered my console lid, found it to be a challenge and it was simple by comparison - all convex without the compound and small-radius curves found in this dash. Admire your determination on this one, as I am one of those "afraid to do it themselves" and am close to gluing on a cap as a result. |
|
#18
|
||||
|
||||
|
I did a test with a small piece of vinyl. Glad I did because the result was bad..
The bond is very strong between the vinyl and foam. The vinyl shrinks just a little bit when the glue dries. Problem is, all the small imperfections in the foam shows thru the vinyl. Sucks.. I thought the foam didnt need much work, and the vinyl will just lay over it. Nope. Thinking what I will do next. I can sand down the foam until its all flush with no bumps and imperfections. I'll keep you posted! |
|
#19
|
||||
|
||||
|
I did a similar project with the 70-71 firebird padded armrests. I used a white calk called Alex Plus as a filler. I smeared a thin coat on and sanded it smooth to fill all of those little divits. Worked well. My struggles came with the vinyl, getting it to fit the contours right, and with long term adherence. I used contact cement which is the best i could come up with.
__________________
1968 Firebird 400HO convertible 1971 Trans Am 4-speed, white/blue |
| Reply |
|
|