FAQ |
Members List |
Social Groups |
Calendar |
Search |
Today's Posts |
|
Non Pontiac Motors in Pontiacs includes factory 403,305,350 Chevy, Buick V6, Also Pontiac Motors in non-Pontiacs! |
Reply |
|
Thread Tools | Display Modes |
#341
|
||||
|
||||
Quote:
__________________
_____________________________ She woke up sunny side down and I was still thinking I was too proud to flip her over |
#342
|
||||
|
||||
Gosh 10 days and no new pics??
__________________
Skip Fix 1978 Trans Am original owner 10.99 @ 124 pump gas 455 E heads, NO Bird ever! 1981 Black SE Trans Am stockish 6X 400ci, turbo 301 on a stand 1965 GTO 4 barrel 3 speed project 2004 GTO Pulse Red stock motor computer tune 13.43@103.4 1964 Impala SS 409/470ci 600 HP stroker project 1979 Camaro IAII Edelbrock head 500" 695 HP 10.33@132 3595lbs |
#343
|
||||
|
||||
Taking care of a few loose ends.....
.....can really occupy a lot of time, it seems like there are a thousand and one little jobs that still need to be done.
I spent some time making up the necessary brackets to secure the fan shroud to the radiator. Quite a few months back I modified some factory lower saddles for the radiator to rest on and trimmed the fan shroud to fit, but until just lately I haven't worked on finishing up the installation. The fan shroud will serve to hold the radiator in place. At the top of the core support the top radiator tank seams rest against a length of 1/4" rubber fuel hose that was slit lengthwise and slipped over a folded sheetmetal lip. The top radiator clamp (3rd picture below) keeps it held down in the rubber-insulated saddles at the bottom. I made up some mounting brackets from 2 X 2 X 1/8" angle iron to secure the fan shroud to the radiator and fill the gap between the shroud and radiator support, there are two 10-32 tapped holes for each shroud mounting tab. The shroud mounting tabs are made from 1-1/4 X 1-1/4 x 1/8" angle iron, each one is tapped with 1/4-28 threads to hold the shroud in place. The top radiator clamp mounts to the same two factory tapped holes in the radiator support that mounted the stock radiator clamp. I made it from a leftover scrap of .135" thick steel plate that I had previously used to modify the trans crossmember and a piece of 1-1/2 X 1-1/2 x 1/4" aluminum angle. I'll round off a few of the sharp corners before it gets painted and use some nicer looking fasteners when it's all finished up, I used some old Pontiac valve cover bolts that were handy for now. I also fabbed up a starter motor shield, it's made from a piece of 3.00 dia. X .060" wall 304 stainless steel tubing that was slit lengthwise, unrolled and flattened to extend upward from the starter motor. The shield extends up high enough to shield the solenoid, starter soleniod wire and positive battery cable along with the crank sensor wiring and knock sensor wiring. I still need to make a small 'L' bracket coming off the lower 8mm hex head starter motor bolt to clamp the shroud to the bottom front of the starter motor. The outside wall of the shield will be polished on a buffer so it will reflect as much heat as possible, I sure hope my starter lives a long life since it will be a pretty big job to change it out. The upper mounting bracket is made from 1 X 3/16" band iron. It mounts to one of the header bolts and has a 1/4-28 hole tapped in it to secure it to the top of the starter shield, it needed a small notch cut in the side so a 5/8" spark plug socket can sneak by. The .060" thick stainless shield and stout upper mounting bracket shouldn't vibrate and crack easily, some of the thin sheetmetal factory heat shields seem to have cracking issues. Another small detail out of the way is the brake master cylinder pushrod. I cut the looped end off and had a machinist friend of mine single-point some 3/8-24 threads on his lathe. Now it will screw right into the factory brake pushrod clevis. Thanks for looking. |
#344
|
||||
|
||||
Looks great. I can't wait to see how you like the brakes!
Andrew
__________________
IG: projectgattago Please get in touch for Holley EFI tuning services. "You were the gun, your voice was the trigger, your bravery was the barrel, your eyes were the bullets." |
#345
|
||||
|
||||
You sure do some pretty fabrication! Mine all ends up butt ugly!
__________________
Skip Fix 1978 Trans Am original owner 10.99 @ 124 pump gas 455 E heads, NO Bird ever! 1981 Black SE Trans Am stockish 6X 400ci, turbo 301 on a stand 1965 GTO 4 barrel 3 speed project 2004 GTO Pulse Red stock motor computer tune 13.43@103.4 1964 Impala SS 409/470ci 600 HP stroker project 1979 Camaro IAII Edelbrock head 500" 695 HP 10.33@132 3595lbs |
#346
|
||||
|
||||
Bart- can 3/8" line be used for any trans cooler lines..ie t400?
John |
#347
|
||||
|
||||
Quote:
The 2-speed Super-Turbine 300 that came in the '64 GTO and the 326 V8 Lemans and Tempest used 3/8" line from the factory. The 3/8" inverted flare cooling line fittings from the 2-speed can be used on the TH400, I did this on my '64 GTO here in this thread: http://forums.maxperformanceinc.com/...6&postcount=27 |
#348
|
||||
|
||||
Quote:
I read the link,, I see it now. |
#349
|
||||
|
||||
B-man, what's goin' on? Too busy driving it to post?
|
#350
|
||||
|
||||
Not a lot going on lately, my hours at work have been increased so I have less free time and energy to get things done.
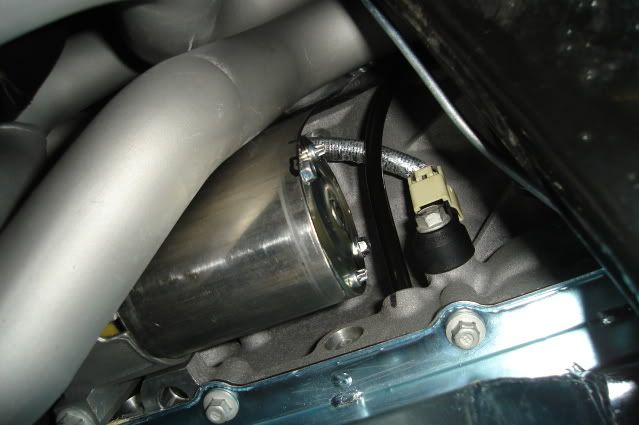
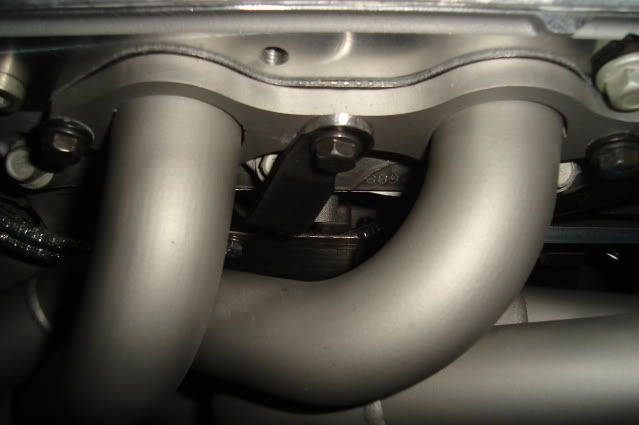
I did spend some time fitting up some universal Lokar column shift linkage made for GM auto transmissions, I want to keep the original 2-speed auto column shifter that came in the Tempest. The factory shift linkage that is supported by a pivot bracket on the frame and the trans selector shaft won't work, the selector shaft on the 4L70E is located about 1-1/4" further back on the trans compared the the TH400 and original ST300 2-speed. The Lokar kit cost me about $50 and was well-worth it. Back when I first installed a TH400 in the car to replace the original Super-Turbine 300 2-speed I did a few mods to the steering column so the shift linkage would travel far enough to grab low gear on the 3-speed TH400. I took the steering column apart and filed a slot in the outer column at the bottom and in one of the inner pieces near the top to allow the extra shift lever travel I needed. I also modified the shifter detent that bolts to the bottom of the column by fabricating and welding on an extension that gives the lower lever another step in the detent. 
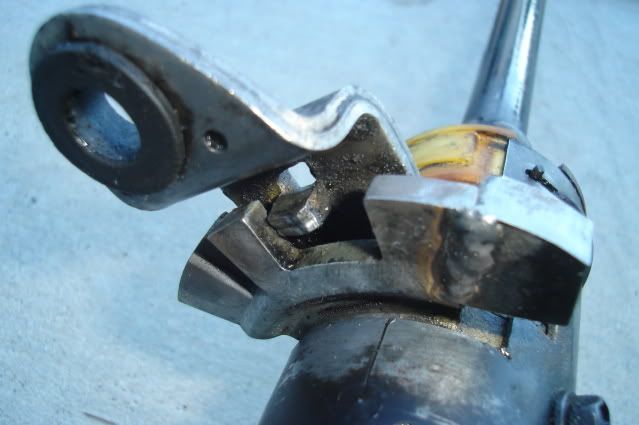
Welding the fabricated mild steel step to the cast factory shifter detent seemed to go okay. I just used a little 308 stainless rod with a TIG welder and they joined together just fine. The weld did spit and pop a little during the process but it's lasted for over 30K miles so far and shows no signs of cracking. 
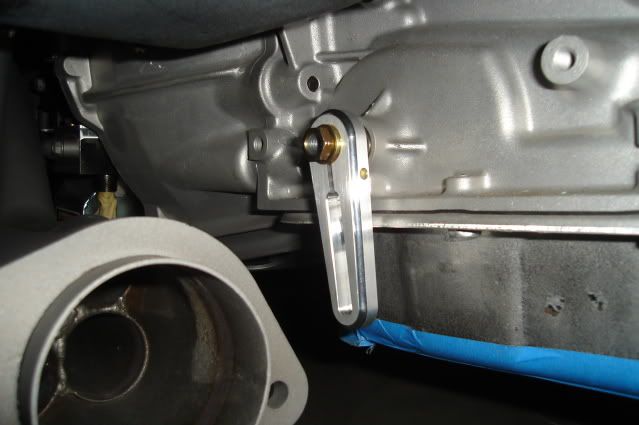
The Lokar kit comes with a nice billet aluminum lever that slips over a splined bushing that bolts onto the shift selctor shaft. The splines fit together very tightly and the lever gets locked in place with a clamp bolt, very high-quality fit and finish on these parts. The lever is slotted so you can adjust the amount of selector shaft travel. I used the position that's located the farthest out to limit the length of lever travel, I only want to select Overdrive, 3rd and 2nd. I see no need to be able to grab low gear. The trans will kick down if I need low gear while accelerating and the trans will start off in low by itself if the selector is in 3rd or Overdrive. 
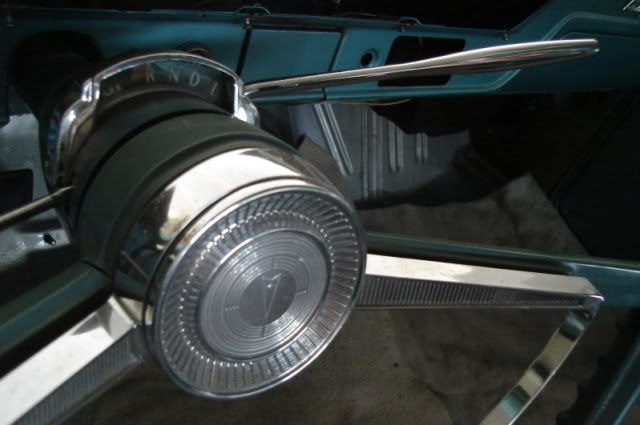
The factory 2-speed shift indicator pointer will be in the correct position for Park, Reverse and Neutral and will be in the Drive position for running in Overdrive. For 3rd gear it will be directly between the Drive and Low positions on the shift indicator, to engage 2nd I will have to pull the lever back and utilize the added shift detent that was welded on. 
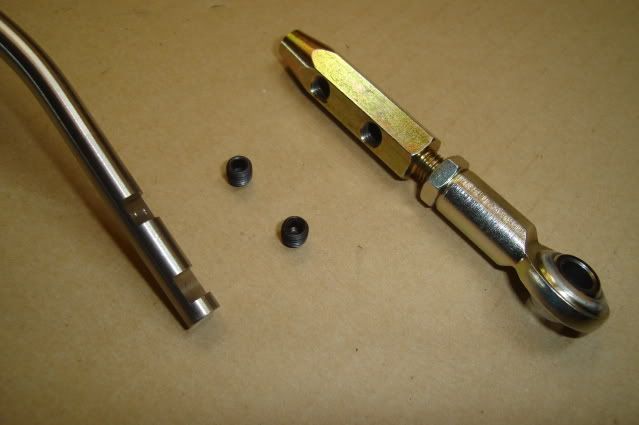
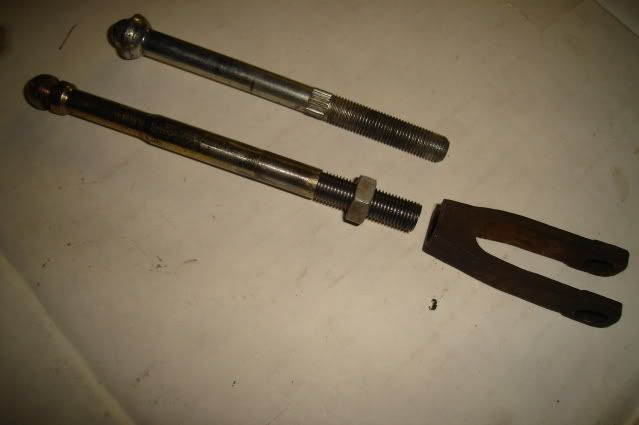
The Lokar kit comes with a 21"-long piece of 5/16" stainless rod that you bend and cut to length for your particular application. It comes threaded 5/16-24 on one end for a heim joint, the other end gets cut off and a piece that screws into the other heim joint slips over the rod and gets secured with a pair of 1/4-28 set screws. The 5/16" rod is very hard to bend cold, you need to clamp it in a large bench vise (using aluminum soft jaws) and push or pull it using all of your weight to bend it. I have my 6" vise bolted to the corner of a 48" X 36" X 1/2" thick steel welding table and I was able to lift the corner of it off the ground while bending the rod, so it's definitely plenty stiff and won't give any while shifting gears. Getting the rod bent in the correct configuration takes a lot of time, constantly checking and bending it and later on trimming it until it's not hitting the firewall, engine or trans in all of the different positions of travel. I must have bolted this thing on and taken it back off 20 or 30 times before it was right. 
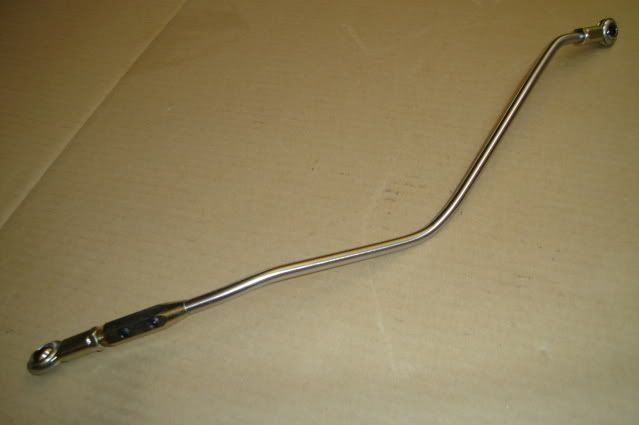
The kit instructions tell you to file a couple of flats after marking their locations. I had a friend mill the flats perfectly level in relation to one another and properly located center to center so the 2 set screws (with blue Loctite) would be best able to positively secure the heim joint. A lot of effort for a column shifter that almost nobody else would want on a car like this. That's all for now, thanks for looking. Merry Christmas! |
#351
|
||||
|
||||
Just saw your thread for the first time today. I have a 67 GTO with the body off and am toying with the idea of a LS motor instead of the 455 block I have planned. I also have a brand new chevy stroker to toy with before the final motor decision or that I can just sell for the money to fund another direction. I am going to save and read the full thread later, just wondering how it is going now. And by the way, if I pulled up next to your car and saw those dog dish tires, I would not think it was a grandma car. That car says all business, bring it on.
Thanks, Bill |
#352
|
||||
|
||||
Quote:
Right now I'm taking a breather on the Tempest project. I need to tighten up the front end parts and get the brakes working, then blow it apart (remove engine, trans, A/C unit) so I can insulate the floors and firewall and trailer it to an upholstery shop to get a headliner installed. Also need to get the new windshield and old back glass installed, then the next big hurdle will be getting all the wiring taken care of (fan relays, A/C unit, gauges, etc.) after the dash bezel gets painted. Turned out to be a lot more involved than just an LS3 swap. Hoping to finish it up this year, I'm anxious to start running around in it with some of the local Pro-Touring folks. Might even take it on the Power Tour. Bart |
#353
|
||||
|
||||
Maybe Im crazy, but I think it would be cool to paint the LS3 Pontiac Metallic Blue!
__________________
|
#354
|
||||
|
||||
Come on B-Man we need some updates.
|
#355
|
||||
|
||||
Nothing new going on with my project.
Too many other things going on right now, I can't spend any of my time working on the Tempest for a while. |
#356
|
||||
|
||||
hey Bart, let's get crackin on this Tempest :P It's too cool to let sit for this long! You're in the home stretch!
__________________
Mark |
#357
|
||||
|
||||
Any updates?
__________________
"What ain't no country I ever heard of. They speak English in What?" - Jules Winnfield ------------------------------ 2015 Jaguar F-Type 340hp Convertible, Polaris White/Ebony Interior 1964 Pontiac GTO, Tri-Power, 4 Speed, Grenadier Red/Black Interior 1965 Chrysler 300 Convertible, 383/727TF, Factory Air, Spanish Red/Red Interior/White Top |
#358
|
|||
|
|||
Wow this is an old thread. I forgot about it. Anything new Bart?
|
#359
|
||||
|
||||
x3. Always enjoy seeing updates to this thread.
__________________
Tod Hoffmann 1966 GTO Montero Red Hardtop - Holley EFI'd 462, KRE DPorts/Muncie 4spd 1990 Chevy 454SS pickup - Accel DFI/T56 6spd - Hot Rod Power Tour Long Hauler 1996 Chevy K2500 ECSB 'Poopy' 2002 Honda VTX1800C 2016 Cadillac CTS Premium My project thread: http://forums.maxperformanceinc.com/...d.php?t=516826 |
#360
|
||||
|
||||
Family comes first......
.....of course in our lives, and within the last couple of years mine has undergone some major changes.
My wife of over 30 years passed away from cancer earlier this year. She bravely fought this dreaded disease for nearly a year before she finally succumbed, now she is at peace. I would gladly push all of my cars off of a cliff if that might bring her back to me. Soon I will be getting married to a fine woman, I have been fortunate enough to have found her because of the wonders of the world-wide web. After we are married and settled I will jump back in on the Tempest, but my time will be spent sparingly out in the garage, the car hobby is not important to me in the grand scheme of things now. Thanks, Bart |
Reply |
|
|