


| FAQ |
| Members List |
| Social Groups |
| Calendar |
| Search |
| Today's Posts |
|
#21
 04-24-2013, 08:05 PM
|
|||
|
|||
|
So here is what has been vexing me.
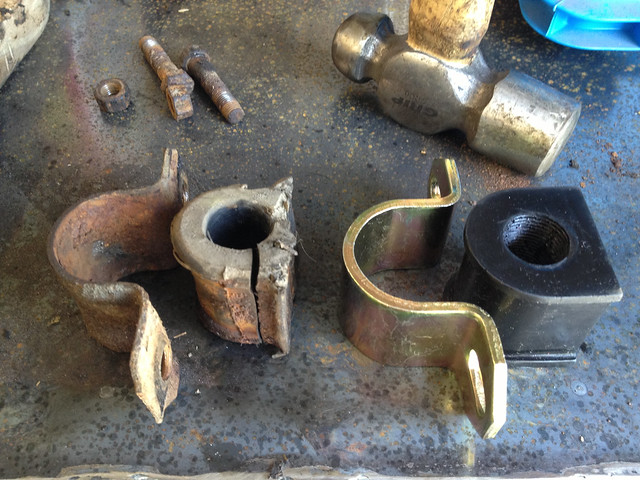
 Five little bits. One spring, 2 seal boots, and 2 dust boots. You put on one pair of nitrile gloves, and start lubing everything with a coat of brake fluid. I pushed the first seal in, followed by the cleaned up piston, and gently pushed on the dust boot. Then I hit it with a hammer, then I used a piece of 2x4 to push with all my weight. The dust boot is a tad stubborn. Then came the tricky part. The spring went in. With slippery hands you have to press the seal in, hold it, get the piston in, hold it, seat the boot, hold it, and start pressing the edges in. After it holds a bit, you have to quickly get it seated with some weight so the spring doesn't shoot everything across the garage. Ask me how I know. 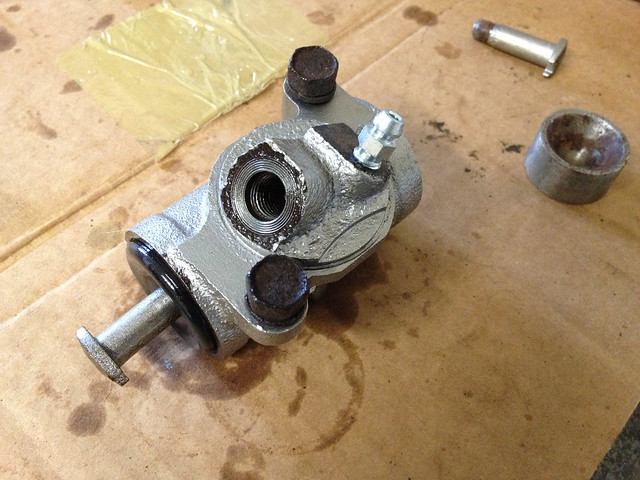 One side 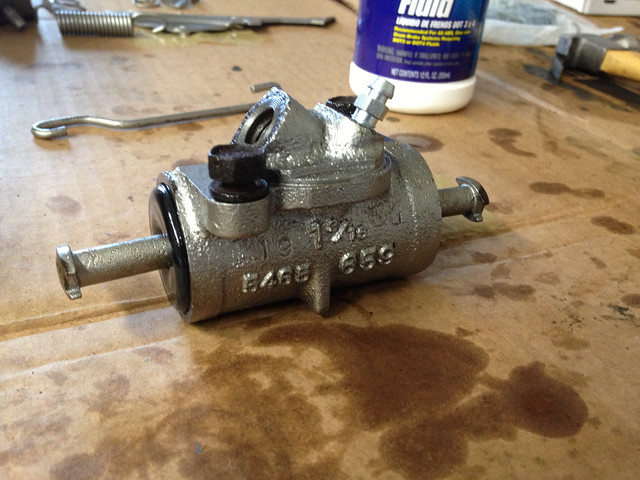 Both sides! WOOT! 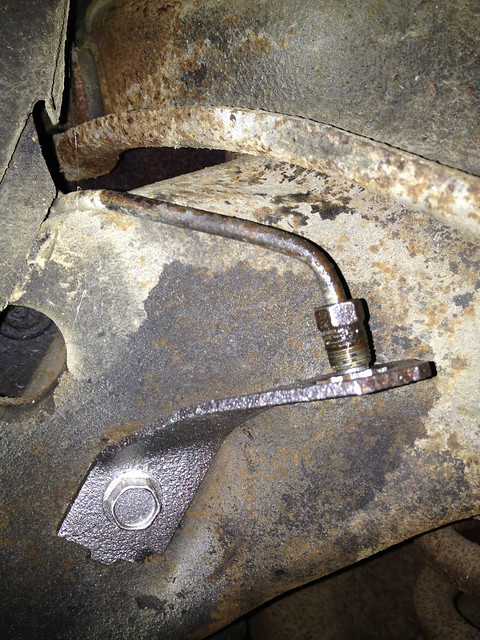 I re installed the brake hose bracket 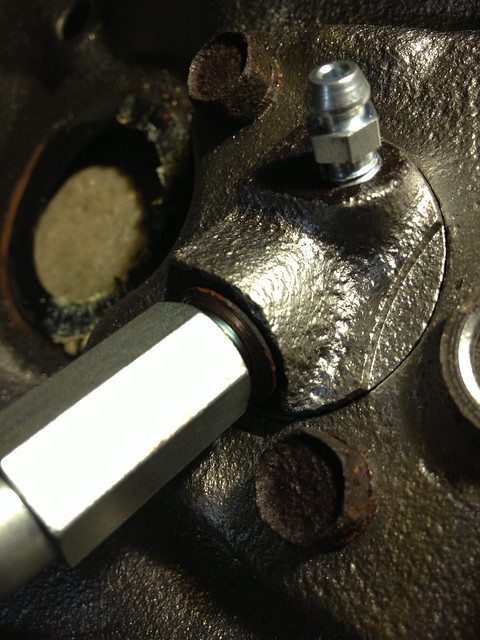 Seated the wheel cylinder and attached the brake hose. You need to make sure the copper washer is installed.  Shield and cylinder re installed. Added some anti sieze to the 6 rub points where the shoes will sit. Added some to the adjustment screw, on the screws and the nub where it will rub. 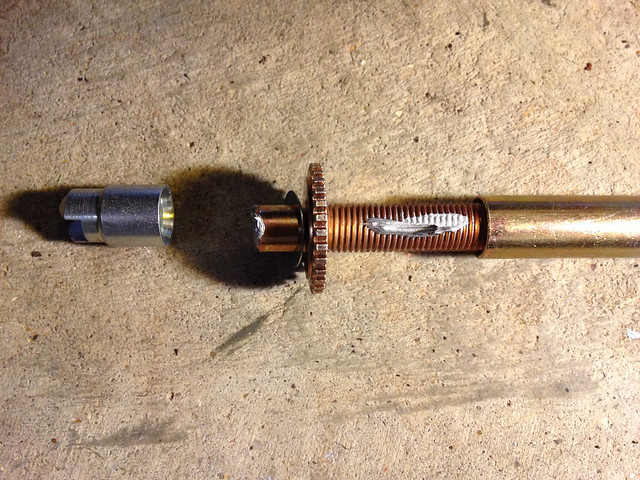 I started with the spring at the bottom and the screw, which holds it in place long enough to start swearing. 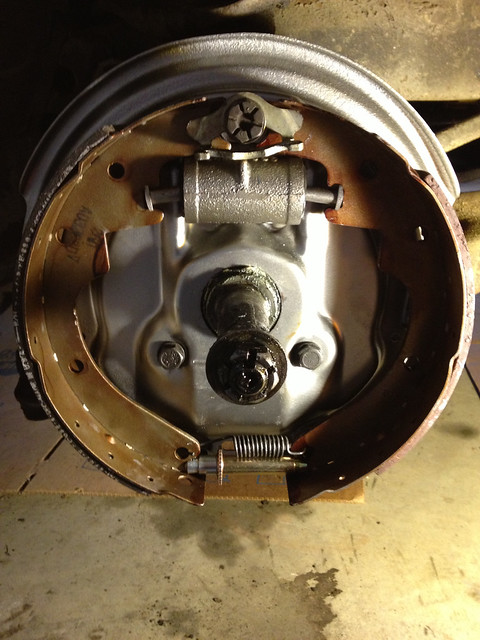 There are pins at 4 and 8 o'clock that go into a spring and then a slotted cap. They need to be compressed and the pin rotated 90 degrees. 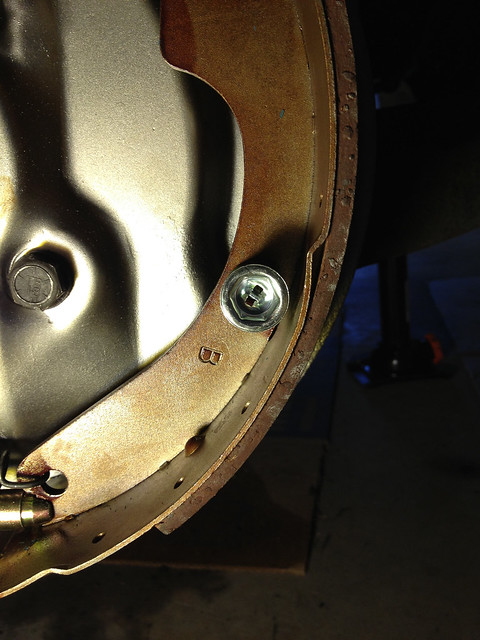 Simple, right? yeah. The secret is to use a box wrench to compress the spring and cap, then use a needle nose pliers to grasp the pin and rotate it. Let's leave it at a simple sounding solution, rather then a screaming obscenities one. All that is left is to re assemble in the reverse order, using the drum brake tool to get the springs over their respective perches. Before 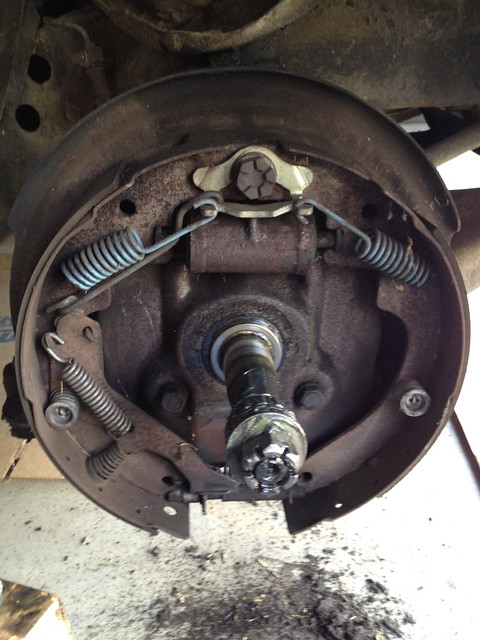 After 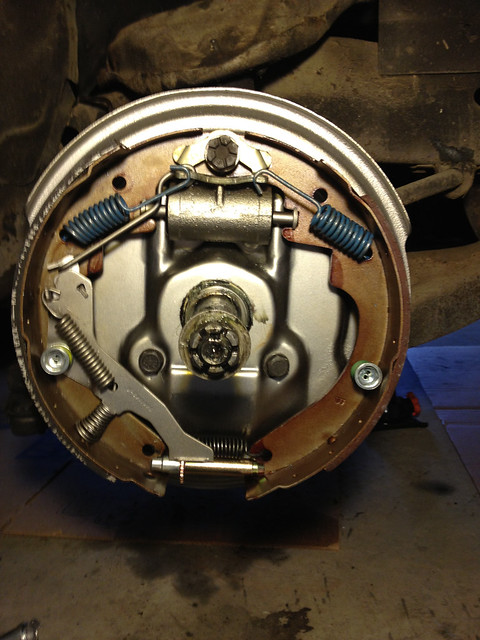 I'm not even going to lie about the victory dance and the repeated shouting of; "Suck it, drum brakes!" It was a good day, with a good dinner and my wife admitting the brakes looked good. Although she noted a few scratches and wondered aloud if her side would look even better, lol. Yeah, we'll see.
__________________
Slumbering Death|Dachshund of War|TerrierX|1967 Pontiac Catalina|360# Anvil|2 Burner Gas Forge
|
|
#22
04-25-2013, 01:15 PM
|
||||
|
||||
|
Just saw your thread while searching for info on converting my front drums to disc. I have a 68 Ventura, 400ci, 2bbl. It does have the THM400 and I believe Keith is correct on everything he posted. I converted mine to dual exhaust but kept the 2bbl setup. Performance is fine unless you really want to push it.
I also converted the 14" wheels to 15". I really like the difference, not so much wallowing but I have one issue and that's radial tires on these original wheels. Crappy. I'd like to get some bias ply tires but money's short. Of course the other option is to by new rims designed for radial use. They can be had even in the Rally II design but I like my old rims. At any rate, nice car and I love your build photos. 
|
|
#23
04-25-2013, 01:40 PM
|
||||
|
||||
|
Great looking car and a good story behind it.
__________________
Jason  1968 lemans :In progress!  1970 Bonneville 455 HO convertible (survivor)sold 1969 firebird |
|
#24
05-01-2013, 06:58 PM
|
||||
|
||||
|
Nice Bonny Jason.
|
|
#25
05-01-2013, 07:51 PM
|
||||
|
||||
|
Quote:
__________________
Jason 1968 lemans :In progress! 1970 Bonneville 455 HO convertible (survivor)sold 1969 firebird |
|
#26
05-01-2013, 08:05 PM
|
||||
|
||||
|
Thanks, me too. Next week I'm converting the front drums to disk and then I'm done, I hope.
|
|
#27
05-01-2013, 10:26 PM
|
|||
|
|||
|
Just out of curiosity, what is the problem with radials on the Rally IIs? People do it all the time with no real probelms that I'm aware of.
|
|
#28
05-01-2013, 11:28 PM
|
||||
|
||||
|
Just seem a little wobbly for lack of a better word. I spoke to an engineer from Les Schwab and he tells me that their studies show that older solid steel wheels and radials don't allow the proper flex.
|
|
#29
05-05-2013, 01:42 PM
|
|||
|
|||
|
Keith and I disagree on one point. Put a rear sway bar on the old girl and you'll never look back. I'd also add an inch of ride height to the R/H springs that you have in the front and 2 in the rear if you want a bit of a rake. that will allow air to escape from under the car reducing drag and also drop the ride height to level when the trunk is loaded. I use Coil Spring Specialties for the springs. Reasonable prices and they're right when they come. Grease the **** outta the poly bushings and they'll be fine. I run them on almost all of my builds and have never had a squeaking issue. I use about twice the amount what is included in the kit. The Quadrajet should get better fuel economy than the 2 barrel carb and will feed the engine better at WOT in the upper RPM range. Rare HO manifolds are pricey but will help it breath and fit better than tube headers. resonators will quiet the exhaust down even with race mufflers and won't restrict flow.
That's a great looking car. Enjoy it. Mike
__________________
so many pontiacs, so little time.................. moderator is a glorified word for an unappreciated prick.................. "Only two things are infinite, the universe and human stupidity, and I'm not sure about the former." --Albert Einstein "There is no such thing as a good tax." "We contend that for a nation to tax itself into prosperity is like a man standing in a bucket and trying to lift himself up by the handle." - Winston Churchill |
|
#30
05-09-2013, 08:19 PM
|
||||
|
||||
|
Put a rear sway bar on the old girl and you'll never look back. Interesting idea, thanks.
|
|
#31
06-12-2013, 10:21 AM
|
|||
|
|||
|
Sorry it's been a while, but I have a lot to update.
First, since she was up on jack stands and the brakes off, I got a much better idea of the mess she was in. To give you an idea of the bushing issue/general crud problem.   This is the driver's side upper ball joint. You can see how they tried to keep it going with grease, dirt, and what appears to be grass clippings. Based on this, I have applied for a Hybrid Tax refund. I used the word 'patriot' in the application, so the IRS should take about 24 months to reject it. lol. 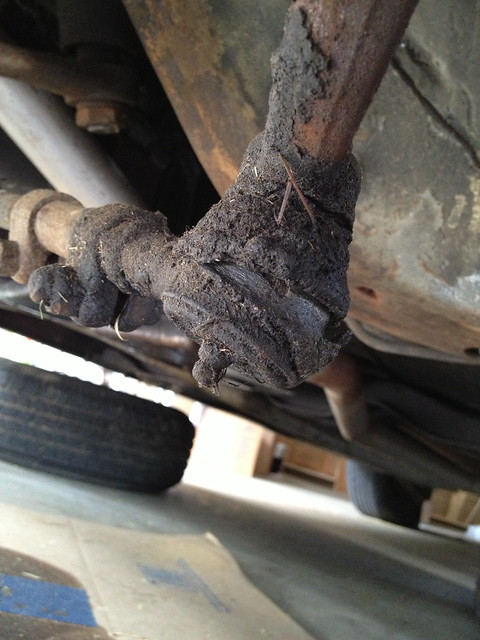 The tie rod. 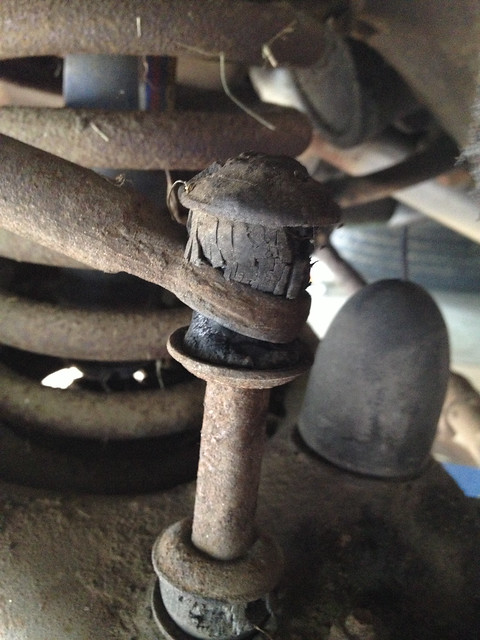  Sway bar bushings. So that will all be torn out, and the bits cleaned and painted with chassis protectant. Then I will need to have the ball joints and control arm bushings pressed in at a shop since I don't have a press. yet. lol. That ended up changing. I did set up the drill press to use the wire brush with, and that works a far sight better then the cordless drill.
__________________
Slumbering Death|Dachshund of War|TerrierX|1967 Pontiac Catalina|360# Anvil|2 Burner Gas Forge
Last edited by Bliss_Street; 06-12-2013 at 10:50 AM. |
|
#32
06-12-2013, 10:22 AM
|
|||
|
|||
|
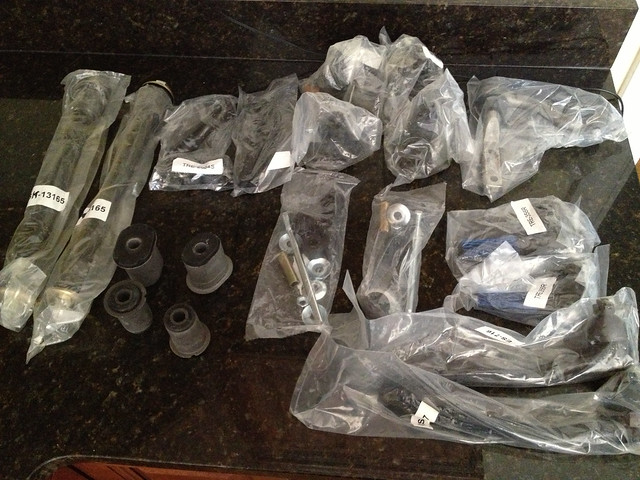
I did order a front end kit from PST. It arrived in 2 days, sweet!
 Now I just need to get a wall painted done, the office sorted done, pictures framed and hung done, cook appetizers for 40 people easy, doneand survive a social function with out putting my foot in my mouth I blame the beer for showing off Gabby, but done. That will get me to Monday and a day alone out in the garage. Unless we take the Sunday and hang out together all day under a car. Sexier things have happened. Edit: On a side note, I was using the wire brush on something random to get a look at the substrate and got a piece of metal stuck into my cornea. Not a big deal, it didn't penetrate the cell covering; just got lodged in it. But it did require a trip to urgent care and some uncomfortable eyeball touching. Remember kids, safety first.
__________________
Slumbering Death|Dachshund of War|TerrierX|1967 Pontiac Catalina|360# Anvil|2 Burner Gas Forge
Last edited by Bliss_Street; 06-12-2013 at 10:51 AM. |
|
#33
06-12-2013, 10:25 AM
|
|||
|
|||
|
Ok, it was a busy day. I had to re organize the house after the house warming party. Then I had to take the Dachshund of War to the vet; she fractured her rear toes whilst fetching a tennis ball.
But I did get the sway bar removed. 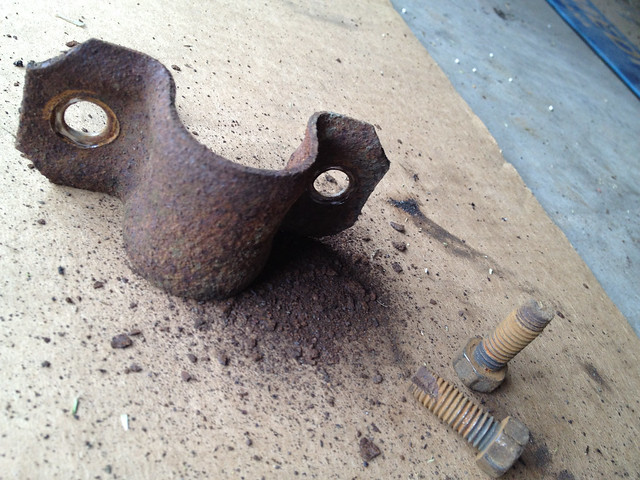 That little pile of rust dust? that was between the bracket and the bushing, lovingly grinding away. 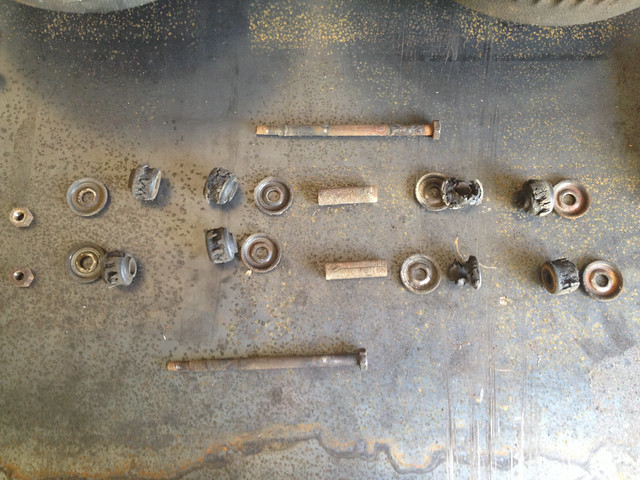 These are the posts that connect the sway bar to the lower control arms. you can see the bushings on the right there, completely worn away. I mean, all of them look crap, but where the bar ends sat, it's just gone. A new complete set is sitting in plastic, waiting. 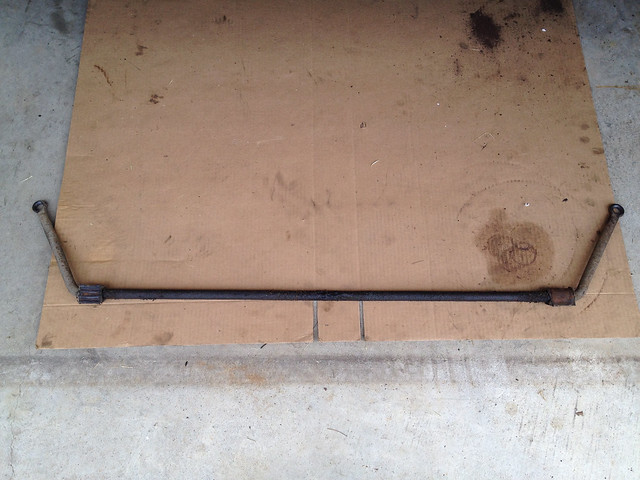 The sway bar. Here you can see the built up oil caked on in the middle. That's from one of the many oil pan/main seal leaks. I have wiped most of it off and it's sitting in degreaser over night. Tomorrow morning the truck has to go in for service, but after that I'll pick up a ball joint/tie rod/pitman arm service kit to start breaking down the front end joints. On a side note, I thought the ball joints were pressed in/riveted. After removing the grease and grime, there seems to be 3 bolts holding the ball joints to the control arms. We'll find out more after the truck service.
__________________
Slumbering Death|Dachshund of War|TerrierX|1967 Pontiac Catalina|360# Anvil|2 Burner Gas Forge
|
|
#34
06-12-2013, 10:26 AM
|
|||
|
|||
 The FedEx guy just dropped off my new sway bar bushings. And I got the tie rod ends off. I am however waiting for the ball joint, tie rod and pitman arm pulling set to arrive as well as my new shiny torque wrench. They should be here Thursday, so hopefully by that evening I'll have the steering linkages all apart and the control arms off. Then it's a a weekend of cleaning parts, getting them painted and finding a grease gun.
__________________
Slumbering Death|Dachshund of War|TerrierX|1967 Pontiac Catalina|360# Anvil|2 Burner Gas Forge
|
|
#35
06-12-2013, 10:27 AM
|
|||
|
|||
|
A little off topic, but it will swing around to the car in a second.
Back when we were living in Atlanta, my wife's then boss set me up with some deer antlers. In exchange I offered to make him a nice kitchen knife. 2 weeks later, they announced her promotion and move to this position and things got hectic. 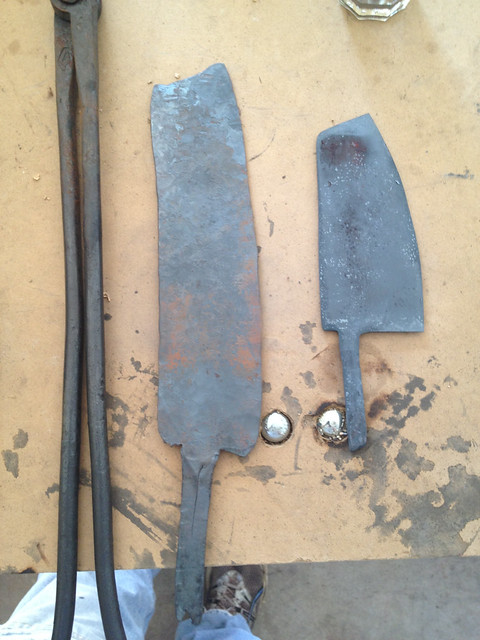 But before we left I had a chance to forge out the knife, on the right. 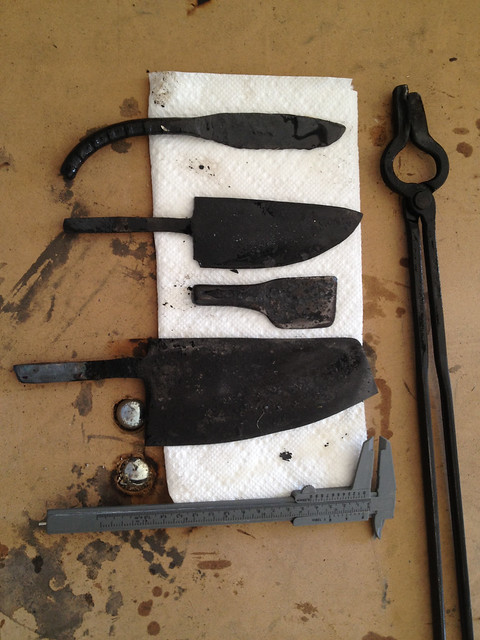 And get it hardened. On the bottom, right out of the quench. Mike's a great guy and was an awesome boss. He set my wife up with a CTS-V coupe as her assigned car for a going away. So he's having a dealer function in Nashville tomorrow and she has to attend since it covers some of 2012. Last night she comes home and asks if I could finish the knife so she can give to him, very very late. The woman wants a knife, she gets a knife. I have encouraged this, time to man up. 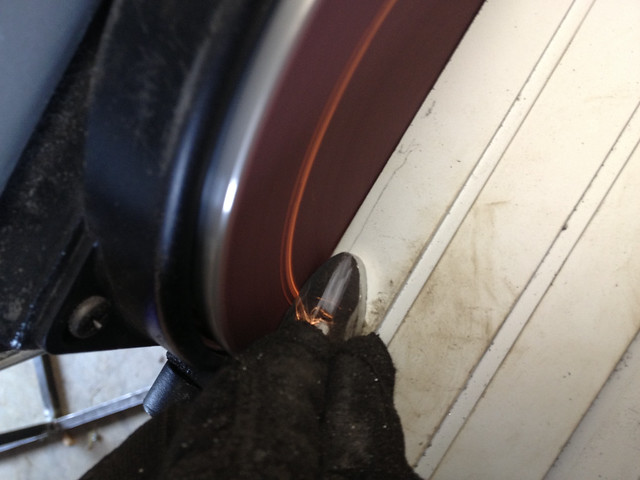 Since he'll be cooking with it, I wanted to use a steel bolster instead of a brass one. So I ground it rough.  Bored out and filed the tang slot.  Checked fit, filed, checked, filed....... 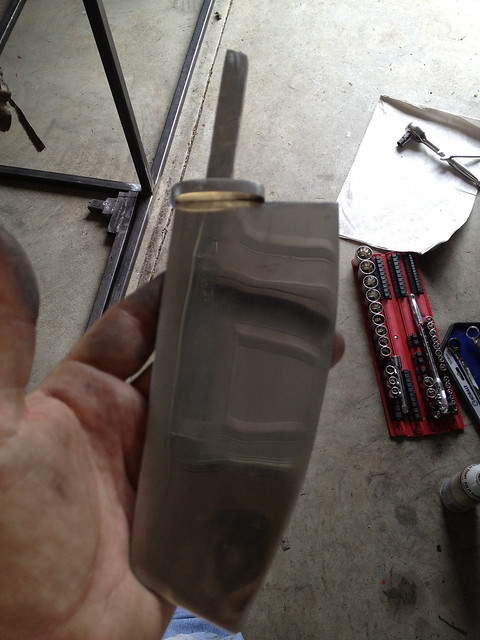 Once the bolster fit, I finished it by hand to 1200 grit. Wrapped the blade in tape. Made up a layered spacer, and rough fit the handle. 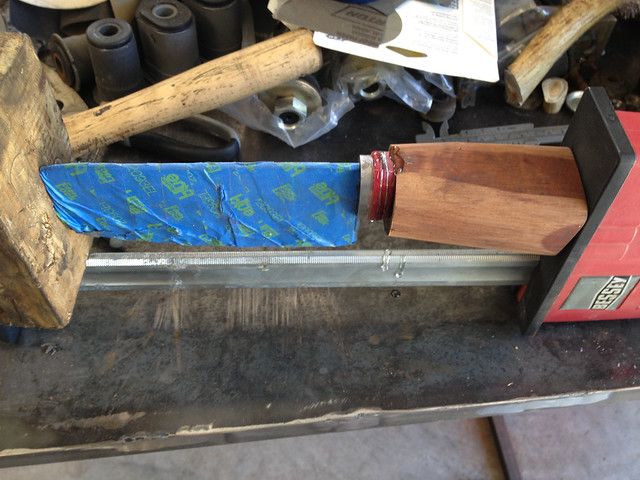 And then epoxied the it all together and clamped it. Now I'm just waiting for it to cure. After which it will be roughed out more, finish sanded and made to look pretty. Sounds easy, but I have been at it for about 12 hours now. Car stuff? Oh yeah.  My front end service kit got here around an hour ago. 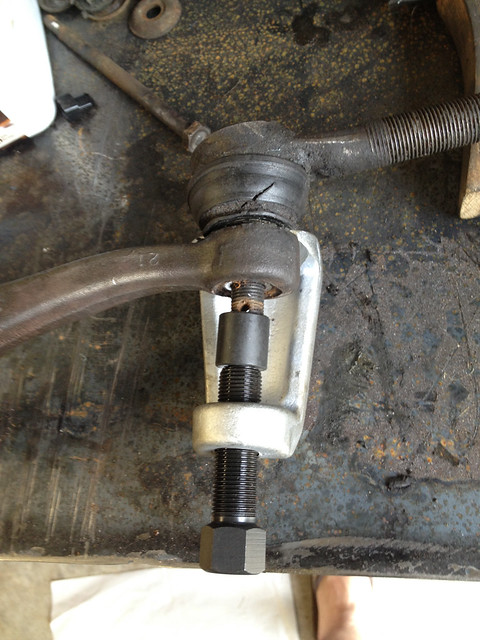 Of course I had to try it out. 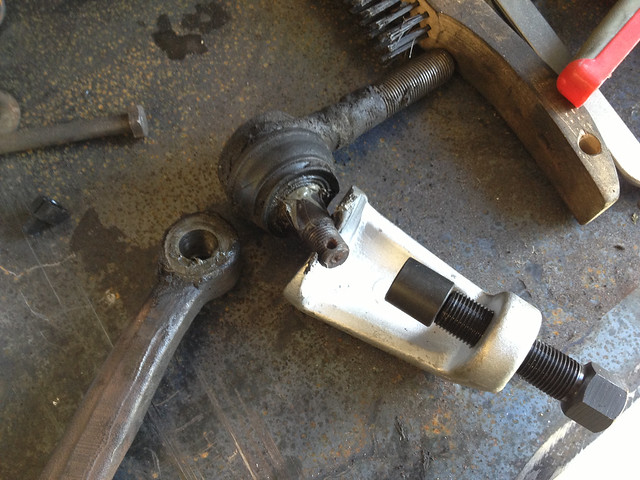 POP! It turns out that my wife actually thinks that pickle forks are cool and wants one even after we have this kit. I think she just likes having a tool called a pickle fork. But, the woman wants one, she gets one. Never shirk a chance to buy more tools. So tomorrow I should have the impromptu knife stuff cleaned up and will spend the entire day removing the rest of the front end.
__________________
Slumbering Death|Dachshund of War|TerrierX|1967 Pontiac Catalina|360# Anvil|2 Burner Gas Forge
|
|
#36
06-12-2013, 10:30 AM
|
|||
|
|||
|
First, let me just come right out and say it. Coil springs suck.
There. The day was less productive then I would have liked. I did finish the knife. 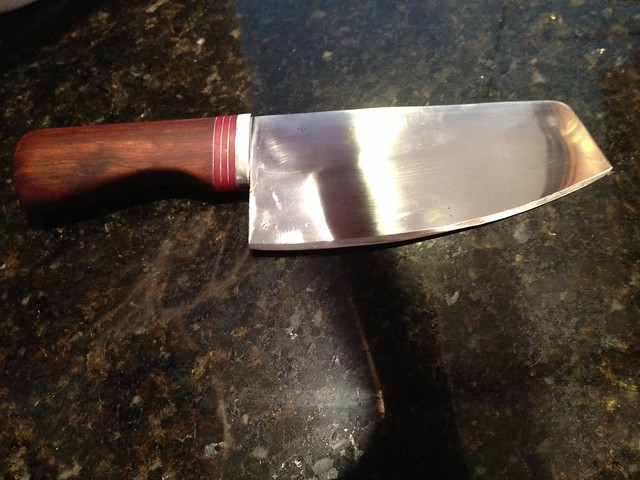 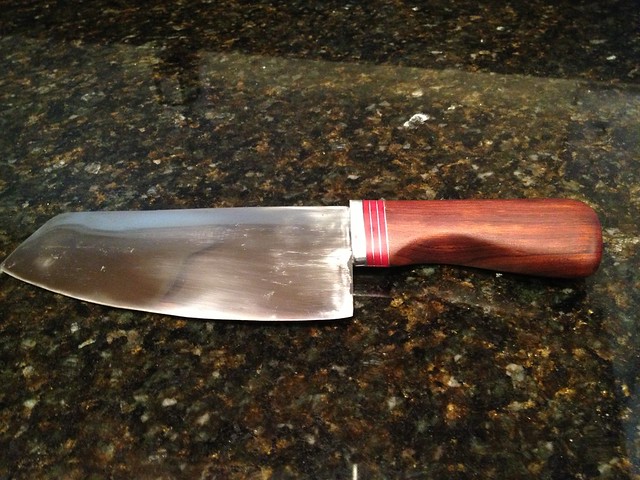 Right hand ground, steel bolster, steel and red plastic spacers, Mopane wood handle. Olive oil finish in keeping with a kitchen knife. My wife is happy, I'm a little irritated about a few scratches I couldn't polish out. Overall, I'm winning. Then, after a quick clean up, I get to the old girl. Jack up the control arm, pop the first ball joint, don't kill myself. Awesome. Start to lower the control arm, to release the spring.....control arm hits the ground. The car is too low. So I jack the car up 2 notches in the jack stands. now the control arm is free, but the spring isn't budging. Like going no where and bent at a very nervous angle. I jack the control arm back up, and head over to the parts store. Now, I'm a nice tool sort of guy. I'm really not that keen on buying cheap tools, experience has taught me it's just a way to spend more money. The parts store has a $34 spring compressor. It's cheap, I'm not happy but I need it now. I check out, and pay. THEN I notice that I can borrow one for $40 and it's a high test unit (and by borrow, I mean I get my $40 back when I return it). You don't think the dude would have mentioned it? He says; "You want me to do a refund?" No, you moron, I want to buy a cheap chinese tool that might kill me when I could borrow a good one for free. OF COURSE I WANT A REFUND! :duh: So no more coffee for me, but I did get the compressor. Which took me 2 hours to figure out. Not because I'm stupid, but because when something stores that much energy, I take my time. Sorry no pictures, I'll take them in the morning on the driver's side. With the spring gone and safely decompressed, I took out the lower control arm bolts. Which were torqued to a millon lbs/ft. and rusted. yay. those will be replaced with grade 8 ones when it goes back in. The LCA had to be massaged out, the rubber was fused to the frame. Then it was just a 'pop' with the new ball joint press and 30 seconds to remove the rubber bumper. Done. 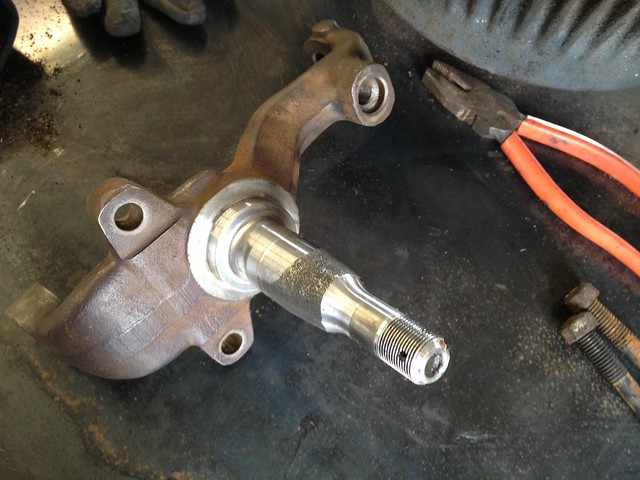 Spindle and knuckle cleaned up and degreased a bit.  LCA 1/2 cleaned up. The ball joint is, in fact, held in by 3 bolts. Now for the bad news. If it's even bad news. 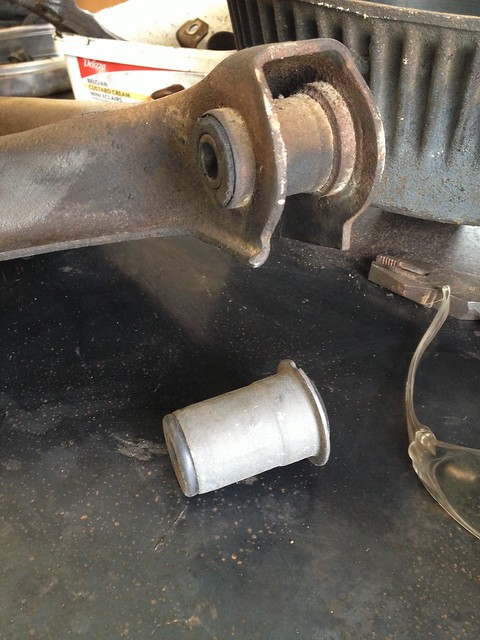 The LCA bushings are not going to be in my ability to do here at home. The bushing actually is pressed into 2 different sides of the arm, wich have nothing to support them in between. The bushing outer shell actually is what connects them, and leaves open the possibility of crushing the to sides while trying to press in the bushing. Now, part of me wants to solve this by making a spacer and trying to old threaded rod and washer technique. Part of me doesn't want to risk the arms. I need to mind meld with the wife over a hot bath and cocktails. I'll get back to y'all.  In closing, there is a big empty wheel well with nothing but an upper control arm, a ball joint, and an inner tie rod left. Still work left to do. Now, I have some laundry to do and 4 black and tans to drink. 
__________________
Slumbering Death|Dachshund of War|TerrierX|1967 Pontiac Catalina|360# Anvil|2 Burner Gas Forge
|
|
#37
06-12-2013, 10:37 AM
|
|||
|
|||
|
I drove out to Kansas to pick up my niece and nephew, under tornado watch the whole time. Luckily, her ATS4 is the sort of car that eats up miles. The are staying with us for a week as we are the cool, weird aunt and uncle who travel the world. Some one has to make sure they grow up with some culture and science. But it's a slow rainy morning and everyone is reading, so I'll bang out this update.
There will be a little bit of back tracking, since I got the images off my phone and uploaded. 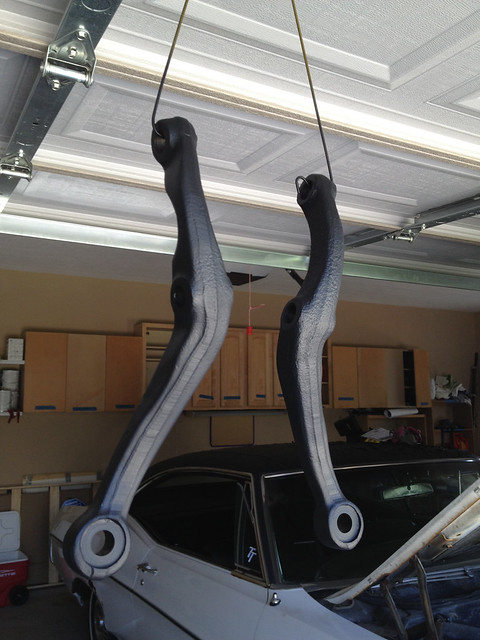 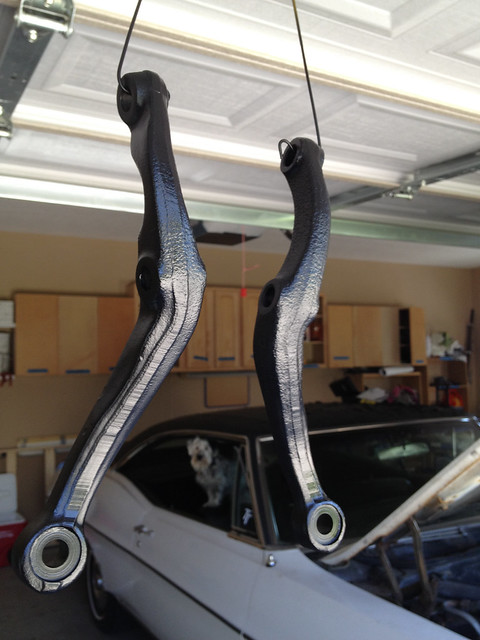 These are the bits that connect the steering knuckle to the tie rods. I primed them with a rust encapsulator and then with a chassis paint. Left is primed, right is finished. Turned out great!. 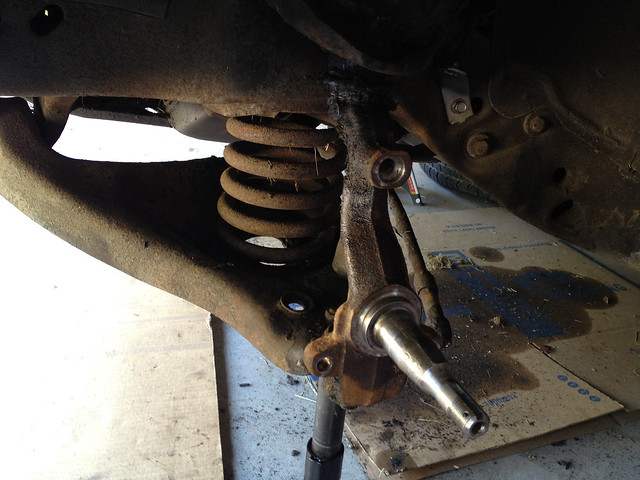 Driver's side assembly, looking ratty. 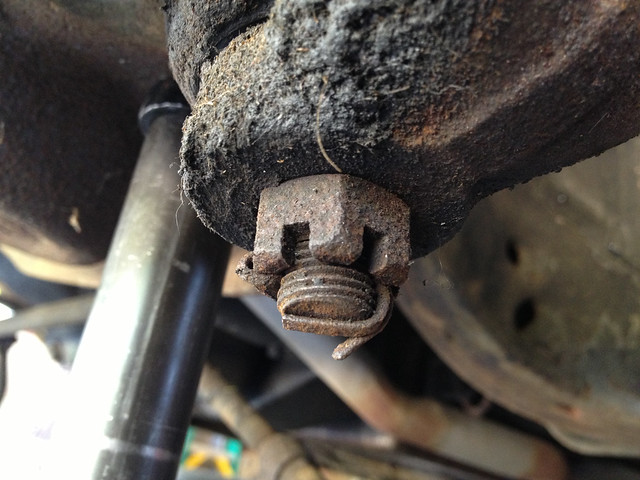 The lower ball joint nut with the cotter pin rusted in place. Swearing ensued, as usual. 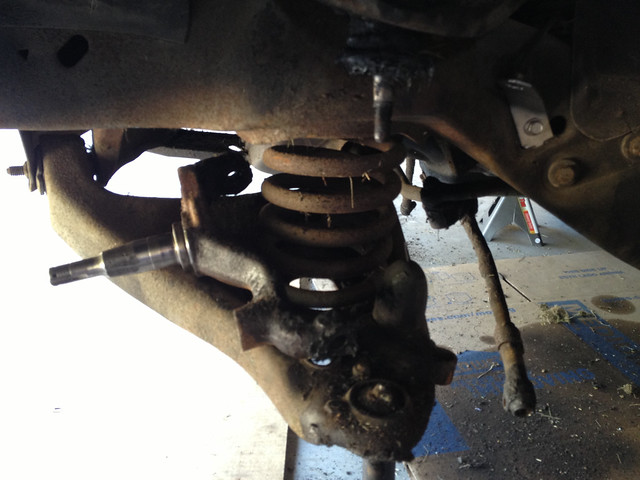 The spindle removed, blurry. Not even a photographer can get it right with greasy gloves on. 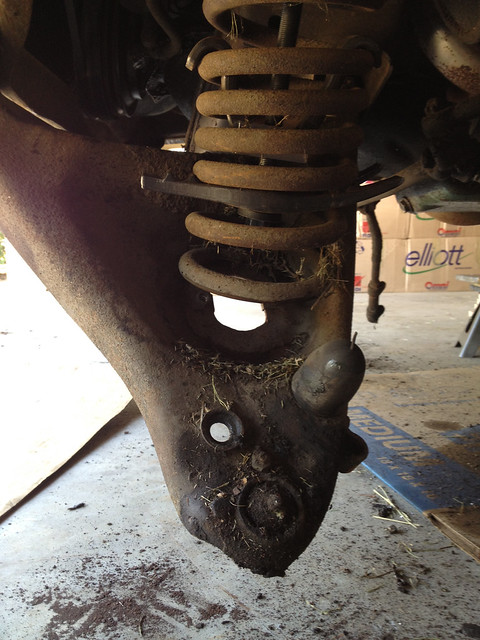 Spring compressor in, and the LCA swinging free. You can see the wonderful collection of grass clippings and dirt that was in the lower spring pocket. Is everyone's car this dirty? 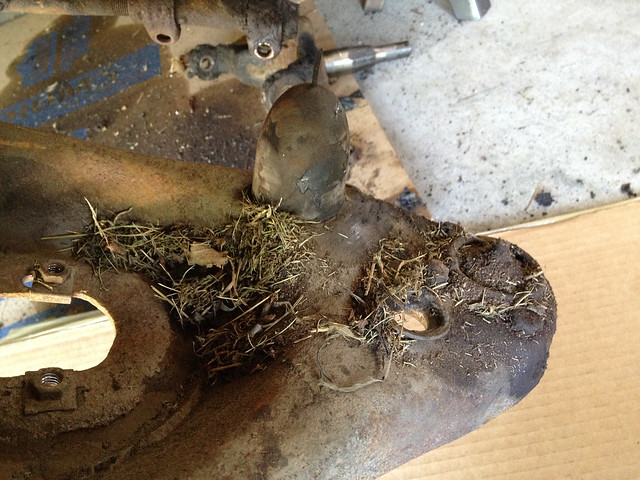 A better view of the mess. 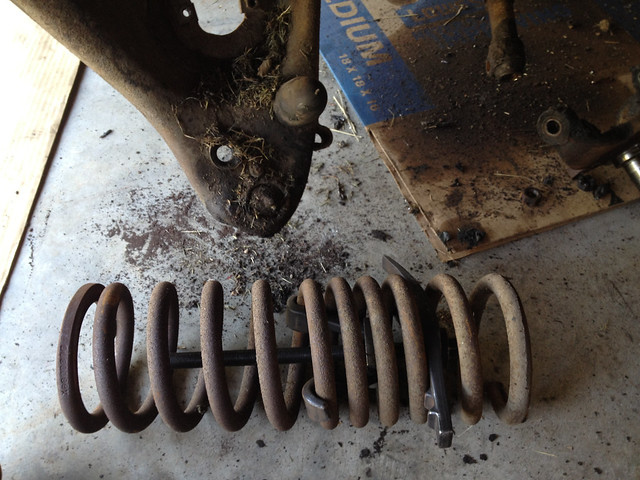 Spring out and free. The part on the left actually sits in the frame, so the right hand side is all you have to work with in terms of spring compression. 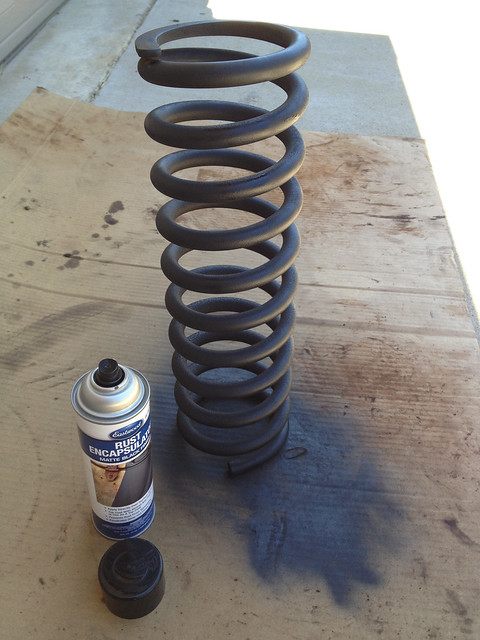 I know, it's just a spring, but I hit it with some 80 grit sand paper anyway and then the rust encapsulator. Looks nice and clean. 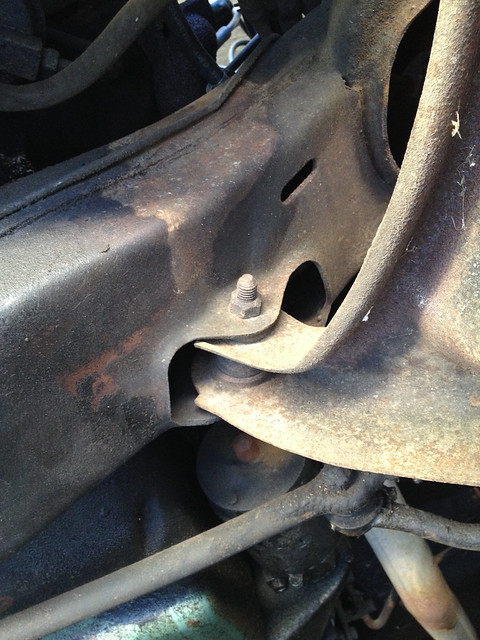 The LCA bolts, rusted in place. I wish I had thought to stop here and get the impact wrench, but my wife didn't suggest it until they were already removed and I was working not he UCA bolts. I mentioned that I didn't want to invest in an air compressor system at this time, since we still are unclear how long we are in the US this time. She comes back with; " We have both air and electric at work." Ahh, a woman with working knowledge of tools, car assembly, and medieval history. Honestly, it doesn't get better then that.  The UCA ball joint with the rivets. Which is odd, since the LCA were bolted in. Which means the lowers were replaced at some point. Which is bad, since they are supposed to be replaced in pairs. 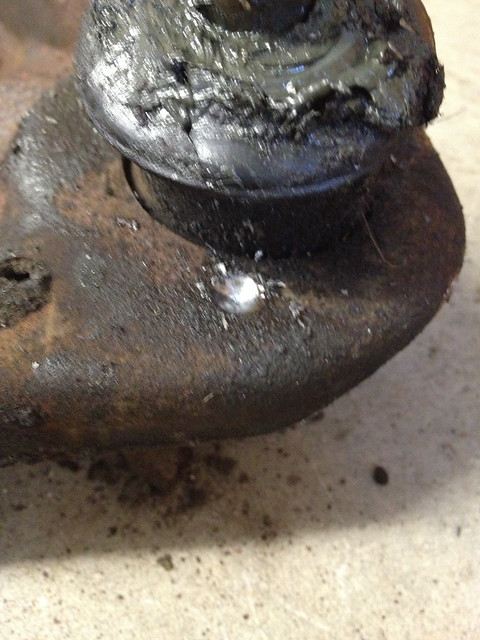 "Blurry rivet removal, an artistic approach" Limited edition prints available now. 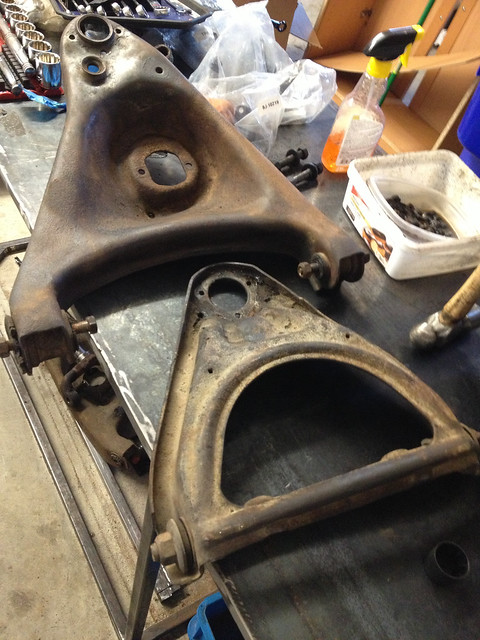 Both control arms, after the rivets were drilled out and now both ball joints are removed. Pro tip: use a punch to start the drill bit when drilling out a rounded rivet. It stops the bit from wandering. At this point all of the components on both sides are removed, slightly cleaned and the ball joints removed. A few are in various stages of paint. But the remaining task in the "never been done" category are the bushings. I was online, looking at the bushing removal tools out there and let's just say it was quite an investment to make to get 4 bushings out. So I took some advice and that of a few youtube gear heads and built my own. 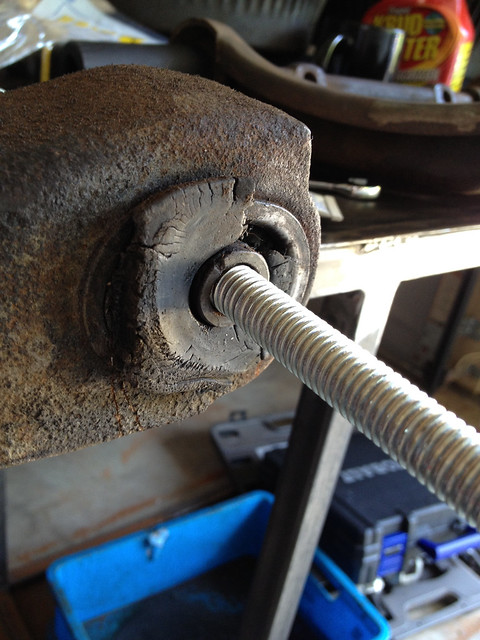 1/2 threaded rod: $1.20. you can see where this is going. 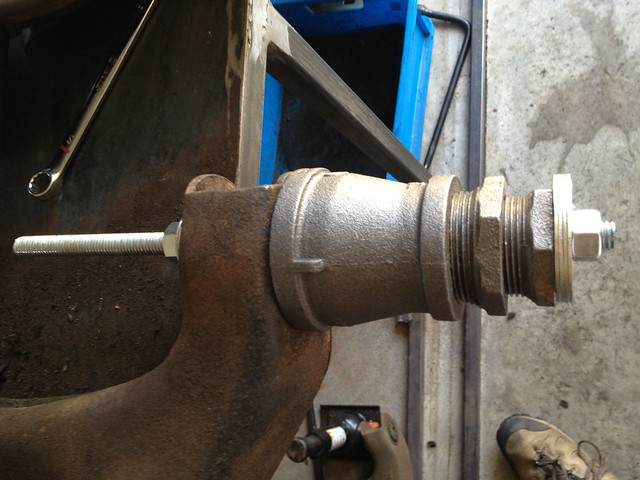 and the complete tool, ready to pull the bushing. Total cost? $9. Sweet. 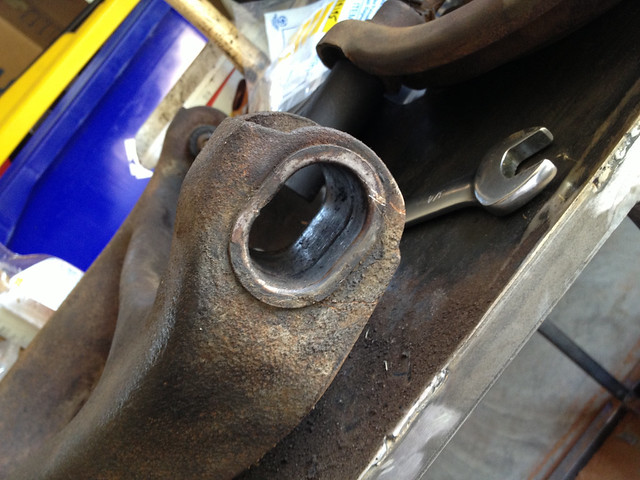 A little anti seize on the treads, a wrench and all that is left is the shell. 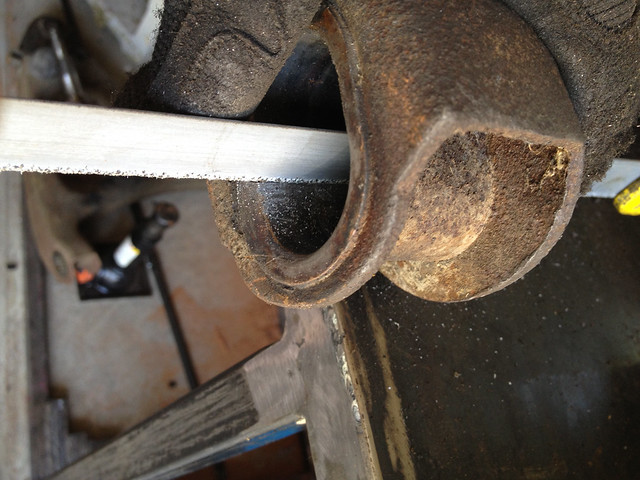 Some gentle hack saw action, just to get through the shell. Go slow and be sure not to nick the control arm. 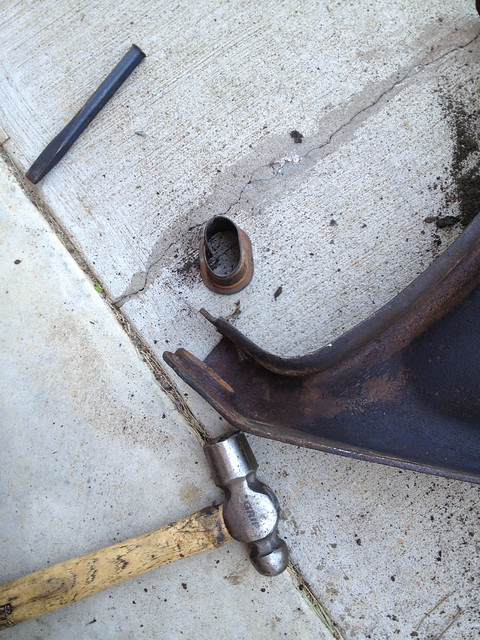 Then just crush the shell with a cold cut chisel and hammer. It pops right out. The front bushing is oval, but the rear is round. The round one popped straight out with the shell. 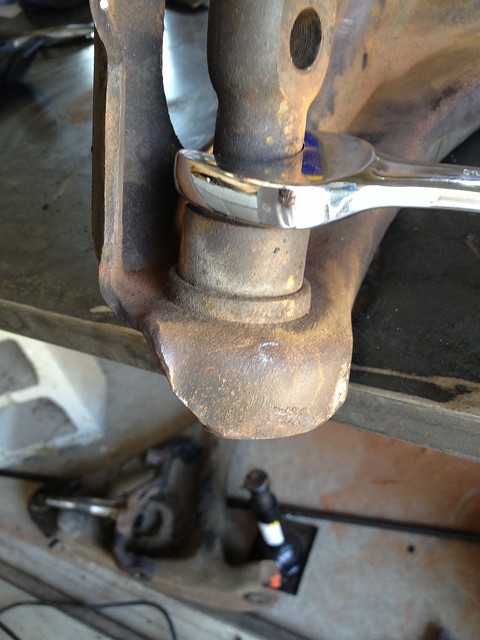 The UCA is a tad harder. It has the bar that connects it to the frame in between the bushings, so there is nothing to thread the rod through. A box wrench, hammer and heat applied the control arm made this an easy task.  LCA prepped for priming and paint. 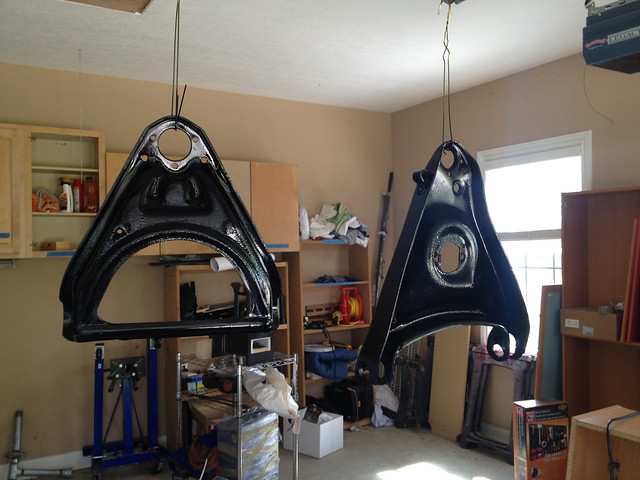 Both control arms painted and curing. You can see the forge in the background, along with all the stuff I still need to unpack and organize. 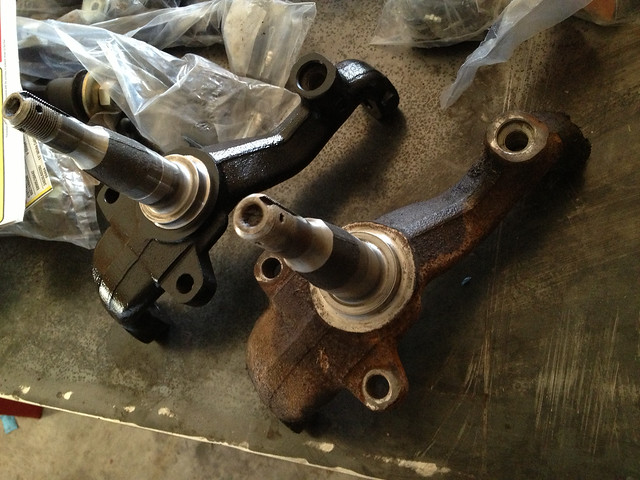 One spindle done, along side the crusty one.  Then it really is just a matter of re assembly. Hammer the new bushings in. Bolt the new ball joints in, making sure to get the proper sized ones on the right control arm. Re install the bumper. Clean up the bolts and nuts. Break out the manual and the torque wrench. At this point I just loosely put it together. The spring needs to be compressed again and installed. The new tie rods need to be installed. The ball joints need to be injected with grease. But that is all happening next week, after I drop the satan's spawn off with their parents. lol Edit: 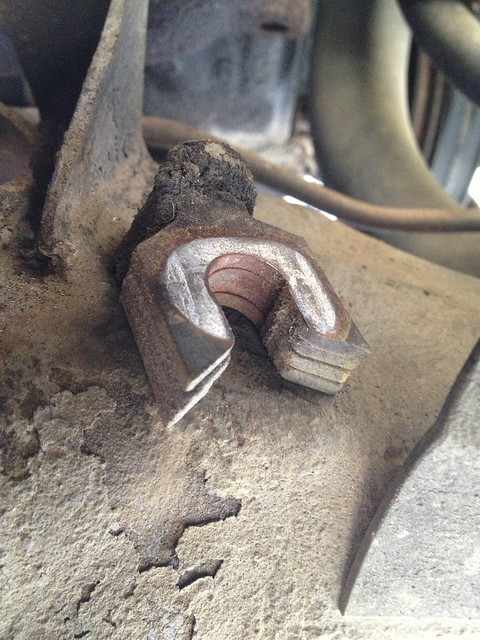 Between the UCA bar and the frame are the shims for caster and camber. Be sure and not lose these! I marked them as to where they came from. That way you can actually drive the car to the alignment shop with out destroying all the work you just did. The putty they used when they installed them was fairly brittle. I simply wrapped them in some masking tape to hold them together while I got the bolts tightened.
__________________
Slumbering Death|Dachshund of War|TerrierX|1967 Pontiac Catalina|360# Anvil|2 Burner Gas Forge
|
|
#38
06-12-2013, 10:39 AM
|
|||
|
|||
|
Well, the niece and nephew were here for a week, and we spent the weekend in St. Louis so they could see the gateway arch. Just before we left, my wife got a message that the BIG GUN (It starts with a "C" and rhymes with "2014 Corvette Stingray Z51 in red/red") was rolling off the line and ready. It needs to be in the garage for a variety of reasons, so the worked 14 hours straight to get the front end done. I finished up by lunch today, and totally forgot to take pictures.
That being said, 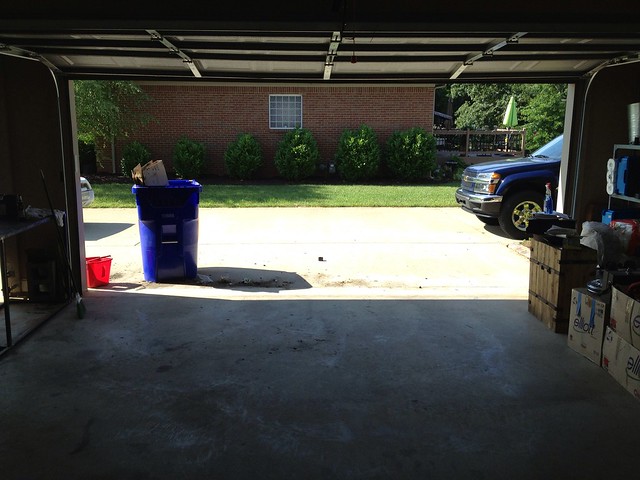 Getting the last little bits swept up.  and sitting pretty. She handles great now, no play in the steering, no wandering. All in all, a success. After week, I'll loosen and re torque the control arm bushings to remove any imbalance in the stance. It might be my eyes, but she's leaning a tad to the passenger side. I have to decide now, rebuild the rear or pull the motor out. Edit: Last night over dinner we decided to stick with the original plan and do the rear end first and save the motor for the winter. I'm printing the relevant section from the shop manual and will start looking at parts soon. Any suggestions as to part and upgrades are welcome.
__________________
Slumbering Death|Dachshund of War|TerrierX|1967 Pontiac Catalina|360# Anvil|2 Burner Gas Forge
Last edited by Bliss_Street; 06-12-2013 at 11:21 AM. |
|
#39
06-12-2013, 11:12 AM
|
|||
|
|||
|
Quote:
Quote:
__________________
Slumbering Death|Dachshund of War|TerrierX|1967 Pontiac Catalina|360# Anvil|2 Burner Gas Forge
Last edited by Bliss_Street; 06-12-2013 at 11:18 AM. |
|
#40
06-12-2013, 12:50 PM
|
||||
|
||||
|
Great rendition of build events, thanks. That includes your wife's input and needs. It's a lot of fun when my wife understands (laughs about) the constant washing and polishing as well as my complaining over a small (tiny) imperfection in the paint that no one notices but me or that imaginary tone change in the exhaust at exactly 48 mph. Seems you and I have it all.
|
| Reply |
|
|
The PY Online Forums is the largest online gathering of Pontiac enthusiasts anywhere in the world. Founded in 1991, it was also the first online forum for people to gather and talk about their Pontiacs. Since then, it has become the mecca of Pontiac technical data and knowledge that no other place can surpass.


 Linear Mode

