


| FAQ |
| Members List |
| Social Groups |
| Calendar |
| Search |
| Today's Posts |
|
#1
 03-01-2014, 02:40 PM
|
||||
|
||||
 Cam removal
OK so I am deep into the top end rebuild of the 400 in my 68 Firebird.
I unbolted the headers (what a mother f-er), removed the front accessories, removed the radiator, the intake, and both heads. I'm getting ready to remove the timing cover, chain, and cam. I left the distributor in so that I could line up the timing marks on the cam. The plan is to line up the marks dot to dot, then mark the distributor where it meets the block and another mark where the rotor sits. The idea is that everything should drop right back into place. I've marked all my plug wires as well. It's been a while since I did any internal engine work and I'm just trying to cover all my bases. I'm hoping to stab in the new Crower 60243 cam and line it up dot to dot, then have a mechanic buddy of mine come over to help me degree it in. Then the game plan is to drop the distributor in exactly how I pulled it out, bolt on the new #13 heads, adjust the valves and then re-assemble everything else. Is there anything I'm missing before I pull the cam and distributor or is there any advice on anything I might need to look closely at?
__________________
 Greg 68 Firebird Verdoro Green 428, 6X-4 heads, Comp XE284 cam Muncie 4 speed 3:73 rear |
|
#2
03-01-2014, 03:02 PM
|
|||
|
|||
|
No, you've covered all your bases. Just be sure to put all the pushrods back in the order in which they were removed and DOUBLE CHECK all of your torques.
__________________
“It takes considerable knowledge just to realize the extent of your own ignorance.” Dr. Thomas Sowell |
|
#3
03-01-2014, 03:35 PM
|
||||
|
||||
|
Just be cool on how you pull the cam out. Don`t get in a hurry and pull it out too fast and damage your cam bearings.
|
|
#4
03-01-2014, 04:57 PM
|
||||
|
||||
|
Line everything up at TDC before removing anything.
__________________
461 Stroker Built by Me - 
|
|
#5
03-01-2014, 05:09 PM
|
||||
|
||||
|
Quote:
On top of that the game plan was to double check TDC when we degree the cam.
__________________
Greg 68 Firebird Verdoro Green 428, 6X-4 heads, Comp XE284 cam Muncie 4 speed 3:73 rear |
|
#6
03-01-2014, 05:20 PM
|
||||
|
||||
|
Quote:
Crank at 12 o'clock and cam at 6 o'clock (dot to dot) would be #6 piston at TDC. 12 o'clock and 12 o'clock would be #1 TDC.
__________________
Bill 64 GTO, tube chassis w/606" IA tall deck, PG & a pro geared Fab 9". 2750 lbs. [email protected]/4, [email protected]/8, 1.1981-60-ft. 8/10/08 
|
|
#7
03-01-2014, 08:52 PM
|
||||
|
||||
|
Are you going to have enough room to slide the cam out before you run into a hood latch or brace?
__________________
Robert 69 Firebird-462/Edel round ports/currently running the Holley Sniper/4sp/3.23posi/Deluxe Int/pwr st/vintage air/4wl disc( a work in progress-always ) http://youtu.be/eaWBd3M9MN4 |
|
#8
03-01-2014, 11:04 PM
|
||||
|
||||
|
Either way, both #6 and #1 are at TDC, dot to dot (crank @ 12, cam @6) or crank @ 12, cam @12. The difference is dot to dot #6 is set to fire while #1 is 180 out.
What I do is set the engine dot to dot because it's easier to see if it's aligned, then rotate the crank one full turn, it'll be ready to fire on #1 George
__________________
"...out to my ol'55, I pulled away slowly, feeling so holy, god knows i was feeling alive"....written by Tom Wait from the Eagles' Live From The Forum |
|
#9
03-02-2014, 02:17 AM
|
||||
|
||||
|
Leaving the distributor in place is going to create more problems that you are trying to avoid. Just as when you stab the distributor and the rotor turns, the rotor and the oil pump are going to turn when the cam gear engages. Just when you need to be concentrating on getting the cam slid in place, you now also have to worry about properly meshing the cam and distributor gears. Even if it works, I'd much rather keep those two problem tasks separate.
__________________
Mick Batson 1967 original owner Tyro Blue/black top 4-speed HO GTO with all the original parts stored safely away -- 1965 Catalina Safari Wagon. |
|
#10
03-02-2014, 09:08 AM
|
||||
|
||||
|
Quote:
My idea was to line up the timing marks. When they are in line, I was going to mark the base of the distributor where it meets the block with a black marker. Then I was going to mark a spot on the distributor where I see the rotor pointing and then pull the distributor. My thinking was that after I installed the new cam, degreed it, and lined up the timing marks on the new timing chain that I would be able to prime the engine and then drop the distributor right back into place hopefully making initial start up easier. I've heard how excessive cranking on initial start up can wipe out cam lobes and I'd like to avoid that issue. I was also thinking in my head that when it came time to adjust the valves it would be easy to start off with #1. But if I start at #6, it's no big deal I'll just start at 6 and follow the firing order. I'm sure when I get to the part of adjusting the valves, I'll put up another post. It's been a while.
__________________
Greg 68 Firebird Verdoro Green 428, 6X-4 heads, Comp XE284 cam Muncie 4 speed 3:73 rear |
|
#11
03-02-2014, 09:09 AM
|
||||
|
||||
|
Quote:
__________________
Greg 68 Firebird Verdoro Green 428, 6X-4 heads, Comp XE284 cam Muncie 4 speed 3:73 rear |
|
#12
03-02-2014, 09:33 AM
|
|||
|
|||
|
just take your time and everything should turn out right, the biggest mistake people make is dropping the dist in 180 off thinking it should point to no. 1 instead of no. 6. if you get this right you should be ok. I use lock tight on the cam and harmonic balancer bolts, also don't forget to drain the oil and add fresh oil before start up, this is due to the water entering the oil pan from the front timming cover being removed. good luck
__________________
1970 firebird, 468, e heads, |
|
#13
03-02-2014, 10:01 AM
|
||||
|
||||
|
Quote:
__________________
Will Rivera '69 Firebird, 400/461, 290 Eddy D-Ports, HR 230/236, 4l80E, 8.5 Rear, 3.55 gears '69 LeMans Vert, XS 350, #47 heads, TH400, 10 Bolt 3.23 gears, work in progress ‘66 Lemans, 455, 310 KRE D-Ports, HR 236/245, TH400, GV OD, 12 bolt 3.73 gears - see it here: https://youtu.be/RP_s1wJKm_Y?si=K0NZxoTyaGcj8Dcb |
|
#14
03-02-2014, 10:30 AM
|
||||
|
||||
|
If you are replacing the timing gears, sand or grind out the old cam gear so it slips on easy and or get a section of band iron or aluminum, pop a hole in it and bolt it to the cam to use as a install handle as it sure beats only holding on to snout of the cam for install!
__________________
Wernher Von Braun warned before his retirement from NASA back in 1972, that the next world war would be against the ETs! And he was not talking about 1/8 or 1/4 mile ETs! 1) 1940s 100% silver 4 cup tea server set. Two dry rotted 14 x 10 Micky Thompson slicks. 1) un-mailed in gift coupon from a 1972 box of corn flakes. Two pairs of brown leather flip flops, never seen more then 2 mph. Education is what your left with once you forget things! Last edited by steve25; 03-02-2014 at 10:35 AM. |
|
#15
03-02-2014, 03:02 PM
|
||||
|
||||
|
Ok all this marking stuff is going to be invalidated once you change cams. There's no gaurantee that the timing gears on the new cam are going to be in exactly the same relation to the cam key as they were with the old cam. This puts the rotor in a slightly different position with the new cam, and therefore would put the housing in a different position in relation to the block.. so a housing to block mark would be misleading.
About the only meaningful mark you could make, is get the crank at 0 on the compression stroke, then before pulling the distributor, mark the dist housing exactly where the rotor is pointing. Then when you get the new cam in, get the crank back on 0 on the compression stroke (whichever method already describe above), and then you know exactly where your housing needs to be in relation to the rotor. after it's all done you should still dust off the ole timing light.
__________________
'78 Macho T/A DKM#95, 460cid, SRP pistons, KRE 310 D ports, 3" pypes, Hooker 1 3/4" headers, hydraulic roller, 10" Continental, 3.42 gears 11.5 @117.5mph 3900lbs  ([_|_] ##\|/##[_|_]) |
|
#16
03-03-2014, 08:38 AM
|
||||
|
||||
|
I'll be following this thread since this is on my agenda for this summer (after I get done with the rear swap). Keep us up to date on your progress.
You must have a heated garage...it's been too damn cold up here in PA for me to get any work done.
__________________
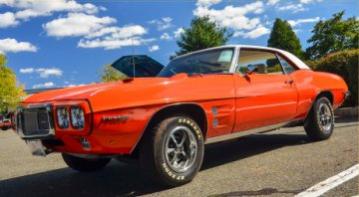 '69 Firebird original 400/4 speed '72 Chevy Blazer 4X4 350 TPI/ 4 speed |
|
#17
03-03-2014, 01:15 PM
|
||||
|
||||
|
Quote:
To be sure it's on a compression stroke, I usually turn the engine over, watch the intake valve open and close, then line the mark on the balancer up. I usually mark the dizzy cap on the outside with a sharpie on the #1 terminal, make a line down the side of the cap. You can then lift/install/lift the cap and check orientation with the rotor easily. The leading edge of the rotor should be at the edge of the tower, going dead on/even will be advaced. The oil pump shaft can be moved anywhere you want when the dizzy is out, you can stick a large flat screwdriver down there to turn it so you can have the rotor point anywhere you want. It really doesn't matter where it points as long as you have enough room to advance/retard and not have the vacuum can hit something. Most shoot for the #1 terminal in the roughly 2 o'clock position if facing the engine from the front, only because that's the way the factory manuals are. (Think that's because of the wire sets/lengths, and places more of the terminals on the bank they go to) .
__________________
. 1970 GTO Judge Tribute Pro-Tour Project 535 IA2 http://forums.maxperformanceinc.com/...d.php?t=760624 1971 Trans Am 463, 315cfm E-head Sniper XFlow EFI, TKO600 extreme, 9", GW suspension, Baer brakes, pro tour car https://forums.maxperformanceinc.com...ght=procharger Theme Song: http://www.youtube.com/watch?v=7zKAS...ature=youtu.be |
|
#18
03-03-2014, 02:27 PM
|
||||
|
||||
|
A couple of things...
You know after you install it that when you spin the motor over the first time you remove most of the assembly lube that you put on the cam and lifters. Most of the rest is washed off by the oil when you prime it before the initial start up so while it's a good idea to turn it over the least amount of times before it starts, it's probably not a tragedy if it isn't perfectly lined up. As long as you don't have to crank it too much. Maybe think about priming the carb too before you try. Another thing is to remove the inner springs when you break it in. Kind of a pain to have to r&r and set the lash more than once but better than buying another cam set and doing everything again.
__________________
Robert 69 Firebird-462/Edel round ports/currently running the Holley Sniper/4sp/3.23posi/Deluxe Int/pwr st/vintage air/4wl disc( a work in progress-always ) http://youtu.be/eaWBd3M9MN4 |
|
#19
03-03-2014, 03:31 PM
|
||||
|
||||
|
Nah, moly paste doesn't 'squeegy' off with a couple of rotations, that's the point of it. The film strength and properties prevent that. Takes oil a little while to wash it off too, like 3-5 mins at 2000+ would probably do it.
Yup, absolutely prime the carb before you crank it. Squirt bottle through the vent works great. You want that puppy to fire off within the least amount of rotations as possible. Mine usually go in like 2 or 3 rotations/seconds max. As for the inner springs, not going to get into that, there's plenty of other threads that cover that. .
__________________
. 1970 GTO Judge Tribute Pro-Tour Project 535 IA2 http://forums.maxperformanceinc.com/...d.php?t=760624 1971 Trans Am 463, 315cfm E-head Sniper XFlow EFI, TKO600 extreme, 9", GW suspension, Baer brakes, pro tour car https://forums.maxperformanceinc.com...ght=procharger Theme Song: http://www.youtube.com/watch?v=7zKAS...ature=youtu.be |
|
#20
03-03-2014, 05:20 PM
|
|||
|
|||
|
I have in the past when re-installing the distributor, put #1 piston on TDC. Then after dropping in the distributor, rotate it so the rotor is pointing where #1 spark plug wire terminal is. Put the cap on and make sure the red power wire is connected then turn ignition switch on. Use a phillips screwdriver and put it into the #1 spark plug wire end and and hold the screw driver a 1/8 inch from a good ground. Now rotate the dist back and forth 'til you get a spark. That should put you pretty close to timing for an easy start. It worked for me many times.
Last edited by track73; 03-03-2014 at 05:35 PM. |
| Reply |
|
|
The PY Online Forums is the largest online gathering of Pontiac enthusiasts anywhere in the world. Founded in 1991, it was also the first online forum for people to gather and talk about their Pontiacs. Since then, it has become the mecca of Pontiac technical data and knowledge that no other place can surpass.




 Linear Mode

