


| FAQ |
| Members List |
| Social Groups |
| Calendar |
| Search |
| Today's Posts |
|
#1
 10-19-2014, 11:36 PM
|
||||
|
||||
 Replacing Door Interior Skins...ADVISE?
So I received my complete interior kit form PY for my 68 GTO (PUI brand). Having fun and getting ready to change the skins on the front and back door panels. Took off the old door panels and absorbing what needs to be done here. I've read that this could be a bear but I like challenges. So before I get started, I'm looking for advise on how to go about this. I understand that I need to reuse the metal upper portion from the old ones. I have changed out the window fuzzies in a Lemans so I understand that part. I guess I'm wondering about how to glue the new skins to the old metal upper part. what glue to use, any advise on getting it right the first time!
|
|
#2
10-20-2014, 02:43 AM
|
|||
|
|||
|
I used the 3M super strength interior spray glue. Just make sure the item is good & dry & make sure the part your spraying is clean & lint free to. Spray both parts of your job, the front of the door panal & the door panal itself & it should hold longer then you'll need. But use the SUPER strength as the reg. strength will work but no where near as good.
|
|
#3
10-20-2014, 08:40 AM
|
|||
|
|||
|
I did this on my FB.
With the metal uppers they had round punch holes that go into the cardboard. I straitened the teeth on the metal punch holes and tested several different adhesives to see what would stick with metal and the cardboard the best. Sorry don't remember what glue I used her. Might be in the archive on the first generation firebird site. I clamped them together and let them dry for a day or two. I also used the 3M 80 adhesives on the vinyl. Be sure to really pull the vinyl tight. My is a bit loose now after a couple years. Its not really the best adhesive IMO, after using the profession DAP adhesive. I attached my fuzzies with the metal staples like the factory did. It was horrible. I used the wire staples and drilled each hole one at a time. |
|
#4
10-20-2014, 09:32 AM
|
|||
|
|||
|
This site has a nice review of the process. I used the rivets and it turned out well. I did have trouble with the adhesive though. The cardboard is really slick, consider getting some industrial grade adhesive.
http://www.chevelles.com/forums/showthread.php?t=271914 |
|
#5
10-20-2014, 11:12 AM
|
||||
|
||||
|
Coincidentally, I was just about to start a thread on this because I couldn't find any info line (Didn't find the Chevelle thread). Anyway, here are few pics and my way of doing it.
I used "3m Fast Tack Trim Adhesive" (PY has it as a woodgrain dash insert adhesive) as I was advised by the tech at Legendary not to use any type of spray adhesive. Not strong enough. The 3m has worked very well for me holding the board while I rivet and also, more importantly, holding the covering in place when it's pulled tight. As for Rivets, I used not pop rivets but more of a 'buck rivet' used on leather belts and purses. You just drill the hole and stick one end through. Put the bucking end on the other side and give it a whack with a small hammer. I did not trust pop rivets to hold in the 'cardboard' door panel. I was also told by the Legendary rep NOT to attempt to glue the covering or the underlying felt down all over, JUST the PERIMETER. He said that it should be a 'floating' arrangement. When I pulled my originals off, this was just the case. Glued along the perimeter of the metal only. Heres a link to the Rivets I used- http://www.ebay.com/itm/261566656449...#ht_1329wt_943 Adhesive- 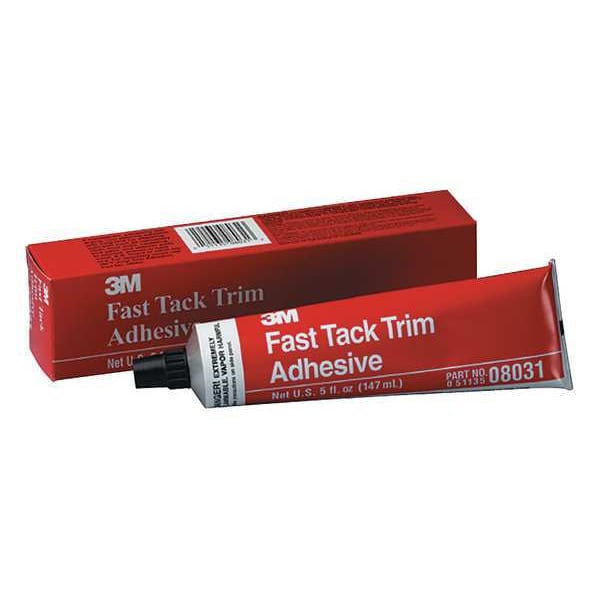 Some photos- This is the rear quarter for an example. The metal has been separated from the original backing and cleaned of excessive rust etc.  The panel has been glued to the upper metal and rivets inserted and bucked into place. 
__________________
Greg Reid Palmetto, Georgia Last edited by Greg Reid; 10-20-2014 at 11:27 AM. |
|
#6
10-20-2014, 11:19 AM
|
||||
|
||||
|
Continuing, the inner felt has been laid over the rivets and glued at the upper edge and a little on the outer edges.
 And finally, the vinyl covering has been stretched and glued into place and the trim attached.  An industrial type heat gun is and excellent aid in getting the vinyl soft around a tight radius. Heat it and rub it into place until it cools. Also, the glue I used is forgiving in that for several hours you can pull the vinyl up and reposition it to get the slack out that may show here and there. Again, the heat gun is a help here even into the next day. Some areas won't want to stay down because the glue can't overcome the memory of the stiff vinyl. Especially where you've folded it over an edge. Put just a little fresh glue down, heat it and rub it down until it cools, it's stay there.
__________________
Greg Reid Palmetto, Georgia |
|
#7
10-20-2014, 11:24 AM
|
||||
|
||||
|
Here's a front panel in the works-
 And the front door metal before rust treatment and showing the prongs that attach the original door card. I just beat these flat against a vise anvil. 
__________________
Greg Reid Palmetto, Georgia |
|
#8
10-20-2014, 11:56 AM
|
||||
|
||||
|
By the way, that Chevelle link was very good and had some details that I hadn't thought of.
__________________
Greg Reid Palmetto, Georgia |
|
#9
10-20-2014, 10:51 PM
|
||||
|
||||
|
I have this on our Buick site...easy to do..just time consuming.
http://www.buickperformanceclub.com/drpnl.htm |
|
#10
10-21-2014, 08:54 AM
|
||||
|
||||
|
I couldn't find this info anywhere and now it's everywhere....lol
Very good writeup George. Your method differed from mine in only very minor details. Type of rivets, type of glue, etc. I also noticed that your advisor told you almost the same thing about the felt/foam backing that Ron at Legendary told me. It should be a floating layer between the metal, the board and the vinyl. I only glued it at the top of the metal and only glued the vinyl on the backside of the metal, around the perimeter.
__________________
Greg Reid Palmetto, Georgia |
|
#11
10-21-2014, 09:42 AM
|
||||
|
||||
|
Greg thanks for taking the time to show the steps you used to accomplish that. All your posts (dash chrome, etc.) are much appreciated.
__________________
1968 LeMans conv. 350 HO - 4 speed triple white (hear it idle here) https://www.youtube.com/watch?v=eVmq...ature=youtu.be 1968 LeMans conv. 350 - 4 speed Solar red/pearl |
|
#12
10-21-2014, 11:18 AM
|
||||
|
||||
|
It's the least I can do considering all the help I've gotten over the years on this site and others. Anytime I take pics and post this stuff it's with the thought that someone, somewhere, someday may do a search and find the information they need, just as I have so many times.
I'm sure that George on this site and the guy over on the Chevelle site had the same end in mind when they did it.
__________________
Greg Reid Palmetto, Georgia |
|
#13
10-21-2014, 11:42 PM
|
||||
|
||||
|
Great! I took a bunch of pics thinking that I would do the same in posting my progress. Will have to absorb what you said and look at the other link before starting...although I was ready to begin tomorrow.....I like progress but not at the expense of failure...
|
|
#14
10-23-2014, 11:09 AM
|
||||
|
||||
|
Just to follow up...here is the door panel pictured in my last photo. All finished except the hole for the vent window crank.

__________________
Greg Reid Palmetto, Georgia Last edited by Greg Reid; 10-23-2014 at 11:41 AM. |
|
#15
10-23-2014, 01:10 PM
|
|||
|
|||
|
Quote:
|
|
#16
10-23-2014, 02:14 PM
|
||||
|
||||
|
Yeah, I'll probably cut it closer to the stainless trim with an x-acto to neaten them up but frankly, the old ones had them too and I believe they are original. I never noticed them before doing this recover job.
__________________
Greg Reid Palmetto, Georgia |
|
#17
10-23-2014, 04:41 PM
|
|||
|
|||
|
I didn't think my old ones had that... but then again I have not seen them in 15 years or so. I also thought the new door panels had two layer of vinyl and the old only had one layer.
|
|
#18
10-23-2014, 08:26 PM
|
||||
|
||||
|
Funny, I looked this evening and the driver's side had them showing and the passenger's side was trimmed back. I was going to trim them either way though.
__________________
Greg Reid Palmetto, Georgia |
|
#19
10-23-2014, 11:14 PM
|
||||
|
||||
|
I did my rear panels today and everything went very well. I used the method in the Chevelle link posted below. Using the 1/8" rivets with the washers worked excellent. Just one thing that I noticed and made me stop and think before proceeding...
The new skins I have are from PUI and they come with pre-drilled holes in the cardboard for the upper piece of door trim on my 68. Yet, maybe misleading, above those pre-drilled holes were three slashes in the cardboard. At first I thought these were guides to line up the edge of the metal upper shoulder. After comparing my old skins to the new, these "slashes" were too far up to be an alignment mark. On my original the pins on the chrome trim sat just under the metal upper shoulder. I followed my original pattern, little weary about knocking out all of the predrilled holes for arm rest and window until I put it in place to make sure it lines up. Over all, I would recommend the procedure in the Chevelle post. Everything went very smoothly. Make sure you have a ton of clamps ready to go. I used 3M Super Trim Adhesive (8090 I believe) which is in a spay can ($17 Napa Auto) worked great. Soon will move to do the door panels next week with the same method. One thing about one of the other comments on this post about the originals just having the adhesive on the outer portion of the upper metal shoulder. They probably did this to save adhesive. unless I read it wrong. I sprayed the whole upper metal shoulder, then laid the under foam to it. After it set, I trimmed off excess. Then sprayed the outer rim were the fuzzies lay and other areas, then laid the vinyl over that, worked like charm. |
|
#20
10-24-2014, 11:00 AM
|
||||
|
||||
|
When I said adhesive just on the edge, I may have not been clear or just plain mistated. Yes, the upper portion can be glued for the foam backing. The outer edge is just for the vinyl. I was told that by the Legendary advisor and also that's the way the originals were done.
I didn't require any clamps with the glue used except on one panel while gluing the card stock to the metal. It was a little warped and I wanted it to seal the entire length.
__________________
Greg Reid Palmetto, Georgia |
| Reply |
|
|
The PY Online Forums is the largest online gathering of Pontiac enthusiasts anywhere in the world. Founded in 1991, it was also the first online forum for people to gather and talk about their Pontiacs. Since then, it has become the mecca of Pontiac technical data and knowledge that no other place can surpass.






 Linear Mode

