


| FAQ |
| Members List |
| Social Groups |
| Calendar |
| Search |
| Today's Posts |
|
#1
 04-03-2015, 08:06 PM
|
||||
|
||||
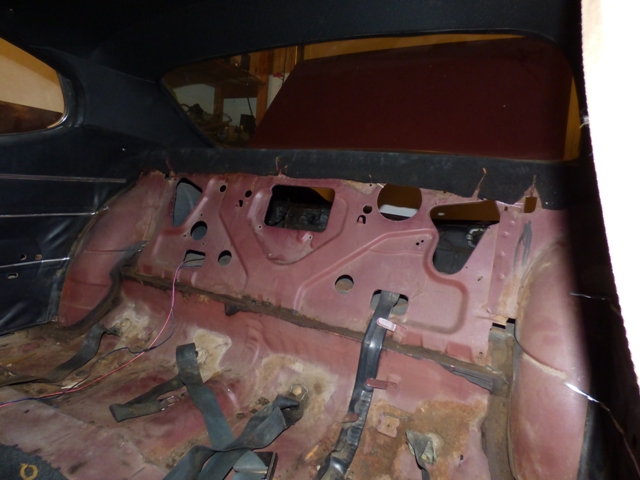
 '68 GTO Interior quarter trim
Can anyone show me a photo of how many screws are showing on an original or just a correctly installed interior quarter trim panel for '68? Don't want to be drilling holes in mine if they don't belong.
My interior screw kit lists 2 screws but I don't know for sure where they go. Your source doesn't have to be original if you know it to be correct. While we're at it, how many screws across the bottoms of the doors? I think 4 for each door?
__________________
Greg Reid Palmetto, Georgia |
|
#2
04-03-2015, 10:59 PM
|
||||
|
||||
|
I just took my '69 quarter panel cover off & there were 2 screws and another 2 for the armrest. I unfortunately did not take pictures :-(
Yes, 4 screws at the bottom of the door panels in the carpet. |
|
#3
04-04-2015, 12:35 AM
|
||||
|
||||
|
Quote:
I was just out working on mine and looking at the originals that I removed. My best estimate is that, at least on my car, there were two screws holding the front edge windlace in place. This is the 'bead' that PY called 'Doorjamb Edging' and the screws are completely hidden by the finished panel. Other than that, just the armrest screws. I found one photo that shows one screw up high near the package tray, and this would support the '2' listed on the screw kit callout, but most of the pics I've found online show no visible screws anywhere. I've about decided to just put the armrests on and and hide one near the back somewhere just for support and let it ride 'cause right now, it fits pretty tight with no screws at all...not even the armrest.
__________________
Greg Reid Palmetto, Georgia |
|
#4
04-04-2015, 12:37 AM
|
||||
|
||||
|
By the way, I just looked at your link...that is a REAL nice looking LeMans!
__________________
Greg Reid Palmetto, Georgia |
|
#5
04-04-2015, 12:46 AM
|
||||
|
||||
|
Found it on your site Ben...Come to think of it, the only cars I've seen that one screw in was one or maybe two '69s. No '68s.
__________________
Greg Reid Palmetto, Georgia |
|
#6
04-04-2015, 09:35 AM
|
||||
|
||||
|
Quote:
Quote:
|
|
#7
04-04-2015, 03:14 PM
|
||||
|
||||
|
Mine have one screw per side (upper corner by the package tray) and the two for the armrest. I've had the panels off and on a bunch of times, don't ever recall seeing any indication that there were any more.
__________________
Ken '68 GTO - 464 - Ram Air II heads - 236/242 roller - 9.5” TSP converter - Moser 3.55 Truetrac (build thread | walk around) '74 Ventura 350 '69 AMC Javelin SST |
|
#8
04-04-2015, 10:13 PM
|
||||
|
||||
|
Well, I went ahead and installed them today. I just put the three in the jamb edging as it seemed like a good idea and I could see the screwholes there. Other than that, the quarter trim panels are in place and seem perfectly happy with no screws at all. I also put the package tray and upper seatback in.
Been a long, long time since this car has had an interior other than the two bucket seats. Thanks guys, I may have more questions on this subject as I go on. The only downside so far is that what I thought was a pretty decent looking original headliner now looks like crap. I'll save that for later and I think I'll pay someone to do it.
__________________
Greg Reid Palmetto, Georgia |
| Reply |
|
|
The PY Online Forums is the largest online gathering of Pontiac enthusiasts anywhere in the world. Founded in 1991, it was also the first online forum for people to gather and talk about their Pontiacs. Since then, it has become the mecca of Pontiac technical data and knowledge that no other place can surpass.




 Linear Mode

