


| FAQ |
| Members List |
| Social Groups |
| Calendar |
| Search |
| Today's Posts |
|
#1
 06-05-2012, 04:21 PM
|
||||
|
||||
|
ok..looking for the best way to get excellent results on painting my motor and tin..i know about cleanliness and prep..but what else? some guys' work looks just awesome, and holds up for years...secrets?? paint type? brush or spray cast parts? primer used? thank you!!!!
|
|
#2
06-05-2012, 04:35 PM
|
||||
|
||||
|
You pretty much nailed it; properly cleaned and prepped, an engine will look great almost irrespective of who applies the paint.
Quote:
Rattle-can paint is the way to go. Several light-to-medium coats, with an adequate amount of gel/cure time in between.
__________________
Peace, through close combat. |
|
#3
06-05-2012, 10:56 PM
|
|||
|
|||
|
I have had great success with keeping the paint from burning off. As mentioned several light coats with a little drying time in between then a heat cycle several times seems to work the best. Of course I always go back and "touch up" the exhaust ports and exhaust crossover on the intake before the paint discolors or burns off and corrosion starts.
Mark C |
|
#4
06-06-2012, 01:03 AM
|
||||
|
||||
|
You said you were looking for excellent results. IMO, I think the best you are going to get with a rattle can is "very good" or "nice". I was just doing some research on the same subject and came across this: http://www.nsra.org.uk/newforum/showthread.php?t=44637
__________________
71 Formula 433, Splayed cap 400 block, 4" stroke Scat forged crank, 6.8 Eagle rods, custom Autotec pistons. SD 295 KRE D ports, Old faithful hybrid roller, Torker II, Holley Sniper Stealth, Tribal Tubes, TKO 600, 3.73 Eaton posi. |
|
#5
06-06-2012, 06:01 AM
|
||||
|
||||
|
For the heads, I heat them in my grill for 30 min at 250-300 ºF (there is a ton of moisture that sweats out) and then let them cool to about 100 ºF. I then spray them with high temp primer and get the exhaust ports well. Then I spray them with Duplicolor Pontiac metallic blue the next day. The paint lasts a long time on the exhaust ports without rusting, I have a set going on 5 years now. Cleaning them properly before painting is a given and I assemble my heads so I heat them bare.
|
|
#6
06-06-2012, 12:35 PM
|
||||
|
||||
|
i want the 1973 pontiac slate blue for my motor, but they only have it in rattle can now..id like a quart so i can use a self etching primer and a spray gun on the motor, or ill have to have someone mix it..great link btw..that dude is thorough!
|
|
#7
06-06-2012, 01:11 PM
|
|||
|
|||
|
I researched this one to death and got these tips from everyone here.
I used Bill Hirsch paint. I read their instructions and I called them and asked about the application. Used a VHT 500 deg primer on steel engine parts. Sprayed directly on cast parts with no primer except I use a 1200 deg KBS primer on the exhaust ports of the head first. Spray 1 light coat and waited for it to get tacky then sprayed only enough to give even coverage on the motor. I was warned not to coat it heavy. For prep: I sprayed down the block with phosphic acid and wirebrushed it to both etch and remove the rust on the block. The heads had been cleaned at the machine shop. Rinsed with (some thinner product from Lowes that has an "x" in the name. I used it because it was one of the ingrediants in the Hirsch paint) Before I applied any paint went over the block with a propane tourch to sweat out the metal. I think this was one the best suggestions I have ever got. Sprayed the motor with the intake off. I gave the motor 3 weeks to cure before starting. This was the hardest. 2 weeks was the minimum suggested. I'm going on the 2nd year and the motor is still looking good. Some the paint has burned off around the exhaust ports as expected, but the High temp primer is doing its job so its not rusting. |
|
#8
06-06-2012, 05:11 PM
|
||||
|
||||
|
Great thread! I'll be following closely and referring back to this when I paint my motor. I had all of my paint burn off the exhaust ports in a matter of months on my 455. I want the 400 looking pretty for a very long time!
__________________
1969 GTO .040 over 400, 68cc #62 heads, stump puller cam TH400, 3.31 posi |
|
#9
06-07-2012, 11:09 AM
|
||||
|
||||
|
Search here, topic has been covered many times.
Yes, etch, and the best product to use is metal-prep, available at auto paint supply shops. You can 'sweat' the block, but I wouldn't use a propane torch. Propane, or any gas flame, may cause paint to fish eye due to residue or a reaction from the metal you're heating. A heat gun would be the right choice IMO. And that's really only to 'dry' the part. Oven would be the best, but who has an oven big enough that you can trash with a block? Exhaust ports - Eastwood Stainless steel high temp paint is your friend. Etch the heads, pay attention to the exhaust port area, and coat with the SS paint as directed. Let it fully cure and rattle can it after, again, following the rattle can instructions. You can prep the parts by sanding, etc, but personally, it ends up not looking natural, and I personally prefer the natural look. Plus you can make more of a mess that way, causing countless hours of work. I say rattle can because it can be easily touched up, and the paint is easily sourced. I went away from VHT for a couple reasons, and now use only plasti-coat. Engine paint works great on all engine parts, it's sticks to everything for the most part, and they make a vast array of colors. As-cast iron for master cyls & ex manifolds, aluminum for intakes and alts, semi-gross & low gloss black, etc. Use the semi-gloss on accessories, firewall, frame, it works. Brand new aluminum intakes you etch too by the way, with alumi-prep. Spraying them when new prevents them from being pourous and makes them easy to touch up (they don't stain). There's even a gold anodize in a rattle can that works pretty good. (boosters). .
__________________
. 1970 GTO Judge Tribute Pro-Tour Project 535 IA2 http://forums.maxperformanceinc.com/...d.php?t=760624 1971 Trans Am 463, 315cfm E-head Sniper XFlow EFI, TKO600 extreme, 9", GW suspension, Baer brakes, pro tour car https://forums.maxperformanceinc.com...ght=procharger Theme Song: http://www.youtube.com/watch?v=7zKAS...ature=youtu.be |
|
#10
06-08-2012, 12:24 PM
|
||||
|
||||
|
I wonder if the block/heads can be effectively dried by spending a couple of weeks in a small space with a dehumidifier keeping humidity down around 40%? I have my shop dehumidified year round and can get it down that low ...which really dries stuff out.
JohnnyB |
|
#11
06-08-2012, 01:46 PM
|
||||
|
||||
|
Quote:
.
__________________
. 1970 GTO Judge Tribute Pro-Tour Project 535 IA2 http://forums.maxperformanceinc.com/...d.php?t=760624 1971 Trans Am 463, 315cfm E-head Sniper XFlow EFI, TKO600 extreme, 9", GW suspension, Baer brakes, pro tour car https://forums.maxperformanceinc.com...ght=procharger Theme Song: http://www.youtube.com/watch?v=7zKAS...ature=youtu.be |
|
#12
06-08-2012, 07:09 PM
|
||||
|
||||
|
I've been thinking about spraying half way under some of the gasket areas. I've found rust to start at the gasket edges. I would definitely use some kind of primer. I painted mine after assembly and ten years later:
__________________
http://www.pontiacpower.org/ |
|
#13
06-09-2012, 02:50 AM
|
||||
|
||||
|
I paint everything that doesn't come in contact with oil. Here's a recent pic of a '72 455 block:
__________________
Mick Batson 1967 original owner Tyro Blue/black top 4-speed HO GTO with all the original parts stored safely away -- 1965 2+2 survivor AC auto -- 1965 Catalina Safari Wagon. |
|
#14
06-09-2012, 10:51 AM
|
||||
|
||||
|
Quote:
Paint the edge of the timing cover before you install it. That will help too. .
__________________
. 1970 GTO Judge Tribute Pro-Tour Project 535 IA2 http://forums.maxperformanceinc.com/...d.php?t=760624 1971 Trans Am 463, 315cfm E-head Sniper XFlow EFI, TKO600 extreme, 9", GW suspension, Baer brakes, pro tour car https://forums.maxperformanceinc.com...ght=procharger Theme Song: http://www.youtube.com/watch?v=7zKAS...ature=youtu.be |
|
#15
06-09-2012, 06:03 PM
|
||||
|
||||
|
Quote:
|
|
#16
06-09-2012, 07:10 PM
|
||||
|
||||
|
I have all my blocks shake-and-baked by the machine shop prior to any machining which removes most of the crud. When I get the block home I use a shotgun brush and scrub the lifter galleries spotless (have to start on the inside or the block won't be around long enough for the paint to get old). I use mineral spirits first and scrub inside and outside, then I use Purple Power and scrub it down fully twice. I air blow it dry and apply paint. I use a lot of masking tape and paper to prevent any overspray from getting inside the block. Same for the heads, timing cover, etc..., and I spray all the parts separately before assembly.
I think a lot of problems come up when the engine is assembled first and the oil gets back on the exterior surfaces and sinks in. I don't use any primer, and find the engine paint adheres very well to bare metal. I do use a quality high-temp paint over the exhaust areas just so when the blue departs, the high temp paint will remain and keep rust from forming.
__________________
Mick Batson 1967 original owner Tyro Blue/black top 4-speed HO GTO with all the original parts stored safely away -- 1965 2+2 survivor AC auto -- 1965 Catalina Safari Wagon. |
|
#17
06-09-2012, 10:54 PM
|
|||
|
|||
|
Wow, you guys are making this way too hard! LOL! As for the comment about rattle can paint jobs only being "nice". My rattle can engine paint job took first GTOAA concourse! It is all in the prep work and laying on thin coats. I did remove the engine, disassembled all acessories that were not supposed to be engine color as well as painted intake off the engine. Other than that after a thorough degreasing I carefully taped up all "openings" and did a light sandblasting to remove any rust/crud and all old paint. Applied light coats, heat cycled the paint curing process, and would occasionaly touch up the exhaust ports and intake exhaust crossover when the paint started to slightly turn lighter color.
I have a 67 Grand Prix that I painted the motor in the car (lots of time to carefully remove and tape off). I drive it everywhere and have never had the exhaust ports rust or paint peel off. Just keep touching it up with light coats when the paint starts to slightly burn off. Mark C |
|
#18
06-10-2012, 12:12 AM
|
||||
|
||||
|
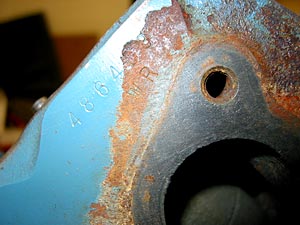
Today I decided to touch up my exhaust ports. They have been rusty and crappy looking for the last year or so. When I was building the car, I just did a basic cleaning and sprayed the motor. I didn't think I would still be running it 4 years later.
When I did my intake 4 years ago, I glass beaded the entire intake (was a different color and was not on this motor originally), and painted it with ceramic high temp header paint. Then I painted it with Pontiac engine paint. Then it was set on the motor and all of it was painted again. The intake has never burned through on the crossover. You can see it turning a silvery color (the high temp paint is silver), but it has never burned through and/or rusted. I will probably touch it up too, but not now. I gotta pull my carbs and do some cleaning. I'll do the intake then. It really doesn't look bad. Most don't notice the difference between the silver and the pontiac blue (1966) The exhaust ports are another story... Today I did a little disassembly, wire brushed the ex ports, masked off everything that needed masked, and sprayed the high temp exhaust paint on the ports. Then as the high temp paint flashed over, I sprayed the pontiac engine paint on (two coats). I did this today before even seeing this thread. I like alot of the suggestions in this thread. When I build my 428/455HO, I will probably try some of these tips. My BBC in my truck was painted with automotive urethane in Victory Red. It was done 12-13 years ago. It is a little dirty, but looks almost as good as the day it was done. Big Block Chevys have exhaust ports that are raised similar to a Pontiac, but no paint has burned off my motor. It is EFI'd, so that may/may not help. I also touched up the exhaust manifolds with Eastwood Stainless Steel paint and a small brush today. A little tougher to do in the car without removing much, but I was able to cover most of what is seen from the top. Trying to make it look decent for the P-Y event next week. I wish I had the A/C lines to just put on to look finished. I would detail the compressor and install it if I did.
__________________
Tod Hoffmann 1966 GTO Montero Red Hardtop - Holley EFI'd 462, KRE DPorts/Muncie 4spd 1990 Chevy 454SS pickup - Accel DFI/T56 6spd - Hot Rod Power Tour Long Hauler 1996 Chevy K2500 ECSB 'Poopy' 2002 Honda VTX1800C 2016 Cadillac CTS Premium My project thread: http://forums.maxperformanceinc.com/...d.php?t=516826 
|
| Reply |
|
|
The PY Online Forums is the largest online gathering of Pontiac enthusiasts anywhere in the world. Founded in 1991, it was also the first online forum for people to gather and talk about their Pontiacs. Since then, it has become the mecca of Pontiac technical data and knowledge that no other place can surpass.


 Linear Mode

