


| FAQ |
| Members List |
| Social Groups |
| Calendar |
| Search |
| Today's Posts |
|
#21
 04-06-2012, 11:08 AM
|
||||
|
||||
|
Do I see Mayfield Maze under the white?
__________________

|
|
#22
04-06-2012, 11:15 AM
|
||||
|
||||
|
Quote:
__________________
Greg Reid Palmetto, Georgia |
|
#23
04-06-2012, 08:32 PM
|
|||
|
|||
|
Quote:
Quote:
~Joe |
|
#24
04-06-2012, 08:47 PM
|
||||
|
||||
|
Well, I hope it's better than mine was....
    All better now though... 
__________________
Greg Reid Palmetto, Georgia |
|
#25
04-06-2012, 10:22 PM
|
|||
|
|||
|
Damn! That makes me worried now! Thanks alot!
Now I have a sick feeling in my gut......oh well....I suppose I'll have to deal with it and make it good. |
|
#26
04-07-2012, 09:58 AM
|
||||
|
||||
|
Well, if your's was that bad, you'd probably be able to feel it. When I bought my car, someone had already 'fixed' it....With expanding foam, fiberglass and bondo.
Right at the last minute, I decided to sand the primer off of the entire car and that's when I found what was underneath...If your's is that bad, you'd probably be better off with another roof rather than patching like I did. Couldn't take any longer and probably easier. Sorry to hijack...got a little carried away with the pics.
__________________
Greg Reid Palmetto, Georgia |
|
#27
04-07-2012, 10:55 AM
|
|||
|
|||
|
No problem Greg. I like pics...I will call them "examples" of the "could be"

|
|
#28
05-28-2012, 11:46 PM
|
|||
|
|||
|
(Greg, I got the top stripped, see update below)
Ok guys, it's been a while since I posted, but that does not mean I haven't been working on it. I've come to terms with myself on the go-ahead of replacing both quarters (full 1/4's). When I took the vinyl top trim off, I removed the pot metal trim piece and found a large crack in the paint, I followed it and actually popped out a piece of 1/8th" thick filler that had some galvanized sheet metal underneath. So I started chipping away and found the passenger qharter to have been fixed at least 3 or 4 times (see pics)....it's pretty bad when there is filler in places that's over a 1/2" thick. So, I've actually pulled the car all the way apart...front clip, interior, glass, doors,....everything except the car off the frame and motor/trans out. Once I got it apart, I took it to get a little media blast treatment. I did the floors, the hood, all the spot welds around both quarter panels since they both have to be changed, all around inside the trunk floor, since I will be putting a full trunk floor in, the rockers and the tail panel. I found that it needs the following.... ~Both full quarters, ~Full trunk pan (and some light repair on the inner wheel tubs) ~Right outer rocker ~Both front floor pan patches ~Rear floor pan section (under seat) ~Front lower left fender patch ~and a few small things to patch/fix here and there....should not be a big deal Not too bad really.....especially since this car had been in the rustbelt all it's life, but the one that scared me more than anything is the rust in the upper cowl at the bottom of the windshield. It was better than some I've seen, but I knew there wasn't a panel available. So with that said, I finally sold some stuff around the house and came up with the funds to make this project possible. This week I will be making a 5K+ order from PY and that will include nearly everything to get this thing more than 90% done and in really good condition.....that is, if I don't depend on anyone else doing the work. Here are some pics.... 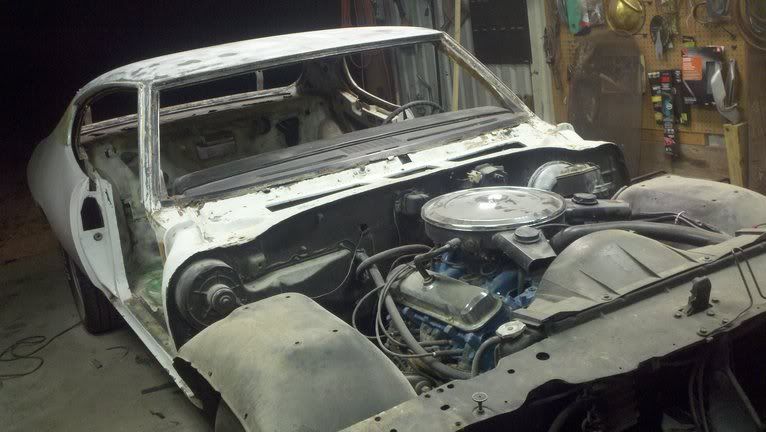 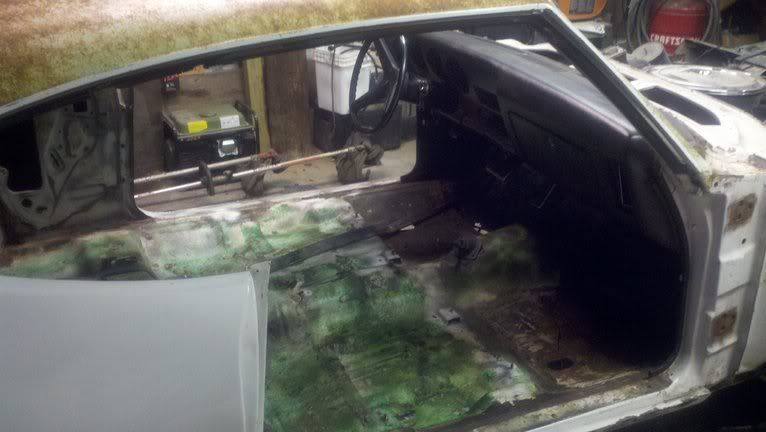 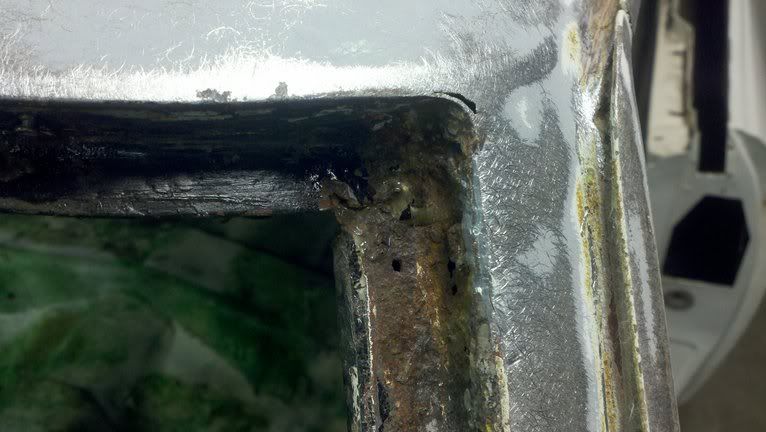 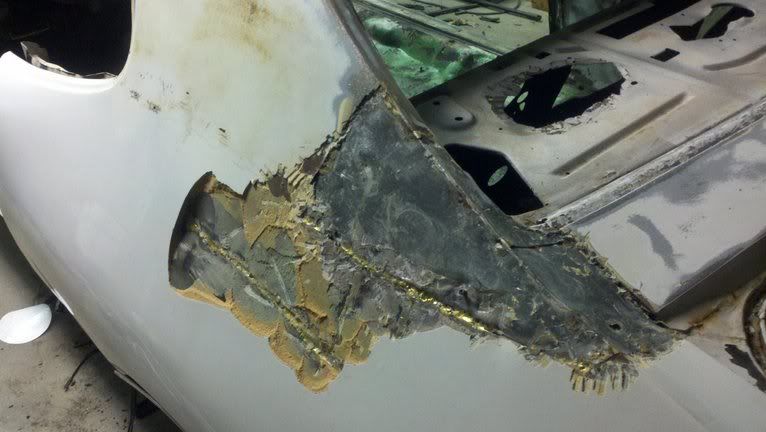 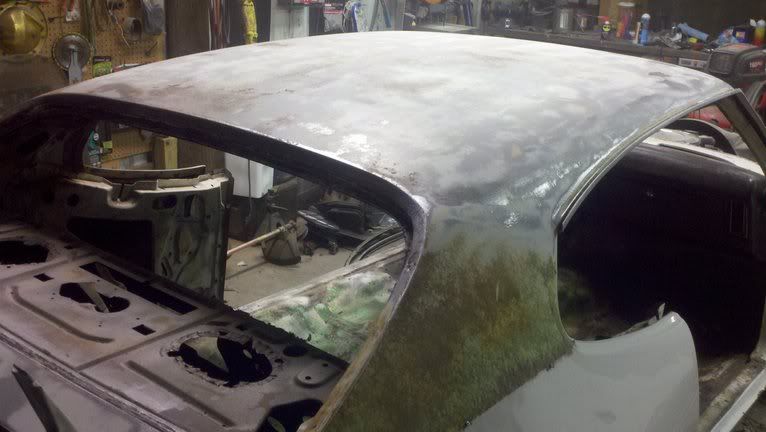 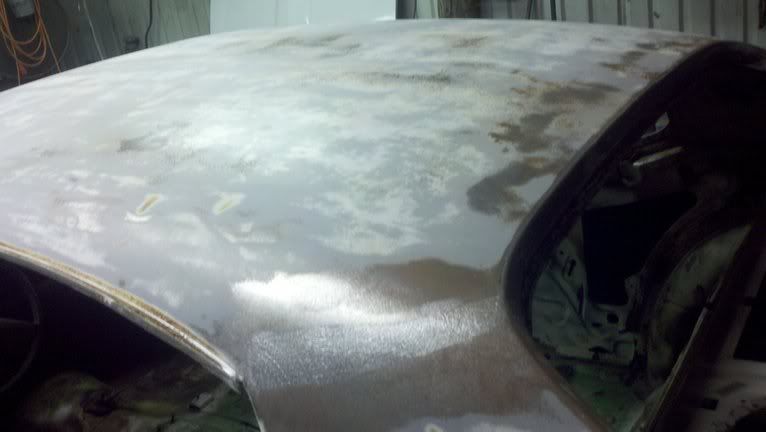 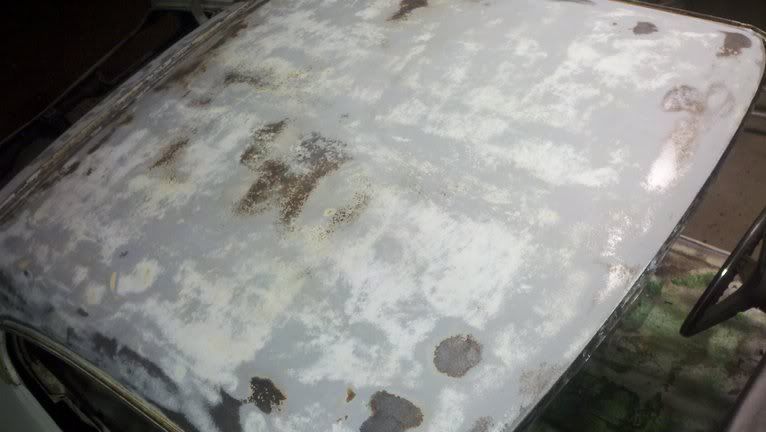 The top didn't look all that bad. It had some pitting, but it wasn't bad. I blasted it with walnut and that took out all the rust, but sadly I didn't get any pics since I had it in a sealer almost as soon as I got back. I knew it was going to rain and be very humid the next day, so I didn't want that surface rust to haunt me later. 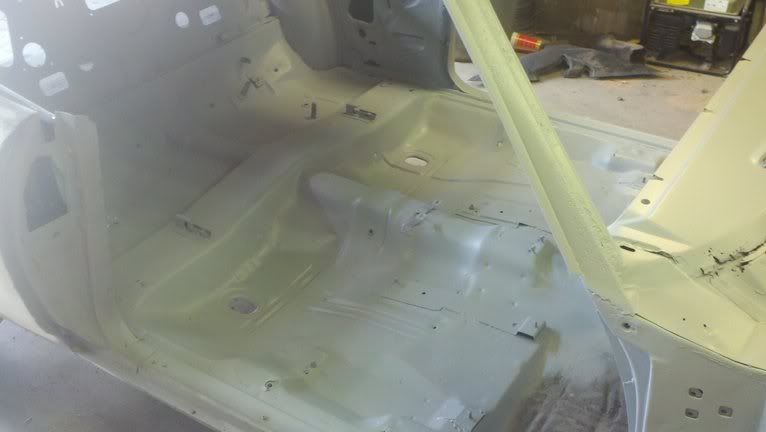 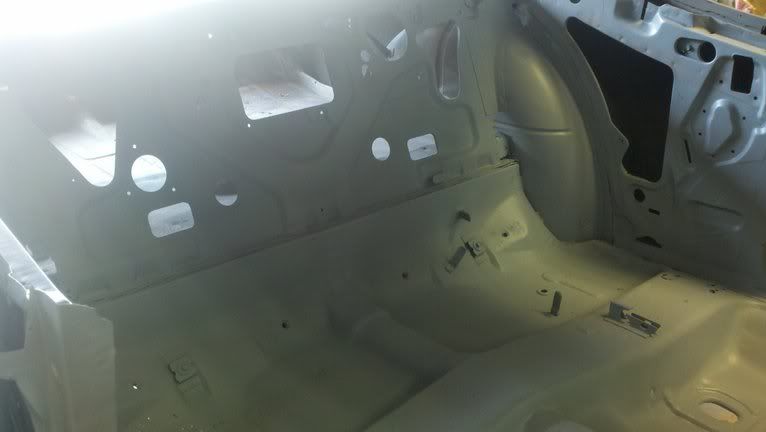  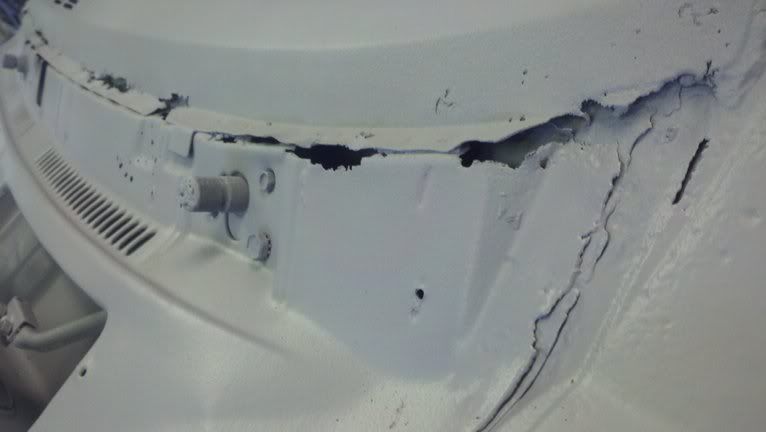
|
|
#29
05-29-2012, 12:03 AM
|
|||
|
|||
|
So, on my 3 day weekend, I went out and started tackling the painstaking lengthy, time consuming task of repairing the upper dash. I spent approx 2 days on it working at it here and there between house duties. I got the upper cowl all finished off, but I'm still working on getting the actual dash repaired.
Some pics .... After removing the upper dash, this is what I started out with.... 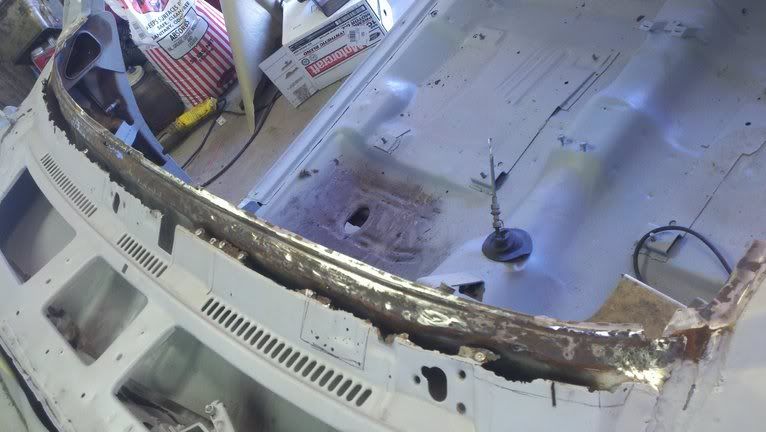 Took about 3 hours (just on the drivers side) of cutting, fitting, grinding and welding 18 gauge sheet metal, but it turned out pretty good I think.... 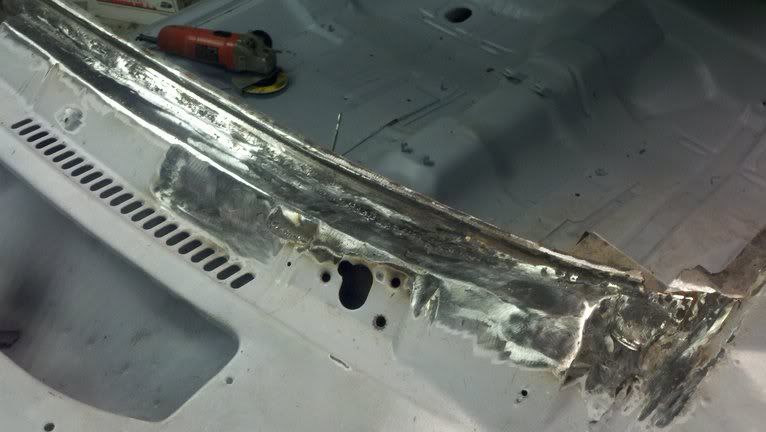 Now, the pass side was a different story. It was alot worse. There were places that were completely rotted away, so most of that had to be all rebuilt.... Started with this.... 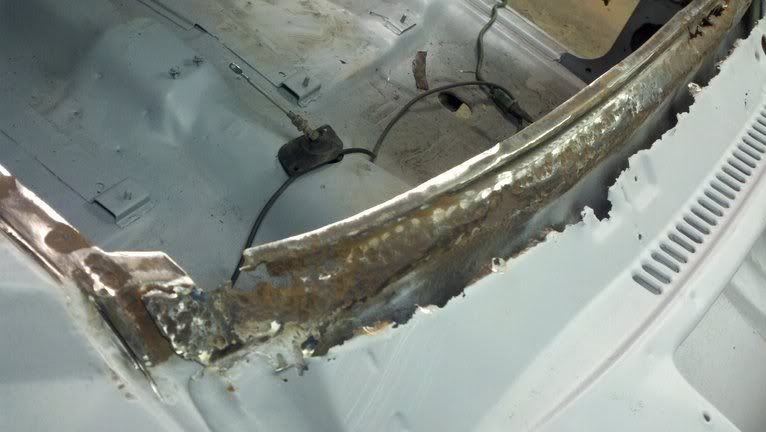 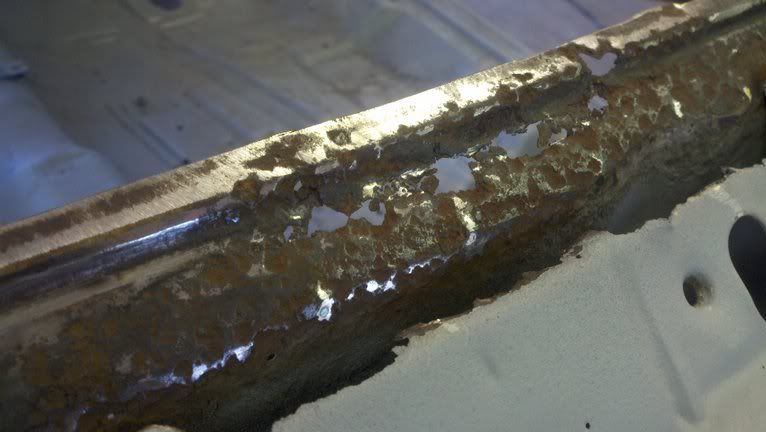 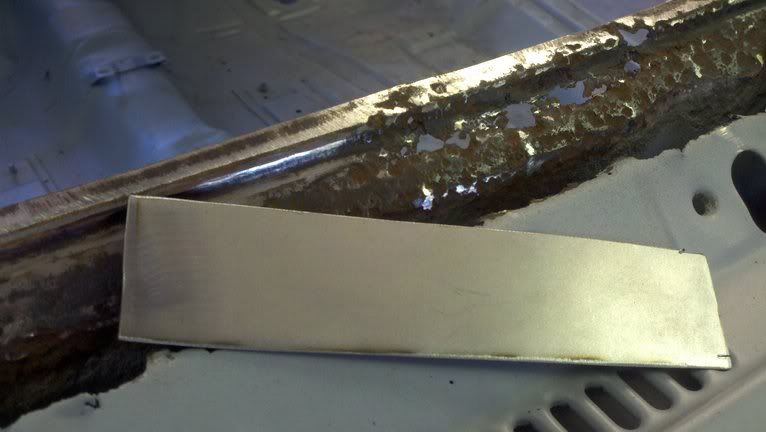 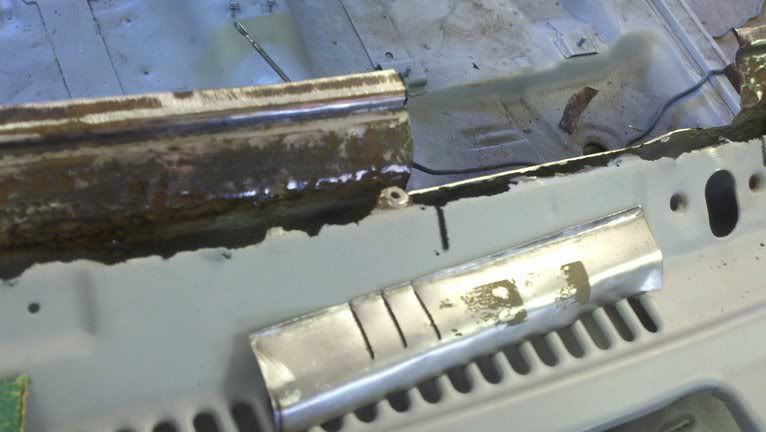 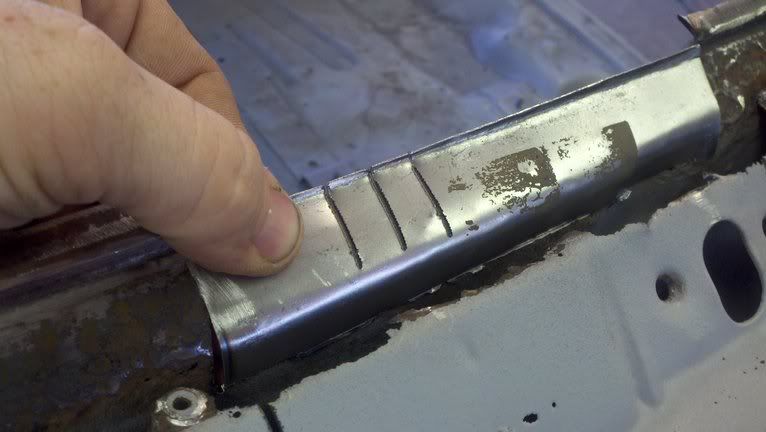 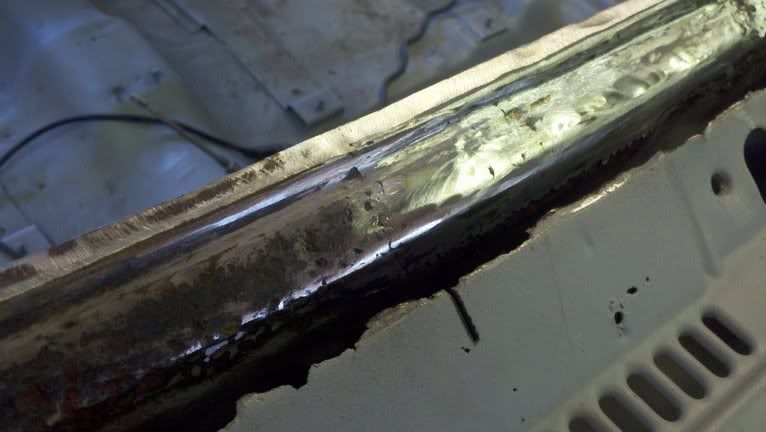 And after fixing all that junk on the lower cowl..... 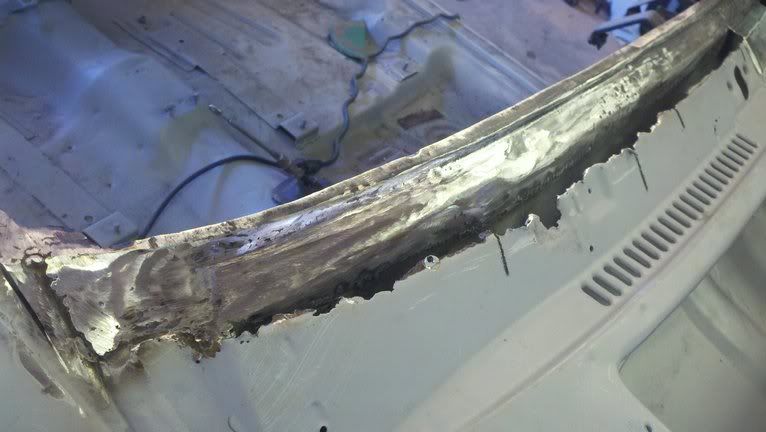 I had the upper cowl to contend with. Was pretty tricky, but I managed.... 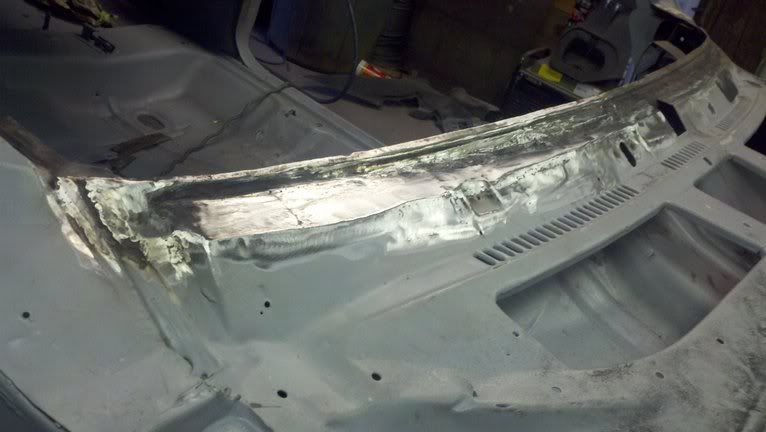 So, this is what I have to fix next...... 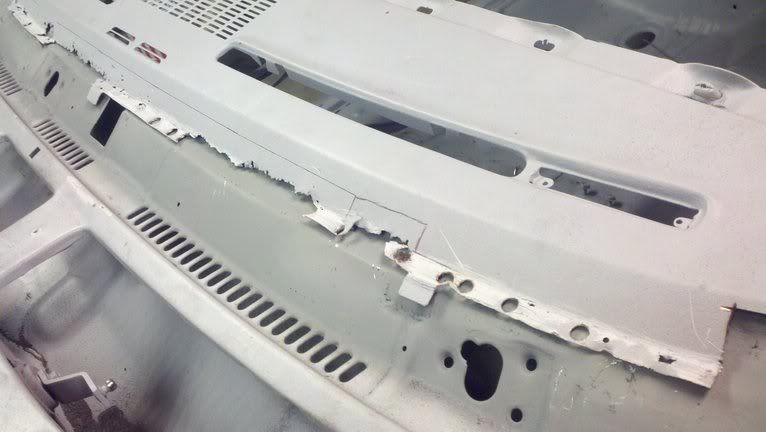 Got this much done, and I was tired...... 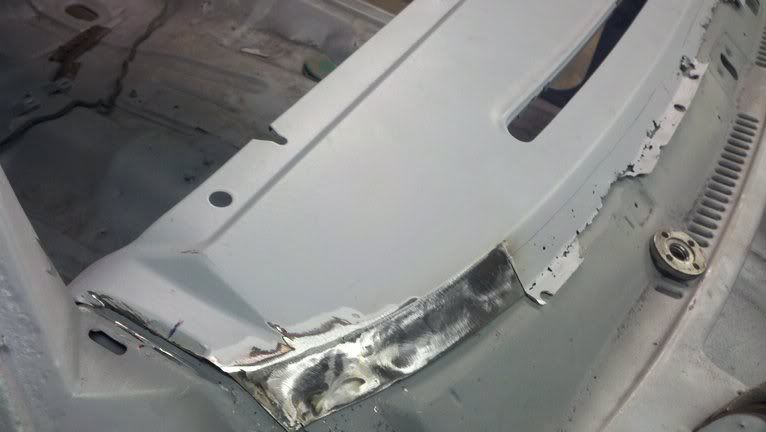 To be continued........................... |
|
#30
05-29-2012, 04:51 PM
|
||||
|
||||
|
Wow....that is the thickest bondo I've ever seen on that left quarter. Looks like they just tried to 'carve' a GTO.
You've got your work cut out for you but it looks like it's in good hands. Nice work so far.
__________________
Greg Reid Palmetto, Georgia |
|
#31
06-11-2012, 12:15 AM
|
|||
|
|||
|
Quote:
Ok, so the upper cowl/dash is done! I figure I have around 8 to 10 hours in it. Was a lengthy job, but I think it turned out well..... 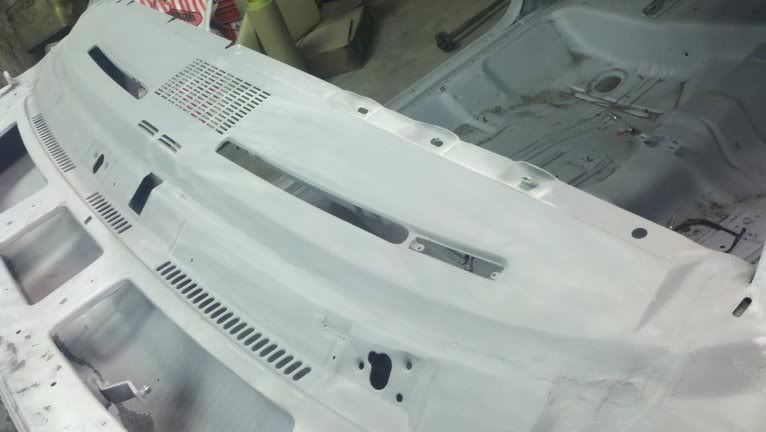
|
|
#32
06-11-2012, 09:04 AM
|
||||
|
||||
|
Looking Good. Noticed you removed vin tag. Any worry about right rivets to put back? I know when back in place a small plastic trim covers the rivets, but do you worry that anyone will question it?
__________________
|
|
#33
06-11-2012, 11:40 AM
|
|||
|
|||
|
Quote:
I figured someone would be all over that. Yes, I did take it off, yes I took it off for restoration, yes I own this car with a title in my hand and in my name, yes I have the correct rivets, and no I don't think anyone will have any reason to question the accountability of the VIN tag as it matches the frame and the body stamp. No worries anyway.....I will never sell this car. 
|
|
#34
06-22-2012, 11:33 AM
|
||||
|
||||
|
Quote:
Great story and great work so far.
__________________
Project "Thanks Dad!" |
|
#35
07-16-2012, 01:53 AM
|
|||
|
|||
|
Thanks 68 DT.
Ok guys, time for a little update. I finally got in all my parts from PY. Took a little longer than expected, but it's here and I have a ton of stuff to do. As of now, I have about 90% of everything to get this car back together. First things first.... gotta tackle the drivers side 1/4 panel. What a mess that was. Right away, I realized that the previous work that had been done was an 80% 1/4 skin. This skin, when installed requires the removal of the last 12" or so of the rocker panel for correct fit. The actual panel goes all the way to the bottom of the rocker panel. This is something I did not realize or catch before I ordered parts. So that being said, and I didn't have a drivers side rocker and I was going to replace the pass side anyway (I had the parts) I managed to find a section of rocker on the pass side that was not rotted, cut it out and fabbed it in on the drivers side. Seems to work fine for me. I also had to wait a day for a pair of outer fender wells to come in....I forgot to order them. After the outer fender install, I attempted to fit the full 1/4 panel. After about a dozen on & off's for fitting, the Dii 1/4 seems to fit pretty good. Not nearly as bad as I was thinking. The worst place was in the upper rear window....was not even close to matching (I didn't think to take a pic), so after about an hour of fiddling with it, I decided to remove that portion from the original 1/4 I removed and fab it in....and it was a great success! I even took the time to weld in metal over the roof/1/4 seam so I don't have to worry about using the awful expensive fiber filler. Now it needs just a small skim coat and she be done! So as of now, I have about 10 to 12 hours in the 1/4 panel install....and all window trim fits nicely. I hope the other side goes as good. Some pics...... Missing rocker portion.... 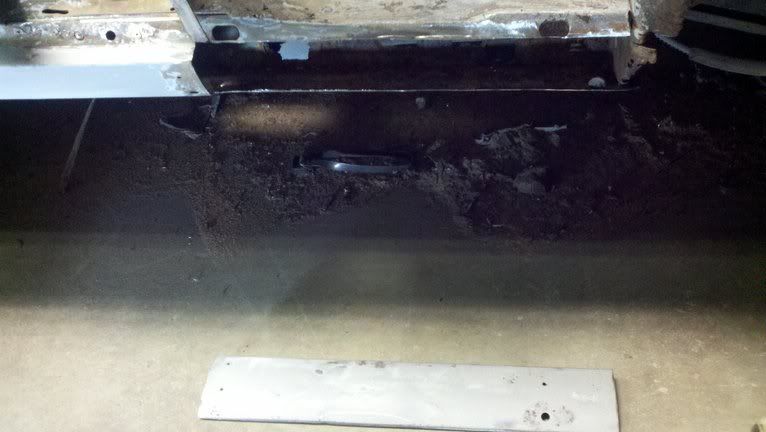 Removed from pass side.... 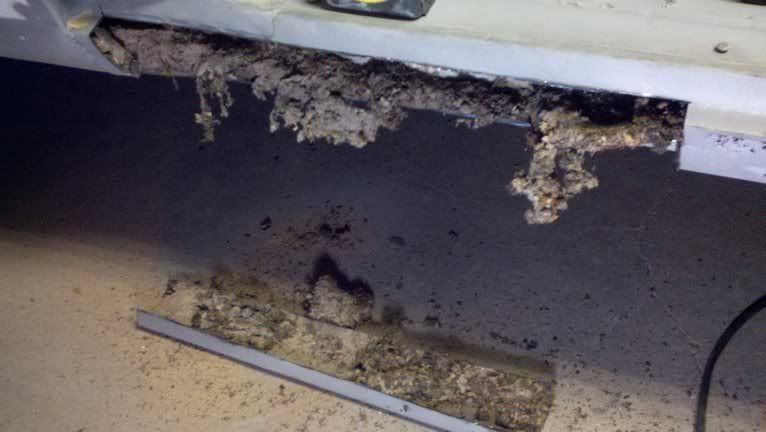 Fabbed in on drivers side.....(not cut for length until 1/4 installed) 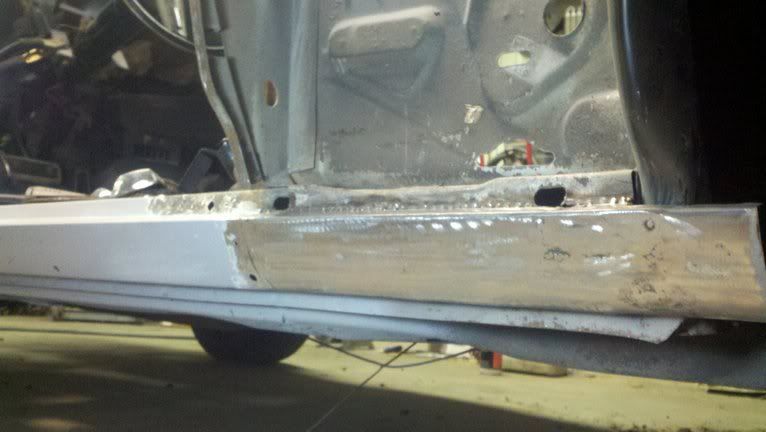 New Dii 1/4.... 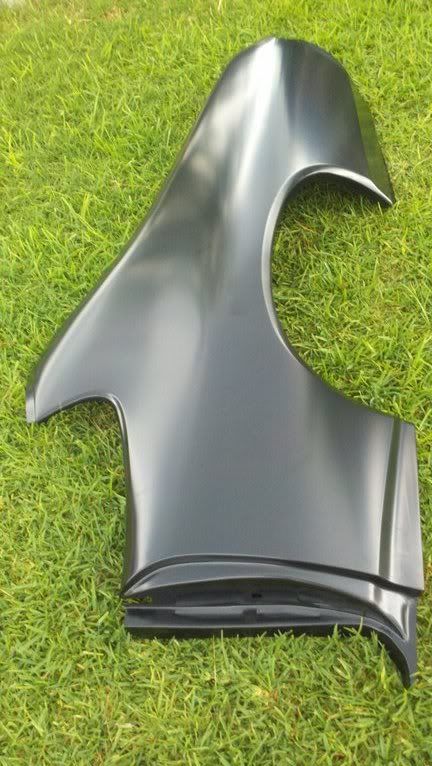 Lead seam.... 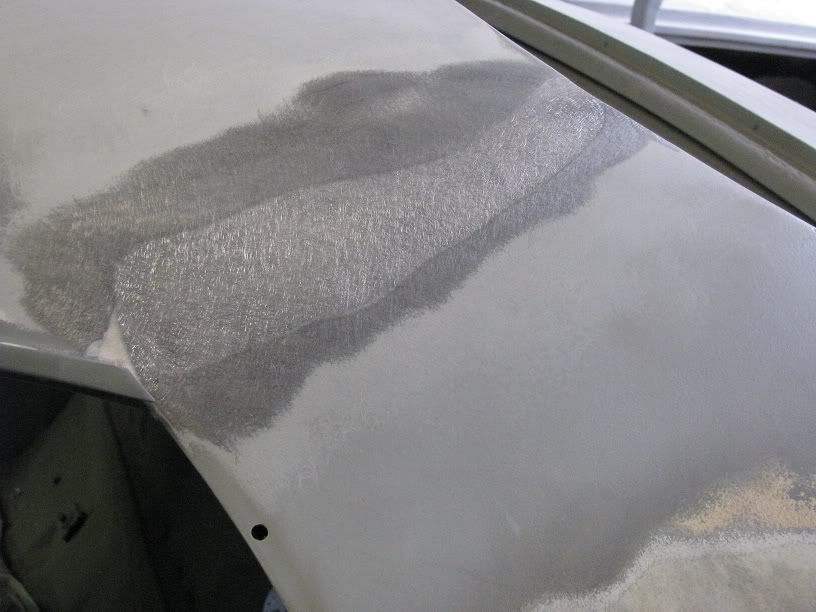 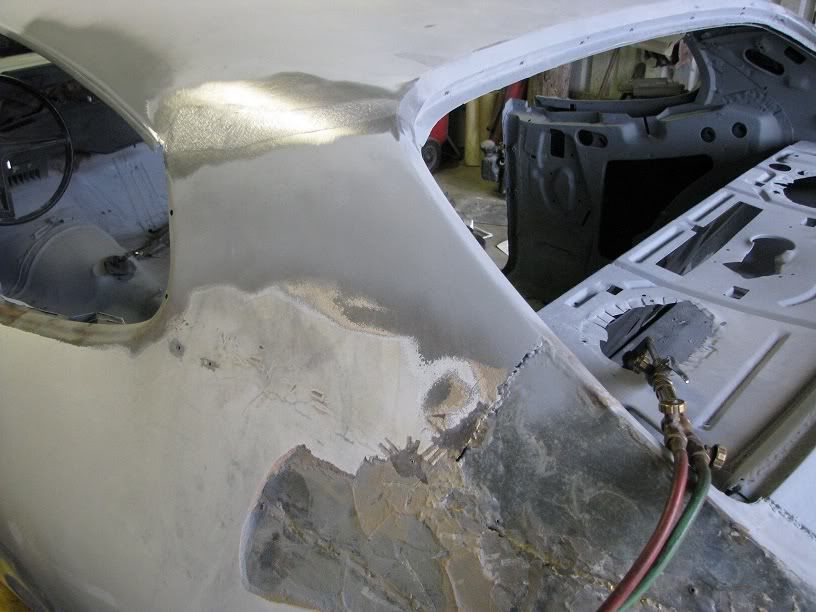 After a quick torching..... 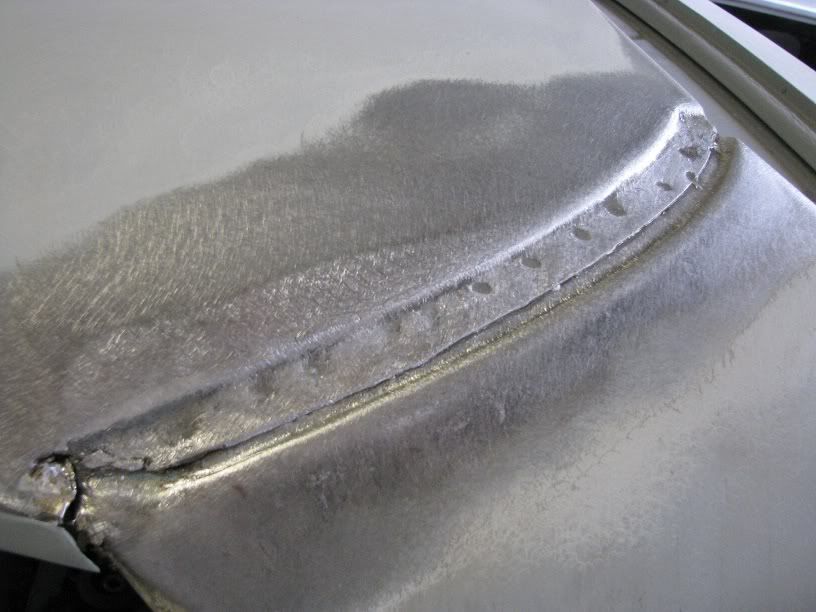 Old, porly/mis installed pile of crapppp removed........ 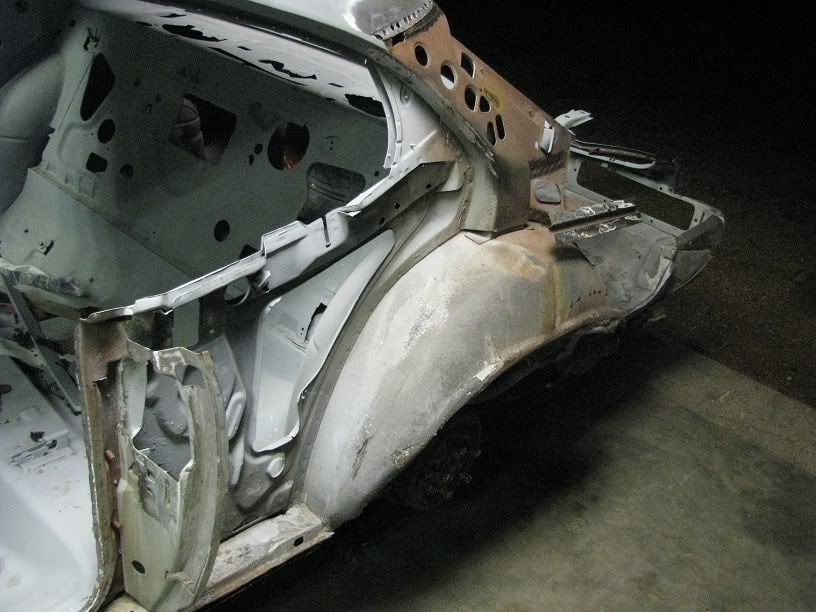 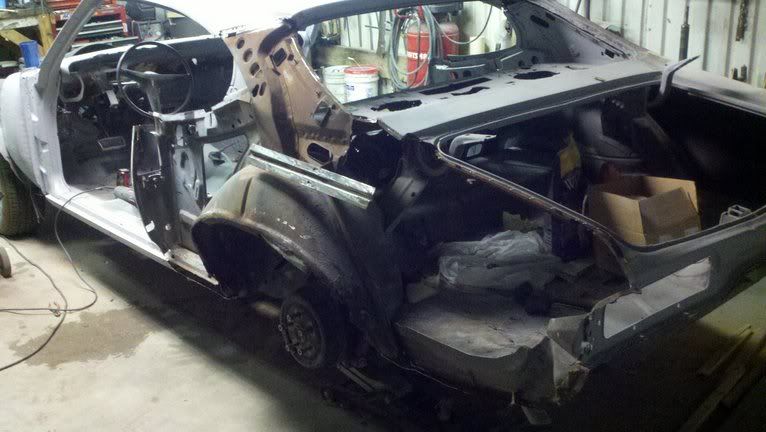 After a little fitting here and there.... 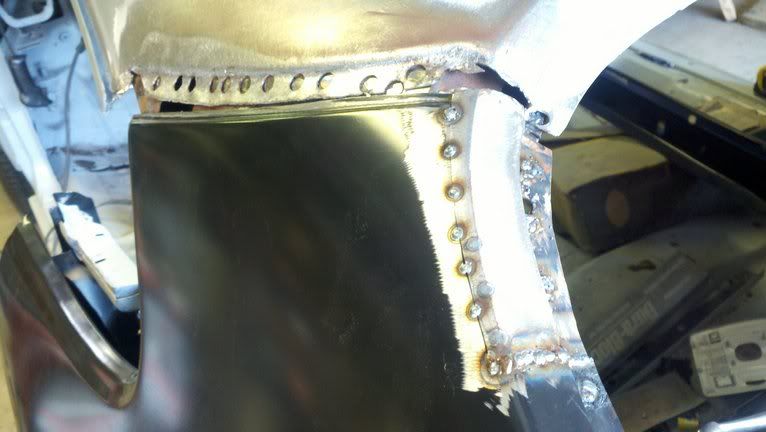 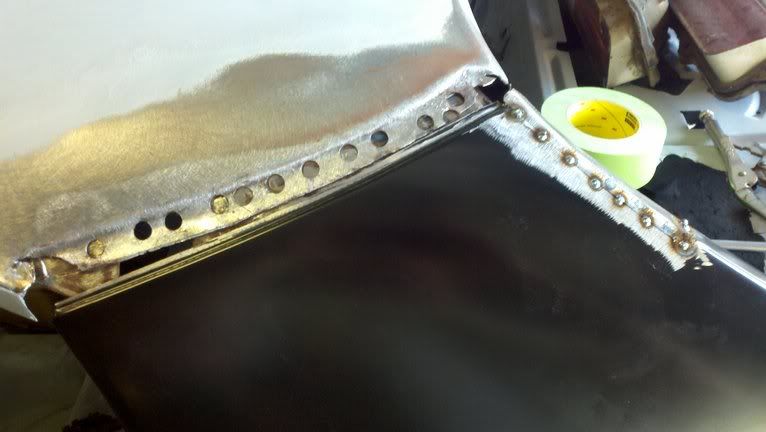 She starts lookin' good...... 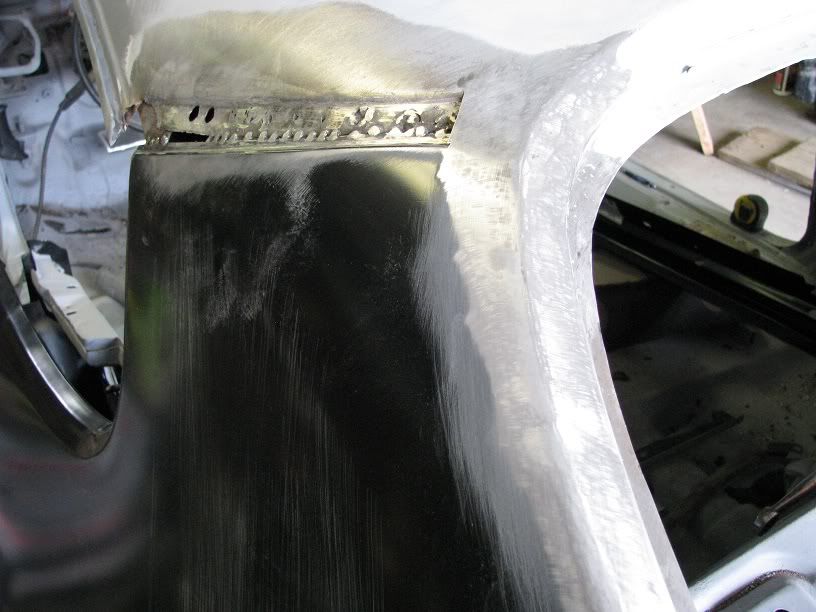 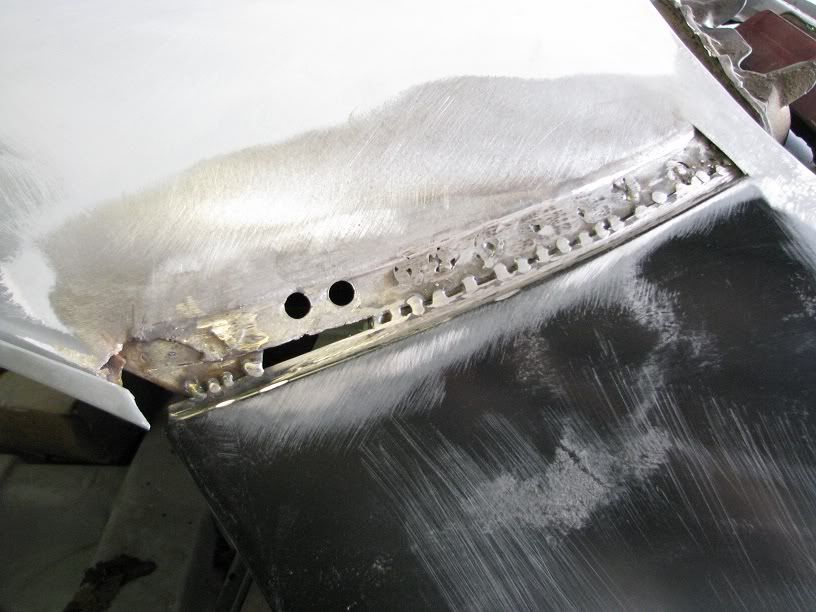 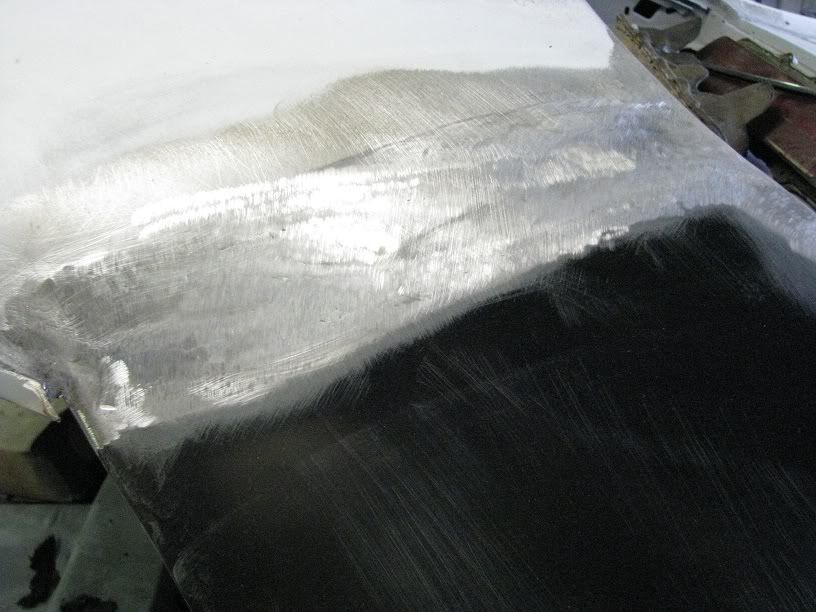  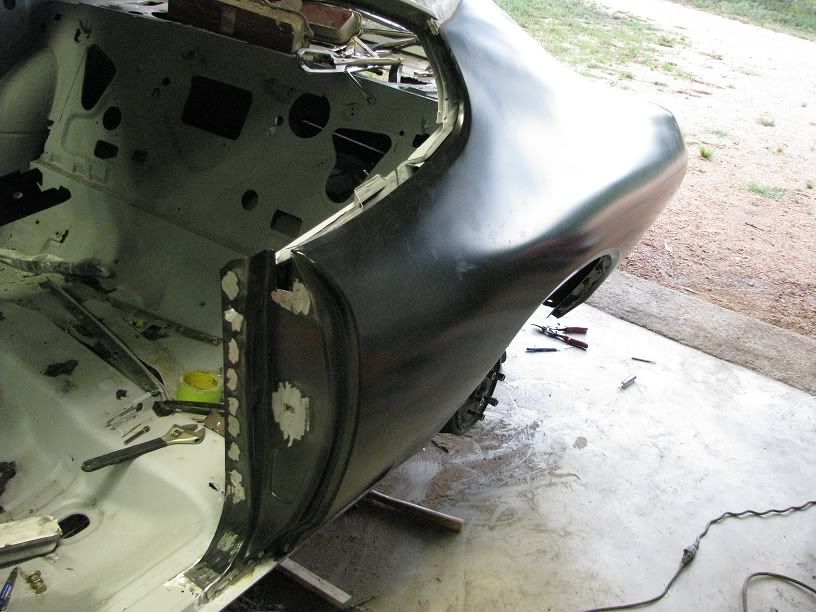 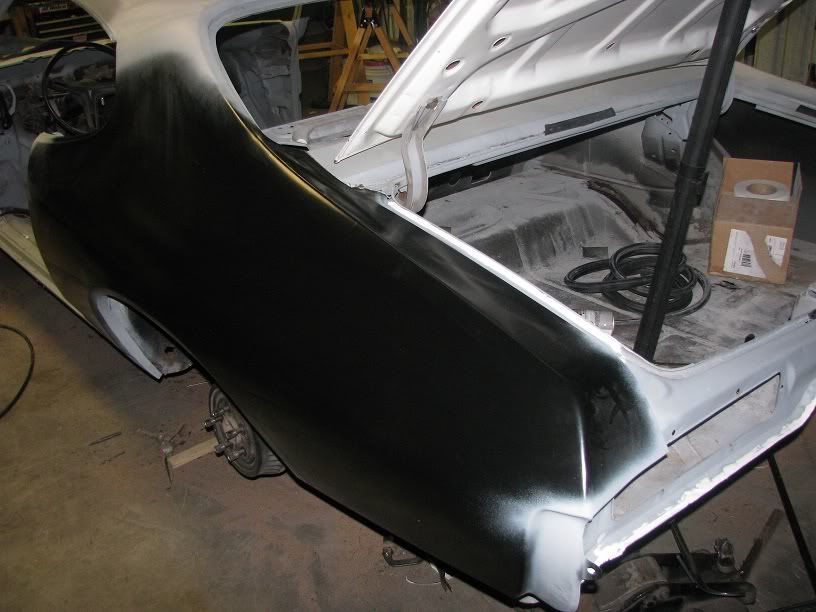 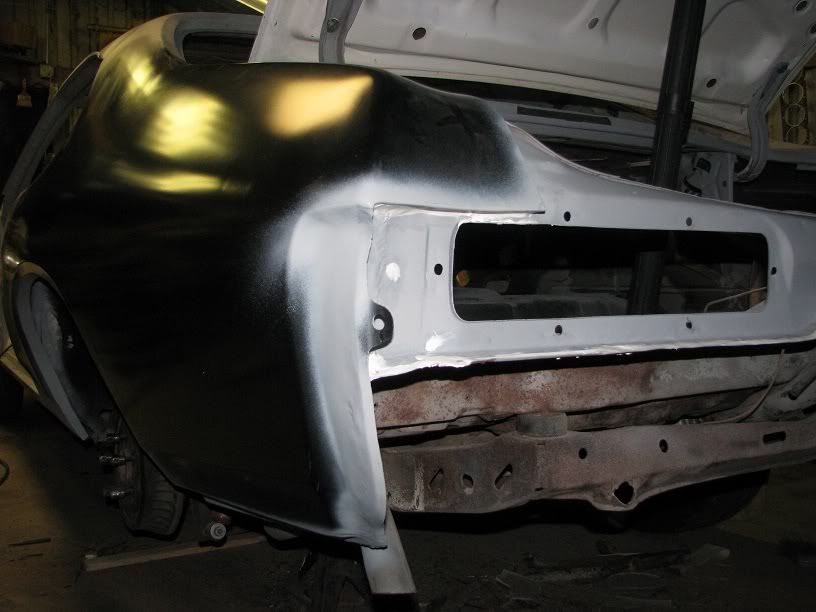 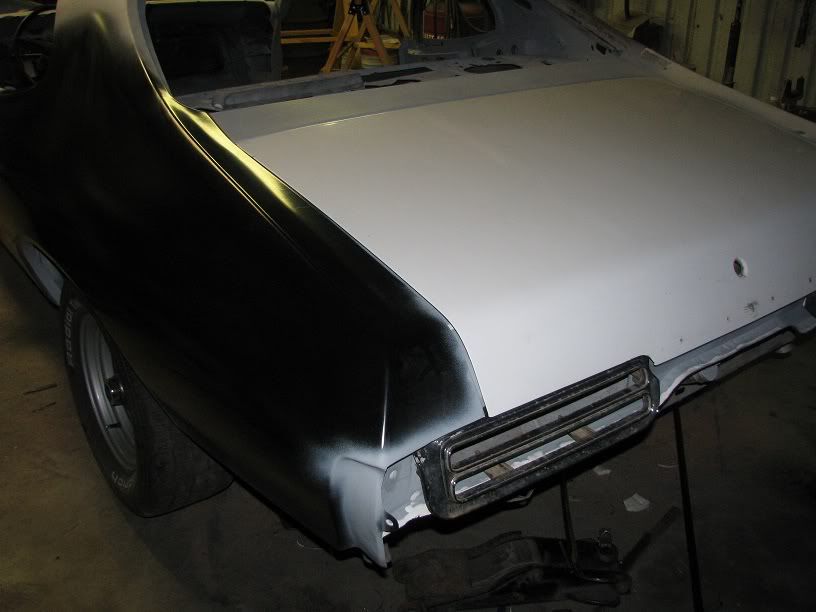
|
|
#36
07-16-2012, 08:30 AM
|
||||
|
||||
|
That looks really good.
__________________
Greg Reid Palmetto, Georgia |
|
#37
07-22-2012, 11:56 AM
|
|||
|
|||
|
Quote:
~Joe |
|
#38
08-21-2012, 12:27 AM
|
|||
|
|||
|
Ok guys, another update is due. I finally managed to get that damn 68 Camaro out of my hair. took nearly twice as long as I thought would. Anyway, I finally got the pass side 1/4 yanked off and the new one all welded up. Also replaced the outer rocker panel, outer wheel well, and deck filler panel. Was a hell of a time fitting this 1/4. It seemed to fit physically better than the drivers side, but the biggest problem was the upper portion where the 1/4 and roof come together. The Dii 1/4 fits well in most places, but this area is a place that they really need to work on....it fit almost the same way on both sides. This time I took pics. There would be so much work to do to make it fit, so to save some time, I cut off the piece I needed from the original 1/4 and fabbed it in. Still had a ton of time and labor in it, but it is what it is. Alot of time was also put towards the trunk lid fit. Made absolutely sure the trunk lid and 1/4's line up evenly and flat....I hope this things looks good with the trim on it.
So the next thing on the list is to get the body off the frame and commence phase 2 which is to get the trunk pan replaced and do a little work on the floor to inner rockers. Pix....... 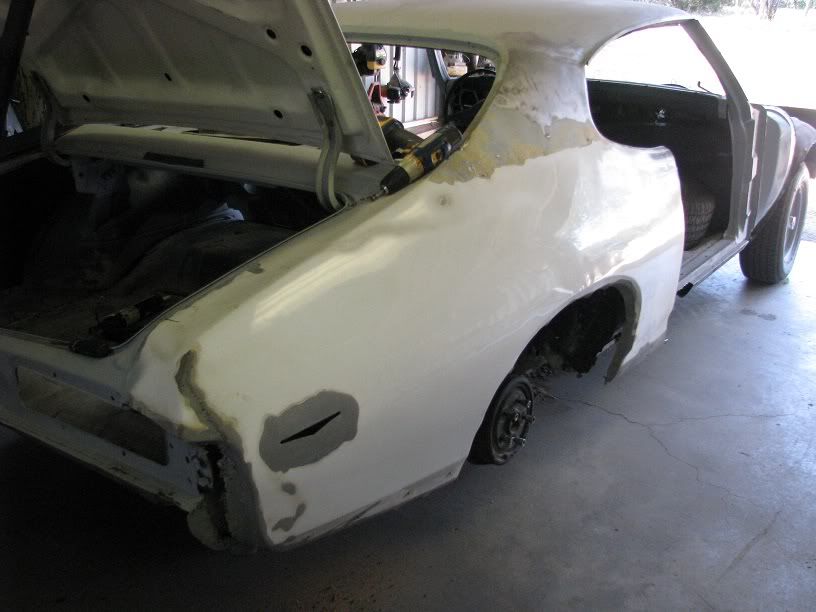 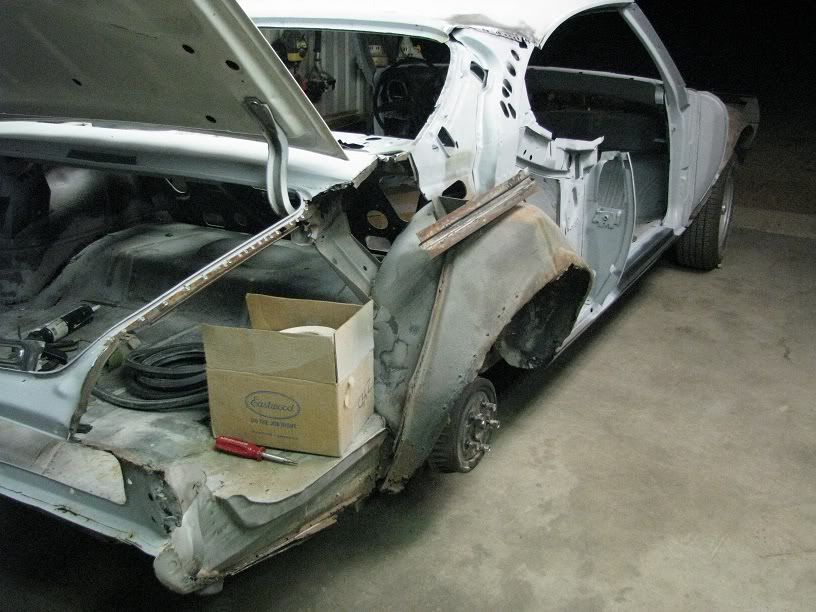 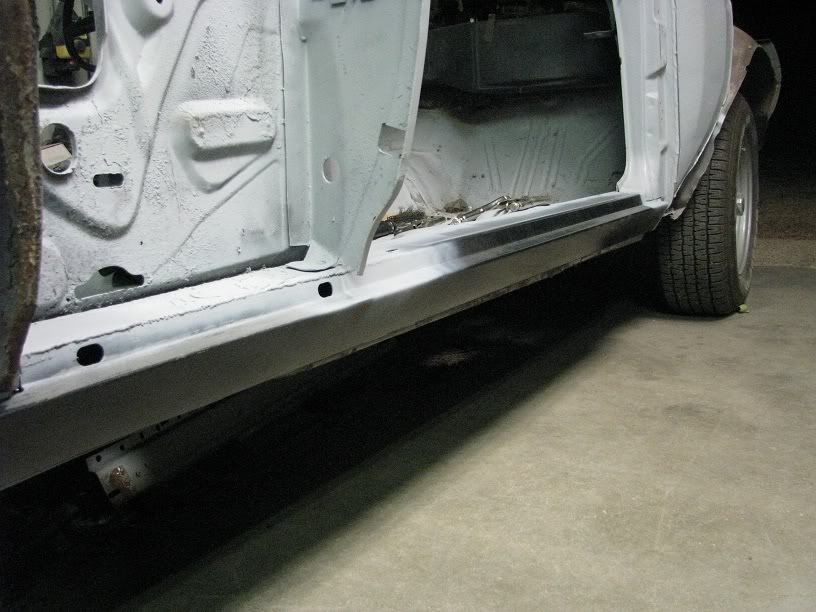 You can see the piss-poor job someone did replacing the deck panel at one point. Prolly the same dude that put 2 gallons of filler in the drivers 1/4 panel.....  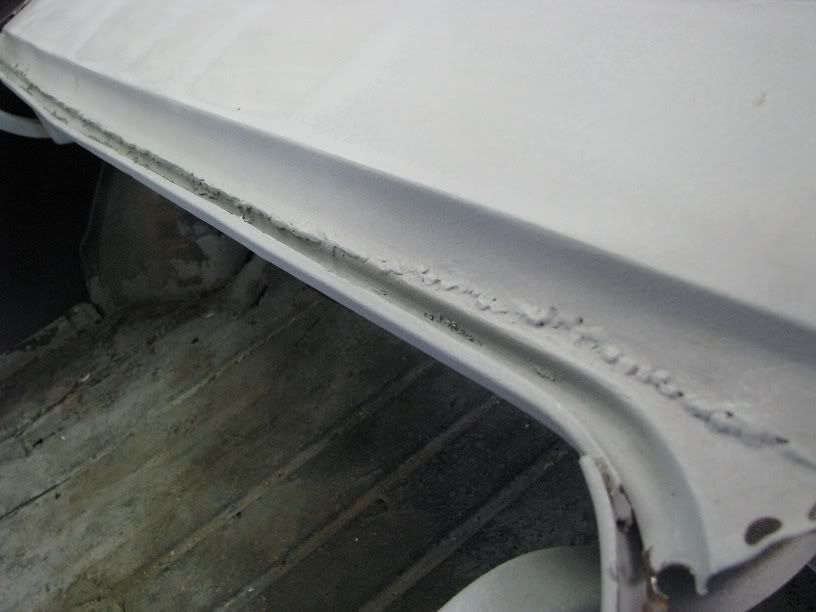 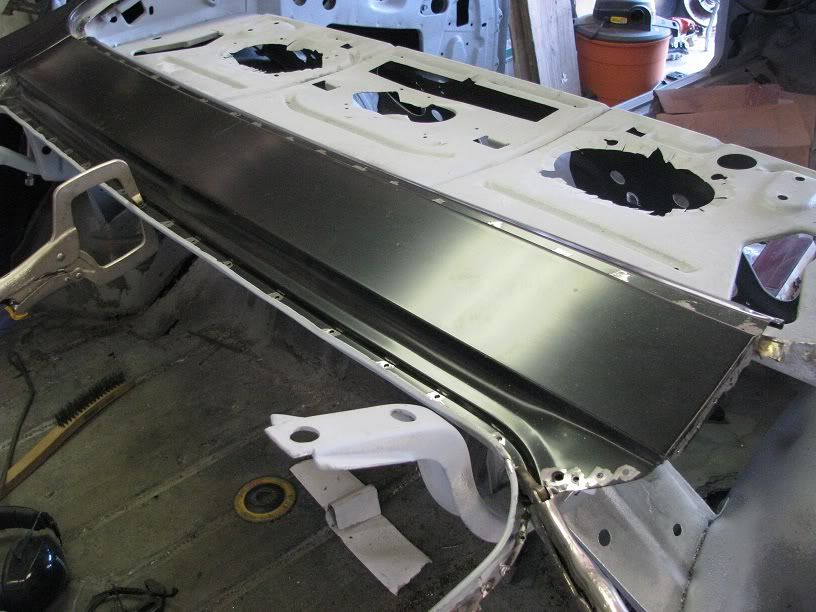 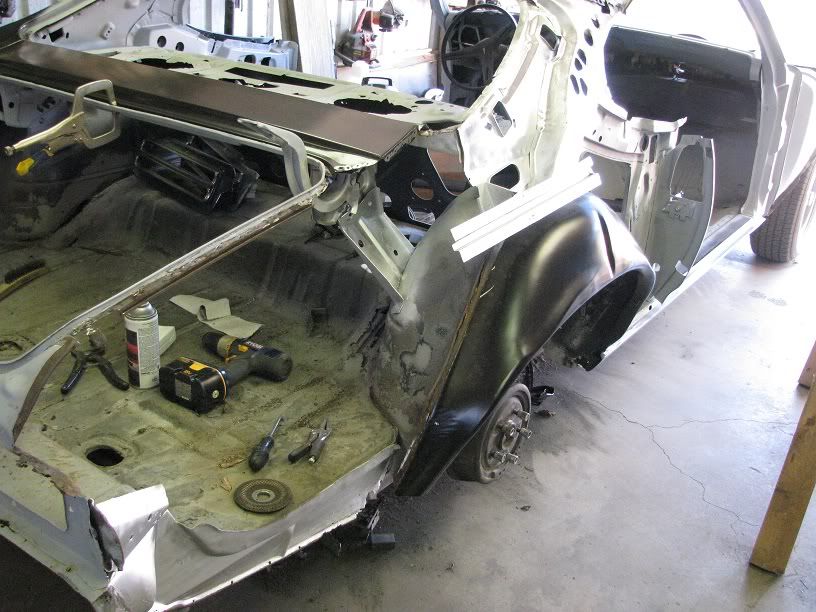 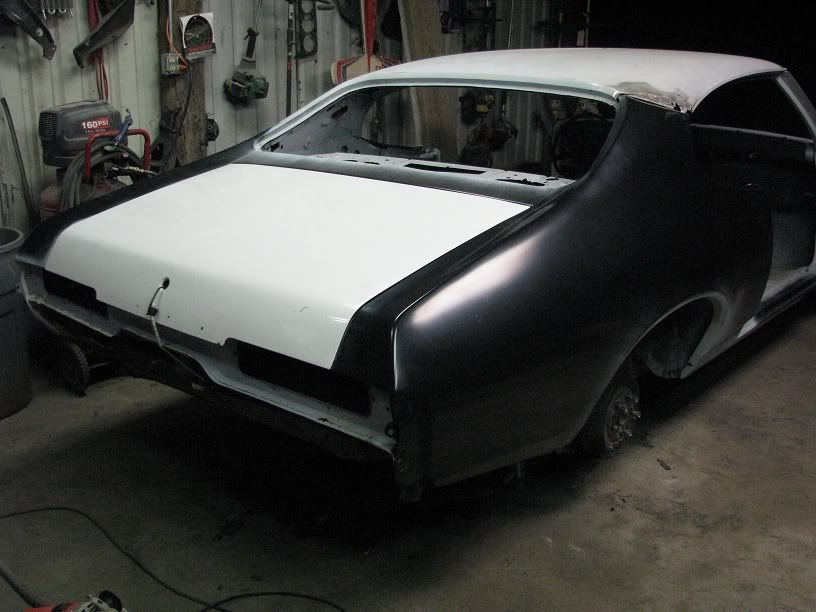 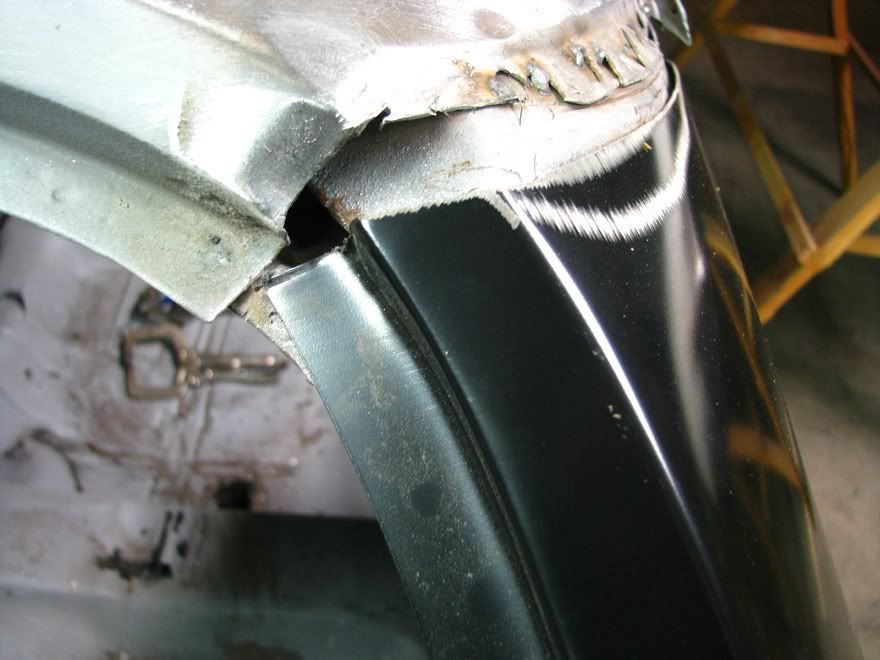 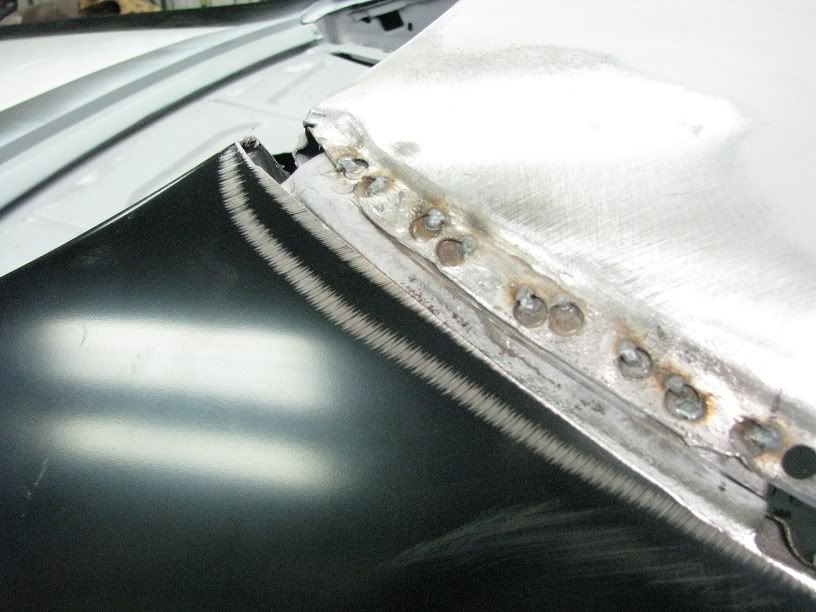 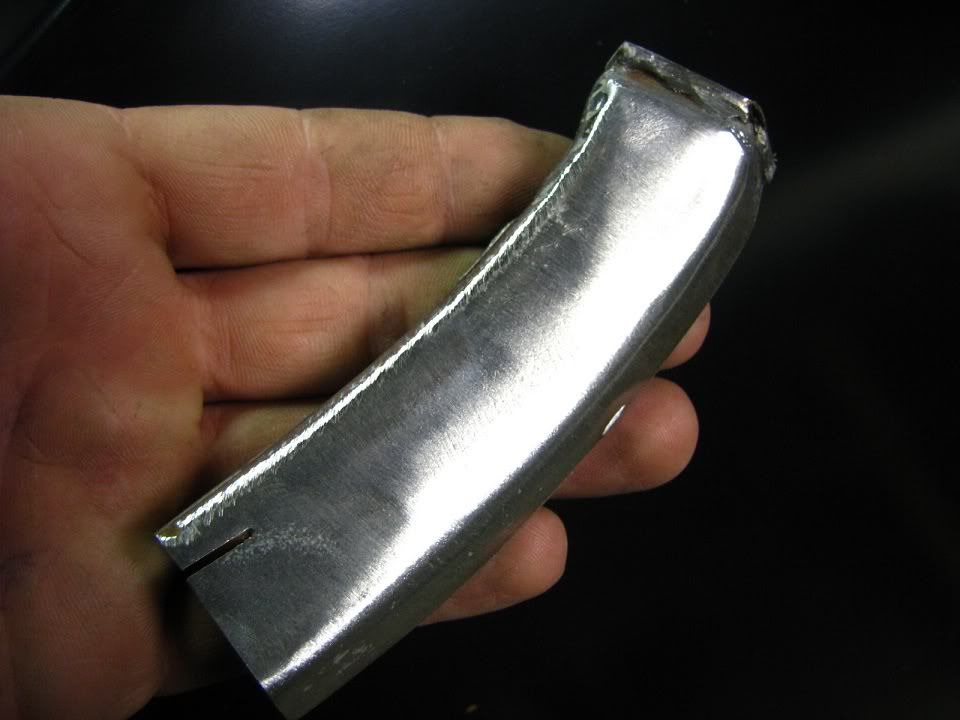 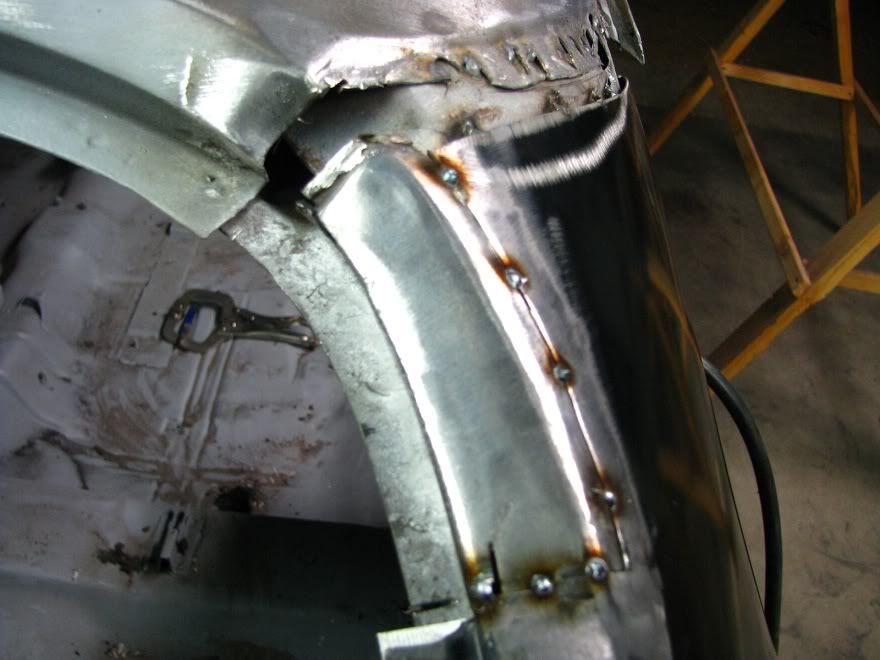 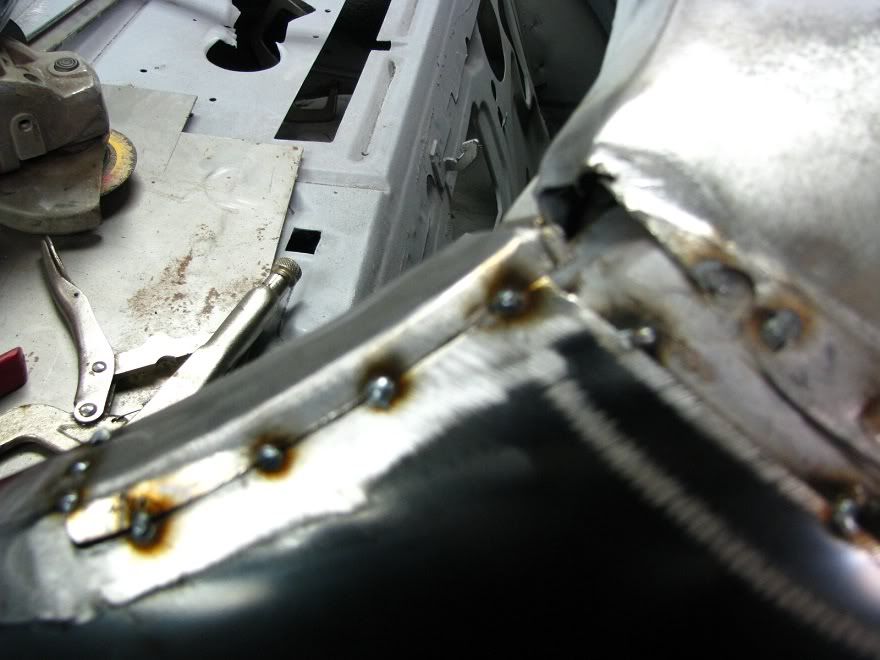 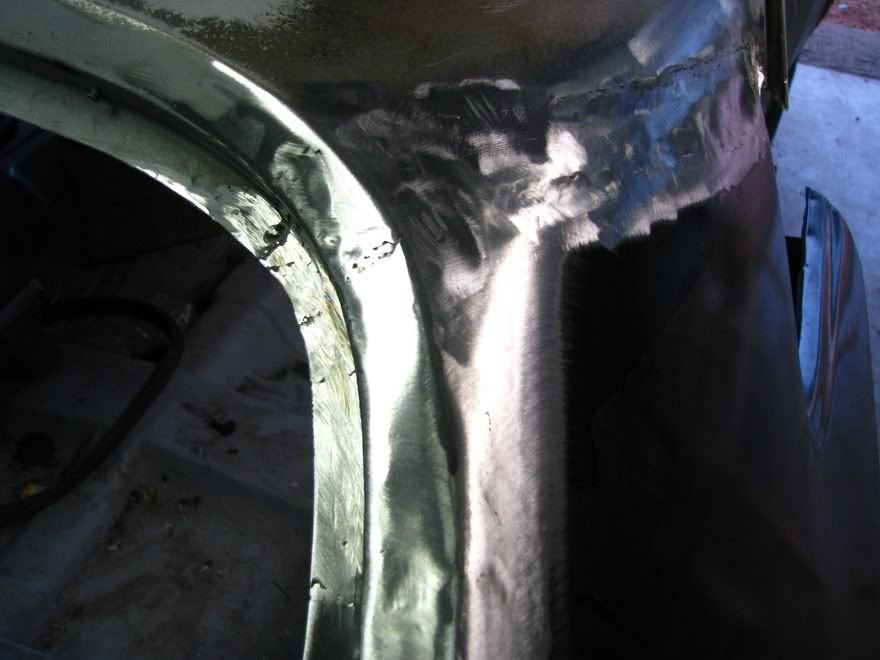 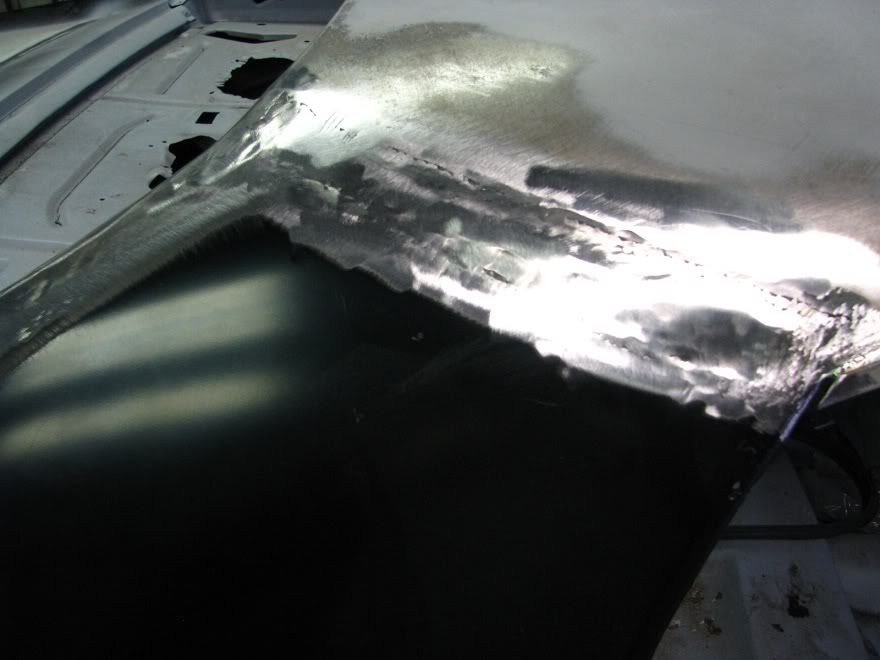 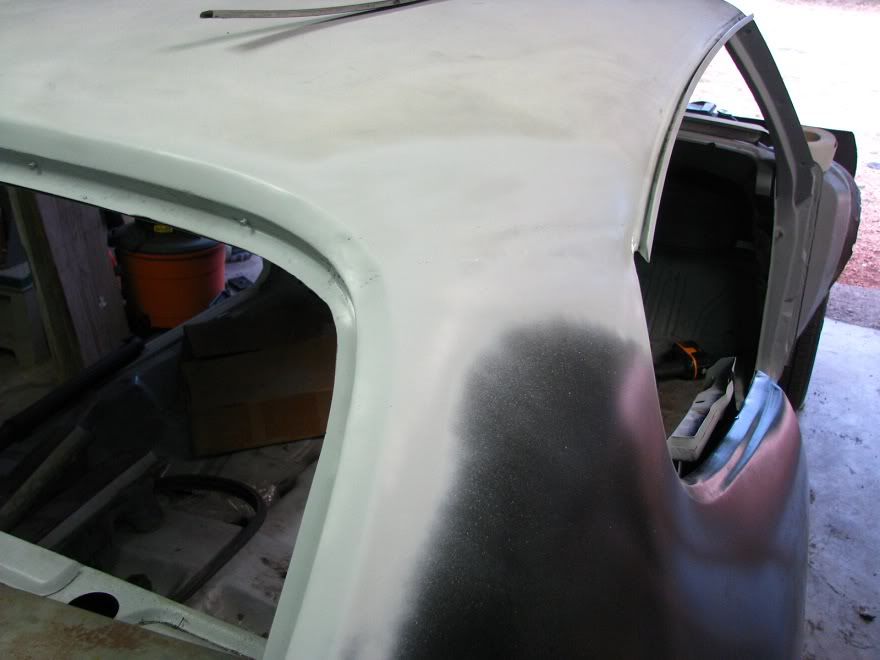 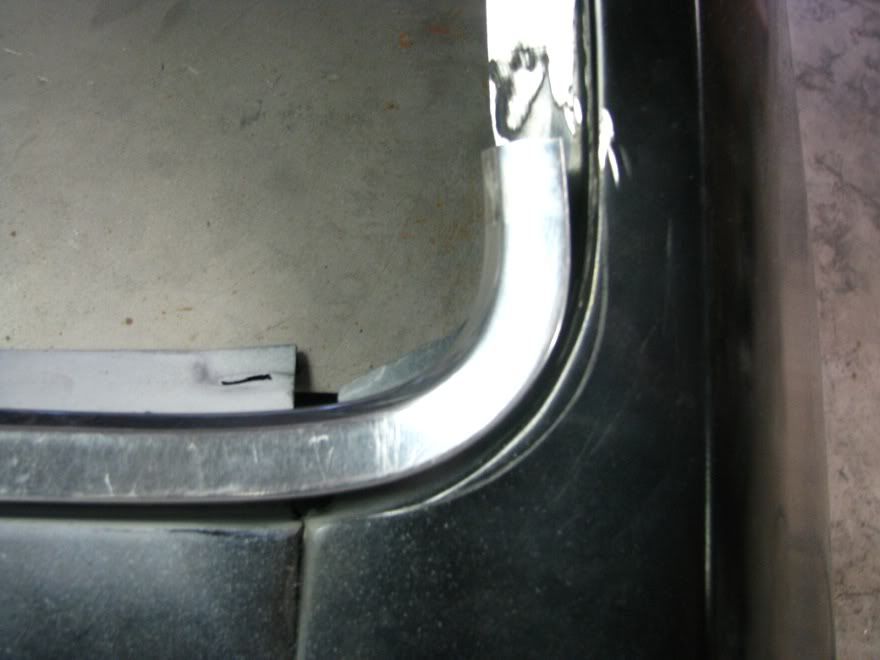 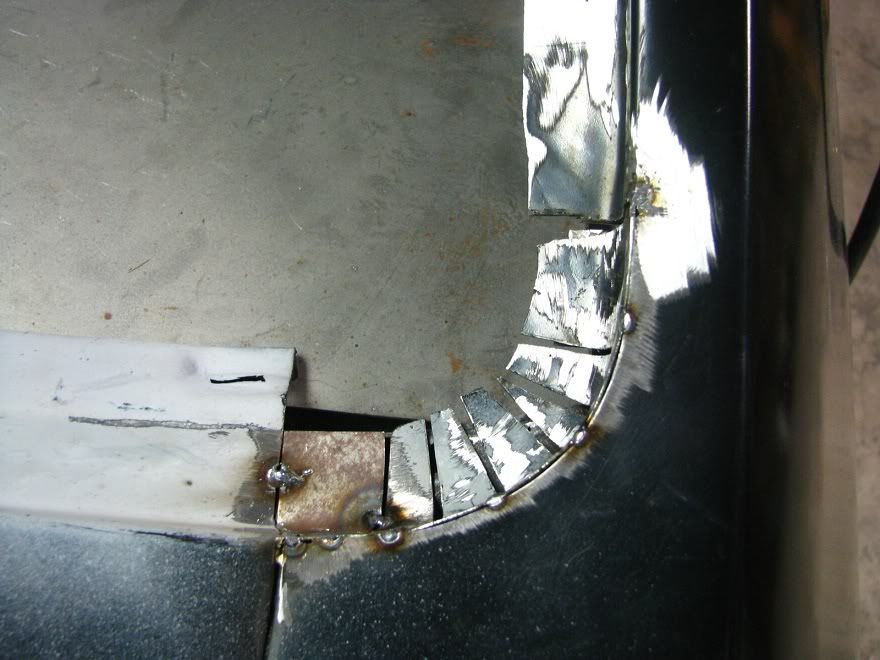 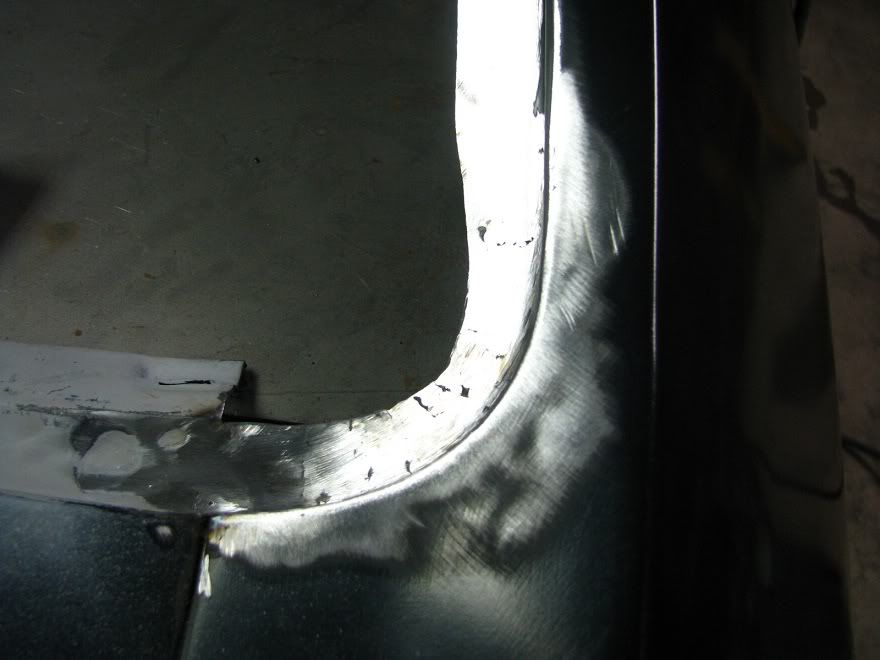  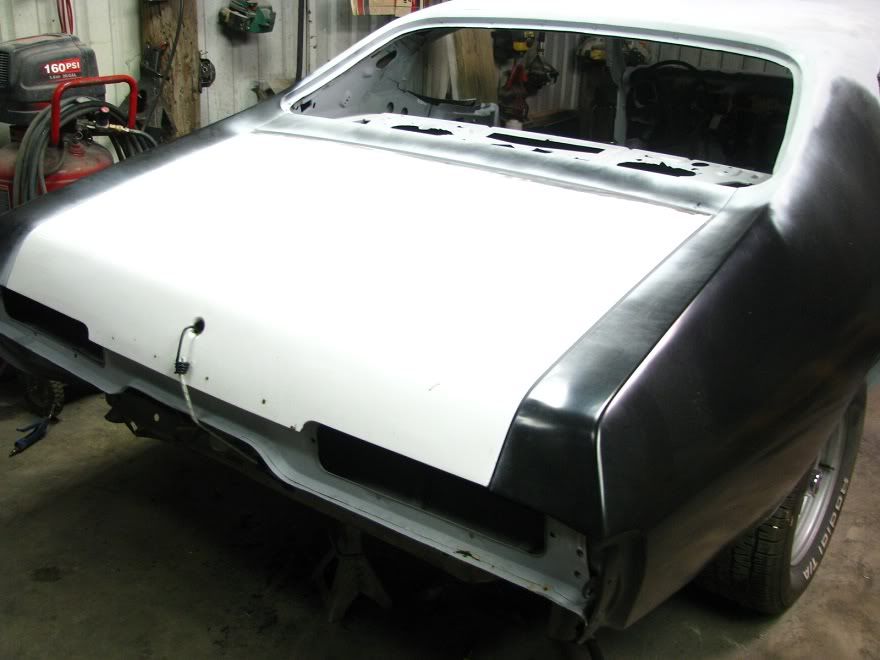 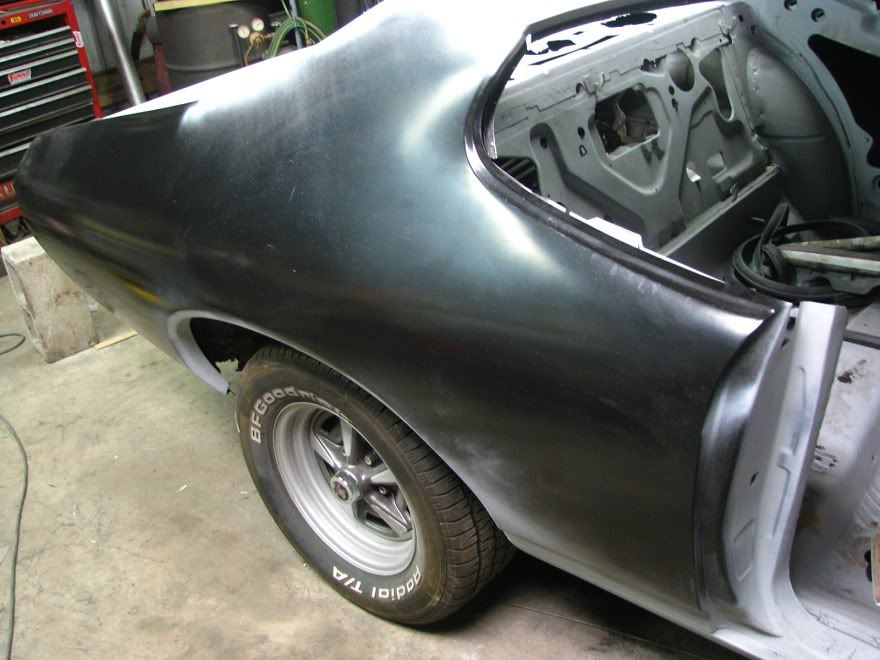 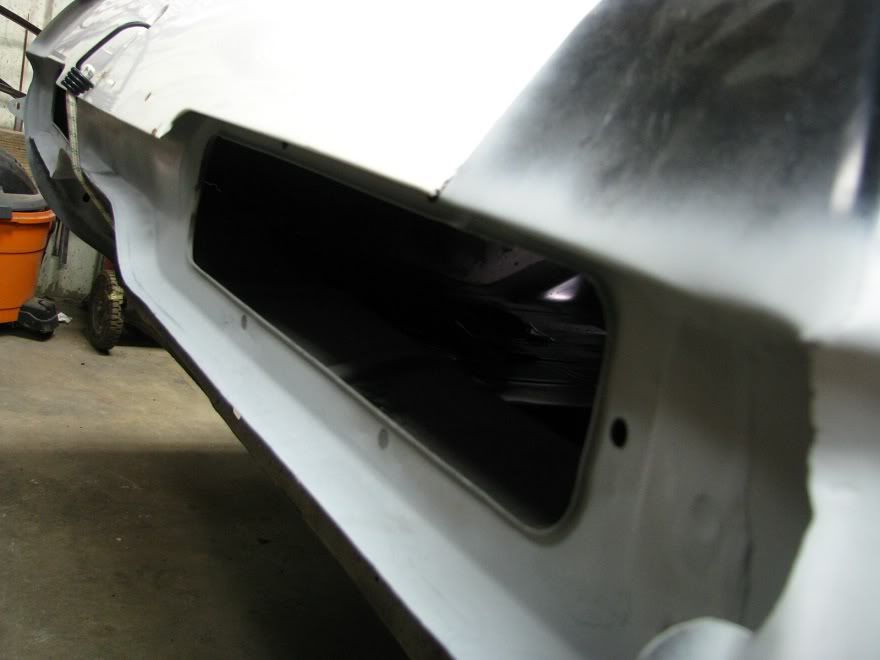 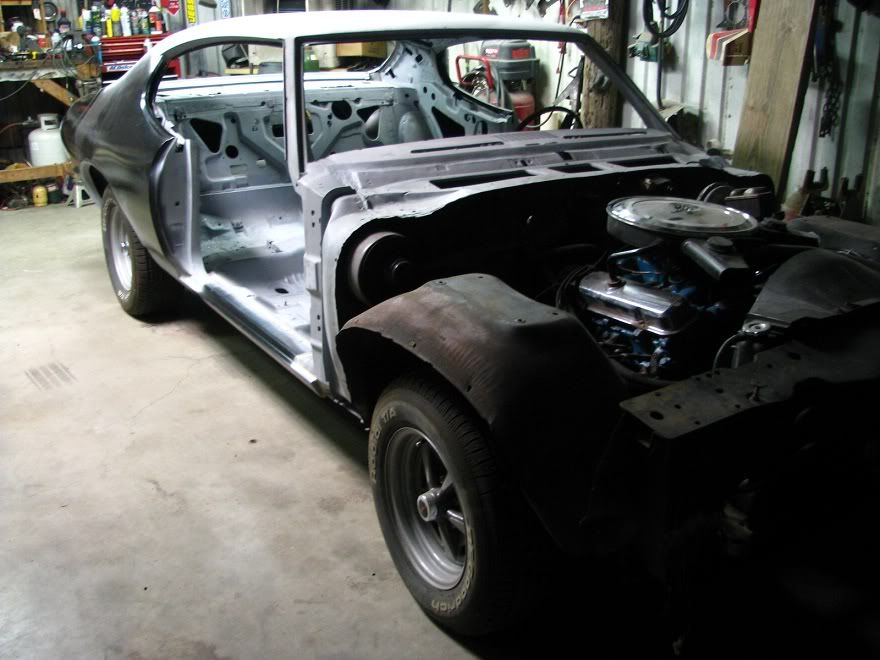 To be continued..... |
|
#39
08-21-2012, 01:25 AM
|
|||
|
|||
|
Awesome work! Your dad will love it! Sure you will still want to give it up once it's done? Lol
|
|
#40
08-21-2012, 01:49 AM
|
||||
|
||||
|
Nice work, it's going to be a nice car when you get done with it. That previous work on the rear filler panel was something else.
__________________
Ken '68 GTO - Ram Air II 464 - 236/242 roller - 9.5 TSP converter - 3.55 posi (build thread | walk around) '95 Comp T/A #6 M6 - bone stock (pics) |
| Reply |
|
|
The PY Online Forums is the largest online gathering of Pontiac enthusiasts anywhere in the world. Founded in 1991, it was also the first online forum for people to gather and talk about their Pontiacs. Since then, it has become the mecca of Pontiac technical data and knowledge that no other place can surpass.


 Linear Mode

