


| FAQ |
| Members List |
| Social Groups |
| Calendar |
| Search |
| Today's Posts |
|
#41
 03-12-2012, 07:18 PM
|
||||
|
||||
|
Quote:
__________________
Ken '68 GTO - Ram Air II 464 - 236/242 roller - 9.5 TSP converter - 3.55 posi (build thread | walk around) '95 Comp T/A #6 M6 - bone stock (pics) |
|
#42
03-12-2012, 09:53 PM
|
|||
|
|||
|
Took the lower quarter trim off to see how much rust was in the quarter. You could just push your fingers thru the panel. Started cutting the rusty portion of the quarter off and of course, found some more rust to fix in the wheel house. Going to fix that before cutting the rest of the quarter off so as not to have it distort while cutting/grinding/welding.
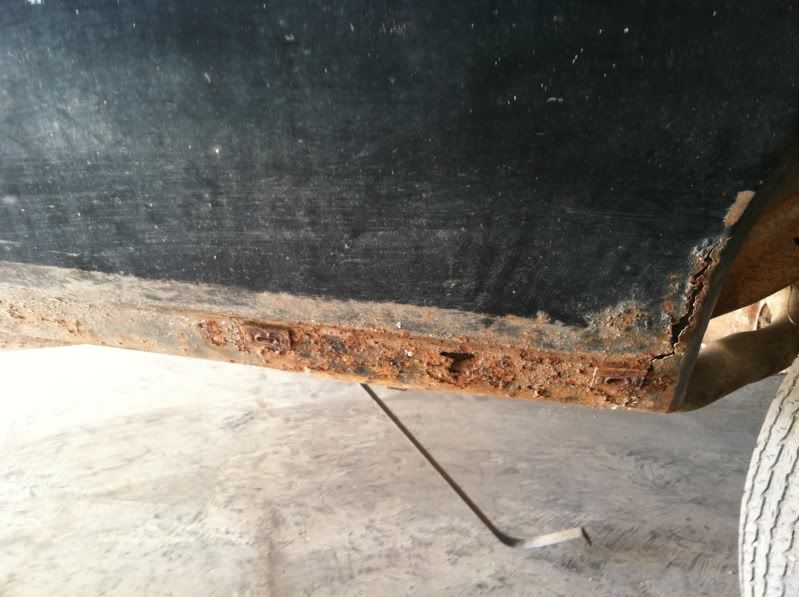 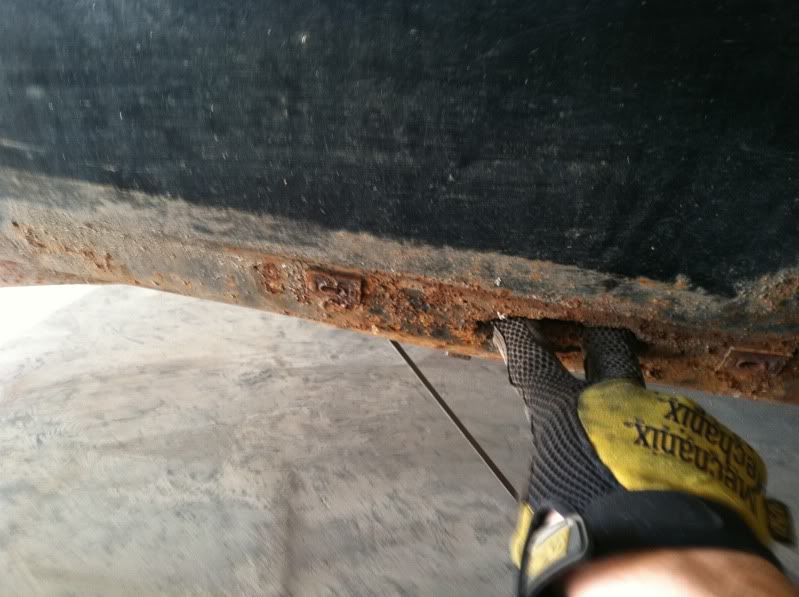 Luckily the metal above this point is pretty good. 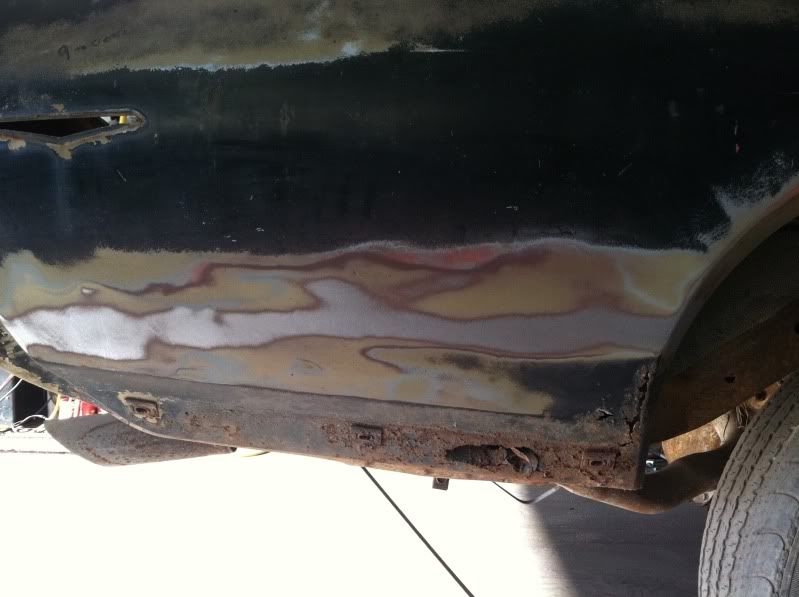 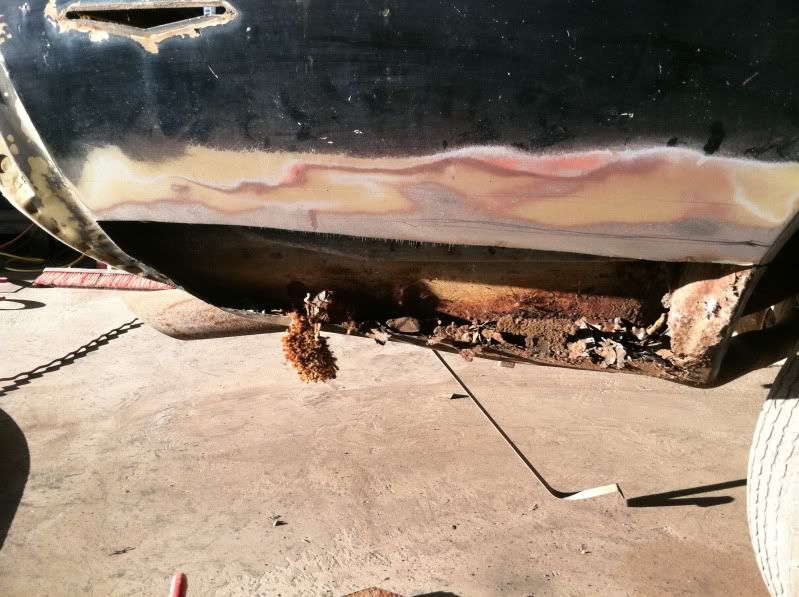 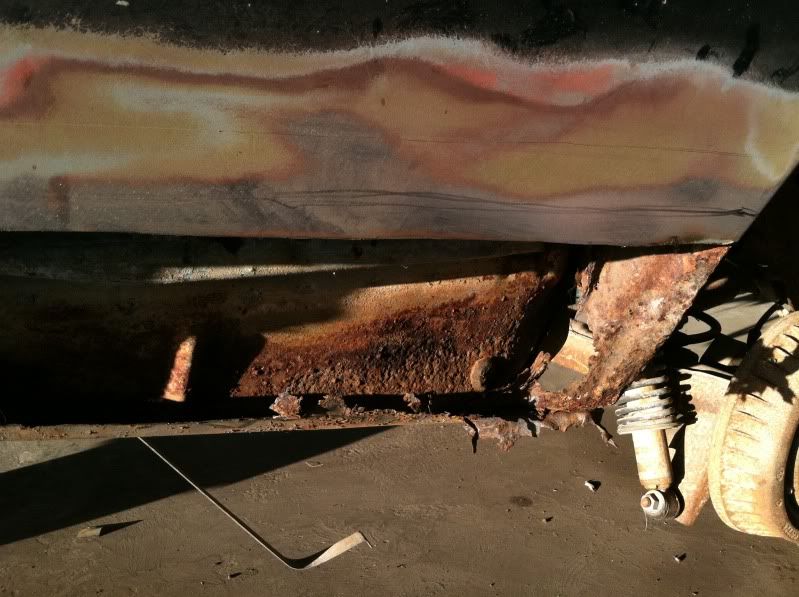 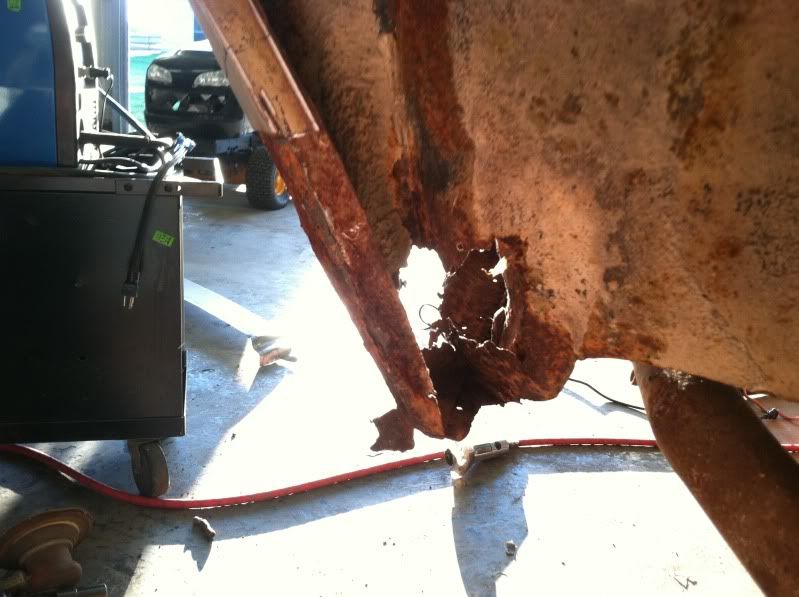 On a side note... I got some restored 14" Rally II's from a member on the forums. These should look sweet. Gotta get some rubber ordered. 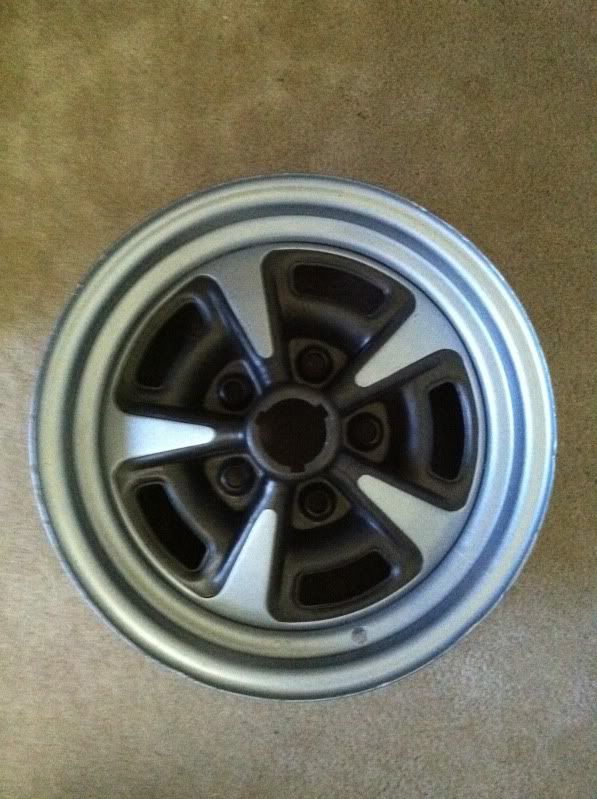
|
|
#43
03-13-2012, 11:04 PM
|
|||
|
|||
|
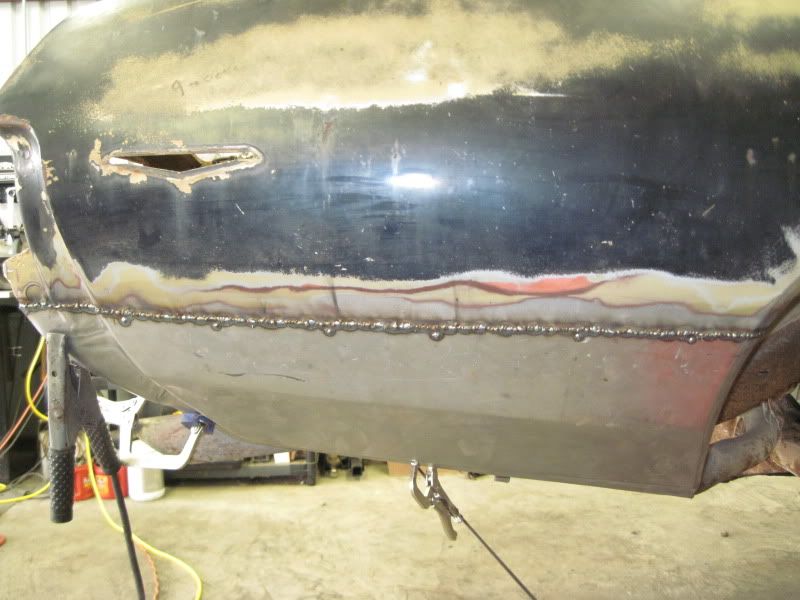
Got a few things done today. Would have got more done if I hadn't run out of gas for my Mig welder.
Started cutting the rust out of the wheel well and building a new patch. 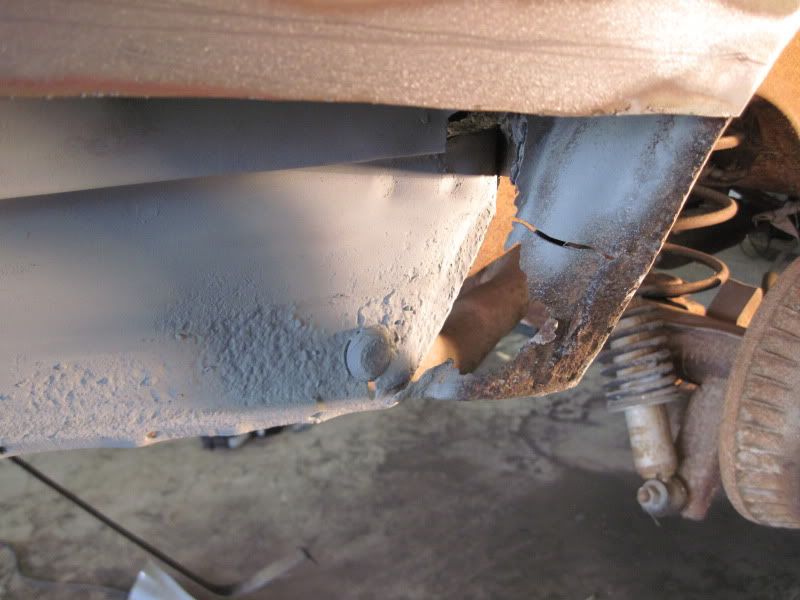 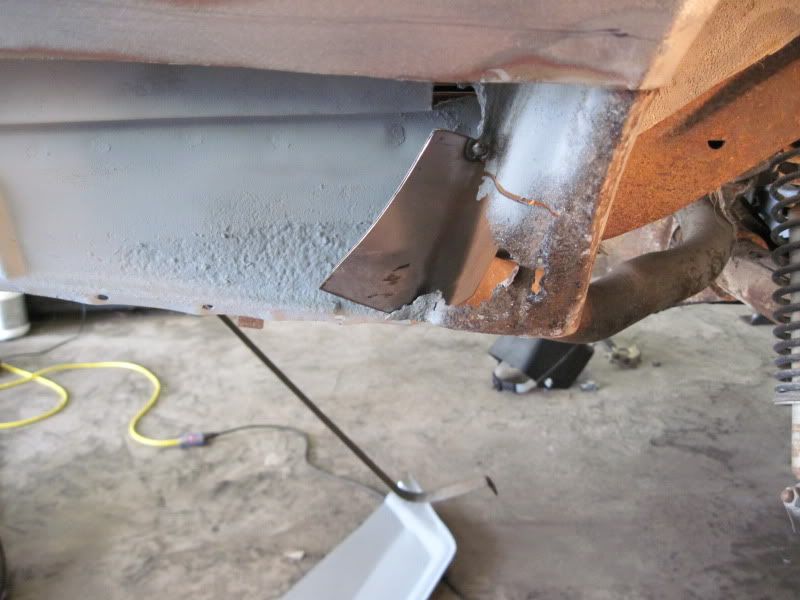 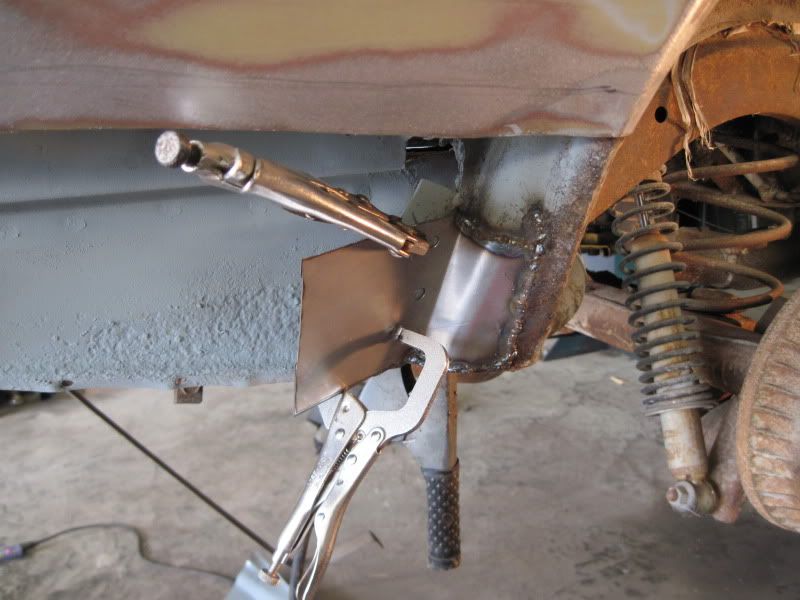 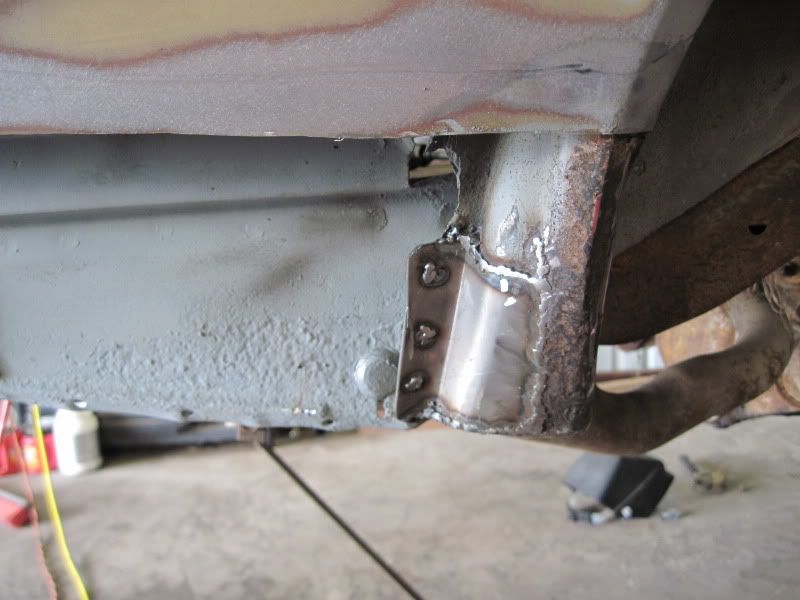 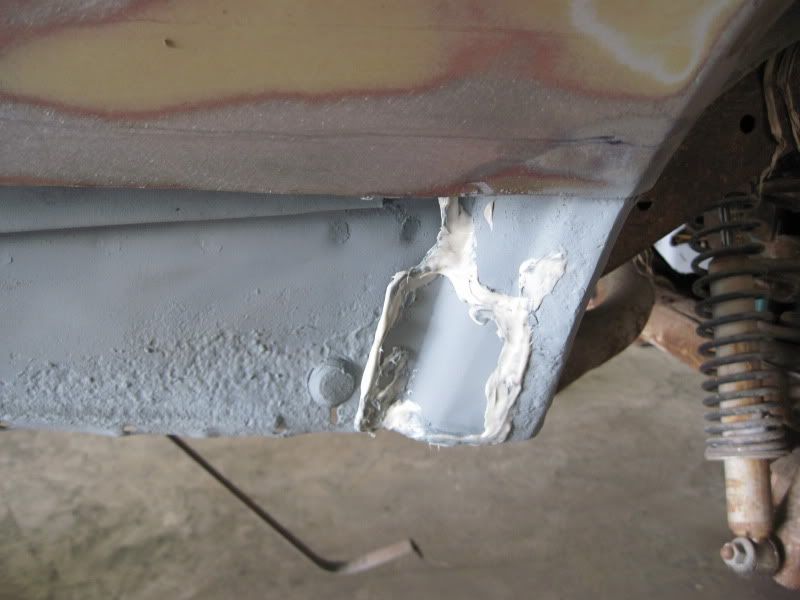 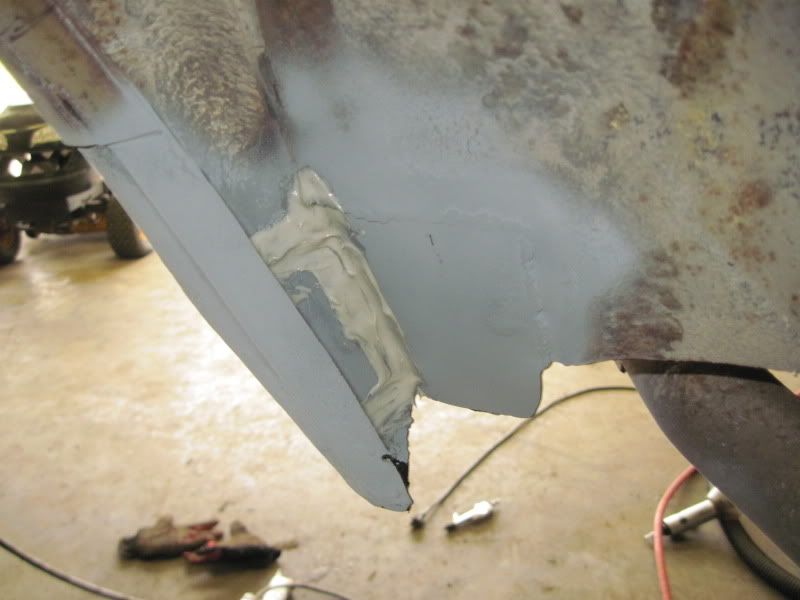 Then started getting the patch panel ready to install. 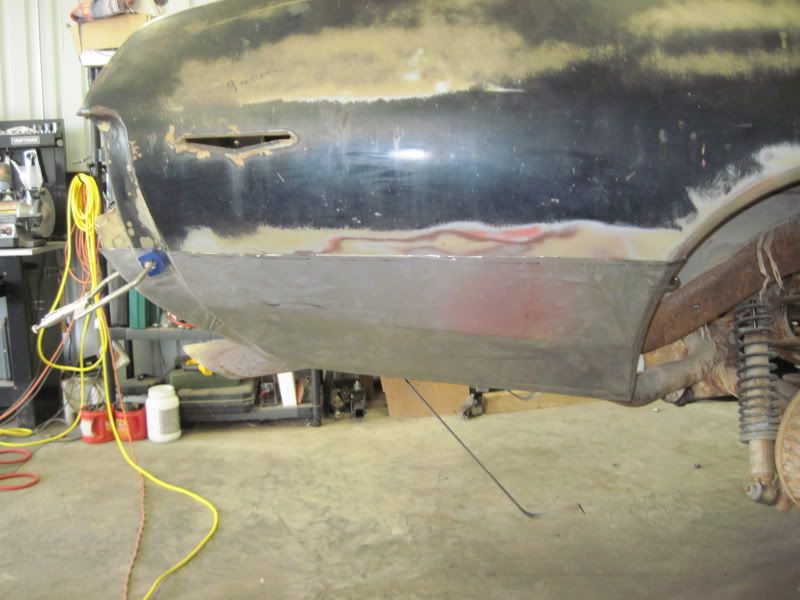 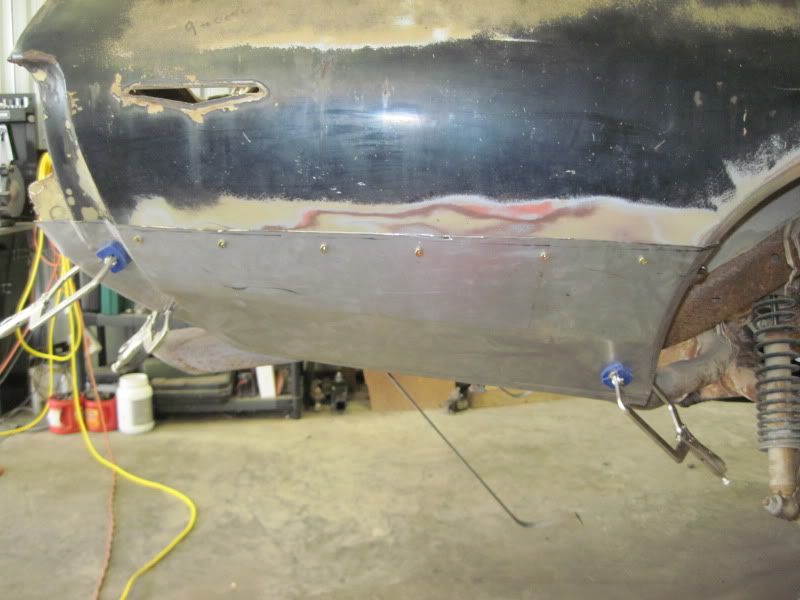 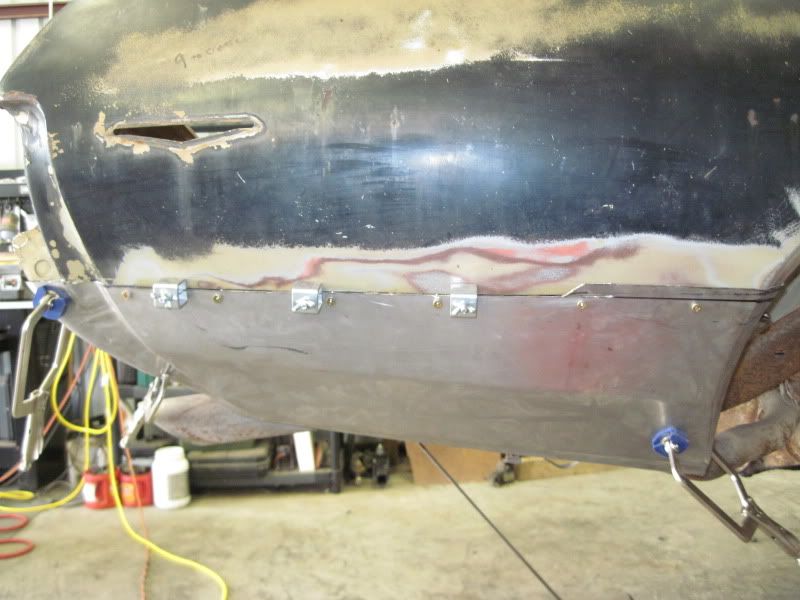  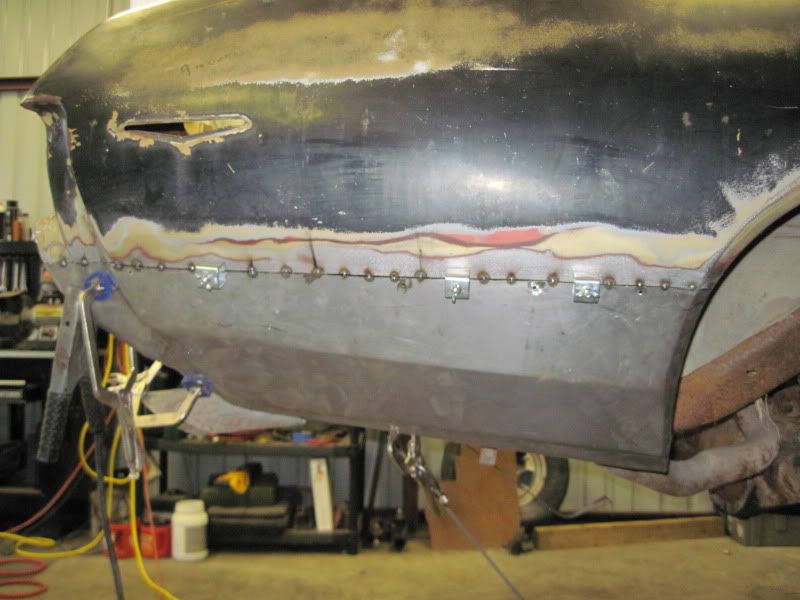
|
|
#44
03-14-2012, 10:02 PM
|
|||
|
|||
|
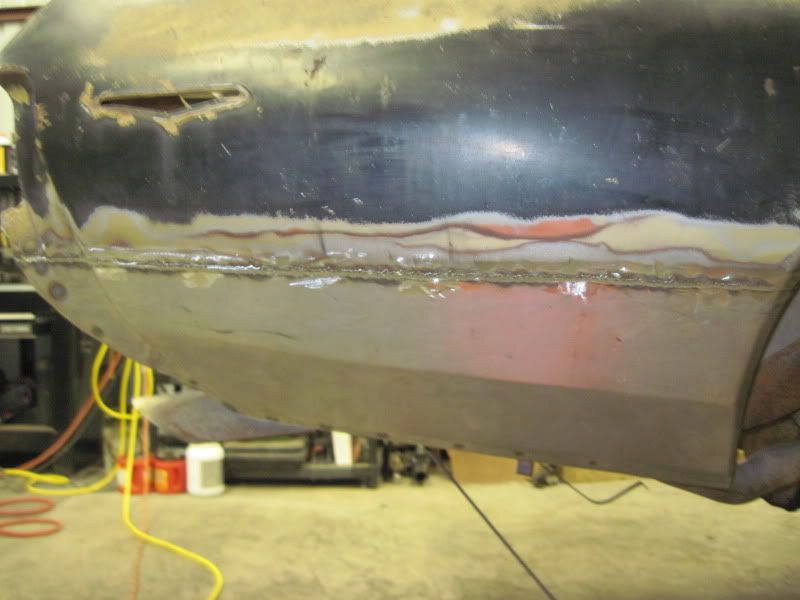
Got the patch welded up to the quarter and to the drop panel. Started grinding down the welds but still have another 20 or 30 minutes of grinding/sanding to go.
|
|
#45
03-14-2012, 10:31 PM
|
||||
|
||||
|
Nice work!
__________________
Greg Reid Palmetto, Georgia |
|
#46
03-15-2012, 09:38 PM
|
|||
|
|||
|
Thanks Greg!
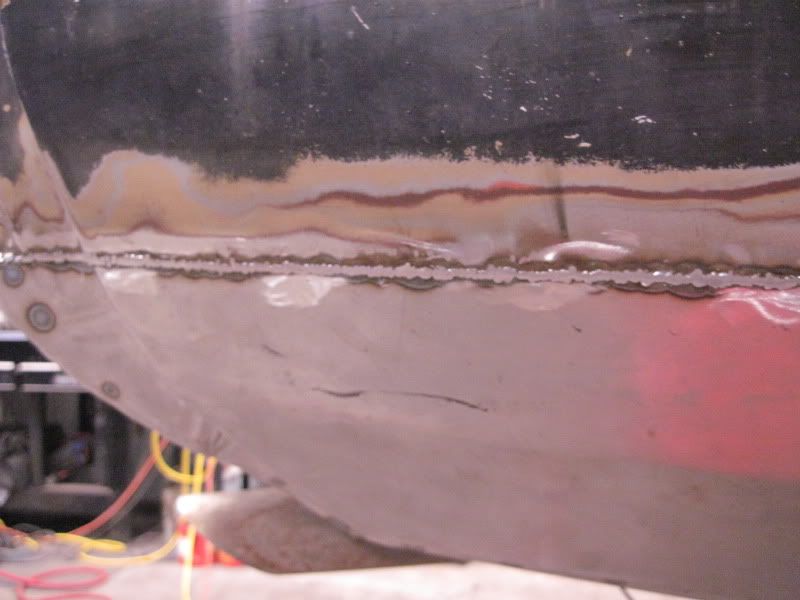
Here is the finished quarter patch. I think it came out pretty nice for my first one. 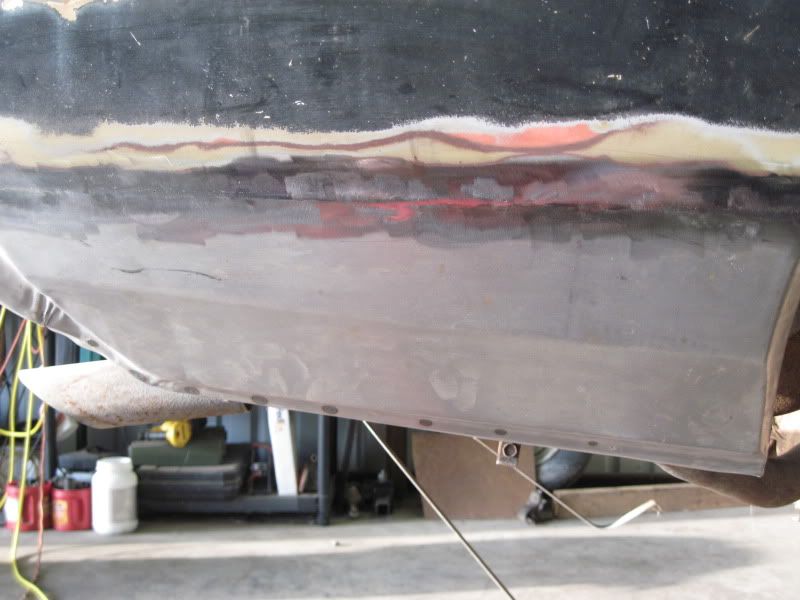 Now I have another issue. I knew it wasn't good, but I didn't think it was this bad.... The left quarter looks like it had a skin installed a long time ago. They did a TERRIBLE job of attaching it. They used a '68 quarter where they welded a piece of metal behind the '68 side marker hole and then filled with bondo. At the sail panel it has more waves in it than a beauty queen in a parade. I guess they tried to pull the waves out because there are about 30 screw holes where they probably tried to slide hammer out the waves. They welded the skin on top of the sail panel instead of butt welding it. The outer wheel well has rust in a couple places. the lower quarter has minor rust and some idiot drilled holes in the quarter to plug weld the quarter to the trunk drop panel. To make matters worse, they drilled the holes too low. My question for you guru's... should I try to patch and fix this quarter, try a quarter skin, or buy a full quarter. 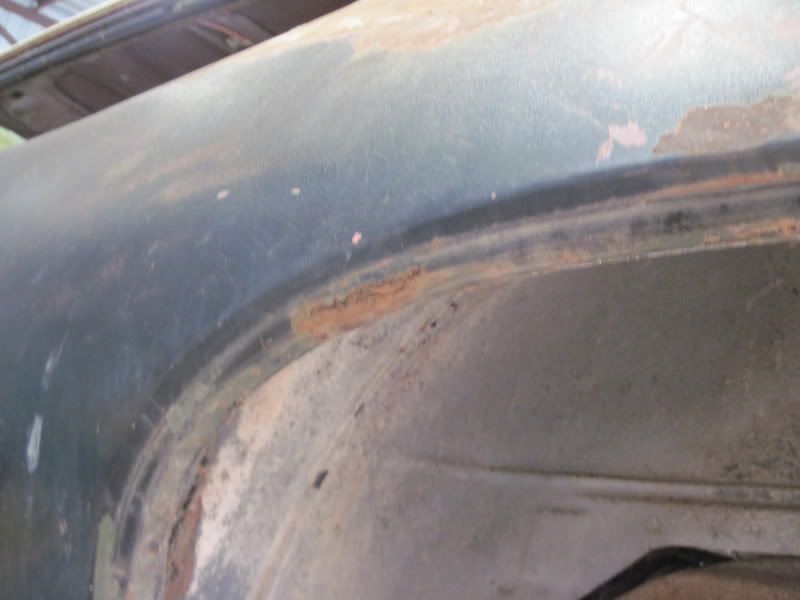 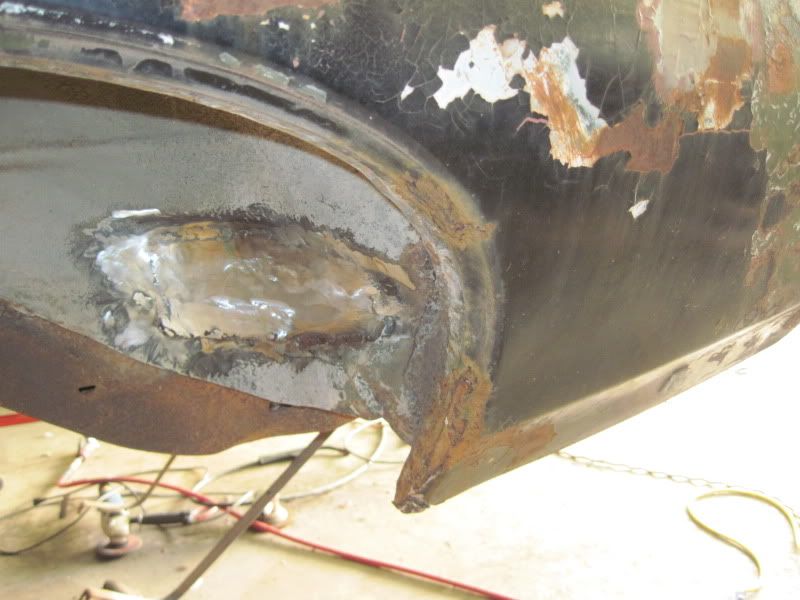 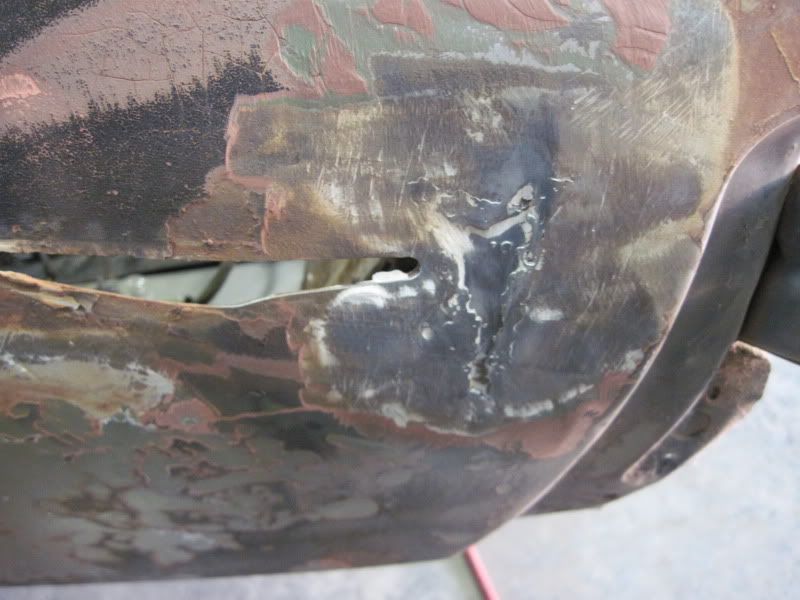 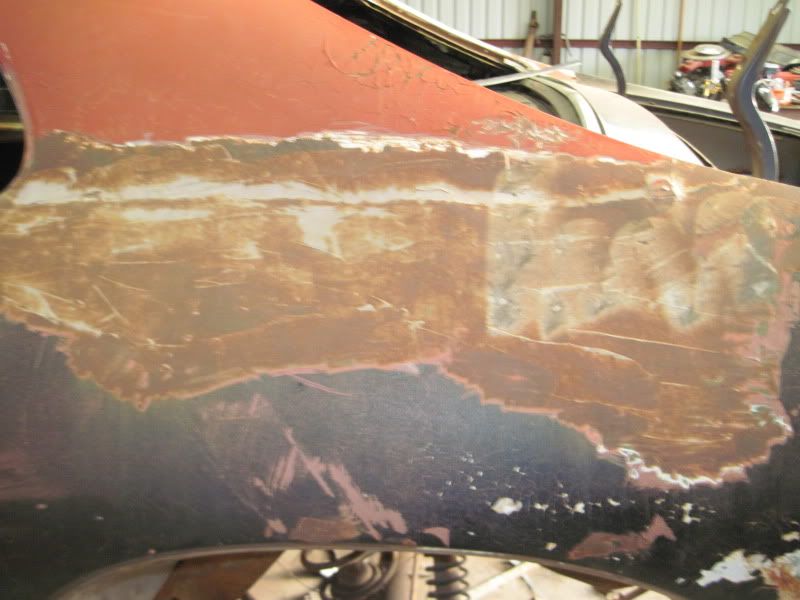 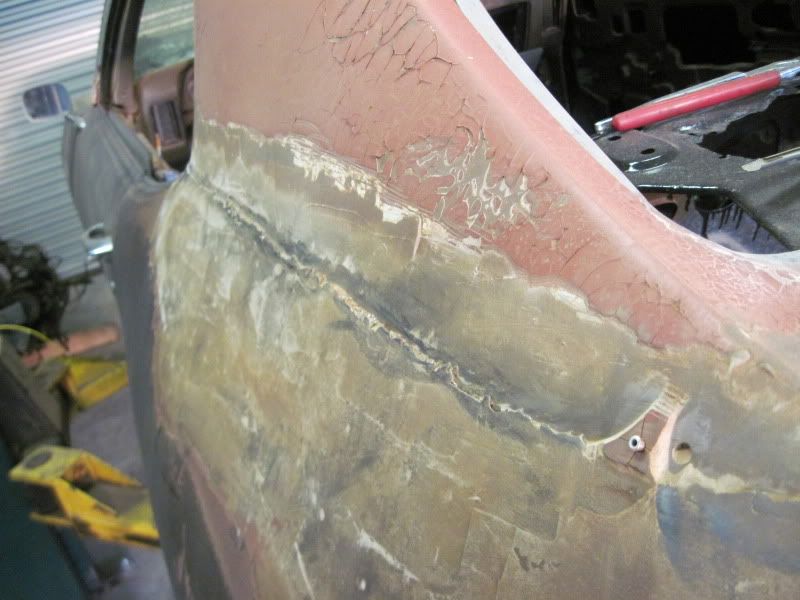 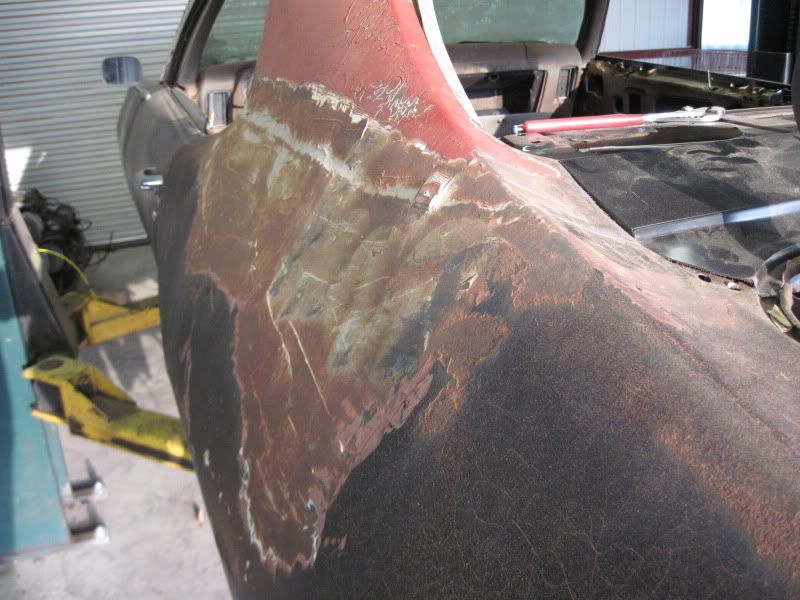
|
|
#47
03-16-2012, 04:40 AM
|
|||
|
|||
|
Where is the seam at the trunk? How about at the quarter window? I ask becuase I have come accross several of these cars with collision damage, repaired long ago, in a time where the cars weren't worth the effort to replace a whole panel. They'd either buy a used or over the counter quarter and piece it in. hardly ever did they replace the sail panel area. it appears to me this may be the case. Remember the 69 lemans and Tempests all used the same quarter as the 68's. Most old repairs and NOS quarters have the Pontiac arrow opening as opposed to the 69 GTO only crest.
__________________
Paul FAST Automotive -The Pontiac restoration shop, not the fuel injection guys! I had the name first. My site... needs updated- www.fastrestorations.com 68 GTO's (RA II, RA I, HO, convert, Pro Street, Racecar, etc.), 2 69 GTO Judges, 70 GTO racecar -10.77 @ 124mph, 68 Tempest survivor, 3 03 Aztecs! |
|
#48
03-16-2012, 09:41 AM
|
|||
|
|||
|
Quote:
|
|
#49
03-16-2012, 01:18 PM
|
||||
|
||||
|
Ive got a "premo nice" full trunk pan out of a 69 GTO, to bad your not closer, Id cut a deal on it to get it gone.
Jeff |
|
#50
03-16-2012, 02:01 PM
|
|||
|
|||
|
JL...How far foward and back does the trunk pan extend and how much do you think it would cost to ship???? I've got a trunk center section, but the rust actually goes further up on the front and rear of the trunk pan than what the replacement covers.
|
|
#51
03-18-2012, 09:00 PM
|
|||
|
|||
|
Got some more done this weekend...and as usual, found some more bad news.
Even though it's trivial, I cleaned up all of the brake drums...decided I didn't want rusty drums up against my new wheels when I get the tires mounted this next weekend. 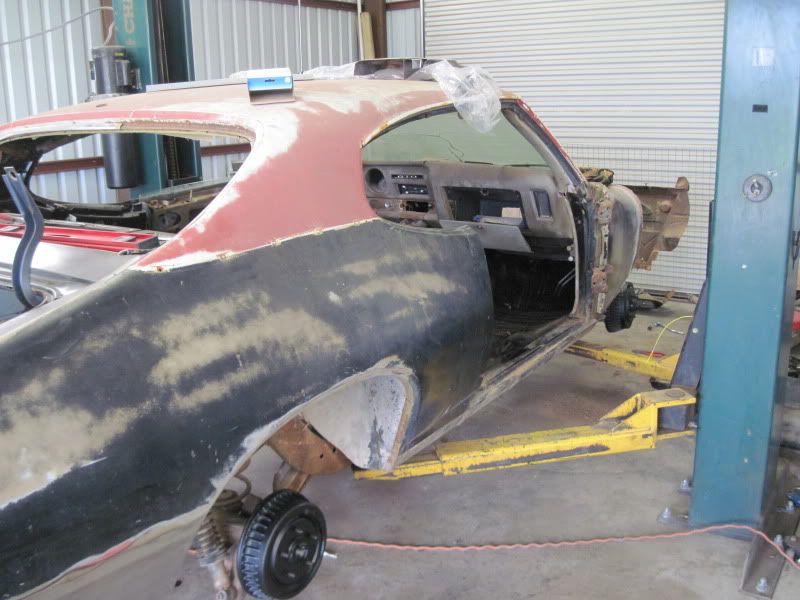 Started ripping the front end off so I could work on the front fenders.  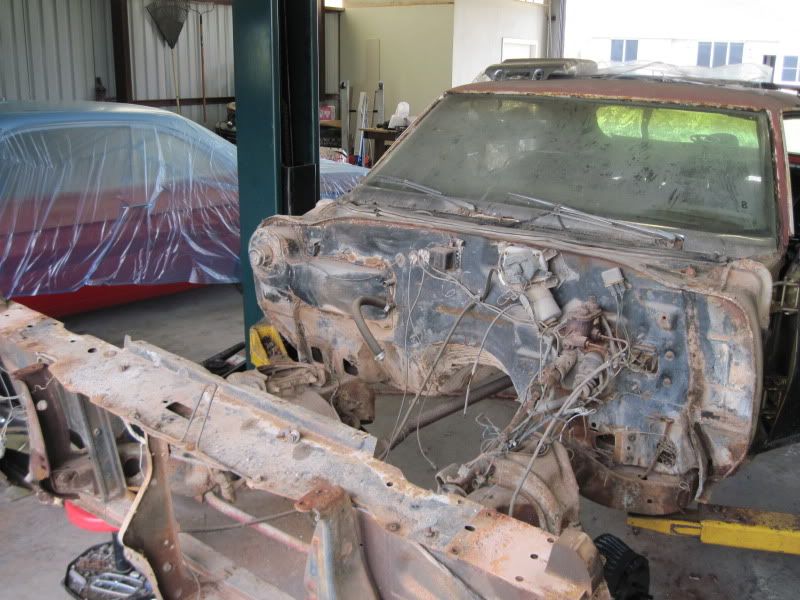 Found some more rust. Going to have to build a patch for this. 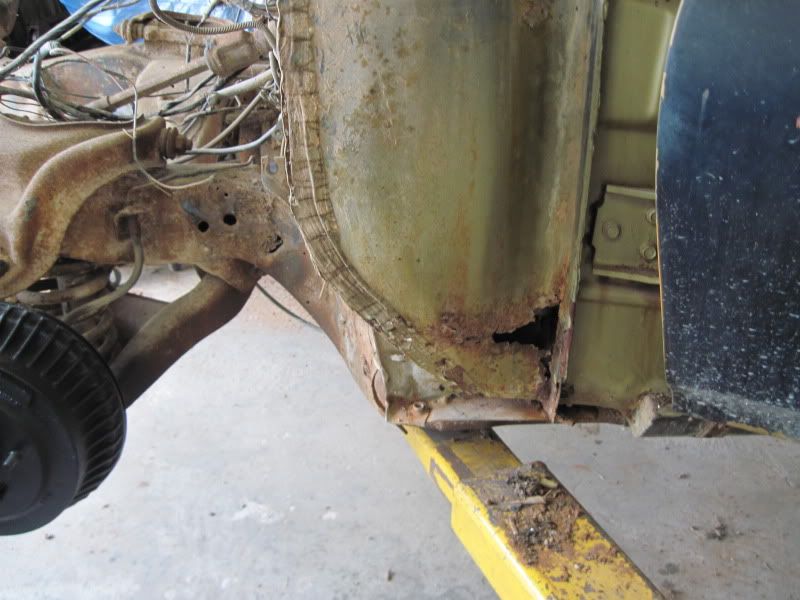 The people that worked on this car previously had an affinitiy for Bondo... 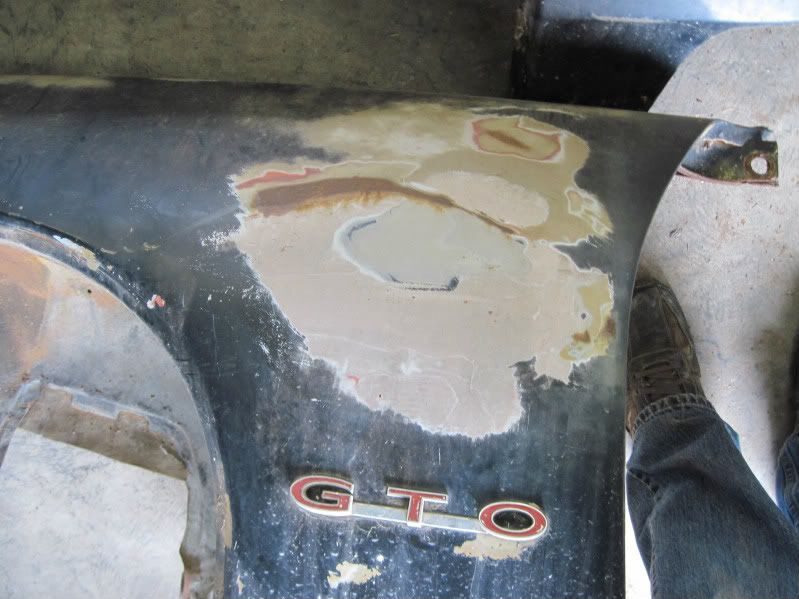 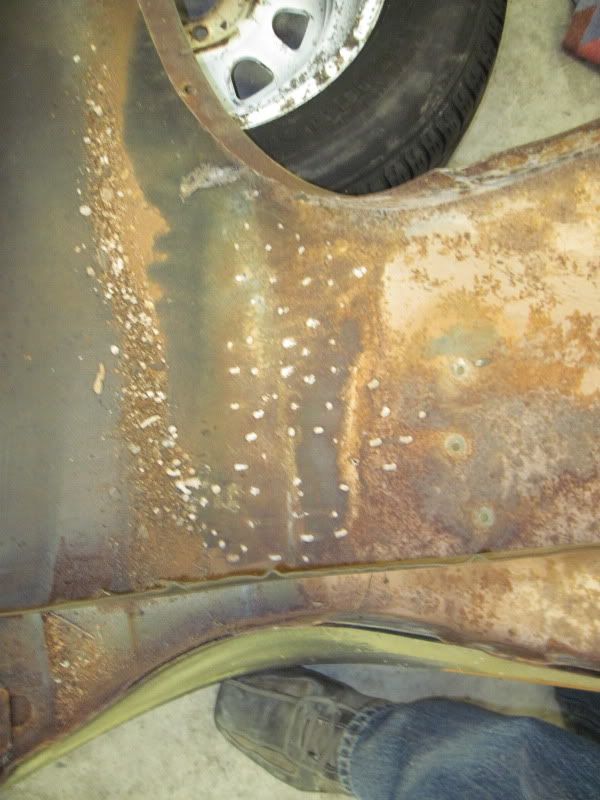 I took a hammer and dolly to it and got it fairly straight. Still have to strip off the rest of the bondo and weld up all the holes in the fender. Check out the chunk of bondo. It was about an inch thick!!! 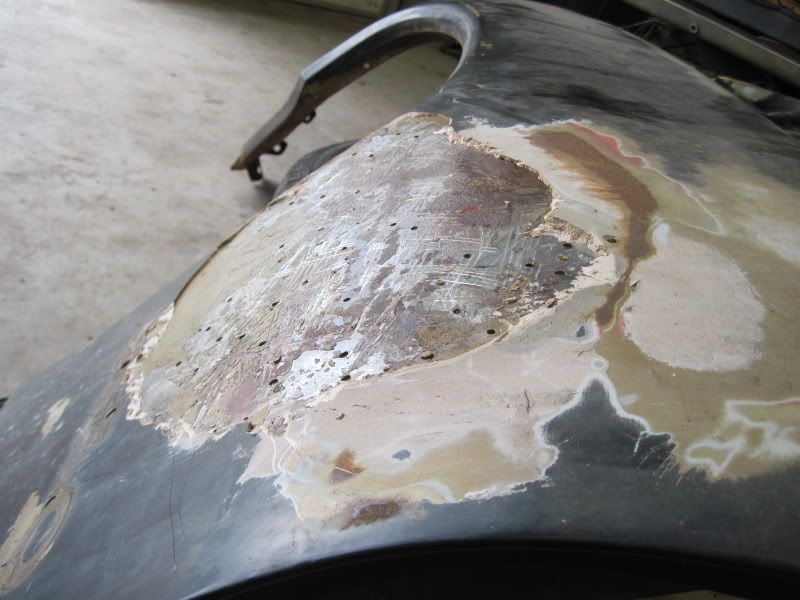 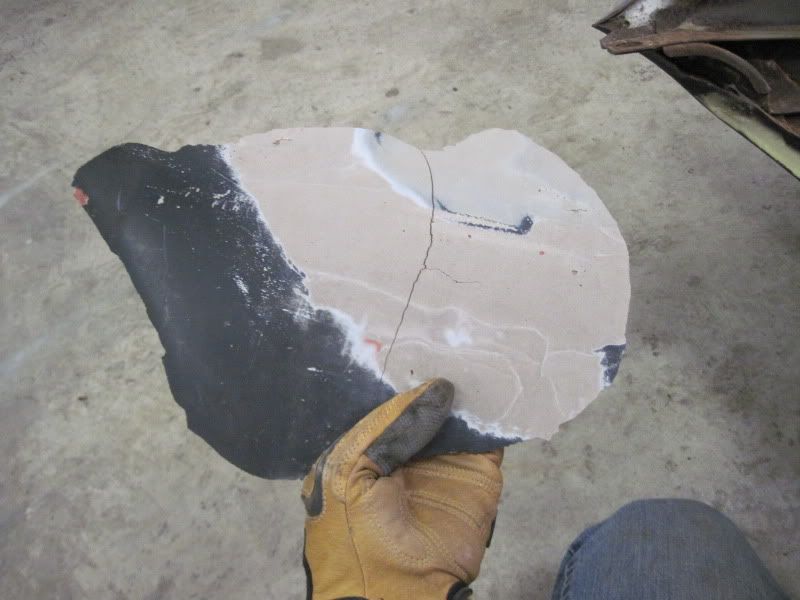 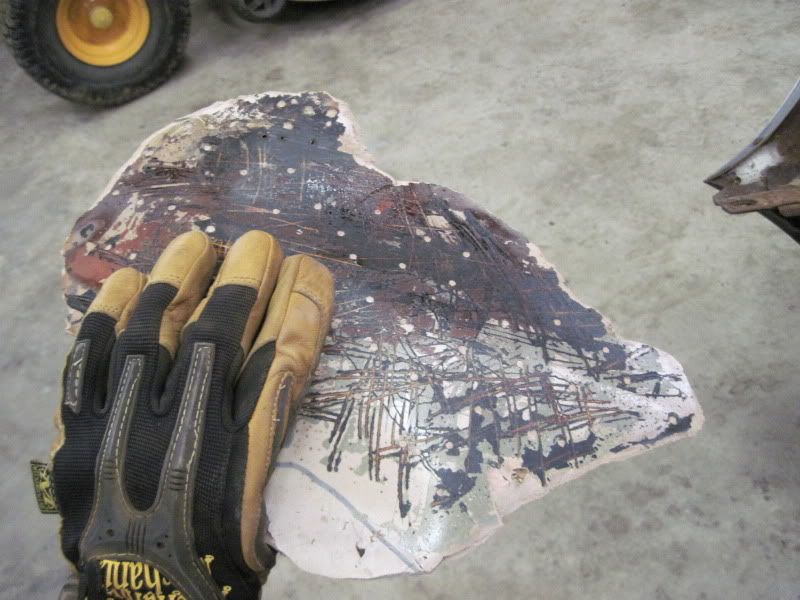 Started doing some repairs to the fenders... 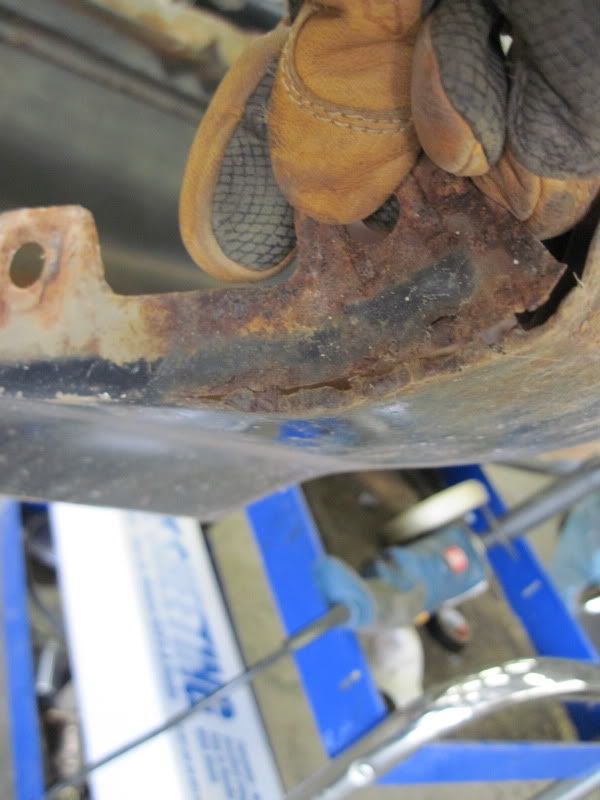 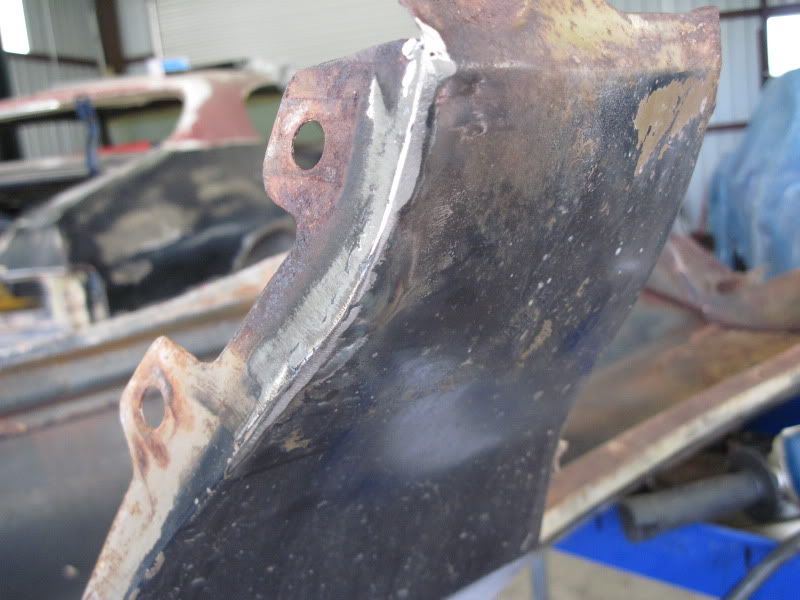 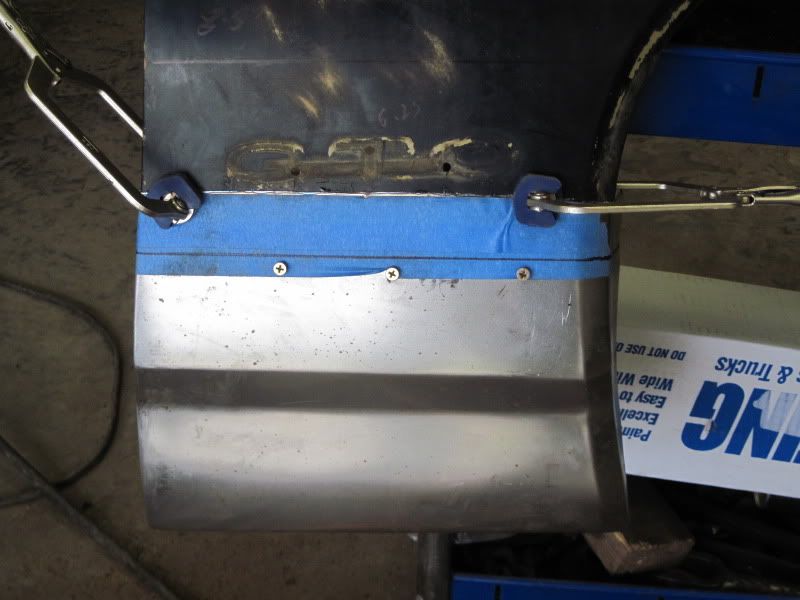 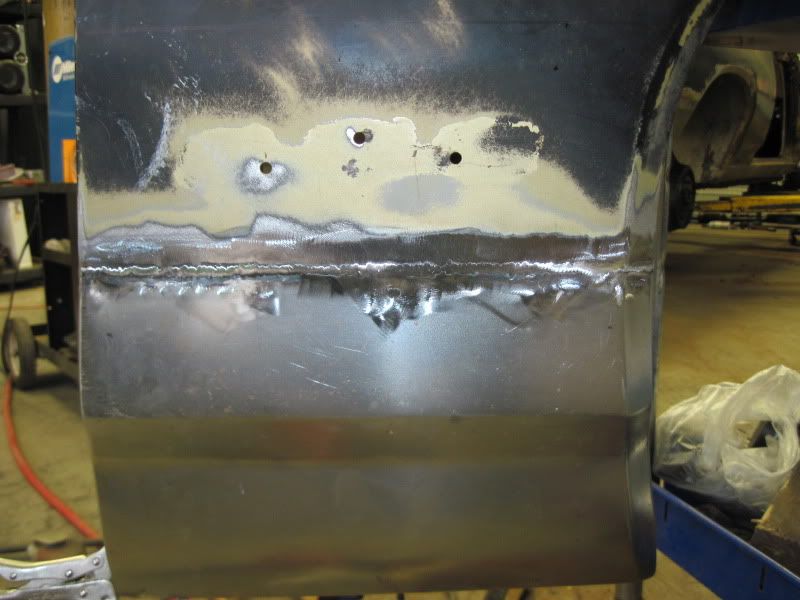
|
|
#52
03-18-2012, 09:07 PM
|
||||
|
||||
|
The previous owner must have had some stock in Bondo!
  Looks like you're making good progress. 
__________________
John Wallace - johnta1 Pontiac Power RULES !!! www.wallaceracing.com Winner of Top Class at Pontiac Nationals, 2004 Cordova Winner of Quick 16 At Ames 2004 Pontiac Tripower Nats KRE's MR-1 - 1st 5 second Pontiac block ever! "Every man has a right to his own opinion, but no man has a right to be wrong in his facts." "People demand freedom of speech to make up for the freedom of thought which they avoid." Socrates |
|
#53
03-18-2012, 11:09 PM
|
||||
|
||||
|
Hey you are doing a great job. I noticed in one of the pictures the rear coilover shocks. Can you read who makes your rear shocks?
|
|
#54
03-18-2012, 11:12 PM
|
|||
|
|||
|
Quote:
|
|
#55
03-19-2012, 01:23 PM
|
||||
|
||||
|
I just welded the same patch on my car, how does the patched fender fit on the car? On mine, the trim side fits great but I've got a nasty gap on the door side to take care of. Not sure if it's because of the way I installed it or if it's just the way the patches are.
__________________
Ken '68 GTO - Ram Air II 464 - 236/242 roller - 9.5 TSP converter - 3.55 posi (build thread | walk around) '95 Comp T/A #6 M6 - bone stock (pics) |
|
#56
03-19-2012, 11:17 PM
|
|||
|
|||
|
Quote:
|
|
#57
03-20-2012, 08:38 AM
|
|||
|
|||
|
Nice patch on the rear quarter. Are you replacing the trim on it? If so, how are you going to do it? My quarter has been replaced and they did not put the trim back on. Any measurements would help. Thanks, Paul
|
|
#58
03-20-2012, 10:52 PM
|
|||
|
|||
|
Quote:
|
|
#59
03-21-2012, 06:39 AM
|
|||
|
|||
|
Measurements would be great. I have purchased the clips and the tool to install them from PY in the past. I planned to drill the ends of the slots after measuring the thickness of the clips and connect them with a dremel.
|
|
#60
03-21-2012, 10:04 AM
|
||||
|
||||
|
You can just hold the trim in place, draw a pencil line along the top edge. The height of the clip will be just a fraction below that line.
If you look at how the trim is held on by the clips, you'll see what I mean.
__________________
Greg Reid Palmetto, Georgia |
| Reply |
|
|
The PY Online Forums is the largest online gathering of Pontiac enthusiasts anywhere in the world. Founded in 1991, it was also the first online forum for people to gather and talk about their Pontiacs. Since then, it has become the mecca of Pontiac technical data and knowledge that no other place can surpass.


 Linear Mode

