


| FAQ |
| Members List |
| Social Groups |
| Calendar |
| Search |
| Today's Posts |
|
#941
 11-21-2009, 07:31 PM
|
||||
|
||||

Thank you, fellow members of the Never-Ending Trans Am Restoration Support Group!
|
|
#942
11-21-2009, 07:32 PM
|
||||
|
||||
|
Quote:
|
|
#943
11-21-2009, 07:34 PM
|
||||
|
||||
|
Quote:
|
|
#944
11-21-2009, 07:40 PM
|
||||
|
||||
|
Hey, it's your car, do what you want if it makes you happy. It's pretty easy to swap a pair of valve covers back. (a little harder if you have A/C, though) :-)
|
|
#945
11-21-2009, 07:48 PM
|
||||
|
||||
|
Quote:
|
|
#946
11-21-2009, 07:54 PM
|
||||
|
||||
|
While were on the subject.Are the VALVE COVERS for a 72 just for that car..?? or are there INTERCHANGABLE years..??
|
|
#947
11-21-2009, 07:59 PM
|
||||
|
||||
|
Same old valve cover. There is a much thicker valve cover gasket and longer bolts, though, for the 455HO engine because of that metal cage contraption under the valve covers that help direct the oil.
|
|
#948
11-23-2009, 05:28 PM
|
||||
|
||||
|
With the help of a board member on the Yenko.net website who identified the random old coil I had in my parts box as an original 1972 Pontiac coil, I was able to test it, clean it up and install it.
http://www.yenko.net/ubbthreads/show...e/0#Post429806 I then tossed the Pertronix coil that had been frying my points, into the "extra parts" box. Here's the new/old coil in place.  And the third set of points I've replaced in the three years the engine has been up and running. Both contact surfaces on the lever arm pad and the base pad have been crystalized to the point that they wouldn't conduct electricity any more. (Ignore the dust - I had it sitting on the sanding table when I was prepping the coil for paint). I guess I will stick to the stock ignition parts from this point on and forget the aftermarket crap. 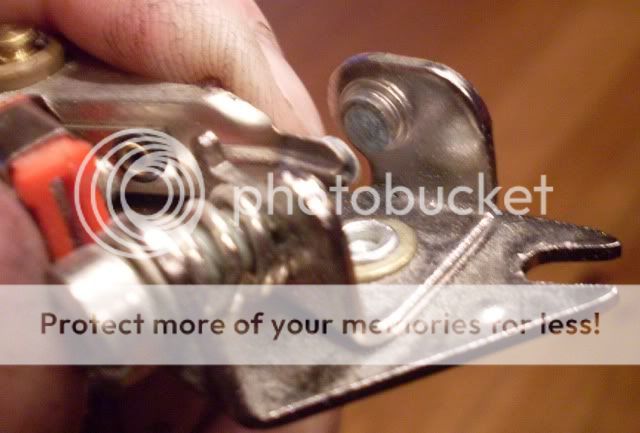 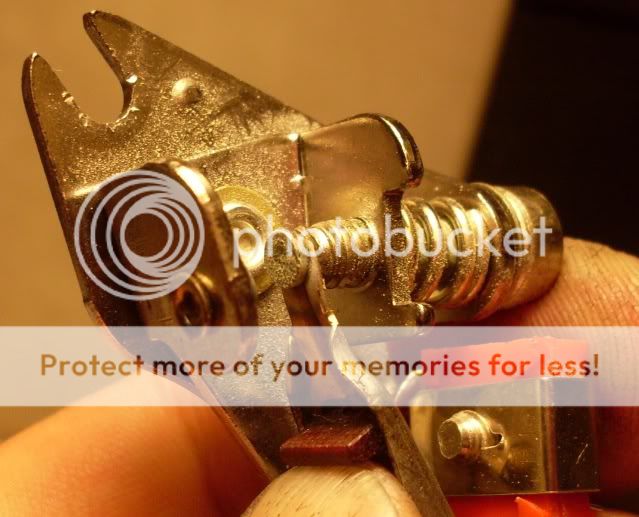
|
|
#949
11-24-2009, 03:44 AM
|
||||
|
||||
|
So Steve,....this is a #425 or #424 coil?
__________________
|
|
#950
11-24-2009, 08:08 AM
|
||||
|
||||
|
425. I am still trying to figure out whether it should be a 424 since 424 is what is listed in the 1972 repair manual. But then again the coil spec section of the repair manual has several typos including a typo under the ohm ratings for that coil saying it should range from "3000 - 2000" ohms". (It should read 3000-20000 ohms like the 71 manual says).
Anyone out there have a definitive answer? If its supposed to be a 424, what application does a 425 fit? Last edited by njsteve; 11-24-2009 at 08:58 AM. |
|
#951
11-24-2009, 07:27 PM
|
||||
|
||||
|
Well, I've always believed the #424 to be correct for '71 & '72 Pontiac V-8. Maybe I need to check this out further. Best I can do for now, is these two pics. The one in the bracket is my 05D '71 84,000 mile VN TA, that I have owned since '84. The other out of a bracket is the coil from my 45,000 mile '72 Esprit, built 10D. They are both #424.
Perhaps the 425 was a Service Replacement coil, since you mentioned someone stated a parts catalog showed the 425 as "correct". I do know for sure, that for many of these years, the M.P.C.'s showed Chev ID numbered coils as a replacement for the Pontiac part. So can't always rely on that source. |
|
#952
11-24-2009, 08:44 PM
|
||||
|
||||
|
The 71 and 72 Service Manuals I have, do show the 1115424 coil for the V8s. I guess I'll stick with the 425 until I find a 424.
I'd love to know the exact application for the 1115425. The guy that linked it to my application did not have any Pontiac books to cross reference the 425 coil. Anybody out there have an old parts book? |
|
#953
11-25-2009, 03:33 AM
|
||||
|
||||
|
Steve, I have original MPC's for every year printed from 1969 to 1983. I'll do some research & post the results. but as I said above, the catalogs I have checked, show Chevy part numbers for Pontiac Service Replacement coils. So they may not be of any help.
|
|
#954
11-25-2009, 11:34 AM
|
||||
|
||||
|
for kicks & giggles i grabbed the coil that failed on my car 2 years ago @ 125k miles & it's a
424 B-R can these be refurbished & what would be the cost & is it worth it ? |
|
#955
11-25-2009, 12:19 PM
|
||||
|
||||
|
Did you test it?
For a coil that is out of the car, get an ohm meter and run the leads to the pos and neg terminals and see what the meter says - the spec is 1.7 to 2.1 ohms (remember to pre-check the meter itself by touching the leads together and if you can't zero the meter, then subtract whatever is showing from your test results. My meter showed .6 for its own leads so I had to subtract that amount from the coil test results). The secondary test is done by running one lead to the coil output and one lead to one of the terminals. That spec is 3000 to 20,000 ohms. My corrected results were 1.8 ohms on the primary and 10,900 ohms on the secondary. Dont know if anyone restores them. |
|
#956
11-29-2009, 03:35 PM
|
||||
|
||||
|
More minor things. Applied the "Trans Am" decals on the fenders. It took an hour to lay out all the tape to get the measurements right...and then took about 15 seconds to actually apply the decals.
Installed the original black rubber hood bumpers, three per fender. Got to use last year's X-mas gift: a set of plastic mini prying sticks. They worked great to push the rubber tabs through the slots in the fenders. Anything metal would have damaged the paint and split the original rubber bumpers.  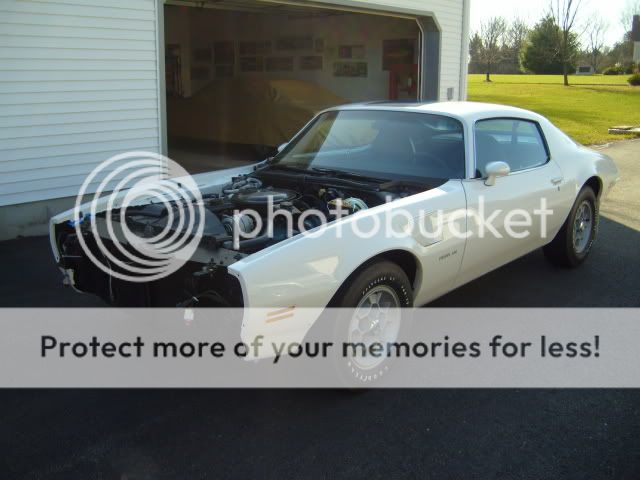 Engine running nicely now that the original coil is back in place and the new set of points are installed.  Even the A/C is working nice and cold...now that it's nice and cold outside. 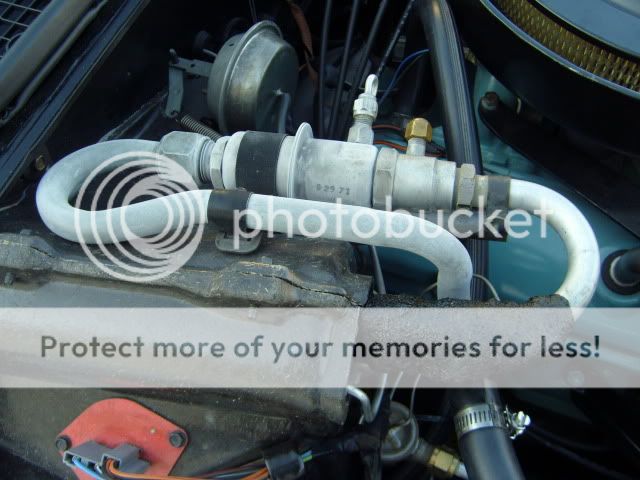
|
|
#957
11-29-2009, 09:38 PM
|
||||
|
||||
|
Steve,
Looks great! Pat |
|
#958
11-30-2009, 08:36 AM
|
||||
|
||||
|
Steve some of the pictures you post really show off the nice body lines, especially the lower line above the rocker and the mid line through the door. Your body man did a fantastic job.
__________________
http://www.starspangledbannerchallenge.com/ |
|
#959
11-30-2009, 12:06 PM
|
|||
|
|||
|
Looking great!
|
|
#960
11-30-2009, 02:56 PM
|
||||
|
||||
|
Steve, never give me your address. I'd become a car thief or a crying car lover. We don't want to find out which.
|
| Reply |
|
|
The PY Online Forums is the largest online gathering of Pontiac enthusiasts anywhere in the world. Founded in 1991, it was also the first online forum for people to gather and talk about their Pontiacs. Since then, it has become the mecca of Pontiac technical data and knowledge that no other place can surpass.




 Linear Mode

