


| FAQ |
| Members List |
| Social Groups |
| Calendar |
| Search |
| Today's Posts |
|
#21
 04-21-2016, 05:07 PM
|
||||
|
||||

We decided to use a '66 Tripower setup on our '68. We lucked out and found an original upper hood pan from Minnesota. We used a fiberglass lower pan for a '66 GTO, which looks the same as a steel one when installed.
It was necessary to remove about 3/8" from the pan carb flanges for hood clearance, but that worked and the pan fits fine. We installed a drain system for water in case we get caught in the rain. We found the open hood scoops on eBay and decided to paint them satin black. In any case, it runs great with the Tripower and Ram Air!
__________________
BONESTOCK GOATS '64 GTO Tripower Hardtop (Wife's Car) '64 GTO Tripower Post Coupe (My Car) '99 Bonneville SE Sedan |
|
#22
04-21-2016, 06:26 PM
|
||||
|
||||
|
Quote:
__________________
1968 Firebird 400 coupe, Verdoro Green w/black vinyl top 1969 GTO Judge, Carousel Red, 4-speed, numbers matching 1971 Trans Am Cameo White, Auto, numbers matching 1970 Buick Skylark Custom convertible Fire Red 1972 Buick GS 455 Stage 1 Royal Blue |
|
#23
04-21-2016, 10:56 PM
|
||||
|
||||
|
wovenweb, What do you use to wash your car?
rohrt, I don't plug mine up when I wash it but of course I don't stream water directly at the openings either. I try to avoid rain if at all possible. When you look at your lower pan, you'll notice that there are some approximately 1/4" holes drilled around the perimeter to allow water to drain. Good question about how well it breathes with the openings plugged. The foam is probably pretty dense when compressed by the hood and it might have an effect? I don't know and I don't plan to swap mine out for the closed ones. I guess if you use the magnet idea to attach the lower foam, you could just remove it when driving with the nostrils closed. You will then have a typical open element type breather under the hood. As for the magnets, I just cut one up into small squares and glued them to the bottom of the lower foam. I figure when the foam is replaced, I'll just trash the magets right along with it. Some are stronger than others so just pick the best one you have around.
__________________
Greg Reid Palmetto, Georgia Last edited by Greg Reid; 04-21-2016 at 11:11 PM. |
|
#24
04-22-2016, 06:38 AM
|
||||
|
||||
|
How did you do that custom upper pan - very cool!
__________________
Some guys they just give up living And start dying little by little, piece by piece, Some guys come home from work and wash up, And go racin' in the street. Bruce Springsteen - Racing In The Street - 1978 |
|
#25
04-22-2016, 10:46 AM
|
|||
|
|||
|
rohrt,
I used a couple dabs of 3M weather-strip adhesive to hold mine down. |
|
#26
04-22-2016, 02:10 PM
|
|||
|
|||
|
Thanks all for the feedback.
Any info on cutting the hood? Is there a template? |
|
#27
04-22-2016, 06:50 PM
|
||||
|
||||
|
I can't remember for sure but I think that the instructions included, which are for the 'birds, (no pun intended) may show how to cut it. If it helps any, I was able to cut my GTO hood with it in place. Just used a cutoff wheel and made sure I covered everything up really well to avoid metal dust in bad places.
__________________
Greg Reid Palmetto, Georgia |
|
#28
04-23-2016, 09:40 AM
|
||||
|
||||
|
Here are the factory instructions for cutting the hood for the pan.
If you use the upper pan for a guide and refer to the drawing, marking and cutting the hood brace is not difficult. You end up with a cut off piece about 1 1/2" wide by 14" long. We used an air-powered rotary cut-off tool. Probably spent no more than an hour marking and cutting. We used high density foam to seal the upper pan to the hood so only cold air from the hood scoops could enter the carbs. The '68 Firebird upper pan has a hole just large enough for the '66 GTO Tripower lower pan. The lower pan foam just barely covers the back edge of the hole in the upper pan.
__________________
BONESTOCK GOATS '64 GTO Tripower Hardtop (Wife's Car) '64 GTO Tripower Post Coupe (My Car) '99 Bonneville SE Sedan |
|
#29
04-23-2016, 11:53 AM
|
||||
|
||||
|
Never seen the actual template that came with the instructions, but made one off of a couple original hoods. The issue is you need to print it 1 to 1 to work, so either D size paper plotter or a bunch of letter size and tape together.
Have a couple good pictures from an original hood with the pan off that I believe came from a member here. Ryan – I just jam foam in the scoops when washing. Usually I use scrap foam as packaging, so if I threw any in that box, save it
__________________
“If you ain't first, you're last” - REESE BOBBY |
|
#30
04-23-2016, 11:05 PM
|
|||
|
|||
|
Great info thanks guys.
|
|
#31
07-13-2016, 09:24 AM
|
|||
|
|||
|
Finally opened the box and looked at the pans. Nice heavy gauge steel. Very impressed. Thanks Brian.
Does anyone have a air cleaner part # to use? |
|
#32
07-13-2016, 01:40 PM
|
||||
|
||||
|
I'm loving mine. Such a big improvement over the aftermarket chrome open-air element I had on there. I have the box the filter element came in at home. Actually though, I ordered it from our host so you could probably get the number right out of the catalog.
__________________
Greg Reid Palmetto, Georgia Last edited by Greg Reid; 07-13-2016 at 02:28 PM. |
|
#33
07-13-2016, 03:01 PM
|
|||
|
|||
|
A212CW AC Delco. NAPA 2095 (wix) Any parts store should have one. Just a regular air filter, not RA specific.
__________________
1968 Firebird 400 RAII M21, 3.31 12 bolt, Mayfair Maize. 1977 Trans Am W72 400, TH350, 3.23 T Top Everyone you will ever meet knows something you don't. Bill Nye. |
|
#34
07-13-2016, 05:11 PM
|
|||
|
|||
|
Quote:
|
|
#35
07-18-2016, 12:35 AM
|
|||
|
|||
|
New questions.
From the instructions it looks like this part was originally part of the upper pan??? Are you guys using this piece? if do how did you attach it?  I'm thinking it would be much easier to remove the hood to do the trimming and fitting. It looks like you have to drill out all 5 holes for the bolt on the upper pan? Anyone have a picture of the foam layout on the upper pan? 
|
|
#36
07-18-2016, 11:59 AM
|
||||
|
||||
|
Does your upper pan have the rear tab shown in the image below? That's what it looks like to me...
The GTO hood is different underneath but my upper does have a couple of similar tabs at the rear that hook on to the under-hood structure to hold it up while drilling the screwholes, etc. It's a big help if you're doing it ON the car. If you take the hood off, you may not even need it. On the other hand, whenever you change that upper seal in the future, you'll want that support back there. As far as cutting the underhood support, I did mine on the car but I had no one to help me get the hood off. Definitely would have been easier cutting that way if I had some help but it wasn't terribly hard even on the car. Just had to cover the engine compartment up well. I used a 4-1/2" electric variable speed cutoff wheel. However you do it, take a little off at a time, fitting and marking the hood as you go. Put the foam as far outboard as you can get it on the flat, upper-pan seal mounting surface. If you allow it too far inboard, it'll show in the scoop openings and look like crap.
__________________
Greg Reid Palmetto, Georgia Last edited by Greg Reid; 07-18-2016 at 12:32 PM. |
|
#37
07-18-2016, 10:57 PM
|
||||
|
||||
|
That tab is spot welded to the back of the hood pan on the originals. I think it's more for locating the pan then to hold it on. I have an original pan with that tab.
When I cut my hood, I scaled up the orignal templates and printed on 8.5x11 paper, taped them together and cut using a cutoff wheel. There's a picture a little ways down on this page showing what I cut: http://1967firebird.atwebpages.com/body2.php
__________________
1967 Firebird Convertible Factory 400/4spd Now 462/5spd Fuel Injected http://1967firebird.atwebpages.com/ |
|
#38
07-19-2016, 09:27 AM
|
|||
|
|||
|
That was a good picture of the spot welded tab. I think I will just leave it out for my project. One less rattle.
|
|
#39
07-20-2016, 01:24 PM
|
||||
|
||||
|
If you've got a welder, it's worth doing. Like having a third hand back there if you need to r&r with the hood on the car. As in, when replacing the foam.
__________________
Greg Reid Palmetto, Georgia |
|
#40
07-23-2016, 01:24 PM
|
|||
|
|||
|
Of course I had to do this over the three hottest days of summer and rushed a bit more then I would have liked but I'm done. I did end up taking the hood off for this. Much easier IMO. I searched all over the interweb for good pics and printed what I could.
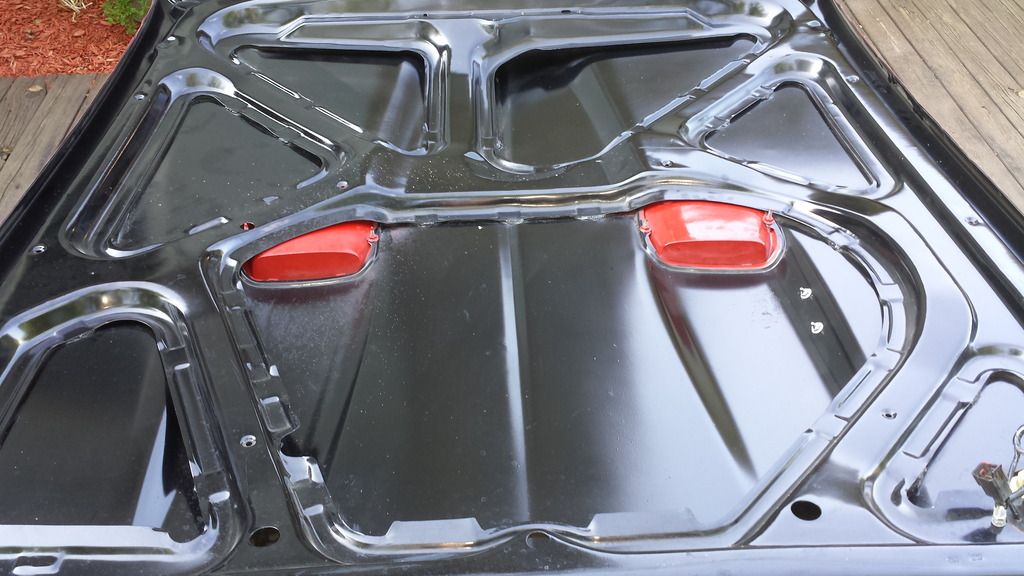 The tab would have been nice to have on but since I already had it all painted I left it off. Maybe i will add in the future. 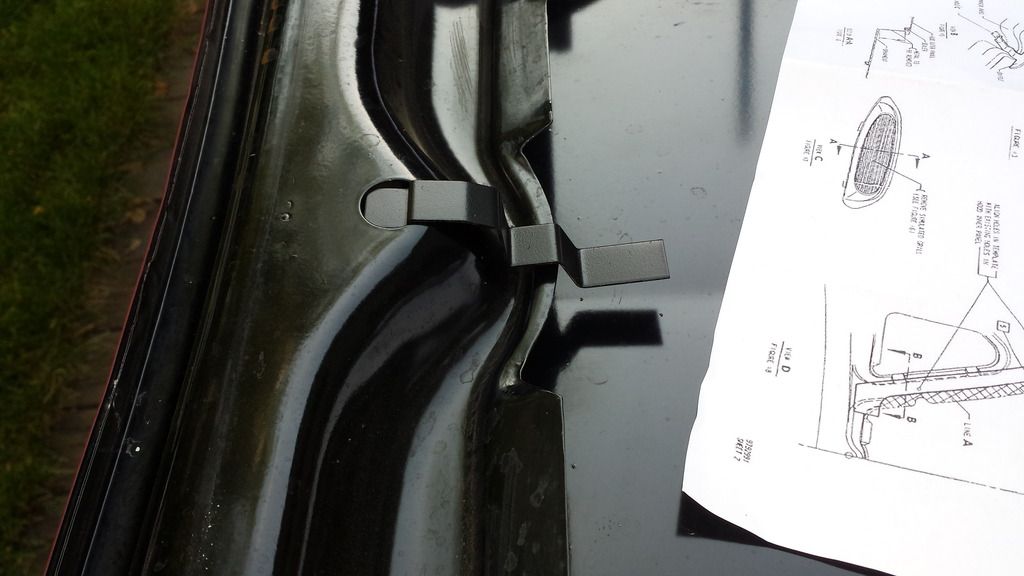 I printed out the template. Thanks brians for that. 6 pages on 11x17 paper at work to get the 1:1. I taped it down and check with the upper plan in place. I just stuck a couple of pencils in the guide holes. 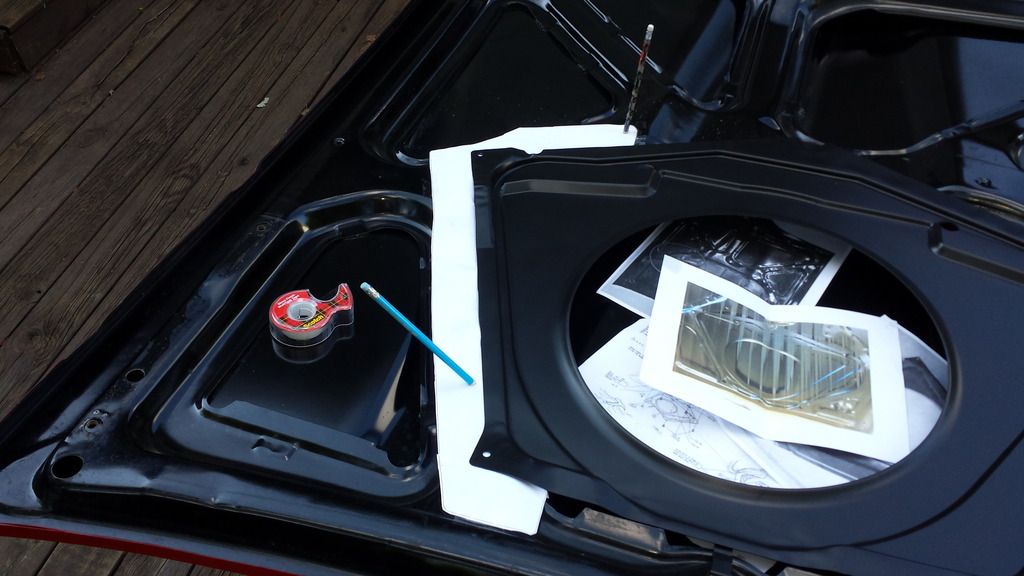 I used my POS harbor freight electric cut off tool and once I grew a pair made the cut. I came close to starting the template on fire but it all came out well. I used the dremel and a file to smooth it up. I hit the bare metal with some SEM trim black. 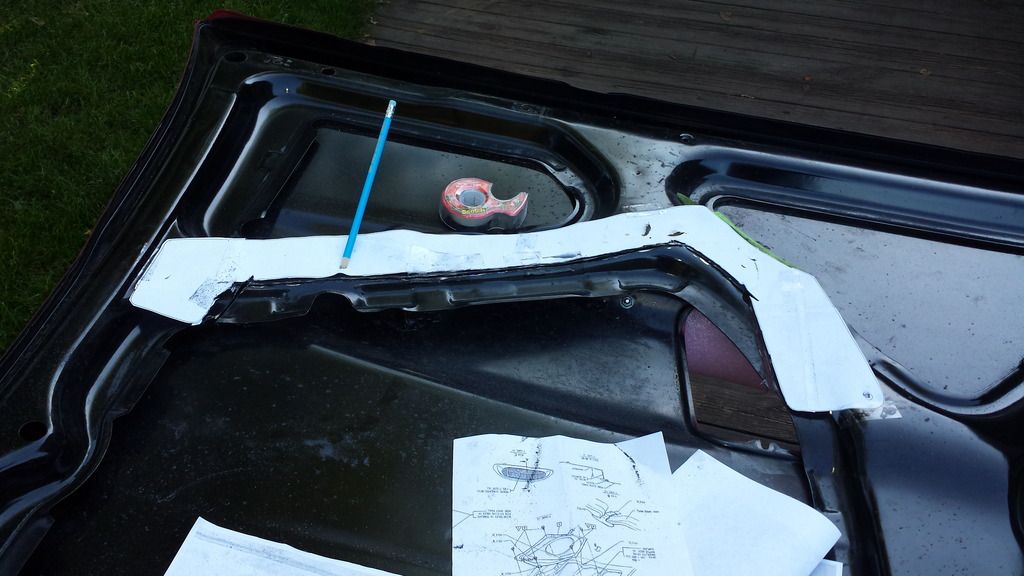 I put some tape down at the 5 spots for the bolts.  I used the hood scoop bolts more than anything to get the holes lined up. 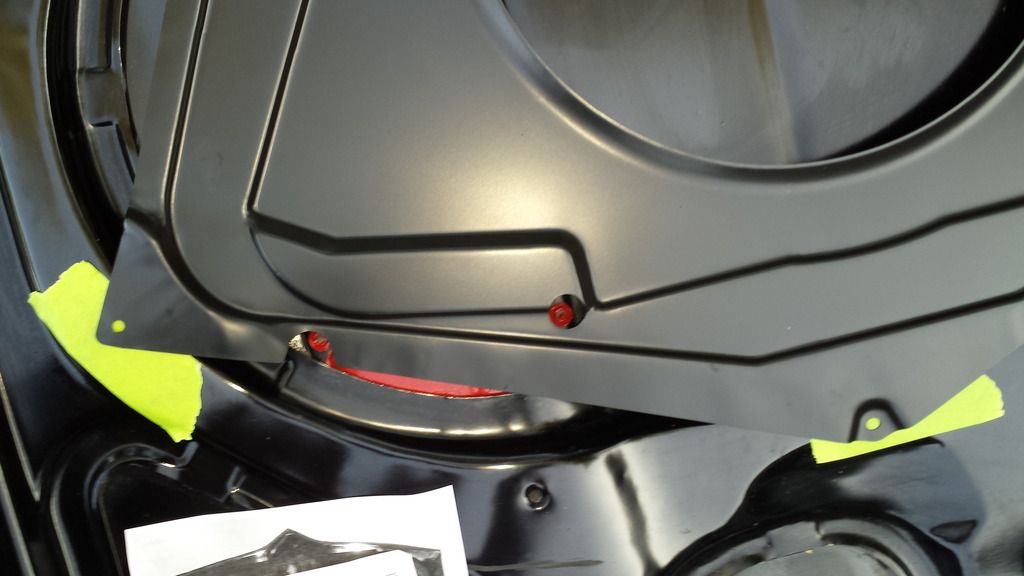 I liked the magnet idea for the foam but I used the weather stip adheasive instead. Of course I got a big smear where I didn't want it. Messed up the paint with 3m adhesive remover and then ended up doing a little sanding and re-painting.  The upper pan is not flat so this is what I did to glue down the foam. 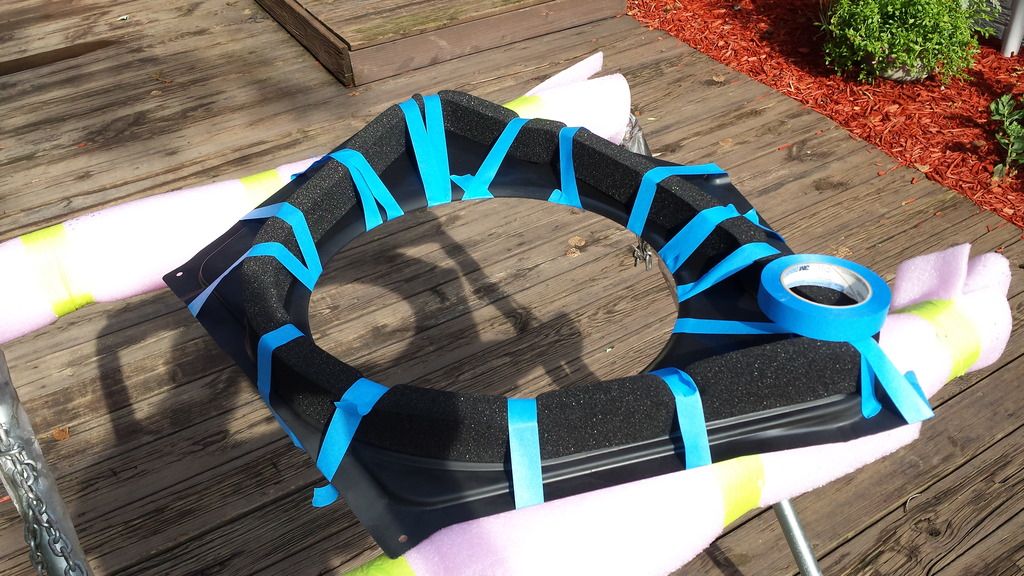 The hood scoops were the high pucker factor on this more than anything. Since its aluminum or pot metal it heats up quick. I saw some else used holesaws and so that is what I used. That was pretty slick. 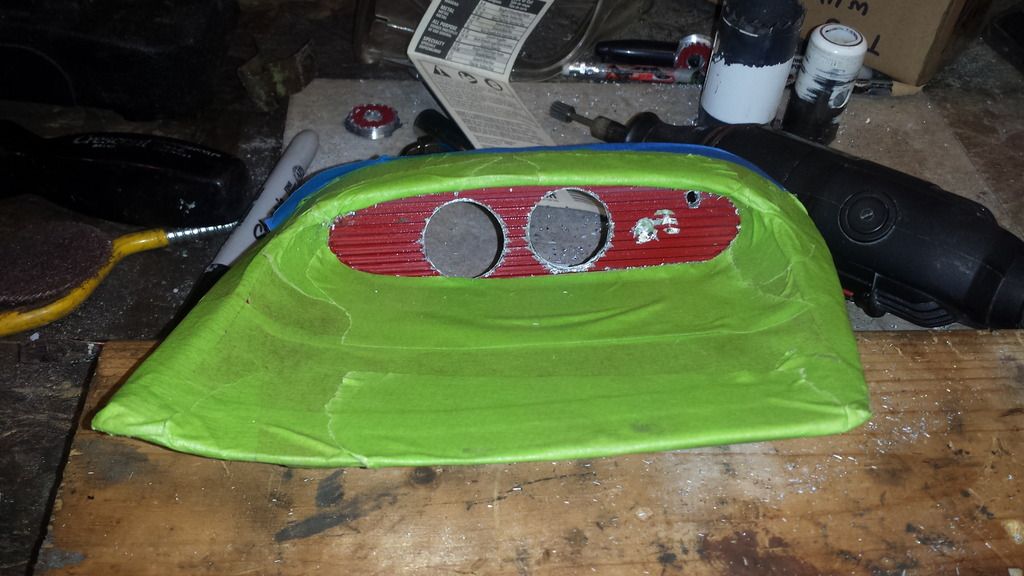 I did the finish work with the dremel. It worked pretty well.  Picked up some touch-up paint at the store to cover the scars. I guess we will see how it holds up. 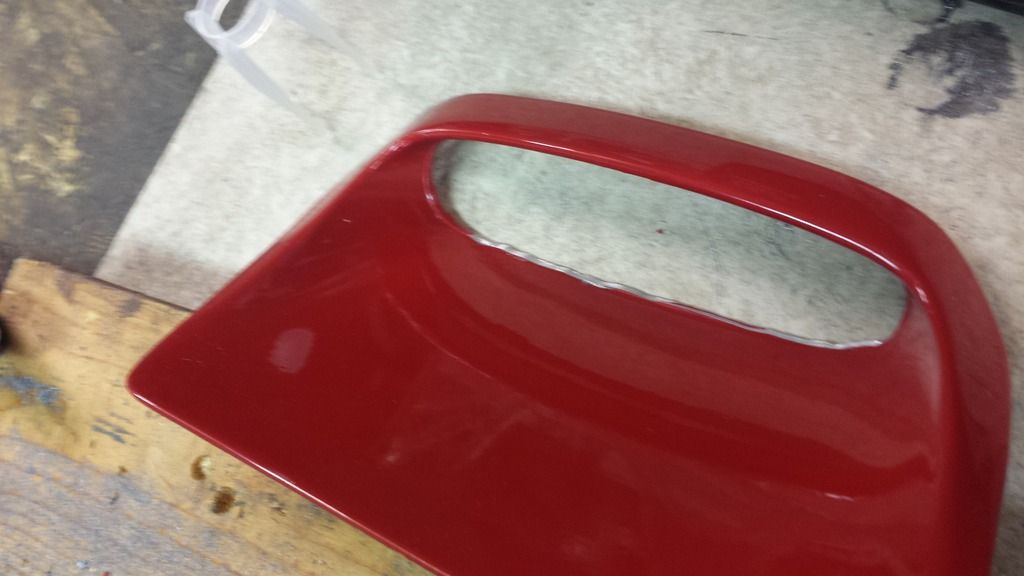 Much nicer than my old air clean. I had to purchase a new air cleaner stud. 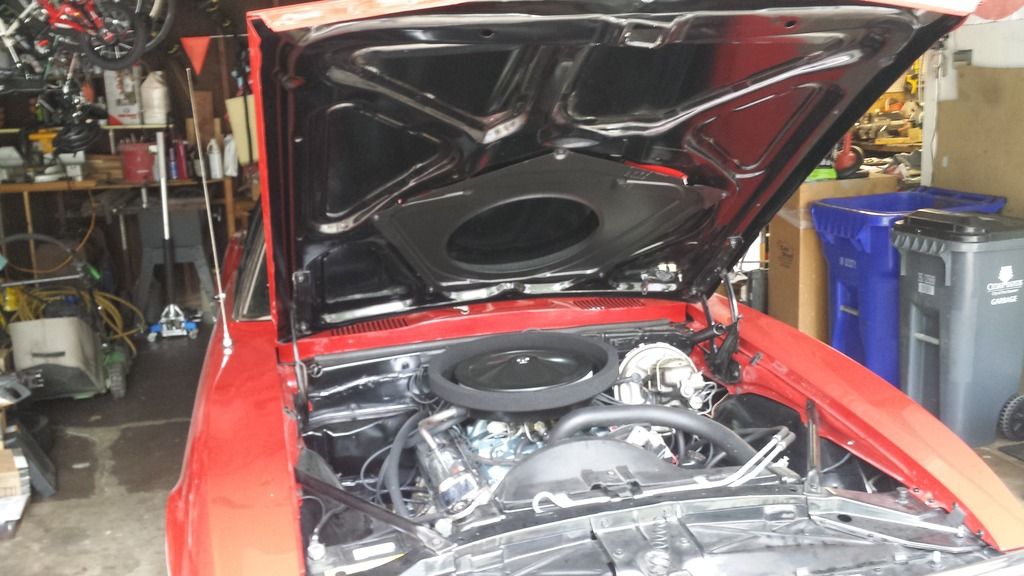
|
| Reply |
|
|
The PY Online Forums is the largest online gathering of Pontiac enthusiasts anywhere in the world. Founded in 1991, it was also the first online forum for people to gather and talk about their Pontiacs. Since then, it has become the mecca of Pontiac technical data and knowledge that no other place can surpass.






 Linear Mode

