


| FAQ |
| Members List |
| Social Groups |
| Calendar |
| Search |
| Today's Posts |
|
#21
 07-11-2015, 11:30 AM
|
|||
|
|||
|
My 99 Suburban brake system used to do this - but not in 2300 miles. Killed the front pads in around 12k. The proportioning valve was bad/wrong ratios and was using the front brakes almost exclusively. Once Chevrolet swapped out the proportioning valve, the wear (and braking) got better. It's still too fast in front but not as fast as it once was.
What do your REAR shoes look like? If they look almost new, you might look at the prop valve. Or possibly the master cylinder? |
|
#22
07-11-2015, 11:35 AM
|
|||
|
|||
|
Quote:
 Quote:
I'm thinking I would have bought these pads in maybe in 1999 and like I said above they were the cheapest option at autozone. The car would site for long periods of time and the rotors would rust up. Anyway I need to get some rotors. One is in excellent shape. No lip and no groves the other is completely shot. There are a few stores that have replacements for around $57 Options that I see: Option1 - Buy a replacement for $57 and have the other turned $15 Option2 - Buy two replacement and change both out. Option3 - Look online for some better deals. |
|
#23
07-11-2015, 12:23 PM
|
||||
|
||||
|
OK. never ran across one like that.
Make sure the pedal is returning all the way and there is clearance at Pedal / push rod, to booster. At least .030".. At rest, there should also be clearance between booster push rod and master. Special tool for this measurement or you can fab up a simple go/no go gauge. -- http://www.mpbrakes.com/techtalk/how...r-cylinder-gap
__________________
Bull Nose Formula-461, 6x-4, Q-jet, HEI, TH400, 8.5 3.08, superslowjunk |
|
#24
07-11-2015, 12:51 PM
|
|||
|
|||
|
You mentioned '68 vs '69 calipers, so I'm presuming this was a drum-to-disk conversion? And that you are using the one-piece rotors?
Here are three on-line, "higher-performing" rotor replacement options. The third one is the rotors I used on my last brake job (1970 GP). http://www.ebay.com/itm/Pontiac-Gran...ca3773&vxp=mtr http://www.amazon.com/SSBC-A2350012-...slotted+rotors I used these about six months ago: http://www.ebay.com/itm/FRONT-KIT-PE...bf51ad&vxp=mtr I would suggest that you call and talk to the sellers of whichever rotors you choose to verify that you get the right rotors the first time. And I've seen that Corvette-style master-cylinder on several original 1969 Grand Prixs many years ago. I think GM was just using whatever castings they had available. The bleeder screws make it nice and easy to bleed the air out when you rebuild the master cylinder. As long as the bore diameter is correct, the larger reservoir shouldn't make any difference. 
|
|
#25
07-11-2015, 02:01 PM
|
|||
|
|||
|
Excessive pad wear on one side is almost always a caliper problem. Piston hanging usually or really shot caliper pins/bolt bushings, though thats usually pad thinner at one end vs the other.
Economy "Lifetime" pads/shoes almost always result in degraded braking capability in some form. Something you might not notice driving around town untill you have to make an emergency stop. Many replacements out there may not meet OEM standards in one form or another. After bad experiences with the bargain stuff I found Raybestos brakes to be at least as good if not better than OEM for stopping ability and wear about the same.(normal daily driver ) |
|
#26
07-11-2015, 03:11 PM
|
||||
|
||||
|
Quote:
|
|
#27
07-11-2015, 06:54 PM
|
||||
|
||||
|
Sounds like it may be a moot point now, but I believe minimum thickness is .965". At least that's the spec I remember for A-bodies. Some new rotors only start out at 1.000" only giving you .035" to work with

|
|
#28
07-12-2015, 11:05 AM
|
|||
|
|||
|
i used slotted rotors from summit, powerstop brand i think. they work great on my firebird with HAWK pads.
i read you dont want drilled rotors for street use, prone to cracks or something. the slotted rotors were only like $80 each, well worth the extra ~$20 over cheap auto zone replacements... & they are zinc plated so no ugly rust around the hub & edges. with your new expensive EBC pads i would definately get new "better" rotors than the stock oem replacement ones & possibly new replacement calipers if you had one sticking. & make sure to clean & lube all the sliding points for the caliper to ensure it floats as designed. |
|
#29
07-12-2015, 08:05 PM
|
|||||
|
|||||
|
Quote:
Quote:
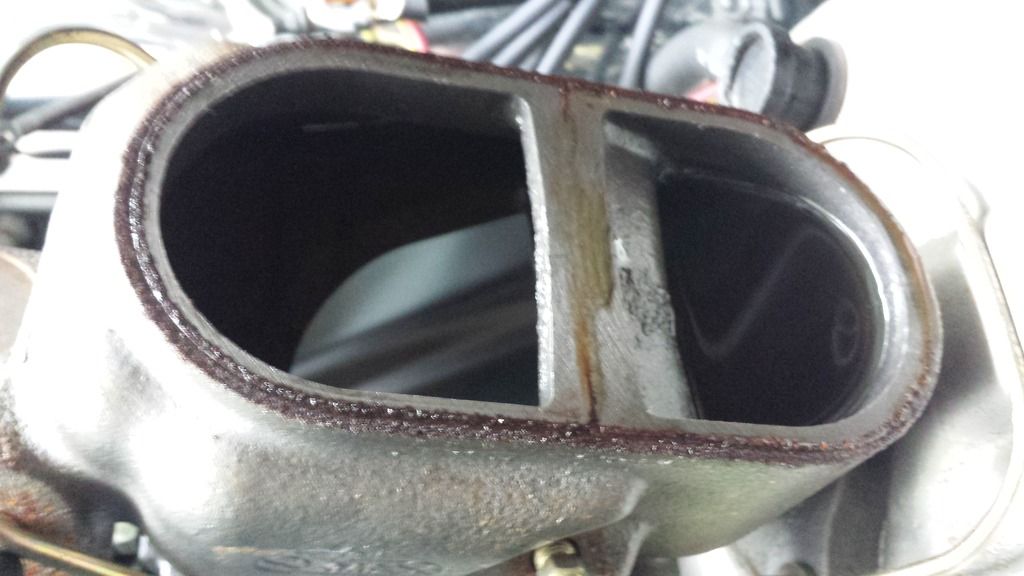
I found what looks just like it on the Dave Pozzi site bottom picture. http://www.pozziracing.com/camaro_ma...er%20cylinders I got to get that tool!!!! That is sweet! Quote:
I'm using 69 parts. I think I ordered everything for 74 Nova from the parts store. I really like some of those rotors but ended up just getting two replacements. I would have jumped all over a set of slotted but not drilled rotors. I'm trying to be ready for a next weekend car cruise. Quote:
Quote:
 I'm going to try and figure out a way to measure this without that fancy M/P tool. Even without a good measurement I can see there is a problem here. Question now is what are my options? 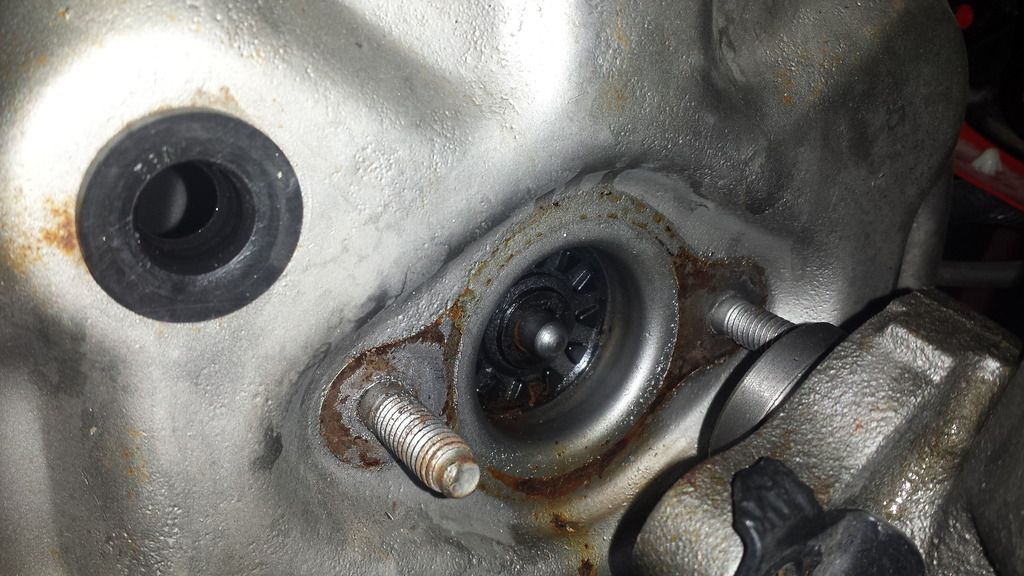 My MC bore size reads 1.050". There is a rod that cam out on the MC that measured 1.5" and is cupped on the inside. The booster rod is 2.44" or 2.632" depending if you include the tip. 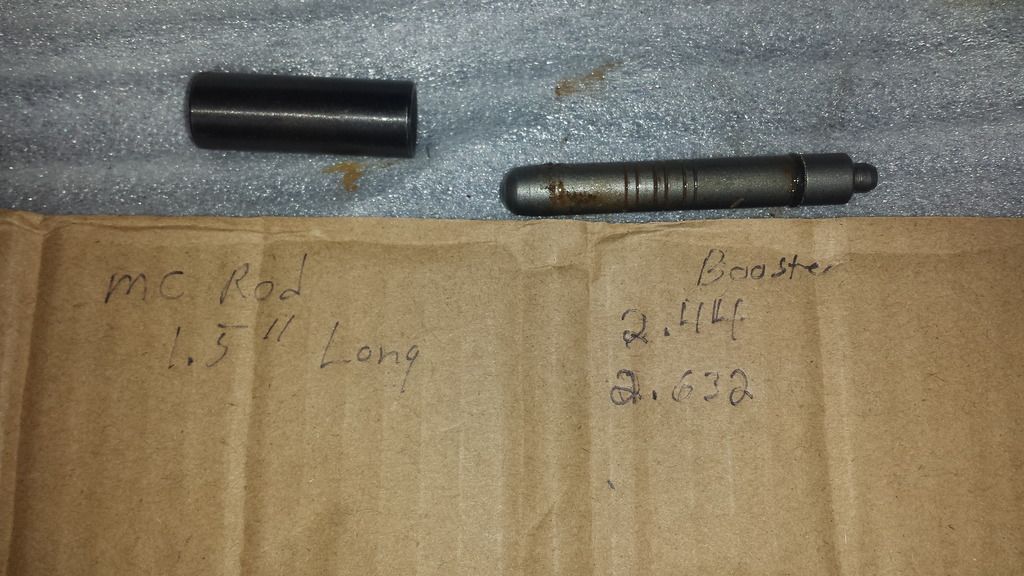 What are my options to resolve this? Last edited by rohrt; 07-12-2015 at 08:38 PM. |
|
#30
07-12-2015, 10:01 PM
|
|||
|
|||
|
update.
Trying the best I can to measure both the MC and the booster I came up with this. MC depth .31 Two different home brewed ways to measure it came up the same. Booster depth .25 I should have a small gap (.06) given this info. MC Brake Website recommends .02. Not making any sense why I was squirting brake fluid pushing the mc and the booster together. Further research on the Dave Pozzi site.http://www.pozziracing.com/brakes.htm#Booster He recorded his Booster Pushrod at 2.625. I recorded mine at 2.632. Sounds pretty close. |
|
#31
07-12-2015, 11:56 PM
|
|||
|
|||
|
Quote:
I'm asking because the larger reservoir should be connected to the discs. The smaller reservoir is for the rear drums.
__________________
Steve F. |
|
#32
07-13-2015, 08:20 AM
|
|||
|
|||
|
Quote:
|
|
#33
07-13-2015, 10:22 AM
|
|||
|
|||
|
I measured the MC depth wrong.
Looking at the MPB Booster Pin Adjustment Gauge tool it measures from the mounting surface of the MC and not from the edge of the round bore. The tool is $25 and shipping is $18. I can't find that anyone else make that kind of tool. Nothing on Ebay and nothing on Amazon. For the love of God what is the deal with shipping anymore when you can drop it in a yellow bubble wrap envelope? |
|
#34
07-13-2015, 09:41 PM
|
|||
|
|||
|
Quote:
Now it becoming clear. If when I pushed the MC on the booster and the front threw fluid up then I would assume that the MC piston is not releasing the pads the way it should be??? IDK. The MC casting is 5468309 or a MC309 for short. Used on many 69 cars. I'm left thinking I need a different booster. |
|
#35
07-15-2015, 12:00 AM
|
|||
|
|||
|
I called Master Power about the check tool they sell and found out its not in stock. So went to plan B. Read about using modeling clay to figure out the booster pin depth.
Here is the booster pin and the MC pin 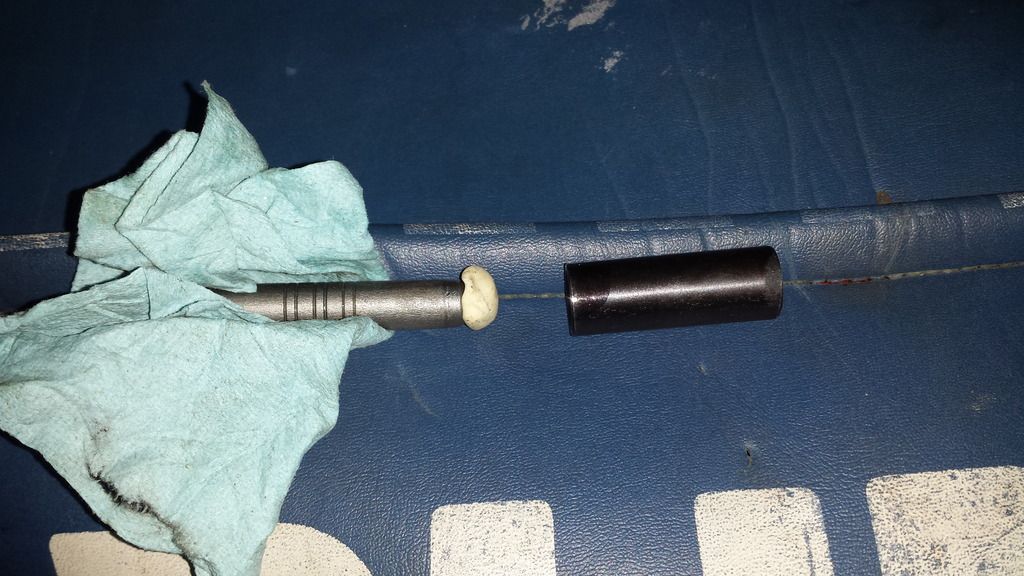 Even with one washer in place I still had a pre-load on the MC. 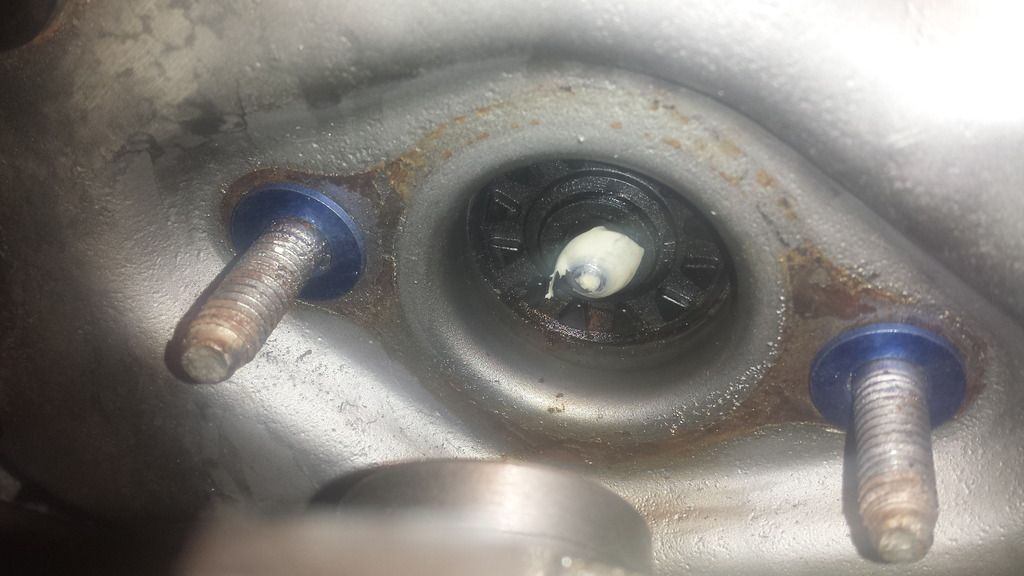 This is was with 3 washers. Gap was just a bit too much. I tried 2 washers and that was darn close to a perfect gap of .020. 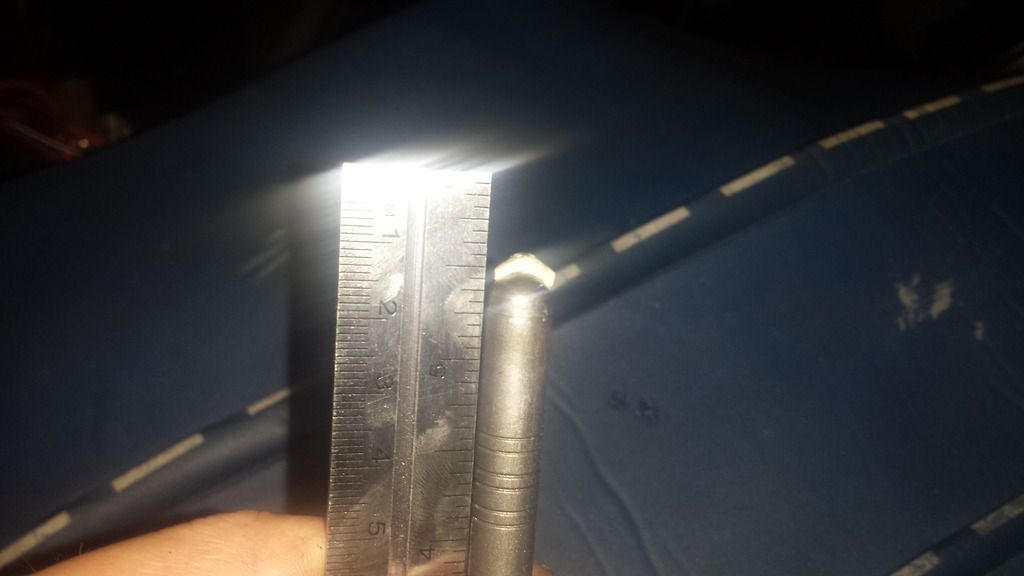 Trying to be carful here if I'm going to grind on the booster pin. With the rounded end and a cupped receiving pin. 
|
|
#36
09-10-2015, 04:18 PM
|
|||
|
|||
|
Thought I would finish out this post.
I got the test tool from Master Power. $18 shipping for a $25 tool. It works pretty slick. Found out I way over shot the gap and had over .050 MP recommends .020 gap. I picked up two booster pins from some junk cars on the farm. No one carries the booster pins by themselves. I got one was a 77GP and the other was 69 executive. The booster pins were exactly the same in every way. My old pin however, had a o-ring seal. I was concern it had a purpose but the best I could figure is it just keeps the pin from dropping out of the booster while handling it. My old pin also had the nub on the end. The used ones I grabbed don't. I thought this might have a purpose too but looking down in the booster its not like it fits in a slot. The only reason I can see is it make it easier to shorten if you need to. So anyway I still have over a 1/4" I had to remove on the pin and did my best to sneak up on the the proper gap. I got just a bit over .010 and left it at that. Pedal feels pretty good now. Hope this issue is done. 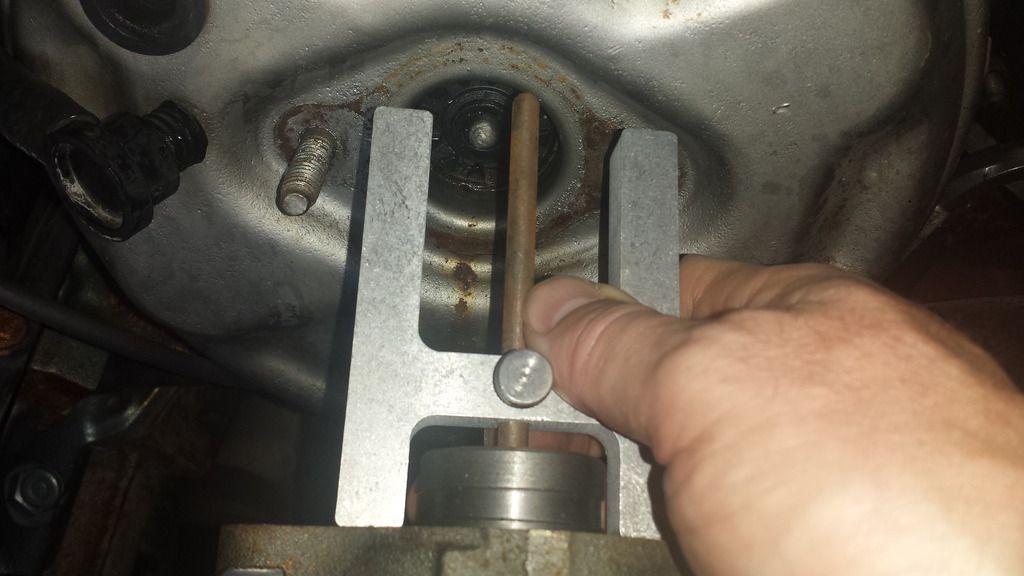 
|
|
#37
09-10-2015, 09:23 PM
|
||||
|
||||
|
Rohrt, how did your pedal feel before you adjusted the rod?
__________________
1969 Verdoro Green GTO #Matching 400 + .045, 4.21 Ohio Forged Crank, SD 290 KRE heads, Torker II, OF Cam, Etc... 1978 W72 Marty Blue T/A GONE |
|
#38
09-10-2015, 09:51 PM
|
|||
|
|||
|
Quote:
|
|
#39
09-11-2015, 08:42 AM
|
||||
|
||||
|
Your residual valve is plumbed to the front brakes? It shouldn't be. That would hold psi on the fronts and could cause excessive wear. What year vehicle? If it's '69-up, and you use the '69-up drum hardware & adjuster, you can eliminate the residual valve all together.
Is this a disc/disc setup? I didn't catch that anywhere. .
__________________
. 1970 GTO Judge Tribute Pro-Tour Project 535 IA2 http://forums.maxperformanceinc.com/...d.php?t=760624 1971 Trans Am 463, 315cfm E-head Sniper XFlow EFI, TKO600 extreme, 9", GW suspension, Baer brakes, pro tour car https://forums.maxperformanceinc.com...ght=procharger Theme Song: http://www.youtube.com/watch?v=7zKAS...ature=youtu.be |
|
#40
09-11-2015, 09:23 AM
|
|||
|
|||
|
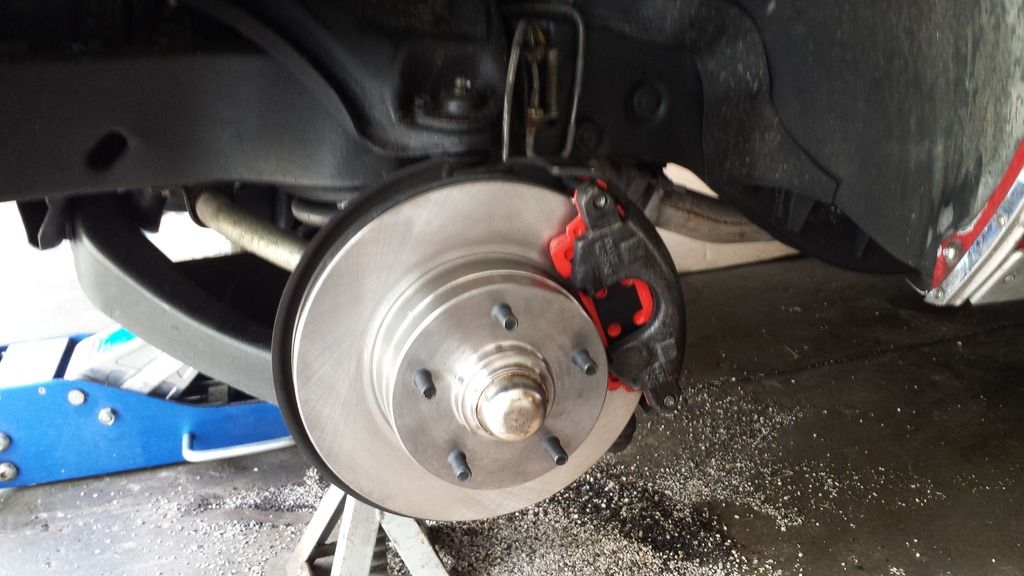
This is a disc/drum 1969 brake MC from inline tube. The pre-bent lines were from inline tube as well.
Never had or noticed and issue with the wheels not wanting to turn. They always spun free when jacked up. Never smelled the brakes burning either. I had a collapsed line on my Tempest so I have an idea of how that felt and smelt. Now you have second guessing how I have it plumbed. Anyone have some good pictures? |
| Reply |
|
|
The PY Online Forums is the largest online gathering of Pontiac enthusiasts anywhere in the world. Founded in 1991, it was also the first online forum for people to gather and talk about their Pontiacs. Since then, it has become the mecca of Pontiac technical data and knowledge that no other place can surpass.


 Linear Mode

