


| FAQ |
| Members List |
| Social Groups |
| Calendar |
| Search |
| Today's Posts |
|
#21
 02-23-2026, 07:55 AM
|
|||
|
|||

Another update here. I'm not posting pictures of every wire I replace, but the renewal of the electrics inside is almost done, while the weather here is still bad, no oldtimer driving weather
 One of the tasks I did was restoring the fuse holder, because ist looked like this: 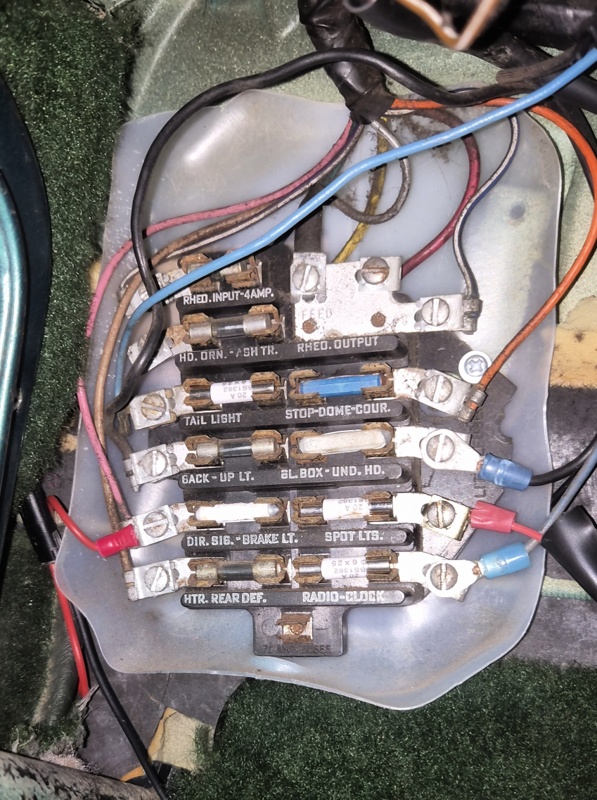 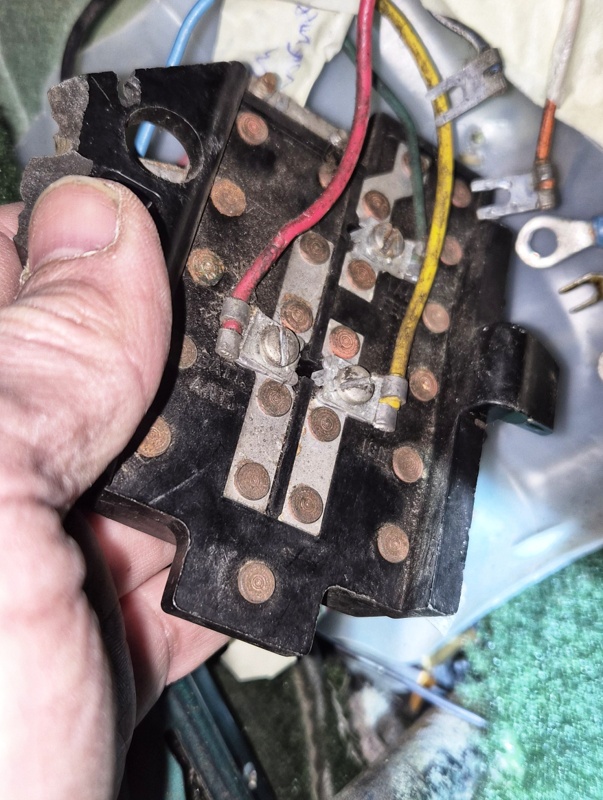 Very rusty, bad contacts, some non fitting fuses violently pressed in by the preowner  I had very strange electric effects because of contact resistances and loose connections - like direction lights failing from time to time, contacts getting hot when I turned on the lights etc. I had very strange electric effects because of contact resistances and loose connections - like direction lights failing from time to time, contacts getting hot when I turned on the lights etc.I also had much trouble while I was trying to retrofit hazard warning lights (legally required here, I'll post this story later), because I needed 12V for the relay. My multimeter proofed there were 12V on the line, but the relay strangely didn't work. After some troubleshooting I found out that the reason was another contact resistance  As soon as the line had some electrical load, the voltage dropped down to almost zero As soon as the line had some electrical load, the voltage dropped down to almost zero  So I removed the fuseholder, removed the fuses and began cleaning all the contacts and all of the small metal plates. First mechanically...: 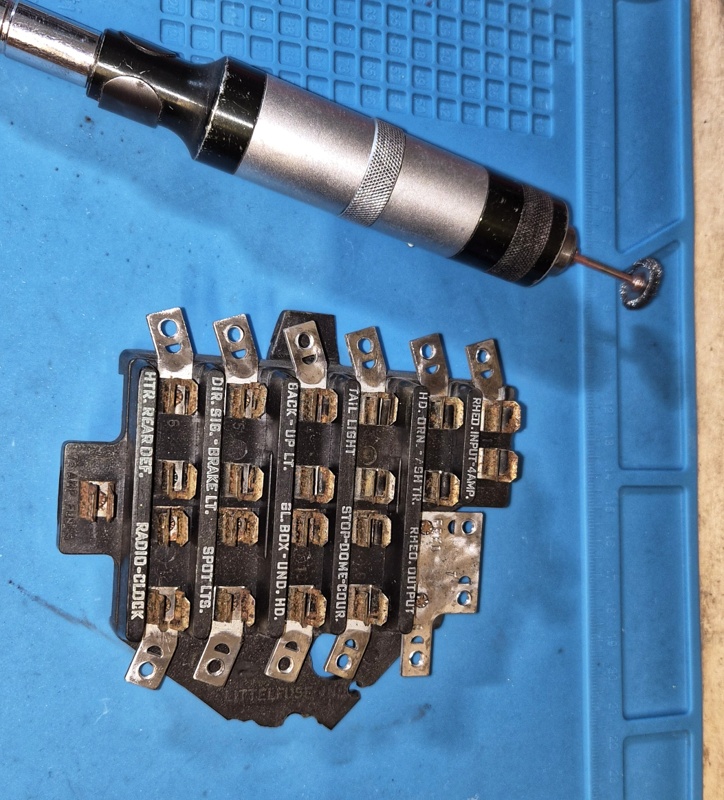 ...and last chemically by using Pelox RE: 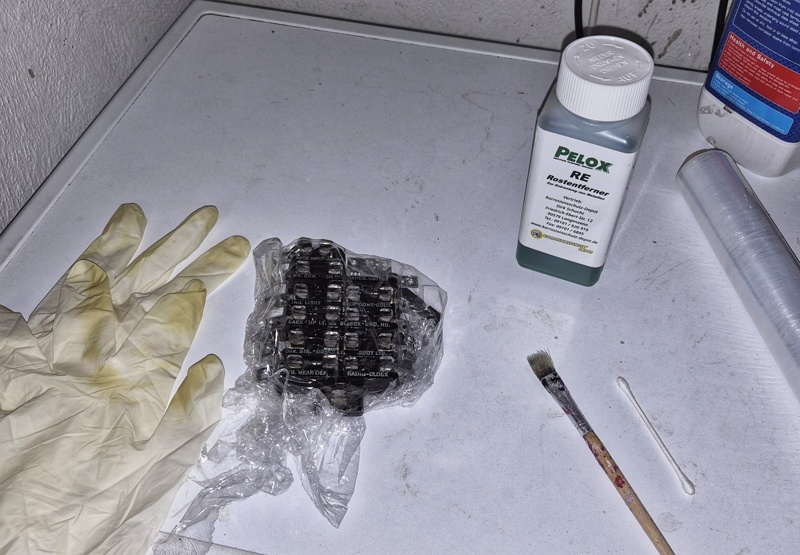 Pelox RE is just phosphoric acid, it etches all the remaining rust particles away and passivizes all metal surfaces. After cleaning it again and drying I replaced all the old fuses by new ones and also all the screws were replaced by new ones of stainless steel: 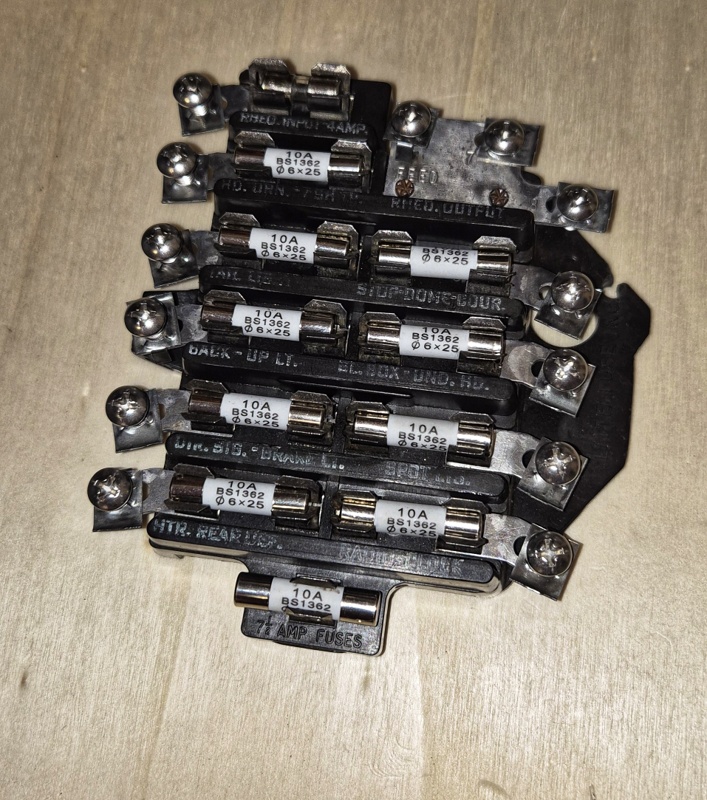 ...I know its 10A fuses and not 7,5 like original, but these are the closest ones you can get here in Germany with this mechanical size. Back in business...: 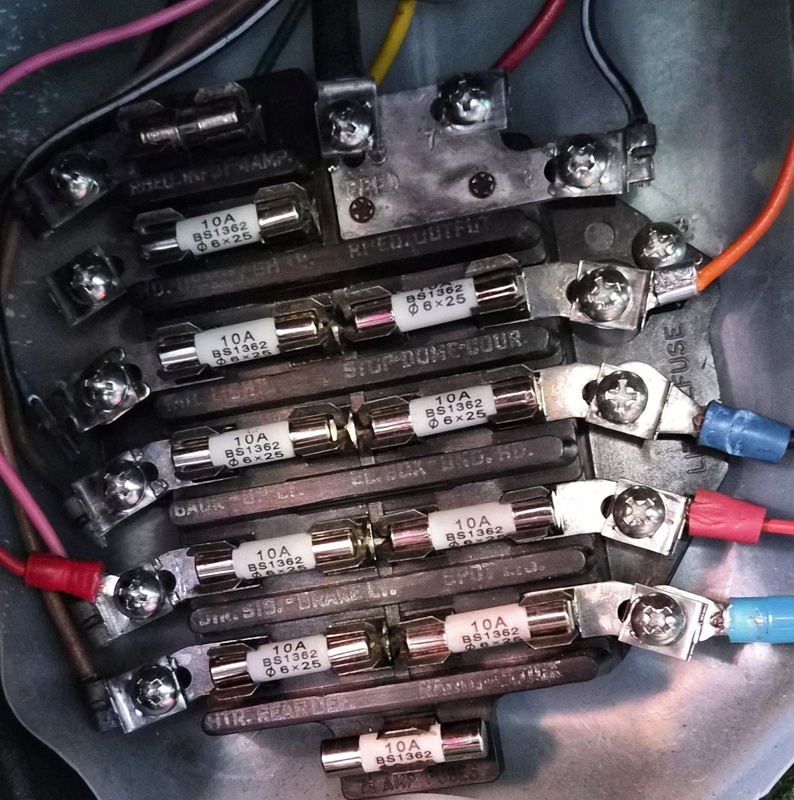 Direction lights now worked 10 times in a row without failing, and no contact is getting hot anymore, wow  More stuff will follow shortly 
|
|
#22
02-23-2026, 11:23 AM
|
||||
|
||||
|
Great job cleaning up the fuse block!
Are all the fuses supposed to be 10 amp or did you just install them for the picture? The spare fuse holder at the bottom is marked for a 7.5 amp fuse. But the blue plastic covered crimp connector in the STOP-DOME-COUR fuse position of the "before" picture takes the prize.
__________________
My Pontiac is a '57 GMC with its original 347" Pontiac V8 and dual-range Hydra-Matic. |
|
#23
02-25-2026, 10:52 AM
|
|||
|
|||
|
Quote:
According to the shop manual they should all be 7,5A, (except the rheostat one which ist 4A), but 10A (or bigger) is the only size of this old fuse format which is available in shops here in Germany. I try to keep everything in the original state and look, but I really wanted to have a few additional instruments, like a rev counter and a voltage indicator. Oilpressure too, but luckily my Pontiac has one originally. I'm the type of person who needs to know if my engine is healthy, to keep my heartbeat in a healthy state too So while doing electrics I also designed and 3D-printed an additional instrument holder. I did it two-part with a cover painted in the original metallic dashboard color. It took me three tries until everything was perfectly primed, filled, polished and painted, including clear coat with no inclusions etc. Its screwed on the holes which are already in the dashboard, so no drilling necessary. I also spent a lot of time to adapt the rev counter (which is originally for a V12 marine engine) and find LEDs with the exact same light color of the original instruments. After a long search I found some beautiful instruments with chrome rings which had almost the same look as the original instruments. This is how it looked in the end: 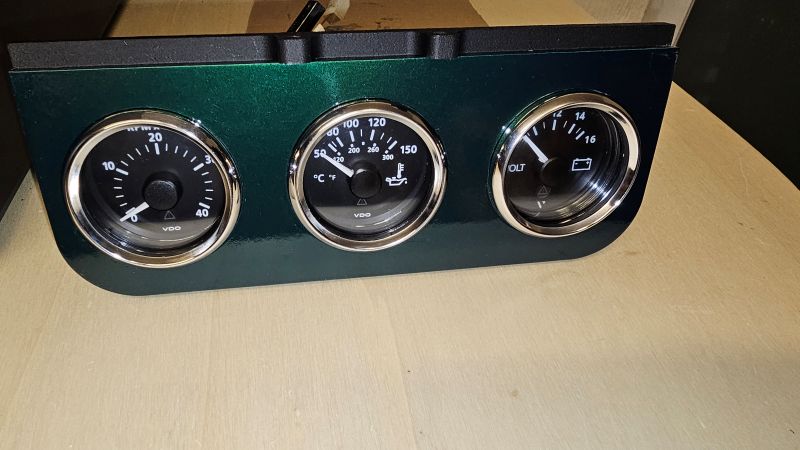 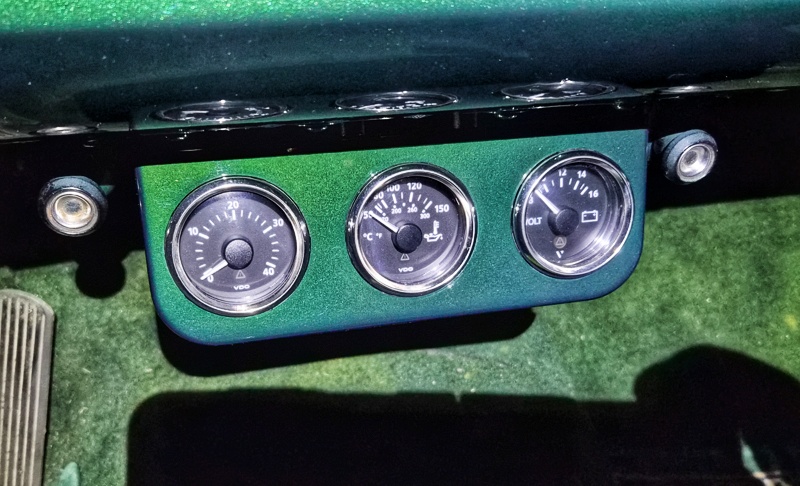 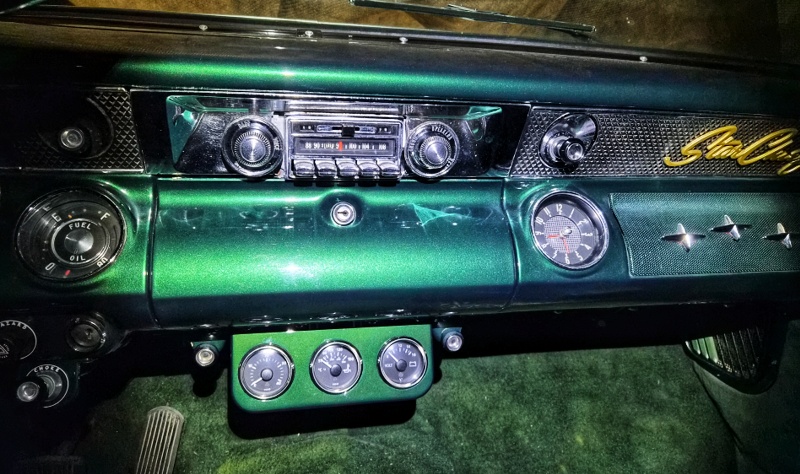 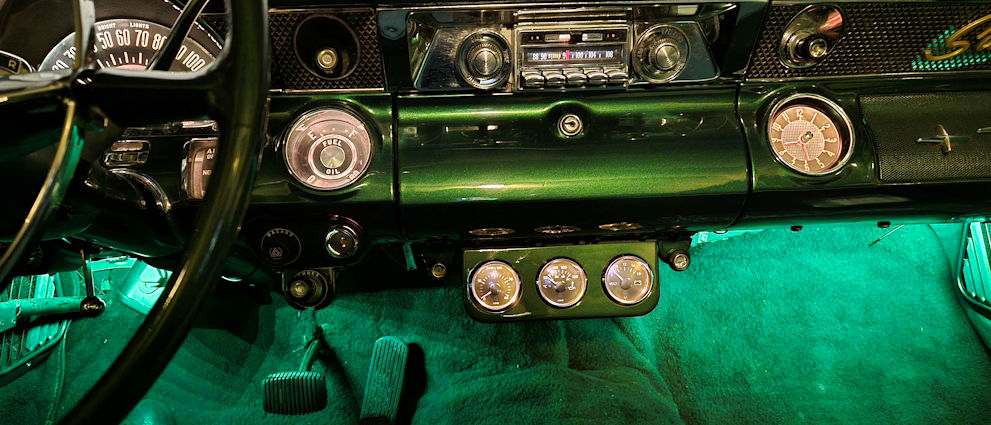 If some wants to have the 3D-print files of this instrument holder for his Pontiac, just let me know. It fits any 52mm instruments. More updates incoming shortly, I got the original radio meanwhile and also the original clock is on its way to me, really looking forward to that package 
|
|
#24
02-26-2026, 12:38 AM
|
||||
|
||||
|
PM me your name and address and I'll send you some 7.5 amp glass fuses.
__________________
Anybody else on this planet campaign a M/T hemi Pontiac for eleven seasons? ... or has built a record breaking DOHC hemi four cylinder Pontiac? ... or has driven a couple laps of Nuerburgring with Tri-Power Pontiac power?(back in 1967) ... or has a Pontiac born the same year as Jim Wangers? (1926} 
|
|
#25
02-28-2026, 03:42 PM
|
|||
|
|||
|
Quote:
Next task I want to do is the installation of the Pertronix Ignitor II electronic ignition. Since I have to adjust the ignition timing afterards, I am wondering how to do it correctly... This is why I am confused a bit: The shop manual shows the marks on the flywheel and the pointer on the harmonic balancer: 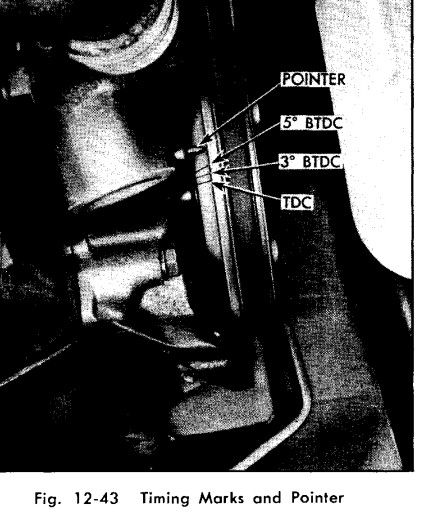 This is how it looks on my engine. The middle mark is missing, but that's not a problem I guess, I think the upper mark is the 5° BTDC mark I need: 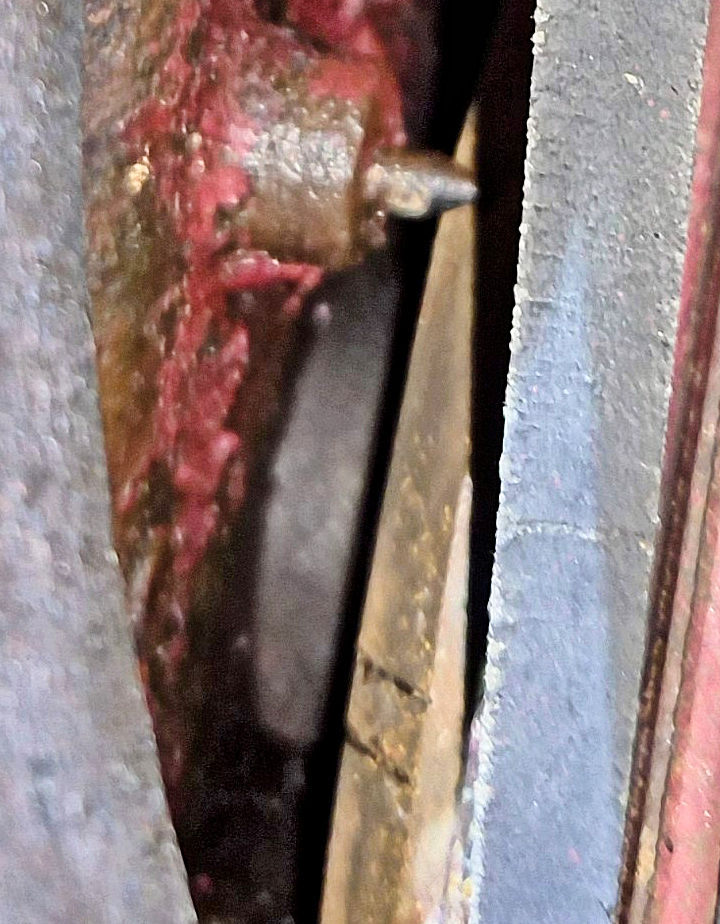 So far so good, but now comes the confusing part. This is what the shop manual says about how to adjust the timing: 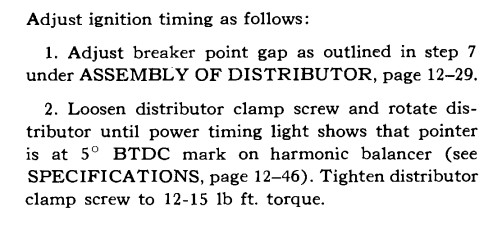 I did many times engine timing on other cars, but I am missing several details here: - at which engine condition the timing should be made? I guess on a warm engine with around 70-80°C oil temperature, as usual, right? - at which revolutions should the 5° BTDC be met? The shop manual doesn't say anything about this, but this is important since the distributor has centrifugal and vacuum advance too. Is this meant like this: 5° BTDC should to be met at idle revs, so at around 450-500 rpm? I saw the mentioned table at 12-46 in the shop manual, where the centrifugal advance of the ditributor is shown. There is no centrifugal advance at idle revs according to this table. - and most important: what about the vacuum advance? From other old cars I know that the vacuum hose from the carburetor needs to be removed while doing the timing. Here the shop manual doesn't say anything about it. We also dont have a rubber hose here, but a stiff steel hose coming from the carb. Is the vacuum meant to stay connected while doing the timing? All my questions are regarding the original 1955 Pontiac 287 cui V8 engine. Any hints are appreciated 
Last edited by Onestone; 02-28-2026 at 03:49 PM. |
|
#26
02-28-2026, 08:30 PM
|
|||
|
|||
|
Base timing is usually set at idle and with vacuum advance disconnected. There should be no mechanical advance when setting the base timing. Unless they did things differently in 1955?
|
|
#27
03-01-2026, 07:11 PM
|
|||
|
|||
|
Standard transmission the timing is set at 460 RPM in neutral. Auto trans is set at 400 RPM in drive. 1955 only has 2 timing marks. The one farthest clockwise is 5 degrees before top dead center. The one counter clockwise is top dead center.
|
|
#28
03-02-2026, 08:07 AM
|
|||
|
|||
|
Quote:
Also, any info about the vacuum part? |
|
#29
03-02-2026, 11:45 PM
|
|||
|
|||
|
Could probably be done in neutral or drive, RPMs just need to be low enough so that no centrifugal advance is in place.
|
|
#30
03-04-2026, 08:07 PM
|
|||
|
|||
|
Right from service manual.
|
|
#31
03-05-2026, 08:15 AM
|
|||
|
|||
|
Quote:
|
|
#32
03-05-2026, 09:37 AM
|
|||
|
|||
|
...I found something the craftsman updates from November 1955
So vacuum officially needs to be disconnected, and the port on the carb must be taped during timing. |
|
#33
03-17-2026, 03:20 PM
|
|||
|
|||
|
Next update here:
My original fuelpump was leaking fuel and oil. I replaced it with an electric Hardi pump, but I think this type of pump is maybe called different in the US (?). ... Its maybe also known as "Mitsuba fuelpump", used in many other old cars. Technically its a diaphragm pump like the original one, but electric driven and it has an internal pressure sensor which makes the pump stop when the fuelpressure against the carburetor gets high (above ~0,35 bar). This way the pump always pumps exactly to the need of the carb - so when the float chamber is full it stops automaticly, and starts again as soon as more fuel is needed. Another advantage is it fills the float chamber before cranking, which makes starting much easier after not moving the car for a longer time. These pumps are used on many oldtimer restorations to greatly increase reliability. This is how this pump looks: 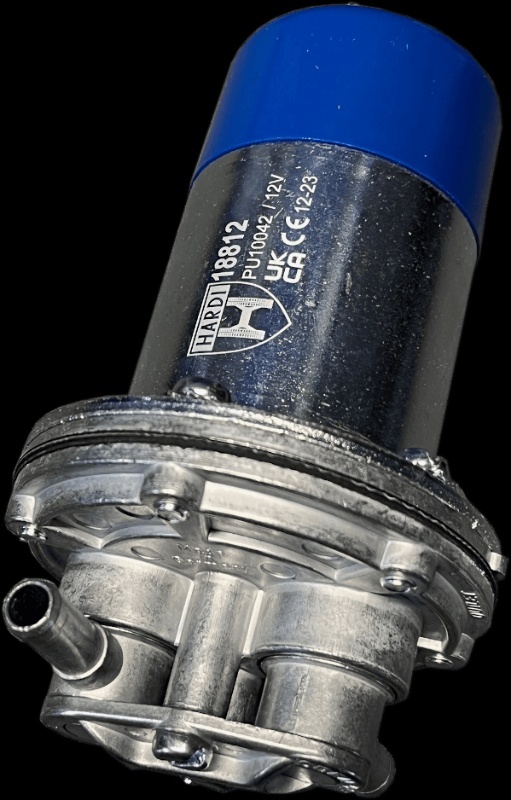 Preparation of the mounting location, also the integrated holder and mountplate I welded: 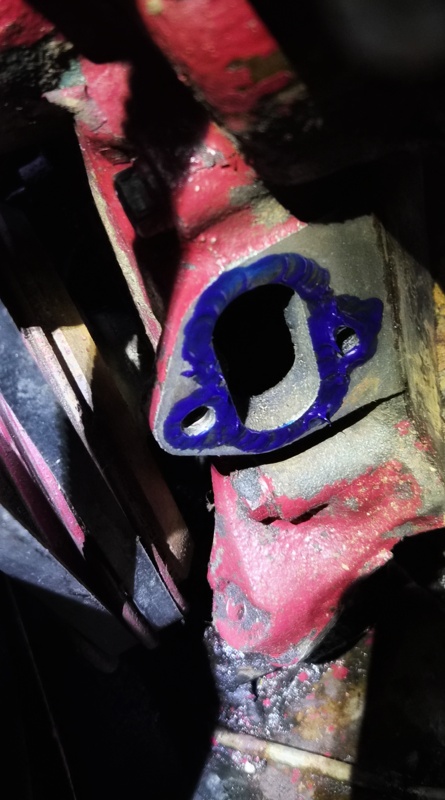 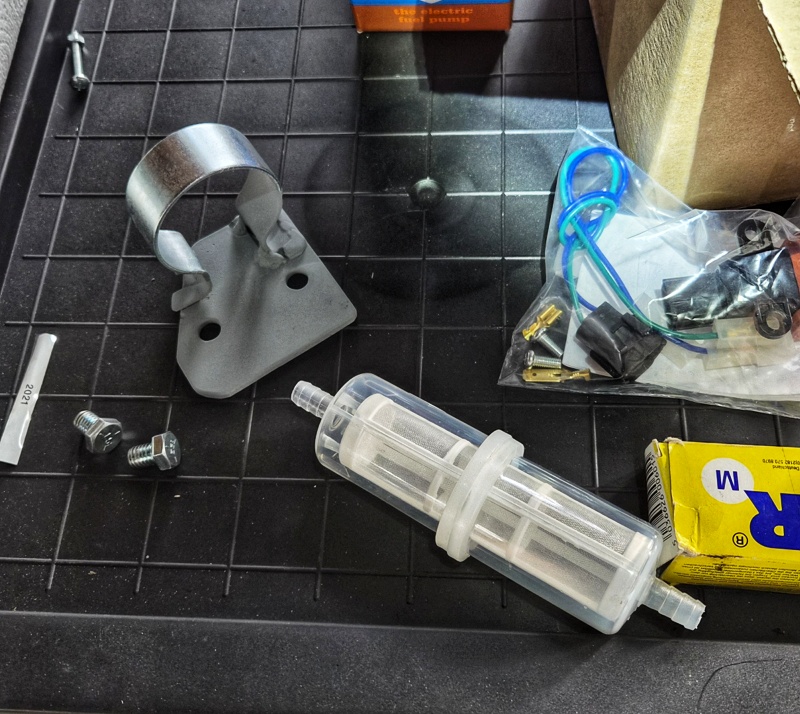 Ready mounted and wired: 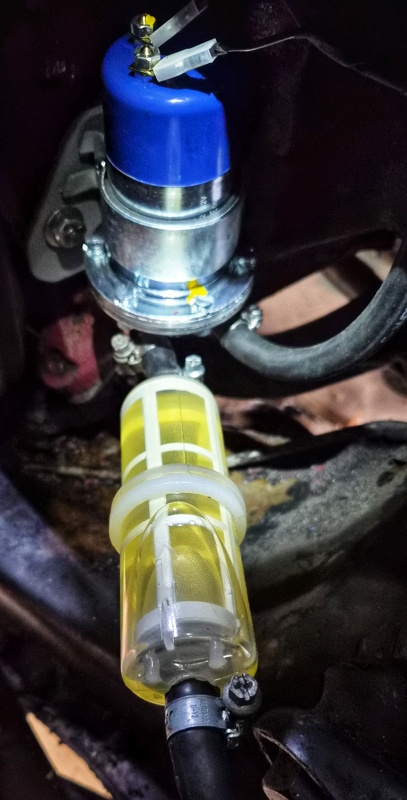 Wiring of this pump is very easy, it just needs ground and +12V ignition. Everything I touch at this car I use new accessories, so here of cource also new hoses, new screws, new filter etc. came in too. The filter is will not stay fo very long, I used this transparent one to check if too much dirt is coming from the tank. After some driving later I will replace it with a metal one. Also a litte optical beautification came in - I replaced these tail lights (I think they weren't original Pontiac ones...?): 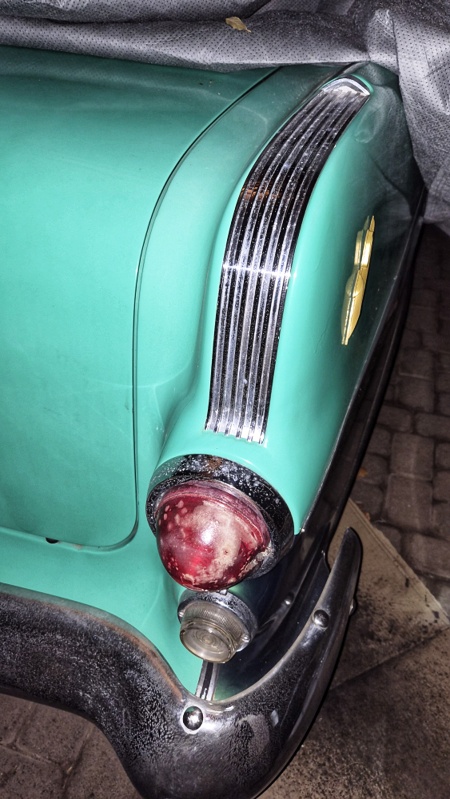 ...with new ones I got from a dealer in IL : 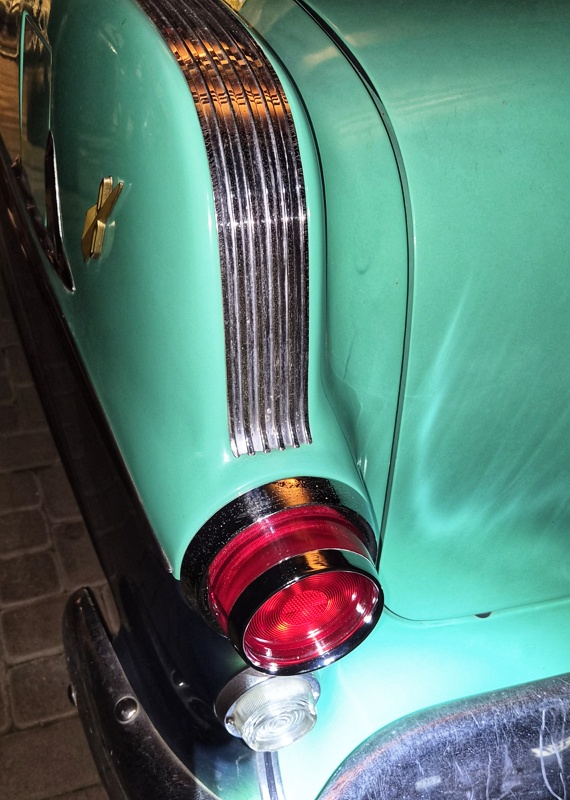 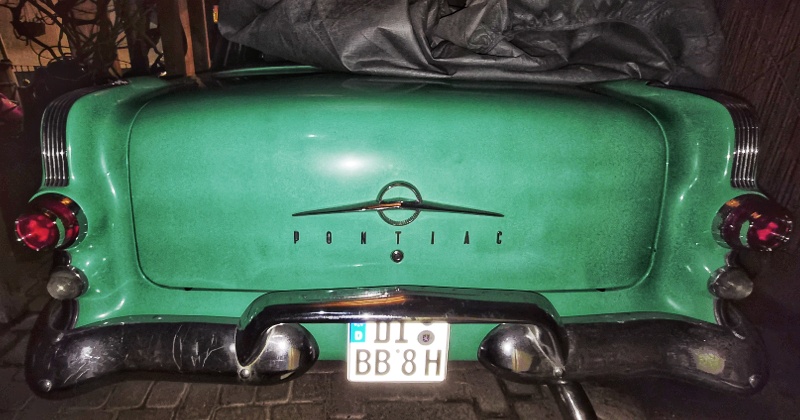 Coming up next: new crank case ventilation and pertronix ignition
Last edited by Onestone; 03-17-2026 at 03:28 PM. |
|
#34
03-17-2026, 09:20 PM
|
||||
|
||||
|
For us undereducated folk, 0.35 bar = just over 5 psi.
__________________
My Pontiac is a '57 GMC with its original 347" Pontiac V8 and dual-range Hydra-Matic. |
|
#35
03-25-2026, 10:40 AM
|
|||
|
|||
|
Quote:
It's just I'm so used to it Next part done: Removed the distributor, because oil leaking everywhere around it and I wanted to change from points to electronic ignition anyway. This is how my poor distibutor was looking before: 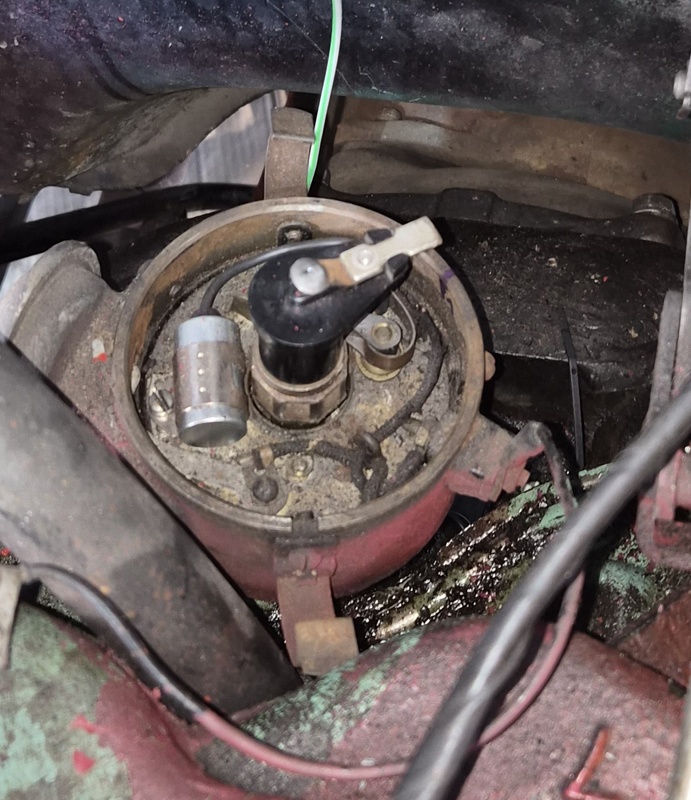 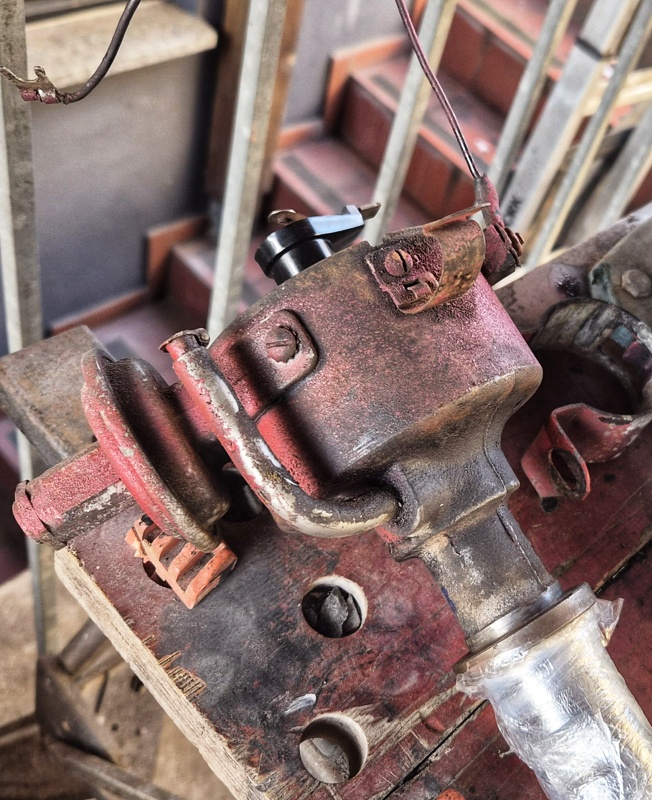 I hate this red color the preowner used on the engine Why didn't he just kept the engine in the original nice color...  After removal I saw that no gasket was there, so oil came from the distributor hole and also from the ventilation hole too where the old rubber was hardened and didn't seal anything anymore. Next I cleaned the distributor, removed the point and condenser, also cleaned the outside carefully and painted it with black satin finish engine paint. Installed the Pertronix electronic ignition set, and of course new rotor, new cap, new screws and new spark plugs came in too: 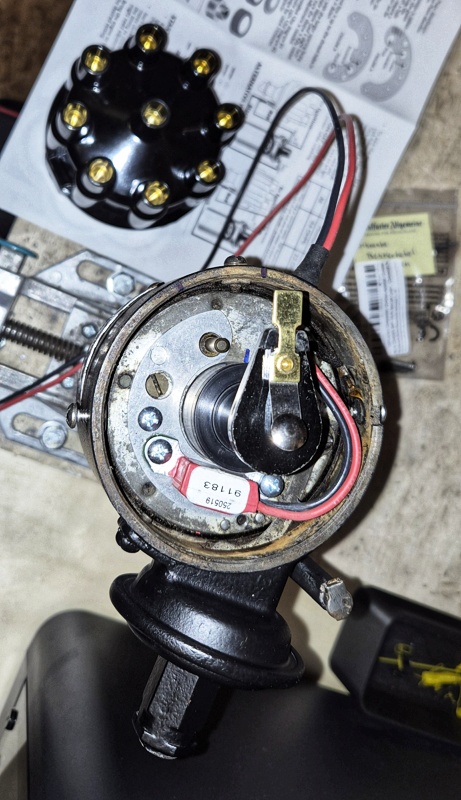 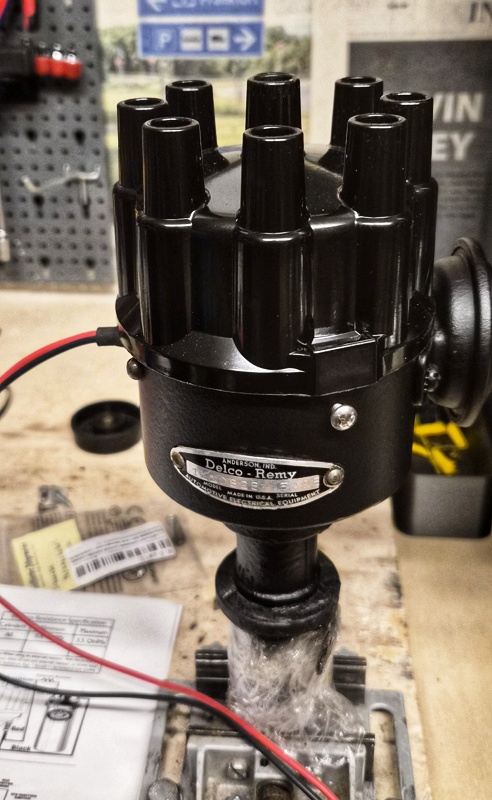 Put the distributor back in its place with a new gasket, and for the ventilation I used a new 90° silicon hose. I also removed the ballast resistor and changed to the matching Pertronix ignition coil. I hope this part of the engine won't leak any oil anymore.... And as always new screws, reconditioned holder and vacuum line etc.: 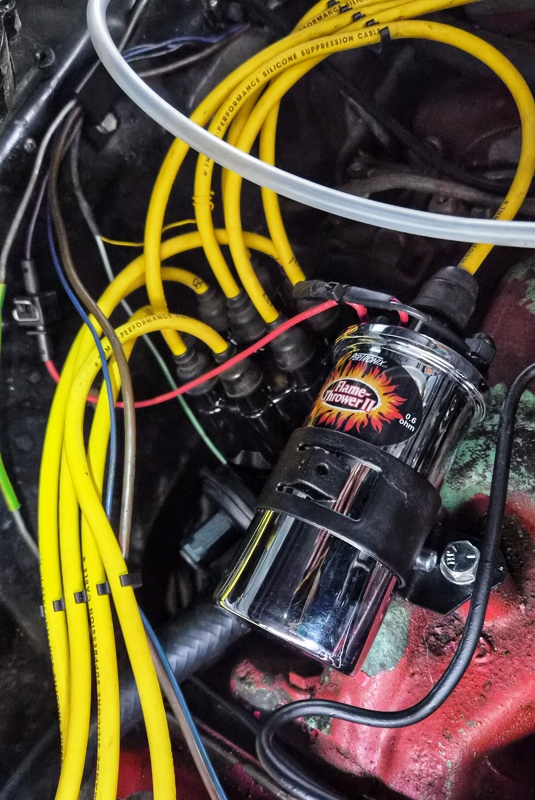 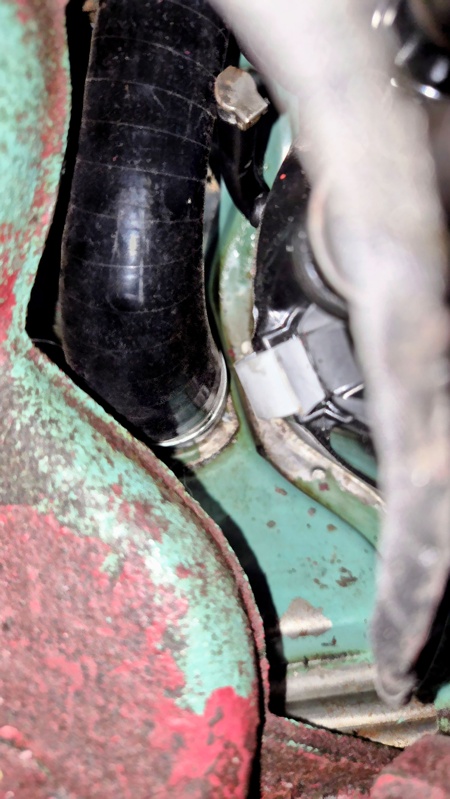 This is how I finshed the crank case ventilation, I extended the silicone hose back into the air filter housing. The preowner had already drilled a hole into it, and I just 3D-printed a small TPU-gasket so the hose won't get cut on the metal edges: 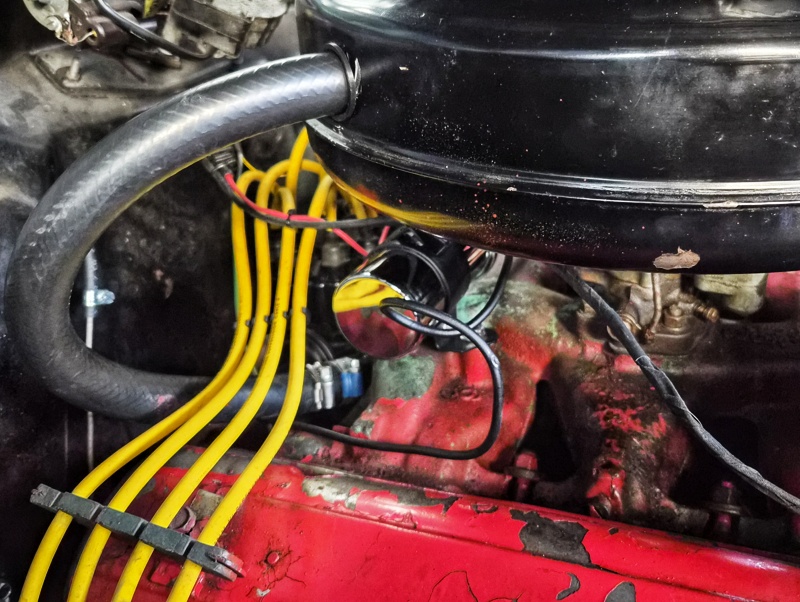 The advantage is at least no more oily smoke coming out, and later engines hat it this way too. Question here: Is this how the experienced Pontiac owners do it too? Good idea with this engine or not? Afterwards I timed the engine, with the information I gathered before:
I used this timing light btw (no affiliate link  ): ): https://www.amazon.com/Innova-5568-a.../dp/B000EVU8J8 Innova 5568, made in USA It's the best timing light I ever owned, I can really recommend it. I also measured how the timing changed after reconnecting the vacuum line again. It changed to about 20° BTDC at idle speed, so its really a big difference if its done with or without the vacuum line connected. According to the shop manual the vacuum advance is at max. 15° with the throttle fully closed (which it is at idle speed), so 5°+15° = 20° absolutely makes sense to me. The engine runs very nice with these new components, also starts up like a charm The next step for me will be taking a closer look to the carburetor. It has a very old sticker on it that says "rebuilt", but I think the engine runs way too rich, and the carb has been tormented by the preowner too, who "converted" the automatic choke to a manual one, like this: 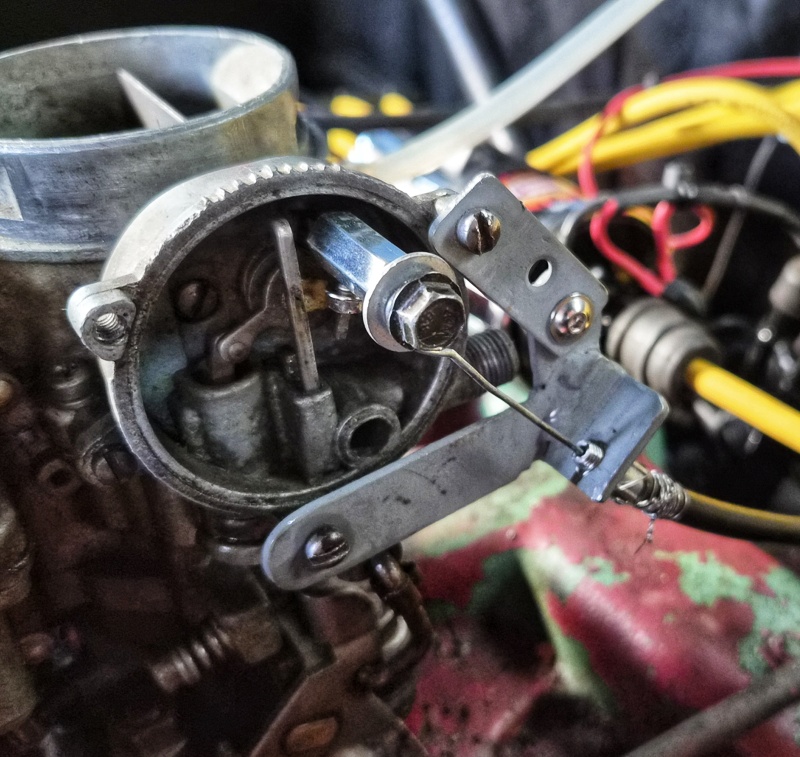 No clue why he did this, or if this is a good idea??? Any hints how to deal with this are 
|
|
#36
03-30-2026, 10:03 AM
|
|||
|
|||
|
For the carb overhaul I opened a separate thread here:
https://forums.maxperformanceinc.com...d.php?t=884764 Still have the question which kind of choke would be the nest solution? I was driving yesterday a little bit, engine is running really nice so far. Now is the time to take a deeper look into may transmission problem - it only uses two gears. Bill already asked me this...: Quote:
Does that info help to guess which gear it is?
|
|
#37
03-30-2026, 10:26 AM
|
||||
|
||||
|
To determine which gears are in use try using the "OPERATING IN LO RANGE" section of the Owner's Guide as shown here: https://www.pontiacsafari.com/55/Owners%20Guide.pdf
The car should start rolling in 2nd gear and downshift to 1st if the pedal is floored. It shouldn't upshift beyond 2nd unless you get to ~ 40 MPH. Compare what happens to when you take off in the LEFT DR position which should start in 1st gear. Once we get more information I'll break out the HydraMatic troubleshooting guide.
__________________
My Pontiac is a '57 GMC with its original 347" Pontiac V8 and dual-range Hydra-Matic. |
|
#38
04-01-2026, 07:11 AM
|
|||
|
|||
|
Quote:
|
|
#39
04-01-2026, 07:46 AM
|
||||
|
||||
|
Quote:
It worked well. My wife will be returning back from the States and may have some room in her luggage for this type of thing. I will be placing an order by tomorrow from Ames so if you wish to piggyback that is fine. Not sure how much cheaper shipping from Portugal to Germany is - if at all... |
|
#40
04-03-2026, 10:50 AM
|
|||
|
|||
|
Quote:
Hi Bill, I just drove a little round, since it's carfriday I just tested what you recommended:Gear lever in LO:
Additional Info, maybe helps too:
So atm it really only uses these two gears... Quote:
|
| Reply |
|
|
The PY Online Forums is the largest online gathering of Pontiac enthusiasts anywhere in the world. Founded in 1991, it was also the first online forum for people to gather and talk about their Pontiacs. Since then, it has become the mecca of Pontiac technical data and knowledge that no other place can surpass.




 Linear Mode

